This site is supported by our readers. We may earn a commission, at no cost to you, if you purchase through links.
Cotton puckers, shifts, and frays if you rush it. Grab any random needle and thread combo, and you’ll fight your machine the whole way through. That frustration usually comes down to one thing: skipping the basics.
Cotton rewards patience. Pick the right weight, prep it properly, and your stitches fall into place almost on their own.
This cotton fabric sewing guide walks you through every stage, from choosing fabric to pressing your final seam. You’ll cut cleaner, sew straighter, and finish projects that actually hold up.
Table Of Contents
Key Takeaways
- Choosing the right cotton weight for your project—lightweight, medium, heavyweight, or specialty—sets the foundation for successful sewing.
- Prepping fabric through pre-washing, colorfastness testing, pressing, and squaring the grain prevents shrinkage, bleeding, and distortion later.
- Cutting accurately with proper grainline alignment, pinning, marking, and sharp blades ensures your finished project won’t twist or fray.
- Matching your machine setup (needle size, thread type, stitch length, and tension) to your fabric weight is key to avoiding puckered or weak seams.
Choose The Right Cotton Fabric
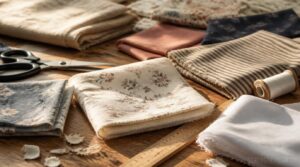
Every great sewing project starts with picking the right cotton. Different weights and types work better for different projects, from breezy tops to sturdy bags. Here’s a quick rundown to help you find your perfect match.
Once you’ve settled on your fabric, don’t forget your machine needs the right needle too—check out this guide on using Singer needles in a Brother sewing machine before you start stitching.
Lightweight Cotton Options
A handful of ounces can make or break a summer project. Voile vs lawn comes down to feel: voile drapes airy and sheer, lawn feels smoother and finer. Poplin fabric structure adds light crispness for shirts. Organdy sheer properties suit stiff overlays. Batiste lining uses shine in lingerie, while chambray brings casual, breathable drape.
The lightweight cotton threshold is roughly 130 gsm, ensuring airy drape and vivid colors.
Medium-weight Cotton Fabrics
Once you’re ready for more structure, medium-weight cotton is your sweet spot. Sitting around 110–150 gsm, this range includes poplin, broadcloth, and quilting cotton favorites.
- Poplin vs broadcloth: poplin has a subtle rib, broadcloth stays smooth and flat
- Quilting cotton uses: patchwork, quilts, and stable prints
- Chambray weave: denim-look, lighter hand
Perfect for summer shirts, trousers, and home decor with real durability.
Heavyweight Cotton Choices
Now we’re talking workhorse fabric. Canvas and duck weigh in at 10 to 24 oz, built for bags, jackets, and gear that takes a beating. Heavyweight twill (10–16 oz) drapes softer, great for chinos.
| Fabric | Weight | Best For |
|---|---|---|
| Canvas | 10-24 oz | Bags, workwear |
| Duck | Heavy | Jackets, outdoor gear |
| Twill | 10-16 oz | Chinos, overshirts |
Specialty Cotton Fabrics
Once you’ve mastered the workhorse fabrics, it’s fun to branch into specialty cotton.
Organic cotton follows strict pesticide-free growing rules under certifications like GOTS. Supima offers extra strength and resists pilling. Sea Island cotton brings luxury sheen to formal shirts.
Brushed cotton adds cozy warmth, while chenille needs gentle washing to protect its plush pile.
Best Beginner Cottons
Every fabric here forgives a little, which is exactly what you need starting out.
Cotton lawn offers ease of handling, poplin brings stability, and broadcloth gives solid stitching practice. Oxford’s texture provides gentle feedback on tension, while calico helps you nail pattern alignment.
All share cotton’s natural absorbency, breathability, and durability, letting you build real skill without fighting your fabric.
Prepare Cotton Before Sewing
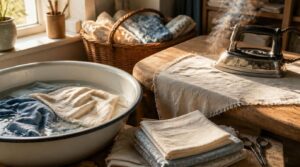
You picked your fabric, and now it’s time to get it ready. A little prep work now saves you from headaches later, like puckered seams or shrinking projects. Here’s exactly what you need to do before that fabric hits your cutting table.
If you’re planning to test pin placement or mark design areas, check whether your fabric’s delicate enough to need a custom embroidery pattern making approach instead.
Pre-wash for Shrinkage
Skip this step and your finished project might shrink right out of shape after the first real wash. Cotton fabric production leaves fibers relaxed, so pre-washing forces the shrinking early, while it’s still fabric, not a garment.
- Wash cold, under 30°C
- Air dry, skip the dryer heat
- Match temps to future care (machinewashed pieces get a machine pre-wash)
This protects absorbency and keeps sizing accurate for cutting.
Test Colorfastness First
Bold dyes can bleed the moment you wash them, staining every lighter piece nearby. Rub a damp white cloth over a scrap—if color transfers, expect washing color retention issues later.
Sweat acidity and ironing heat cause fading too. Test a small corner before committing.
This quick check saves your finished project from ruined dye and finishes down the road.
Press Fabric Flat
Wrinkled fabric leads to crooked cuts, so grab your iron before your scissors.
Set your steam iron to a medium heat, working center-outward for even flatness. Use a pressing cloth on darker cottons to avoid shine, and keep the fabric dry to prevent moisture spots. This simple step boosts fabric softness and durability, giving your fabric care guide a solid, professional start.
Square The Fabric Grain
Think of squaring as your fabric’s foundation. Fold your cotton with selvages aligned, then use a ruler to check that lengthwise and crosswise threads meet at a true 90-degree angle.
This perpendicular grain check prevents seam distortion and stops sneaky bias stretch from ruining your cut. Trim uneven edges, square each corner, and your cotton yarn stays strong, straight, and ready for accurate cutting.
Gather Basic Sewing Supplies
A sewing kit doesn’t need to be fancy, just functional. Grab your essential sewing notions: sharp scissors, pins, and a seam gauge.
Pair a universal needle with cotton thread for smooth stitching on your natural fiber fabric. Add measuring and marking tools, plus a pressing kit for crisp seams.
These basics protect fabric durability and keep your cotton yarn ready for confident, precise sewing every time.
Cut Cotton Fabric Accurately
Cutting is where all your prep work pays off. A clean, accurate cut sets up every stitch that follows, so it’s worth slowing down here. Here’s exactly what to focus on before your scissors touch the fabric.
Lay Pattern Pieces Correctly
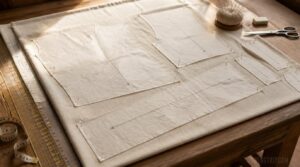
Get your grainline alignment right before anything else touches scissors. Lay big pieces first, matching arrows to the fabric’s lengthwise grain, with center-fold pieces sitting exactly on the fold.
Check nap orientation too. If your cotton has any directional texture, keep every piece facing the same way for a uniform, polished finish.
Leave even spacing between pieces to avoid fabric distortion.
Pin Without Distortion
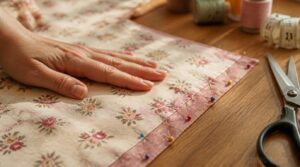
Once your pieces sit right on the grain, pinning locks that alignment in place. Use glass head pins spaced 1-2 inches apart, perpendicular to edges.
- Match pins to fabric weight
- Pin center-out
- Skip stretching tension
- Space evenly
- Remove pins before needle strike
Good pin type selection protects fabric drape and keeps your cotton yarn structure intact.
Mark Darts and Notches
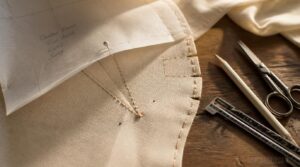
Those pins hold your grain in place, but marks are what guide your needle. Transfer notches and dart points now, before the fabric shifts.
Tailor’s tacks work best for accuracy on cotton apparel. Chalk suits quick jobs. Keep notch depth shallow so seams stay strong, and mark dart placement right at the widest point for a clean taper without distortion.
Cut Clean Fabric Edges
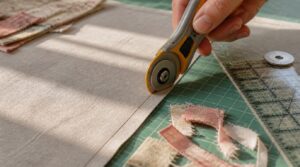
Your blade quality decides everything here. A sharp rotary cutter or fabric scissors glides through cotton without pulling threads, while dull blades fray edges fast.
Use a cutting mat for control and even pressure.
- Sharpen or replace dull blades often
- Cut in one smooth motion
- Keep fabric flat, not lifted
- Follow marked lines exactly
- Store blades away from dust
Keep Grainlines Straight
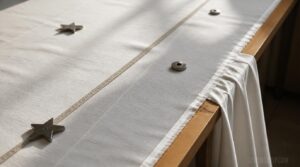
Ever cut a shirt that twists sideways after one wash? That’s off-grain cutting.
A shirt that twists sideways after its first wash is the telltale sign of off-grain cutting
Identify warp direction by checking the selvage, then measure equal selvage distance at several points to confirm it’s true.
| Grain Type | Stretch Level |
|---|---|
| Warp | Minimal |
| Bias | High |
Use pattern weights instead of pins alone, verify bias alignment before cutting, and you’ll avoid seam twisting completely.
Set Up Your Sewing Machine
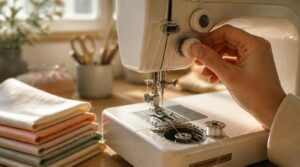
Your fabric is cut and ready, so now it’s time to get your machine ready too. A few quick adjustments make all the difference between smooth stitches and a frustrating fight with your fabric. Here’s what to check before you sew a single seam.
Choose The Right Needle
Your needle is the first thing to touch that cotton, so pick wisely. Match needle size to fabric weight: 70/10 for lightweight, 80/12-90/14 for medium, and 90/14-100/16 for heavy cotton.
A sharp point gives crisp woven seams. Titanium and stainless steel needles resist heat and rust, lasting longer through multiple projects.
Swap needles every 6-8 hours for clean, durable stitches.
Select Cotton-friendly Thread
Since cotton has been the world’s staple textile since the spinning jenny days, it deserves thread that matches its quality.
Cotton wrapped polyester gives you a soft feel plus real strength.
Try mercerized cotton for extra sheen, or organic thread for sensitive skin.
Pick lint control finishes for cleaner seams and smoother textile milling results in every cotton fabric production project.
Adjust Stitch Length
Stitch length can make or break a seam. Get it right, and your cotton project holds up through years of wear.
- Lightweight cotton: 1.5–2.5mm
- Medium weight: 2.0–3.0mm
- Heavyweight: 3.0–4.0mm
- Denim/canvas: 3.5–5.0mm
Shorter stitches fight fabric puckering. Longer ones boost seam strength on heavy cotton. Always test on scraps first, curved seams especially need accuracy.
Test Machine Tension
Loose or too-tight thread ruins even seams fast. Start your tension dial settings around 4-5, then check both sides of a stitch line.
Balanced tension means no loops or puckering, top or bottom. If stitches look loose, nudge the dial up. Cotton’s natural strength deserves stitches that match—test before you commit to your project.
Sew a Fabric Scrap
Grab a scrap from your bin, any leftover cotton works. Sew a quick test seam to confirm your setup before touching real fabric.
Check both stitch sides for balanced tension and even spacing. This step also inspires patchwork ideas, letting irregular shapes become coin purses or patch pockets.
Managing scraps this way cuts waste and builds your organization habits, sorted by color, weight, or texture, ready for creative embellishment later.
Sew and Finish Cotton Projects
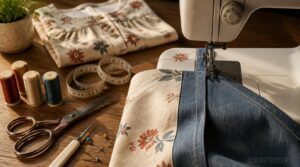
Your machine is set up and ready, so now comes the fun part. Sewing cotton well means paying attention to the small stuff, from seam strength to those final finishing touches. Here’s what you need to know to take your project from stitched to done right.
Use Durable Seam Types
Once you’re ready to sew, picking the right seam makes all the difference for textile durability.
Flat felled seams suit denim and workwear. French seam precision protects sheer cottons. Double stitched strength reinforces pockets and shoulders. Lapped seam versatility works great on trousers, while bound edge reinforcement guards against fraying—giving your project real, lasting strength.
Grade Bulky Seams
Once your seams are sewn strong, the next job is keeping them from turning into lumpy ridges. That’s where layered seam trimming comes in.
- Trim outer layers wider, inner layers narrower
- Reduce bulk at facing intersections
- Smooth collar edges for a clean roll
- Flatten quilting block intersections
- Grade curves gradually for true shaping
This keeps cotton’s natural high tensile strength working for you, not against your finish.
Finish Raw Edges
Raw edges left alone will fray fast, especially on cotton’s soft, absorbent fabric. Serging beats zigzag for speed and durability, but a zigzag stitch works fine without special equipment.
Try bias binding for curved hems, or pinking shears for quick, casual projects. Flat felled seams add serious edge durability for denim. Finishing edges now saves you from unraveling headaches during future textile care.
Press Seams as Sewn
Once your edges are finished, don’t skip the iron. Pressing each seam right after sewing locks stitches in place and stops puckering before it starts. Set your steam iron to the cotton setting, add a pressing cloth, and press lightly.
- Set stitches
- Reduce bulk
- Prevent shine
- Keep grain flat
Small habit, big payoff for lasting durability.
Wash Finished Cotton Projects
Once your project is done, that first wash matters. Cool to warm water on a gentle cycle keeps shrinkage and fading in check, and a mild bleach-free detergent protects your colors.
Low heat drying prevents fiber stress and cuts down on wrinkles. Since cotton has no synthetic polymers, laundering won’t shed microplastics into waterways either.
Fold it flat, store it right, and it’ll wash well for years.
Frequently Asked Questions (FAQs)
What is the best stitch for cotton fabric?
A straight stitch at 0-5 mm works best for most cotton weights, preventing puckering while boosting seam durability. Adjust length up for heavy canvas, down for sheer lawns. Always test on scrap first to confirm balanced tension.
What sewing machine settings for cotton fabric?
Your machine settings can make or break a cotton project. Pick the right needle size, keep tension around 4–5, use 0–5mm stitch length, and match thread weight to fabric to stop puckering fast.
What number of needle do I use for cotton fabric?
Go with 80/12 to 90/14 for most cotton, since fabric weight impact matters more than you’d think. Lightweight cotton wants 70/10 to avoid puckering, while heavy denim needs 100/ Matching needle and thread pairing prevents deflection every time.
What can I sew with 100% cotton fabric?
Think of cotton as your sewing toolbox’s Swiss Army knife. This handy choice covers breathable summer shirts, decorative cushion covers, quilting patchwork projects, durable tote bags, and hypoallergenic baby items. One natural fiber, endless possibilities.
How do you sew cotton fabric?
Prep, cut, and stitch with care. Prewash to prevent shrinkage, test colorfastness, choose the right needle size and thread, then sew steady seams. Grade bulky areas, finish edges, and press well—your breathable cotton project deserves it.
Is cotton easy to sew?
Picture crisp yarns holding their shape under the needle, barely fighting back. Yes—cotton is famously beginner-friendly, thanks to its fabric stability, clean cutting precision, minimal puckering, and strong seams that stay durable, wash after wash.
What fabrics are used in sewing?
Sewers work with natural fibers like cotton, linen, silk, and wool, plus synthetics like polyester and nylon.
Each brings different qualities: breathable cotton, textured linen, lustrous silk weaves, insulating wool, or stretchy synthetic blends for adaptable textile industry projects.
What are the different types of cotton fabric?
From sheer voile to sturdy denim, cotton fabric spans light, medium, and heavyweight varieties.
Upland cotton dominates production, while Pima and Egyptian cotton offer extra-long fibers for softness.
This range covers summer garments, bedding, workwear, decorative textures, and beginner sewing projects.
What thread should I use to sew a cotton knit?
Like a good pair of stretchy leggings, your thread needs to move with the fabric. Go with 50 weight cotton or polyester-wrapped thread for stretch compatibility, using a stretch needle to prevent seam puckering on soft, breathable knits.
Which fabric should a beginner sew?
Quilting cotton is your best bet. It’s a stable weave, budget friendly, and easy to handle. Poplin works too, giving beginners a forgiving, breathable fabric that resists shifting under the needle.
Conclusion
The slowest way through cotton turns out to be the fastest path to a finished project. Every step in this cotton fabric sewing guide, from pre-washing to pressing seams, trades rush for rhythm.
You’ll notice it in straighter cuts, calmer machines, and seams that lie flat without a fight. That’s the real payoff: not flawlessness, but confidence.
Grab your fabric, trust the process, and let your next project prove it.
- https://secondlifeupcycling.com.au/sewing-machine-settings
- https://weallsew.com/tips-for-sewing-heavy-fabrics
- https://blog.moodfabrics.com/sewing-needle-thread-guide
- https://help.brother-usa.com/app/answers/detail/a_id/144041/~/combination-of-fabric%2C-thread%2C-and-needle-to-use
- https://sewingmachineman.substack.com/p/how-the-relationship-between-the-136