This site is supported by our readers. We may earn a commission, at no cost to you, if you purchase through links.
 Finding the right embroidery machine for hats is a bit like finding the perfect shoe—it needs to fit just right and handle a curve or two.
You’ll want a machine with a large hoop and adjustable speed to tackle those tricky curved surfaces of hats.
Look for models offering multiple stitch options to make your designs pop.
Multi-needle machines are ideal if you’re planning to crank out caps for a business.
Curious about which models we suggest? We’ve rounded up the top picks, each offering unique features perfect for anyone ready to master the art of hat embroidery.
Table Of Contents
- Key Takeaways
- Choosing The Right Embroidery Machine
- Top 8 Embroidery Machines for Hats
- 1. Singer Heavy Duty Serger Overlock Machine
- 2. Brother SE1900 Sewing Embroidery Machine
- 3. Brother PE800 Embroidery Machine
- 4. Janome 4 Needle Embroidery Machine
- 5. Multi Needle Commercial Embroidery Machine
- 6. Smartstitch 12 Needle Embroidery Machine
- 7. Brother SE700 Embroidery Sewing Machine
- 8. Janome Memory Craft MC 9500 Sewing Machine
- Tips for Embroidery Success on Hats
- Selecting The Best Hat Embroidery Machine
- Mastering Hat Embroidery Techniques
- Frequently Asked Questions (FAQs)
- Conclusion
Key Takeaways
- You’ll need an embroidery machine with a large hoop and adjustable speed to handle the curved surfaces of hats effectively.
- Consider multi-needle machines if you’re aiming for high productivity and complex designs, as they allow for quick color changes.
- Don’t underestimate the importance of essential accessories like stabilizers, sharp needles, and a variety of threads for achieving professional results.
- Ensure the machine supports multiple embroidery file types and design software for versatile and easy design transfers.
Choosing The Right Embroidery Machine
You’ll want to pick an embroidery machine that fits your hat-making needs like a glove.
Consider factors such as hoop size, needle count, and design software compatibility to make sure you’re set up for success from the start.
Considerations for Hat Embroidery Machines
Ready to explore hat embroidery? You’ll want to keep these key factors in mind when choosing your machine:
- Hat hoop size: Bigger isn’t always better, but it gives you more design freedom
- Embroidery software compatibility: Make sure it plays nice with your favorite design tools
- Machine features: Look for hat-specific settings and easy-to-use controls
- Budget options: Don’t break the bank, but invest in quality that’ll last
Remember, the right machine is like a trusty sidekick in your embroidery adventures!
Essential Accessories for Embroidery Machines
Now that you’ve got your hat embroidery machine, let’s talk gear.
You’ll need a variety of threads – polyester for durability, rayon for shine.
Don’t forget stabilizers: tear-away for caps is a lifesaver.
Hoops are your best friends – get a range of sizes.
Sharp needles are key; they’ll slice through that tough hat material.
And stock up on design formats compatible with your machine.
It’s like prepping your kitchen before a big cook-off!
Importance of Larger Embroidery Areas
While accessories are key, let’s talk about why bigger is better in embroidery.
A larger embroidery area gives you the freedom to dream big with your designs.
You’ll love the flexibility it offers:
- Tackle complex patterns without a hitch
- Create eye-catching logos that pop
- Embroider full jacket backs in one go
- Whip up stunning quilt blocks effortlessly
- Design intricate hat patterns that wow
With a spacious embroidery field, you’re not just stitching – you’re expanding your creativity without limits.
Multi-needle Machines for Home Businesses
Stepping up from single-needle machines, multi-needle embroidery machines are game-changers for home businesses.
They’re like having a small army of needles working for you, boosting productivity and allowing you to tackle bigger projects.
With multiple thread colors loaded at once, you’ll save time and create more complex designs.
It’s an investment that’ll pay off in no time, especially if you’re eyeing hat embroidery as your niche.
Top 8 Embroidery Machines for Hats
You’ll want an embroidery machine that’s as versatile as your hat collection, ready to tackle anything from baseball caps to beanies.
Here are the top eight picks, combining precision and ease of use, to elevate your hat embroidery game in 2024.
1. Singer Heavy Duty Serger Overlock Machine
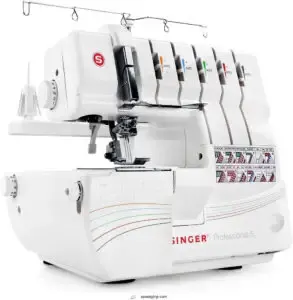
The Singer Heavy Duty Serger Overlock Machine stands out for hat embroidery with its impressive speed and versatility.
With a sewing speed of 1,300 stitches per minute, it’s like having a trusty steed ready to tackle large projects quickly.
The self-adjusting tension system guarantees your stitches are precise and effortless, reducing the learning curve.
However, beware of its quirks, such as maintenance needs for the knife assembly.
Its ease of use and stitch variety make it a solid choice for creative projects.
Best For: This machine is best for sewers of all levels who want a versatile overlock machine with a high sewing speed.
- Offers a wide range of stitch options for various projects.
- Features a self-adjusting tension system for ease of use.
- Provides a high sewing speed for efficient work.
- Some users have reported issues with the knife assembly, requiring mechanical maintenance.
- The machine is a bit complicated to use and requires frequent threading and unthreading for stitch changes.
- Some users have found the machine to be noisy and slow compared to higher-end models.
2. Brother SE1900 Sewing Embroidery Machine
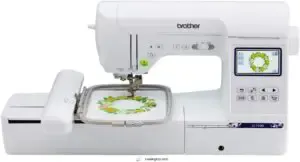
Imagine effortlessly switching between sewing and embroidery—it’s a breeze with the Brother SE1900.
This versatile machine offers 138 built-in embroidery designs and 240 sewing stitches, making it ideal for hats and more.
The 5" x 7" embroidery field gives you room to be creative, while the user-friendly LCD touchscreen keeps things simple.
Plus, it’s reliable and pretty quiet.
Don’t forget your knee lift, which adds comfort as you work.
For aspiring hat embroiderers, the SE1900 is a smart, stylish choice.
Best For: The Brother SE1900 is best for crafters who want a versatile machine for both sewing and embroidery, especially those interested in creating custom hats.
- Offers a wide range of built-in embroidery designs and sewing stitches.
- Features a user-friendly LCD touchscreen for easy operation.
- Includes a knee lift for added comfort while working.
- Does not come with an extension table.
- Automatic threader can be inconsistent.
- Machine is loud when embroidering.
3. Brother PE800 Embroidery Machine
Considering an embroidery machine for your hats?
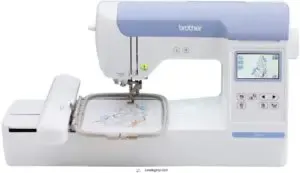
The Brother PE800 is a crowd-pleaser with its 138 built-in designs and 11 fonts.
Its 5” x 7” embroidery field is ideal for detailed hat designs.
If you’re in the market for a hat embroidery machine, check out the selection at this Hat embroidery machine store.
The user-friendly LCD touchscreen makes navigation a breeze, and importing new designs is easy with the USB port.
Although the hoop attachment might challenge some, it’s simple once you get the hang of it.
A felt pad on the thread spindle prevents breakage, ensuring excellent embroidery quality.
Best For: The Brother PE800 is best for home embroiderers who want an easy-to-use machine with a large selection of built-in designs and fonts.
- Easy to use and thread
- Large embroidery field for detailed designs
- User-friendly LCD touchscreen and USB port for importing designs
- Hoop attachment may be difficult for some users
- May require additional accessories like a felt pad and spool net
- Limited design editing features
4. Janome 4 Needle Embroidery Machine
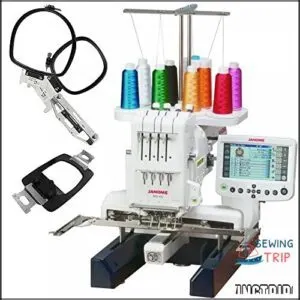
Four needles mean four times the fun (and maybe four times the potential headaches!), but the Janome 4-needle embroidery machine offers serious speed for serious embroiderers.
You’ll find it’s easy to learn, though some users report USB import hiccups.
Before you buy, know that you might get a refurbished model.
Check reviews carefully; some users weren’t thrilled with customer service.
Despite these minor issues, its large embroidery area and multi-needle capabilities make it a strong contender for those seeking efficiency.
Remember to test your files beforehand!
Best For: This machine is best for serious embroiderers who want to speed up their projects with its four needles and large embroidery area.
- Speed: Four needles mean faster embroidery.
- Large Embroidery Area: Plenty of space for complex designs.
- Easy to Learn: Many users found it easy to get started.
- USB Compatibility Issues: Some users reported problems importing files.
- Potential for Refurbished Machines: Be aware that you might get a refurbished machine.
- Customer Service Concerns: Some users were unhappy with the seller’s customer service.
5. Multi Needle Commercial Embroidery Machine
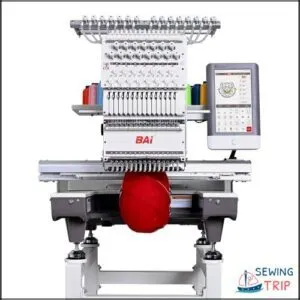
Tackling embroidery projects with a multi-needle commercial machine brings efficiency and precision to your workspace, much like having multiple hands working in harmony.
These machines are designed for speed and accuracy, letting you switch between colors seamlessly without missing a beat.
With a user-friendly interface and advanced features, even beginners can jump right in confidently.
Perfect for home businesses, they transform complex designs into vibrant masterpieces, giving your hats that professional touch.
Explore the possibilities of commercial embroidery and watch your creativity flourish!
Best For: This multi-needle embroidery machine is best for home businesses or individuals looking to create professional-quality embroidery on hats and other items.
- High-quality stitches and precision
- Reliable and efficient performance
- Excellent customer support
- Learning curve for new users
- Heavy machine requiring multiple people to lift
- Some users have reported minor issues with the machine.
6. Smartstitch 12 Needle Embroidery Machine
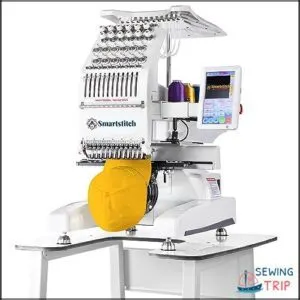
The Smartstitch 12 Needle Embroidery Machine combines state-of-the-art technology with budget-friendly appeal, perfect for personal or business use.
Its large embroidery area is a dream for ambitious projects, while the sleek silver design catches the eye.
You’ll appreciate the 7-inch touchscreen for ease of navigation, and the automatic color change feature saves time.
With thorough training resources, you can conquer the learning curve quickly.
Plus, Smartstitch’s praised customer service guarantees you’re never left in the stitch when troubleshooting arises.
Best For: The Smartstitch 12 Needle Embroidery Machine is best for crafters, small business owners, and anyone looking for a powerful embroidery machine at a reasonable price.
- Large embroidery area for ambitious projects
- User-friendly 7-inch touchscreen and automatic color change feature
- Comprehensive training resources and excellent customer service
- Requires a learning curve and some patience
- May not be suitable for extremely complex designs
- Limited information on the materials used in the machine
7. Brother SE700 Embroidery Sewing Machine
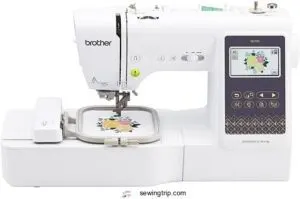
Brother’s SE700 combines convenience and creativity, letting you stitch your dreams onto hats effortlessly.
It’s like having a tiny sewing butler with its wireless LAN, making design transfers a breeze through the Artspira app.
The 4" x 4" embroidery area might seem small, but its advanced features, like an auto needle threader and colorful touchscreen, make it a mighty contender.
A word of caution—some users found the app connection a bit temperamental, but once sorted, it promises smooth sailing for your hat projects.
Best For: This machine is perfect for beginners and crafters who want to add embroidery to their projects, especially those working with hats.
- Wireless connectivity makes design transfer a breeze.
- Auto needle threader and touchscreen make it easy to use.
- The Artspira app offers a wide range of designs and tools.
- Some users reported issues connecting to the Artspira app.
- The embroidery area is relatively small.
- Customer service may be difficult to reach.
8. Janome Memory Craft MC 9500 Sewing Machine
Janome’s Memory Craft MC 9500 Sewing Machine combines precision and technology for hat embroidery aficionados.
Its 90 built-in designs and 98 sewing stitches make it a versatile companion in your crafting journey.
The touch screen makes switching between sewing and embroidery a breeze, though be prepared for a learning curve.
It’s a hefty machine, ensuring stability but expect some heavy lifting.
Patience is key, as its embroidery features demand multiple thread changes—a small price for big creativity!
Best For: Those looking for a powerful sewing machine with advanced embroidery capabilities, but are willing to dedicate time to learning its features.
- 90 built-in embroidery designs and 98 sewing stitches provide versatility.
- Touch screen interface allows for easy switching between sewing and embroidery.
- Heavy construction ensures stability.
- Can be challenging to learn to use.
- Embroidery requires patience and multiple thread changes.
- Machine is heavy.
Tips for Embroidery Success on Hats
To achieve great results when embroidering hats, start by preparing your fabric properly, as it lays the foundation for success.
Don’t overlook using the right stabilizer and needle size, and make sure your hoop size is correct to keep everything in place—that way, your embroidery is sure to impress.
Preparing Fabric for Embroidery
Prepping fabric right boosts your hat embroidery game.
Consider pre-washing fabric to nix shrinkage surprises.
Ironing fabric keeps wrinkles at bay and the stitching smooth.
Choosing between different fabric types requires thinking about hooping fabric and how it fits into your embroidery machine for hats.
These steps make your hat embroidery frame work better, delivering polished results.
Choosing The Right Stabilizer
Choosing the right stabilizer is key to hat embroidery success!
Learn about stabilizer types: tear-away (easy removal) and cut-away (for extra support).
Consider stabilizer thickness: thicker stabilizers prevent puckering on tricky fabrics.
Proper stabilizer placement is important – experiment to find what works best for your hat and design.
Always test your stabilizer on a scrap before embroidering your masterpiece.
Remember, the right stabilizer makes all the difference in achieving professional-looking hat embroidery!
Selecting The Correct Needle Size
Selecting the correct needle size can turn your hat embroidery from frustrating to flawless. Here’s what you need to know:
- Match needle size to the fabric type for smooth stitching.
- Check a needle gauge chart for accuracy.
- Use the right needle size for your thread.
- Opt for specific needle sizes for hats.
- Beginners should start with basics before experimenting.
Using The Correct Hoop Size
If you’ve ever reluctantly punctured fabric with the wrong needle, you’ll appreciate why hoop size matters just as much in embroidery success.
Using the correct hoop size for different hats can prevent embarrassing hooping mistakes.
Hoop size impacts your design’s stability and look.
Check a hoop size chart to nail your technique with various hat embroidery machines.
Selecting The Best Hat Embroidery Machine
Choosing the perfect embroidery machine for hats makes sure your designs look professional and fit any cap flawlessly.
You’ll want to think about factors like machine type, hoop size, sewing speed, software compatibility, and ease of use to make the right choice.
Type of Machine for Hat Embroidery
When selecting an embroidery machine for hats, consider these key points: 1. Hat hoop types are essential for snug fitting on curved surfaces.
- Choose from reliable embroidery machine brands like Brother or Janome. For custom designs on caps, check out embroidery machine caps.
- Curved surface embroidery requires specialized machines.
- Opt for handy hat embroidery software and make sure you perform regular machine maintenance for the best custom hat embroidery results.
Size and Setup of Hat Hoops
You’ve picked your machine, now think about hoop sizes.
Getting the right hat fit means understanding hoop types and placement.
Adjustments make all the difference in hat embroidery.
Hat hoops come in various sizes, ensuring that your cap stays snug.
It’s like finding that perfect hat fit—each adjustment fine-tunes your embroidery machine for hats beautifully.
Sewing Speed and Quality
Picture the delicate dance of stitch consistency when choosing an embroidery machine for hats.
Balancing speed vs accuracy is key; too fast, and your design might look like a Picasso.
Consider needle type impact and tension control to enhance thread quality.
A machine promising precision guarantees your hat embroidery turns out beautifully, creating masterpieces on caps and visors alike.
Software Compatibility and File Formats
Your machine’s compatibility with various embroidery file types (.DST,.PES,.EMB) is very important.
Check for support of your favorite design software.
Consider file size limitations; large embroidery designs might need file format conversion, especially when converting fonts for EPS files best file types for embroidery.
Regular software updates guarantee good performance.
Using a USB port for transferring embroidery patterns is standard.
Don’t forget about embroidery digitizing software if you’re creating your own designs.
Ease of Use and User Interface
A good hat embroidery machine needs intuitive controls, making navigation as easy as pie for both pros and beginners.
Look for:
- Touchscreen clarity: A clear screen is your best buddy for picking designs.
- Feature accessibility: Easily access the design library.
- Streamlined interface: Navigate options without a headache.
Choose wisely, and you’ll weave creativity effortlessly!
Mastering Hat Embroidery Techniques
Mastering hat embroidery techniques doesn’t have to feel like threading a needle in the dark; it just requires the right approach and tools.
By understanding how to hoop a hat and tackle common challenges, you’ll be stitching standout designs in no time.
Hooping a Hat for Machine Embroidery
Selecting the best hat embroidery machine sets the stage, but mastering hooping a hat is where the magic happens.
Secure proper hoop placement to prevent slippage.
Consider hat hoop types for various hat sizes, ensuring the fabric tension is spot on.
Tightly snuggle your hat into the hoop—it’s like giving it a warm hug for a flawless stitch!
Embroidering on Different Types of Hats
After expertly hooping your hat, you’re set to tackle embroidery on various hat types.
Each style requires unique techniques.
Adjustable hoops make embroidering baseball caps a breeze, capturing intricate designs effortlessly.
Choosing designs that complement hat textures boosts style.
To achieve professional-looking results, invest in the right hat embroidery equipment, such as those found on Hat Embroidery Machines.
Keep these points in mind to enhance your craft:
- Adjust hoops for curved surfaces
- Select designs matching fabric’s flexibility
- Prioritize strong stabilizers
- Experiment to perfect your technique
Common Challenges in Hat Embroidery
Why is hat embroidery so tricky?
It’s all about mastering hooping techniques, understanding fabric stretch, and balancing thread tension.
Mastering embroidery machine features such as automatic needle threaders found in the best embroidery machines reviewed can also help in achieving professional results.
Design placement on a curved surface like a hat can test your patience.
Ensuring stitch quality requires the right balance of skill and practice.
Check out hat embroidery tutorials, whether you’re an embroidery machine beginner or a seasoned pro, to conquer these common challenges.
Troubleshooting Tips for Hat Embroidery Machines
You’ve faced challenges, now let’s iron out those kinks. Address thread tension issues by adjusting settings carefully.
Hooping techniques are important; make sure hats are snugly fit to avoid stitch quality problems.
Regular machine maintenance prevents headaches down the road.
- Check Tension: Adjust thread settings as needed.
- Proper Hooping: Fit hats snugly in the hoop.
- Regular Maintenance: Keep your machine in tip-top shape.
Frequently Asked Questions (FAQs)
What machine do I need to embroider hats?
Choose a hat embroidery machine with a cylindrical shape and hat hoops or clamps for precise stitching.
Options like the Janome MB-4S excel, offering accessories to handle the curved surfaces of hats effectively.
What type of embroidery is used for hats?
You might think machine embroidery for hats is tricky, but it’s all about using curved surfaces.
Hat embroidery involves special machines with cylindrical frames, magically making designs fit snugly on those beloved caps.
Is a hat embroidery business profitable?
Running a hat embroidery business can indeed be profitable if you target niche markets and offer unique designs.
Start by keeping costs low, offering customization, and leveraging online platforms to reach more customers and boost sales.
Can a Brother embroidery machine do hats?
A Brother embroidery machine, like the Brother PE800, can embroider hats with the right hoop or clamp setup.
However, due to hats’ curved surfaces, specialized hat embroidery machines often yield better, more precise results.
How do I maintain my embroidery machine?
Keeping your machine shipshape is key! Regularly clean the bobbin area and lubricate moving parts. Replace needles often, and always use the right stabilizer. This prevents jams and guarantees longevity.
What thread is best for embroidering hats?
Polyester thread is your best bet for embroidering hats.
It’s tough, vibrant, and resists fading, making it ideal for outdoor wear.
Choose a 40-weight for most projects, ensuring durability and a smooth finish on that catchy cap.
Can I use regular embroidery machines for hats?
Imagine trying to fit a square peg in a round hole—standard embroidery machines can work for hats but often struggle with curved surfaces.
Invest in a machine with specialized hoops or clamps for best results.
How do I prevent embroidery thread breakage?
To prevent embroidery thread breakage, make sure your machine is correctly threaded, use high-quality threads, and adjust the tension appropriately.
Regularly clean your machine, and replace dull needles.
Consider checking spool orientation and using appropriate stabilizers.
What are common troubleshooting tips for machines?
Check your machine’s manual for specific solutions.
Common issues include thread tension, needle type, and incorrect threading.
Make sure you’re using the right fabric settings, and clean the machine regularly to prevent lint build-up.
Conclusion
Diving into embroidery is like opening a treasure chest—there’s potential for creativity and unique designs, especially with the right embroidery machine for hats.
With these top picks, you’ve got a range of options ready to make your projects shine.
From single to multi-needle models, ensuring speed, precision, and ease of use, each machine opens a world of possibilities.
Equip yourself with the right machine, and transform those blank caps into impressive works of art!

