This site is supported by our readers. We may earn a commission, at no cost to you, if you purchase through links.
 Want better results from your sewing projects? It’s all about good habits!
Start by mastering your machine settings – proper tension is your secret weapon. Pre-wash fabrics to avoid shrinkage surprises, and iron everything like it owes you money.
Embrace the power of pins and clips for spot-on accuracy. Remember, a sharp needle is a happy needle (and happier fabric).
Take time to align your grain lines – it’s like giving your project a solid foundation. And don’t skimp on pressing during construction; it’s the difference between "homemade" and "wow, where’d you buy that?"
But here’s the real game-changer: understanding ease in patterns. It’s the key to achieving that perfect fit you’ve always dreamed of.
Table Of Contents
- Key Takeaways
- Mastering Essential Sewing Machine Settings
- Fabric Preparation Techniques for Flawless Results
- Perfecting Seam Construction for Professional Finishes
- Pressing Techniques to Elevate Your Sewing
- Achieving Accurate Fit Through Proper Measurements
- Efficient Cutting and Marking for Better Results
- Mastering Buttonholes and Zippers for Clean Finishes
- Hemming Techniques for Various Fabric Types
- Interfacing and Stabilizers for Structure
- Organizing Your Sewing Space for Efficiency
- Frequently Asked Questions (FAQs)
- Conclusion
Key Takeaways
- You’ll become a sewing superstar by mastering your machine settings – it’s like finding the secret cheat codes for flawless stitching. Don’t be afraid to play with tension and stitch length; your fabric will thank you!
- Pressing isn’t just ironing’s fancy cousin – it’s your ticket to professional-looking results. Treat it like sculpting your fabric into shape, and you’ll say goodbye to that "homemade" vibe faster than you can say "steam iron."
- Embrace the power of proper measurements and mock-ups. It’s like giving your garment a dress rehearsal before the big show. You’ll catch those fit issues before they steal the spotlight, leaving you strutting your stuff in custom-fit masterpieces.
- Your sewing space is your creative kingdom – keep it organized, and you’ll rule with an iron fist (pun intended). A tidy workspace isn’t just about looking neat; it’s your secret weapon for cranking out flawless projects faster than you can say "where’s my seam ripper?
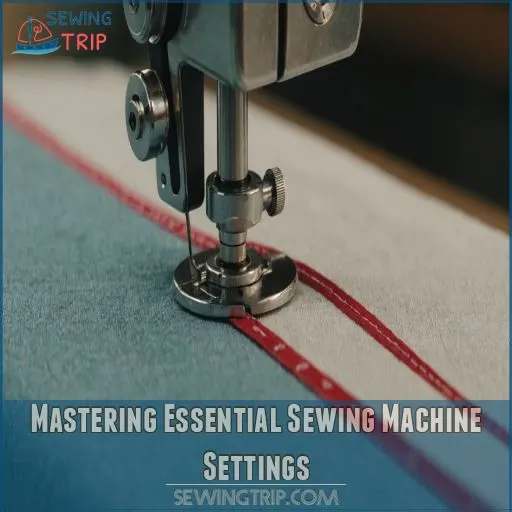
Mastering Essential Sewing Machine Settings
You’re about to become best friends with your sewing machine’s dials and buttons.
Mastering these settings will transform your sewing from "meh" to "wow," turning those wonky seams and tangled threads into smooth, professional-looking creations.
Proper Tension Adjustment
Don’t let tension troubles tie you in knots!
Mastering your machine’s tension is key to flawless stitching, especially when you know how to adjust sewing machine tension.
Start by checking your threading – it’s the foundation of good tension.
Adjust the top tension dial first, aiming for balanced stitches that look the same on both sides.
Remember, fabric type matters too.
Keep a tension log to track your perfect settings for different projects.
With practice, you’ll breeze through tension adjustments like a pro!
Choosing the Right Stitch Length
Threading your way through the maze of stitch lengths? You’ve got this!
For most fabrics, aim for a 2.5-3.0 mm standard stitch . But here’s the scoop: light fabrics love shorter stitches (2 mm), while heavy-duty materials crave longer ones (3.5-4 mm) .
Quilt piecing? Go tiny with 1.5 mm.
Remember, it’s not one-size-fits-all. Test on scraps and adjust till you’re stitching like a pro!
Selecting Appropriate Needle Size
You’ve nailed the perfect stitch length, now let’s tackle needle sizes.
Think of needles as your fabric’s dance partner – they’ve got to match!
A 90/14 is your go-to for medium-weight fabrics .
For sheer cotton, waltz with an 80/12 or 75/11.
Denim? You’ll want a sturdy 100/16 or 110/18 to lead.
Remember, the right needle size prevents fabric damage and makes sure your project goes smoothly.
Thread Selection for Different Fabrics
Every fabric whispers its thread preferences, and it’s your job to listen!
Picking the right thread can make or break your project.
Let’s thread the needle of knowledge with these top tips:
- Match thread weight to fabric thickness
- Consider fiber content for strength and wash-ability
- Choose thread color that complements or contrasts intentionally
- Experiment with thread texture for unique effects
Remember, the right thread is like finding your sewing soulmate – it just feels right!
Bobbin Winding Techniques
Let’s wind up your sewing skills! Properly wound bobbins are the unsung heroes of smooth stitching.
To avoid a tangled mess, crisscross your thread as you wind. This prevents catching and guarantees even tension.
Keep it firm but not overfilled. For heavier yarns, try wrapping and tying before winding.
Remember, a well-wound bobbin is like a perfectly organized toolbox – it makes your sewing life so much easier!
Fabric Preparation Techniques for Flawless Results
You’re about to discover the secret to flawless sewing results, and it all starts before you even touch your machine.
Proper fabric preparation is like giving your project a head start, ensuring your finished piece looks as good as the picture on the pattern envelope.
Pre-washing and Shrinkage Prevention
Now that your machine’s purring like a kitten, it’s time to tame your fabric!
Pre-washing is your secret weapon against the dreaded post-sewing shrink.
Different fabrics need different TLC – cotton’s thirsty for hot water, while silk prefers a gentle bath.
Remember, this step isn’t just about size – it’s your chance to wash away those pesky manufacturing chemicals, giving you a perfectly-fitted garment, and your skin will thank you later!
Ironing and Pressing Methods
After pre-washing, it’s time to smooth out those wrinkles! Remember, ironing and pressing are different beasts .
You’ll want to slide your iron for stubborn creases, but press gently for delicate work.
Grab your ironing board and set your steam settings based on fabric type.
For wool, try the London shrink method or a dryer with damp towels.
Always test on a scrap first – you don’t want to accidentally give your fabric a new, unintended shape!
Grain Line Alignment
Once you’ve pressed your fabric to perfection, it’s time to tackle grain line alignment. This step can make or break your project!
You’ll want to:
- Measure from both ends of the grainline to the selvedge
- Use pattern weights to hold everything in place
- Check for fabric warping or stretching
- Align ribbed lines along the fold for knits
Remember, a straight grain is like a good foundation – it’ll keep your whole project on track!
Fabric Marking Tools and Techniques
Your sewing kit’s secret weapon? Fabric marking tools! Choose wisely between chalk and pens for precision.
Chalk wheels glide smoothly, leaving thin lines that don’t fade quickly. For delicate fabrics, try water-soluble pens or tailor’s tacks.
Always test on a scrap first – you don’t want any surprises! Remember, the right tool can make or break your project.
It’s like finding the perfect dance partner for your fabric!
Cutting Precision and Pattern Layout
Wielding your cutting tools like a pro, it’s time to tackle pattern layout with precision.
Align fabric grain carefully, and consider using paper underneath to prevent slipping. For napped or patterned fabrics, opt for a one-way layout.
Trace patterns accurately, and layer fabric smoothly to avoid shifting.
Remember, cutting accuracy is the secret ingredient in your recipe for sewing success. Don’t rush this step – your future.
Perfecting Seam Construction for Professional Finishes
You’re about to become a seam-slaying superstar!
Master the art of perfect seams, from straight stitches to French finesse,
and watch your sewing projects go from homemade to haute couture in no time.
Straight Seam Sewing Techniques
Sewing’s secret weapon? Mastering straight seams! Let’s turn those wobbly stitches into wow-worthy results.
Start by adjusting your machine’s settings: select the right needle, set proper fabric tension, and choose an appropriate stitch length.
Use your machine’s guidelines or create a DIY seam guide with masking tape.
Take your time and practice – soon you’ll be stitching perfect lines without even thinking about it.
Curved Seam Handling
Now let’s tackle those tricky curves! Curved seams can be a real rollercoaster, but with practice, you’ll be riding them like a pro.
Start by sewing slowly, keeping raw edges aligned as you go.
For smoother results, try different feet – a ¼-inch quilting foot or walking foot might be your new best friend.
Remember, it’s not a race – take your time and adjust frequently to avoid pesky puckers.
Seam Allowance Consistency
Ready to level up your sewing game?
Consistent seam allowances are your secret weapon for pro-level results. Invest in a magnetic seam guide to keep your stitches on track.
A hair’s breadth can make or break your project. Aim for a scant quarter-inch seam – it’s the sweet spot for perfect piecing .
Test your accuracy with a quick three-strip method, and you’ll be sewing like a seasoned pro in no time.
Backstitching for Durability
Let’s lock down those seams. Backstitching is your secret weapon for rock-solid stitches that won’t unravel faster than your patience on a Monday morning.
Here’s how to nail it:
- Keep your backstitch length short and sweet – about 1/4 inch does the trick
- For high-stress areas like crotch seams, go for smaller, denser stitches
- Knowing how to backstitch on a sewing machine can make all the difference in your seam construction, and mastering this technique can help you perfect your backstitching skills.
- Mix it up!
French Seams for Delicate Fabrics
While backstitching keeps your seams secure, French seams take your delicate fabrics to the next level.
They’re your secret weapon for achieving a polished look on sheer or fine materials like chiffon and silk.
You’ll encase raw edges within the seam itself, creating a clean finish inside and out.
It’s like giving your fabric a cozy hug – no fraying allowed!
Master this technique, and you’ll feel like a sewing superhero.
Pressing Techniques to Elevate Your Sewing
You’ve mastered the basics, but now it’s time to press your way to perfection.
With the right pressing techniques, you’ll transform your sewing projects from homemade to haute couture faster than you can say "steam iron.
Importance of Pressing During Construction
You’ve mastered seams, now let’s turn up the heat! Pressing isn’t just ironing’s fancy cousin – it’s the secret sauce for that polished, pro look. Think of it as sculpting your fabric into shape.
Here’s why pressing is a game-changer:
- Banishes the "homemade" vibe, leaving people shocked it’s not store-bought
- Creates crisp lines and flat seams that lie smoother than a cat in a sunbeam
- Gives your garment "memory," helping it keep its shape even after washing
Tools for Effective Pressing
Now that you’ve got the pressing habit down, let’s gear up!
Your trusty iron’s just the start. Grab a tailor’s ham for those curves and a clapper to set those stubborn seams (Source).
Don’t forget pressing cloths – they’re your fabric’s best friend against shine and scorching.
With these tools in your arsenal, you’ll be pressing like a pro in no time!
Pressing Seams Open Vs. To One Side
Let’s tackle the age-old debate: pressing seams open or to one side?
Your choice depends on your project’s needs. Open seams lay flatter, perfect for wall hangings or miniatures.
But pressing to one side allows for "nesting" seams, giving you sharper points and that classic quilt dimension.
Consider your fabric type and garment style – flannel loves side-pressing, while longer seams often prefer the open treatment.
Remember, you’re the boss of your iron!
Avoiding Fabric Shine and Imprints
In the pursuit of flawless sewing, avoiding fabric shine and imprints is essential. Master the art of pressing with the right tools and techniques. Use a pressing cloth to protect delicate fabrics from direct heat. Adjust your ironing temperature based on fabric type, and always press on the wrong side when possible.
- Frustration: No more ruined projects due to shiny patches!
- Pride: Achieve professional-looking results every time.
- Confidence: Tackle even the trickiest fabrics with ease.
- Joy: Rediscover the pleasure of creating without fear of mistakes.
Steam Usage for Different Fabrics
Steam’s your secret weapon for wrinkle-free fabrics, but it’s not one-size-fits-all.
Delicate silks and synthetics need a gentle touch—use a pressing cloth to avoid steam burns.
For sturdy cottons and linens, crank up the heat and let ‘er rip!
Remember, damp fabric can distort, so let it cool before cutting.
Pro tip: a spray bottle and dry iron give you more control, perfect for those tricky bias edges, especially with the help of a pressing cloth and a gentle touch for a pressing cloth.
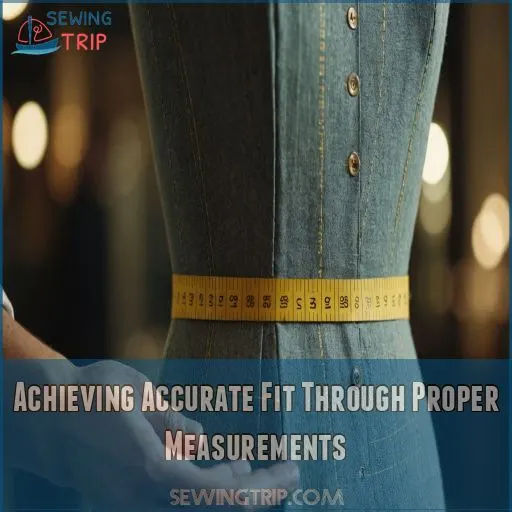
Achieving Accurate Fit Through Proper Measurements
You’ve pressed your seams to perfection, but now it’s time to tackle the puzzle of perfect fit.
Get ready to embrace your tape measure as your new best friend – it’s the key to achieving garments that fit like a dream and boost your sewing confidence.
Taking Body Measurements Correctly
Now that you’ve mastered pressing, it’s time to focus on body measurements.
Accurate fit is the key to garment success, and it all starts with your tape measure.
Strip down to your undies and grab a buddy – measuring yourself can be tricky!
Here are three tips for measurement mastery:
- Use a flexible, non-stretchy tape measure
- Measure twice for accuracy
- Stand tall and relaxed, no sucking in that tummy!
Remember, your body’s unique curves are your sewing superpower.
Understanding Ease in Patterns
You’ve nailed those measurements, but here’s the real secret sauce: understanding ease allowance. It’s like giving your garment room to breathe and move. Think of it as the difference between your body and the final garment measurements.
Let’s break it down:
| Garment Type | Minimum Ease | Comfortable Fit |
|---|---|---|
| Fitted Top | 2.5 cm / 1" | 5 cm / 2" |
| Skirt Waist | 1.3 cm / 0.5" | 2.5 cm / 1" |
| Pants Hip | 2.5 cm / 1" | 3.8 cm / 1.5" |
Remember, ease is personal. What feels roomy to you might feel snug to someone else. Play around and find your sweet spot!
Making Muslin Mock-ups
Ready to take your sewing to the next level?
Let’s talk muslin mock-ups! These fabric trial runs are your secret weapon for nailing the perfect fit.
Choose a fabric that mimics your final garment’s drape. For a summer dress, opt for light batiste; for a coat, go with sturdy duck.
It’s like a dress rehearsal for your clothes – catch those fit issues before they steal the show!
Fitting Techniques During Construction
After crafting your muslin mock-up, it’s time to fine-tune your fit.
Think of pin-fitting as your secret weapon for garment perfection.
As you try on your creation, don’t be shy – pinch, pull, and adjust to your heart’s content.
Remember, a little ease goes a long way.
Baste those seams before you commit, and you’ll be strutting your stuff in a custom-fit masterpiece in no time.
Altering Patterns for Custom Fit
Fitting during construction is just the first step.
Now, let’s tackle pattern alterations for that perfect fit.
Start by copying your pattern onto new paper.
Focus on simple designs first – a tunic or skirt with minimal darts.
Make bust adjustments, sleeve alterations, and waist shaping as needed.
Don’t forget skirt length and pant fit!
Remember, it’s like tailoring a suit to your unique shape.
Efficient Cutting and Marking for Better Results
You’ll be amazed at how much smoother your sewing projects go when you master efficient cutting and understanding sewing stitches and marking techniques.
From wielding sharp scissors like a pro to transferring pattern markings with pinpoint accuracy, these skills are your secret weapons for creating garments that fit like a glove.
Sharp Scissors and Rotary Cutters
Sharp tools are your ticket to cutting-edge sewing results! Keep your scissors and rotary cutters in top shape with these pro tips:
- Always retract the blade when not in use
- Cut away from your body for safety
- Change blades regularly for better cutting and safety
Remember, a sharp blade is your best friend in sewing. It’s like having a well-oiled machine – it’ll make your work smooth and effortless. Just be careful, or you might end up with an unexpected finger trim!
Pattern Weights Vs. Pins
Seasoned sewists often face a dilemma: pins or pattern weights? Let’s cut through the confusion!
Weights offer speed and precision, especially on tricky fabrics. They are gentle giants, and this is beneficial for your projects.
Try both and find your perfect match!
| Pins | Weights | |
|---|---|---|
| Speed | ||
| Fabric damage | ||
| Versatility | ||
| Ease of use | ||
| Cost | Inexpensive | Varies |
Transferring Pattern Markings Accurately
Every stitch counts when it comes to transferring pattern markings accurately.
You’ll want to choose the right marking tools for your fabric type. For delicate silks, try a Chaco liner, while chalk works wonders on firmer wovens.
When selecting a marking tool, consider the fabric’s texture and color to make sure the marks are visible but not too dark, and don’t forget to check out the various marking tools in sewing options available.
Don’t forget to test your tool on a scrap first – you don’t want any unwelcome surprises!
With practice, you’ll be tracing like a pro, turning those paper patterns into fabric masterpieces.
Notching Techniques for Alignment
You’ve mastered marking patterns, now let’s tackle notching techniques.
These little triangles aren’t just decoration – they’re your secret weapon for perfect alignment .
For curved seams, snip a small triangle on the outer edge of your seam allowance.
This keeps your fabric intact while ensuring precise matching.
Remember, skipping notches is like driving without a map – you might get there, but it’ll be a bumpy ride!
Fabric Layout for Patterned Materials
Tackling patterned fabrics? Let’s make sure your hard work with notches pays off!
Lay out your fabric with care, aligning the pattern repeat and grain direction.
Use layout tools like pattern weights to keep everything in place. This’ll help you match patterns like a pro and reduce fabric waste.
Remember, a well-laid pattern is half the battle won!
Mastering Buttonholes and Zippers for Clean Finishes
You’ll love how polished your projects look once you master buttonholes and zippers.
They’re like the icing on your sewing cake, turning a good garment into a great one.
That’ll have everyone asking, "Where’d you buy that?
Buttonhole Placement and Sizing
For buttonhole placement and sizing, precision is your secret weapon.
Measure your button’s diameter and add 1/8 inch for the perfect buttonhole length. Place buttonholes at least three stitches from edges for a clean finish.
Remember, pressure points matter – adjust placement to hit that sweet spot on your bust or belly .
With these tips, you’ll be buttoning up like a pro in no time!
Machine Vs. Hand-sewn Buttonholes
While choosing between machine and hand-sewn buttonholes, consider your project’s needs and your skill level.
Machine-made holes offer speed and consistency, perfect for everyday wear.
Hand-sewn options, though time-consuming, add a touch of luxury and craftsmanship. They’re uneven on one side, giving a unique charm.
Experiment with both to find your sweet spot. Remember, it’s not just about looks – hand-sewn holes often provide more flexibility and durability .
Zipper Insertion Techniques
Now that you’ve mastered buttonholes, let’s zip into zipper insertion! It’s like threading a needle through fabric – tricky at first, but you’ll get the hang of it.
Zippers come in a variety of styles, each with its own strengths and weaknesses. For example, nylon zippers are lightweight and affordable, while metal zippers are heavy-duty and perfect for bags, jackets, and upholstery.
Choosing the right zipper is key to a successful project.
Here are some pro tips:
- Choose the right zipper type for your project
- Align and baste before stitching for perfect placement
- Use a zipper foot for smooth stitching
- Top-stitch for a polished, professional look
Remember, practice makes perfect. You’ve got this!
Invisible Zipper Installation
Ready to take your zipper game to the next level?
Let’s tackle invisible zippers! These sneaky closures are like ninjas in your garment – you won’t even know they’re there.
Start by pressing the zipper teeth flat with your iron (Source).
Then, grab your invisible zipper foot (or regular foot if you’re feeling brave) and sew close to those teeth.
Remember, no top-stitching needed – that’s the beauty of invisible zippers!
Topstitching for Professional Look
You’ve mastered zippers, now let’s tackle topstitching like a pro!
Grab your topstitching thread and adjust your stitch length to 6-8 stitches per inch.
For a polished look, use a walking foot to maintain even stitches over different thicknesses.
Practice on scraps first, and remember: no backstitching!
Instead, tie off threads underneath for a clean finish.
With these tricks up your sleeve, you’ll be stitching like a fashion designer in no time.
Hemming Techniques for Various Fabric Types
You’ll love how a well-executed hem can transform your sewing projects from homemade to haute couture.
Let’s explore some nifty hemming techniques that’ll have you finishing edges like a pro, no matter what fabric you’re working with.
Blind Hem Stitching
The invisible magic of blind hem stitching can transform your garments.
Master this technique to create polished, professional-looking hems on various fabric types.
Whether you’re hand-stitching or using a machine, the key is in the details.
Adjust your stitch length and tension for different fabrics, and use a special presser foot for machine stitching basics.
Remember, practice makes perfect – soon you’ll be hemming like a pro, leaving no trace of your handiwork!
Rolled Hems for Delicate Fabrics
Moving from blind hems to more delicate tasks, let’s tackle rolled hems for those whisper-thin fabrics.
You’ll feel like a fabric whisperer. Start by choosing the right fabric and hem width.
For silk or organza, try the "toymaker stitch" . It’s a game-changer.
Hand stitching creates a beautifully fine edge. Remember, proper pressing and fabric tension are your best friends here.
With practice, you’ll roll out perfect hems faster than you can say "chiffon"!
Mitered Corners for Clean Edges
Ready to turn those corners into crisp, professional edges?
Let’s get into mitered corners, the secret weapon for polished hems. Here’s your quick guide:
- Choose fabric wisely – lightweight linens love miters
- Press like a pro – use starch for extra crispness
- Fold and pin with precision – it’s all in the details
- Stitch carefully – pivot at the corner for that perfect point
- Hand or machine? Both work, so pick your favorite
Remember, practice makes perfect. You’ll be cornering like a pro in no time!
Hem Tape Usage and Application
Ever felt like your hems were letting you down?
Say hello to your new best friend: hem tape! This nifty invention comes in various types, from fusible to lace.
To apply, simply position the tape inside your folded hem, iron for about 8 seconds per section (no steam!), and voila!
It’s perfect for delicate fabrics but remember, it’s not a cure-all for every hemming challenge.
Machine Vs. Hand-sewn Hems
Now that you’ve got hem tape down, let’s talk machine vs. hand-sewn hems. It’s like choosing between a sports car and a vintage bicycle – both have their charm! Your fabric and project will guide your choice.
For a flawless hem, consider the importance of matching thread weight and color.
Here’s a quick rundown:
- Stitch quality: Hand-sewn can be nearly invisible
- Time comparison: Machine is faster, but hand gives you control
- Fabric suitability: Delicate fabrics often prefer hand-sewn TLC
Remember, practice makes perfect, whether you’re racing with a machine or taking a leisurely hand-stitching ride!
Interfacing and Stabilizers for Structure
You’re about to discover the secret weapon of professional seamstresses: interfacing and stabilizers.
These unsung heroes give your projects the structure and support they need, turning floppy fabrics into crisp, polished pieces that’ll make you feel like a sewing superhero.
Choosing the Right Interfacing Type
With your hems looking sharp, let’s talk about giving your projects some backbone. Choosing the right interfacing is like picking the perfect dance partner for your fabric.
You’ve got two main types: fusible (iron-on) and sew-in.
For delicate or heat-sensitive fabrics, go with sew-in to avoid a meltdown. Match the interfacing weight to your fabric or go slightly lighter for a natural look.
Proper Application of Fusible Interfacing
You’ve picked the perfect interfacing, now let’s make it stick!
Lay your fabric wrong side up, then place the fusible interfacing glue-side down. Think of it like making a fabric sandwich.
Next, grab a damp press cloth – your old dish towel can be a star here.
Press down with your iron for about 15 seconds, letting the heat work its magic. Voila! You’re fusing like a pro.
Stabilizers for Knit Fabrics
Knits can be tricky, but don’t let them stretch you thin! Stabilizers are your secret weapon for fabulous results.
They keep your stitches smooth and prevent distortion, like a superhero sidekick for your sewing machine.
Let’s tame those stretchy beasts with some pro tips:
- Choose cut-away stabilizers for maximum support
- Use wash-away toppings for textured knits
- Try iron-on stabilizers for easy application
- Experiment with paint-on solutions for delicate edges
Underlining Techniques for Added Support
Let’s beef up your sewing game with underlining techniques! This secret weapon adds body and stability to loosely woven or delicate fabrics.
Think of it as your garment’s backbone, supporting every stitch.
Choose your underlining wisely – silk organza for a crisp touch, cotton batiste for softness, or flannel for warmth.
Cut both layers, baste them together, and voila! You’ve got a fabric duo ready to tackle any project.
Interfacing Curved Areas
Curved areas can be tricky, but don’t let them throw you for a loop! Mastering interfacing techniques for these challenging spots will give your garments that professional edge.
Here’s how to conquer those curves:
- Choose a soft, lightweight fusible interfacing for flexibility
- Cut interfacing slightly smaller than the fabric piece
- Apply in sections, carefully pressing each curve
Remember, practice makes perfect. Soon you’ll be bending those curves to your will, creating garments that fit like a glove!
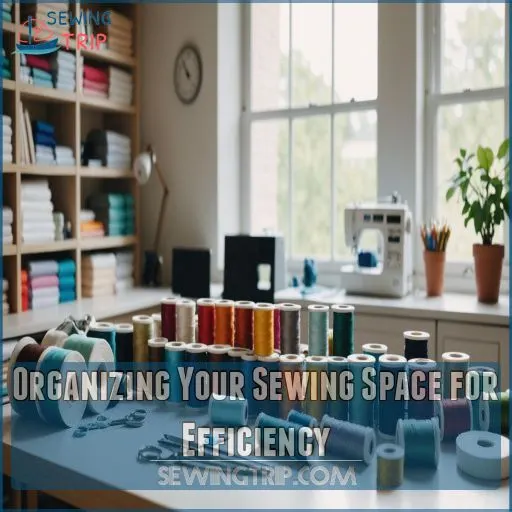
Organizing Your Sewing Space for Efficiency
You’ll sew like a pro with an organized workspace that puts everything at your fingertips.
A tidy sewing area isn’t just about looking neat—it’s your secret weapon for cranking out flawless projects faster and with less frustration.
Essential Tools and Their Storage
Now that you’ve mastered interfacing, let’s talk tools. Your sewing space is like a well-oiled machine – it needs the right parts in the right places.
Having the right essential sewing tools for beginners on hand can make all the difference in your projects.
For instance, investing in a good quality thread and a variety of needles can save you time and frustration in the long run a good thread.
Start with a magnetic pincushion to keep those pesky pins in check.
Hang your scissors within arm’s reach, and use a bobbin saver to wrangle those unruly threads.
A little organization goes a long way in keeping your creative juices flowing!
Fabric Organization Systems
Tame your fabric jungle with a smart organization system that’ll make you feel like a sewing superhero.
Say goodbye to fabric chaos and hello to a well-ordered space:
- Sort fabrics by color for easy access
- Use clear storage containers for at-a-glance inventory
- Implement vertical storage with hanging file folders
- Create fabric swatches for quick reference
You’ll save time, reduce stress, and boost your creativity.
Remember, a place for everything means everything in its place – including those pesky scraps!
Pattern Storage and Cataloging
How often do you find yourself drowning in a sea of patterns? Let’s tame that chaos! Embrace digital cataloging to track your projects and free up physical space.
Create a system that sparks joy:
| Emotion | Storage Solution | Benefit |
|---|---|---|
| Relief | Acid-free boxes | Preserve patterns |
| Excitement | Digital scanning | Easy searching |
| Pride | Labeled folders | Quick access |
Use cloud storage for backups, and watch your creativity soar as you effortlessly navigate your organized pattern collection. You’ll feel like a sewing mastermind!
Ergonomic Workspace Setup
Ever felt like your sewing space was working against you? Let’s fix that!
Adjust your chair height so your feet rest flat on the floor, keeping your knees at a 90-degree angle.
Position your desk at elbow height for good posture .
Don’t skimp on lighting – it’s essential for preventing eye strain.
Organize your storage to keep essentials within arm’s reach.
A well-designed workspace isn’t just comfortable; it’s your ticket to sewing mastery!
Maintenance Schedule for Equipment
Your sewing machine’s like a trusty sidekick – it needs some TLC to keep saving the day!
Whip up a monthly maintenance date: clean out lint, oil moving parts, and check tensions.
Every few months, give it a spa day with a deep clean and lubrication.
Don’t forget yearly check-ups with a pro for troubleshooting and repairs .
A well-oiled machine’s your ticket to sewing success with regular sewing machine maintenance!
Frequently Asked Questions (FAQs)
Are your sewing habits affecting your project?
Sewing habits can make or break your project.
Pressing seams, transferring pattern markings, and maintaining good posture are game-changers .
Trim those pesky threads to avoid dark spots showing through lighter fabrics.
Small changes yield big results!
How can I improve my sewing?
Practice makes perfect! To improve your sewing, set up your machine for quick access, use quality threads and needles, and press seams as you go.
Trim threads carefully, transfer pattern markings accurately, and maintain good posture while sewing.
Do you know how to sew?
Sewing’s a skill you can master.
Start with basic tools like needles and thread. Learn essential stitches: running, basting, and backstitch.
You’ll be stitching up a storm in no time. Ready to thread that needle and start.
How can I change a sewing habit?
Did you know 15% of sewers only change their needle when it breaks?
To change a habit, start small.
Identify one bad habit, like skipping pre-washing fabric.
Replace it with a good one: wash fabric right after buying.
You’ll see better results in no time!
What are the 5 benefits of sewing?
You’ll love sewing’s five fantastic benefits!
It relieves stress, sharpens hand-eye coordination, boosts brain growth, increases happiness, and fights dementia.
It’s like hitting the jackpot for your mind and body – needle and thread included!
What are 3 practical benefits of sewing?
Thread your way to practical benefits!
Sewing reduces stress, sharpening your focus like a well-oiled machine.
You’ll boost hand-eye coordination, stitching up improved dexterity.
Plus, it’s a creative outlet that’ll have you beaming with pride at your handmade creations .
Is sewing good for mental health?
Sewing stitches more than fabric; it weaves mental wellness into your life.
It’s a thread of calm in a tangled world, helping you focus, express creativity, and connect with others.
You’ll find stress unraveling with each stitch.
Why is sewing so therapeutic?
Studies show sewing can combat depression and boost mental health.
It’s therapeutic because you’re fully absorbed in the task, calming your mind.
You’re creating something tangible, which gives a sense of accomplishment and control over your environment.
How to choose the right needle for different fabrics?
You’ll stitch up success by matching needles to fabrics.
For delicate silks, opt for fine universal needles. Tackle denim with sturdy jeans needles.
Knits? Ball points are your best friend.
It’s like finding the perfect dance partner for your fabric!
Tips for sewing slippery or stretchy materials?
Taming slippery fabrics is a breeze with the right tricks.
Use a walking foot to prevent sliding, and try tissue paper under your fabric for stability.
Don’t forget to adjust your stitch length and needle size for smooth sailing!
Best practices for pattern alteration and grading?
Measure twice, cut once!
For pattern alteration and grading, trace your original pattern, then use rulers and a design curve to adjust sizes.
Grade between sizes for a custom fit, and don’t forget to mark your changes.
How to maintain and troubleshoot your sewing machine?
Regular cleaning is key to a happy sewing machine.
Clean lint from the bobbin area, oil moving parts, and check tension settings.
When trouble strikes, re-thread both top and bobbin, and make sure you’re using the right needle for your fabric. (Source)
Techniques for adding decorative elements to garments?
Jazz up your garments with embroidery, beads, or sequins for eye-catching flair.
Try visible mending to turn repairs into art.
Add ruffles or gathers for texture.
You’ll transform plain clothes into unique masterpieces in no time!
Conclusion
Remember, good sewing habits lead to better results. Whether you’re mastering tension settings, perfecting your pressing technique, or nailing that elusive perfect fit, each skill builds on the last.
Embrace these pro tips, and watch your projects transform from "homemade" to "haute couture."
Don’t be afraid to experiment and make mistakes – they’re your best teachers.
With practice and patience, you’ll soon be sewing like a seasoned pro. So fire up that machine, grab your favorite fabric, and let’s create something amazing together!

