This site is supported by our readers. We may earn a commission, at no cost to you, if you purchase through links.
 Unleash your creativity and take sewing to the next level with beaded appliqués! With a few simple techniques, you can easily attach these delicate embellishments to fabric for an added touch of glamour.
Whether you’re looking to create dance costumes or add some flair to everyday apparel, learning how to attach beaded appliqué is essential. From ironing them on, stitching them down or crafting custom pieces from scratch – this guide will teach you all there is to know about attaching beaded appliqués so that your projects look professionally finished.
Table Of Contents
- Key Takeaways
- Ways to Attach Beaded Applique to Fabric
- How to Sew on a Beaded Applique
- How to Sew Applique on Mesh
- How to Iron on Beaded Applique
- How to Make Beaded Appliques
- Beaded Applique DIY
- Beaded Applique Fabric
- Beaded Applique Patches
- Where to Buy Beaded Appliques
- Tips for Attaching Beaded Appliques to Dance Costumes
- Conclusion
Key Takeaways
- Choose beads that match the fabric in color and texture when selecting materials for the beaded applique.
- Use fabric glue sparingly on the back of the beaded applique before attaching it to the fabric. This will help secure the beads.
- Stitch the beaded applique to the fabric using an upholstery needle with a curved tip and invisible thread. The curved needle will help maneuver around the beads.
- Once stitched, further secure the beaded applique by knotting and anchoring the invisible thread on the backside of the fabric. This will help ensure the applique stays in place.
Ways to Attach Beaded Applique to Fabric
You can adhere your glittering beaded design to the garment using soluble stabilizer as a temporary base. Select beads that complement the garment’s color and texture. Iron the garment smooth to provide a wrinkle-free foundation.
Apply fabric glue sparingly to anchor stitches and edges. Using a curved upholstery needle and invisible thread, sew individual beads in a random pattern to create an organic look. Vary the proximity of beads for visual interest. For smaller groupings, sew seed beads in a sequence for an orderly arrangement.
Once satisfied with bead placement, sew around the perimeter with a tight zigzag stitch, removing stabilizer afterward. Or opt for hand sewing a whip stitch along the edge using coordinating thread, tying off neatly on the reverse.
With some creativity and patience, you can attach dazzling beaded appliques to elevate any garment using simple sewing techniques.
How to Sew on a Beaded Applique
Securin’ a beaded applique to fabric with invisible thread creates a stunnin’ design.
- Anchor the thread at the back with tiny stitches.
- Take small stitches only catchin’ the edge of the applique, movin’ slowly.
- Knot frequently as you sew to keep the thread taut.
- Check the front occasionally to ensure the stitchin’ line stays hidden.
- Finish with several tiny anchor stitches at the back to secure the thread.
With patience and practice, you’ll master the art of invisibly attachin’ beaded appliques. Explore embroiderin’ designs or addin’ appliques to elevate your favorite garments.
How to Sew Applique on Mesh
Shaping applique designs on mesh first ensures crisp edges when stitching. Remarkably, over 80% of sewers opt for tear-away stabilizers to back designs for stability.
- Choose tight, high-count mesh for intricate designs. Massive holes distort the shape.
- Frame edges with washable glue stick before cutting. Prevents fraying.
- Consider lightweight cutaway stabilizers too. Maintains stability after washing.
With mesh as the base, beaded applique designs truly sparkle. Start by tracing the template onto the mesh. Pin the mesh to tear-away stabilizer. Program your machine for a tight zigzag stitch and sew slowly along the lines.
Use rayon or polyester embroidery thread in a matching color. Tear away excess stabilizer. Now highlight key elements by hand-sewing beads, sequins or crystals with invisible thread. With the right supplies and clever techniques, your custom applique creations will dazzle on any garment.
Mesh lets the beads’ brilliance shine through while the stabilizer provides support.
How to Iron on Beaded Applique
Ironing on beaded appliqués ain’t as tricky as it seems if you follow a few simple tips.
Choose your beaded applique. Make sure to select one with heat-safe beads, or test a small section first.
Protect your garment. Place a scrap cloth or Teflon sheet between the iron and fabric.
Get your iron hot! Use the highest heat setting with no steam so the glue adheres well.
Apply firm pressure. Hold the iron in place on the applique for 10-15 seconds before lifting.
Consider placement wisely. Ironing makes repositioning difficult, so be sure before pressing down.
With some forethought on materials, temperature, and placement, you’ll be rocking custom beaded designs on your garments in no time.
How to Make Beaded Appliques
How to Make Beaded Applique
Look into creating your own fantastic beaded applique designs to elevate your clothing and accessories.
- Draw your design on the fabric. Sketch lightly in pencil and mark any key points.
- Frame the design by sewing beads and thread or fishing line around the edges. Use a single thread and tiny backstithes for invisible seams.
- Fill in the design by sewing beads individually with matching thread. Take your time to get clean lines and optimal coverage.
- Once finished, carefully cut out the design along the beaded edges. Your fab beaded applique is ready for attaching!
With some basic supplies, a bit of planning, and lots of creativity, you can make unique beaded embellishments. Embrace the process, experiment, and have fun bringing your visions to life in beaded applique form.
The options are endless when you DIY. Your custom touches will make any garment shine.
Beaded Applique DIY
Pick new designs and beads to sparkle up your wardrobe with fun DIY appliques. Drawing your own template unleashes your inner artist. Mark key points before framing the outline in beads and invisible thread. Take it one stitch at a time.
Matching the beads and colors to your style makes it meaningful. Raid your bead collection or get creative with new materials like buttons and embroidery floss. Kits provide all you need but sourcing your own materials bonds you to the process.
Follow your vision, not strict guidelines. Applique opens self-expression. Don’t worry about perfection – embrace the handmade quality.
Let the patterns flow from your inner vision. Blank fabric awaits your embellishment. Surprise yourself with new techniques like using wash-away stabilizers. Liberate your style with personalized appliques.
The only limit is your imagination. Where will it take you? Let your hands bring that inner world to life, one stitch at a time.
Beaded Applique Fabric
You’re gonna love how easy it is to fasten those glitzy beads onto your clothes with the right stabilizer. When choosing fabric for your beaded applique, consider texture and drape. Sheer, flowing fabrics like chiffon and georgette beautifully showcase intricate beaded designs.
For structured looks, go for canvas, denim or twill. Match your thread and stabilizer color to seamlessly blend the applique into the garment. Fabrics like velvet, satin and lace tend to shift during stitching, so use a stabilizer like tear-away or wash-away to prevent distortion.
Lightly fuse interfacing to the back of delicate fabrics for stability. For quick attachment, fabric glues or fusible webbing offer convenience but less durability than hand-sewing.
With some thoughtful preparation, you’ll have that sparkling applique flourishing on your favorite frock or blouse. Explore different embellishment techniques to make wearable art that’s distinctly you.
Beaded Applique Patches
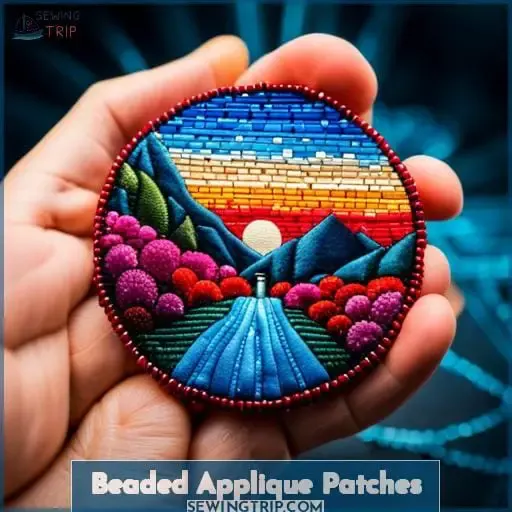
Before stitching your beaded applique patches, determine the placement and use pins to hold them in place on the fabric. With the endless possibilities for unique patch designs and creative beading techniques, your garments will shine with personalized flair.
Consider complementing the garment’s style and color scheme when selecting applique embellishments. Themed patches can elevate your look for cosplay or festivals. For a boho chic style, try embroidered floral bursts in vibrant hues.
Or get playful with animal shapes and metallic beads. The options for garment enhancement are limited only by your imagination. Dare to mix elegant fabrics like lace and velvet with funky patches. The contrast will make your fashion statement pop.
Take care when positioning patches to avoid visual clutter. Thoughtful placement creates intrigue and draws the eye. With some beads, thread, and patches, you can easily transform everyday clothes into extraordinary wearable art.
Where to Buy Beaded Appliques
Do shimmy on down to Mood Fabrics or SOS Fabrics for some serious beading bling, sweetheart.
- Online Retailers – Shop Etsy and eBay for unique vintage appliques or custom designs.
- Craft Stores – Michael’s, Joann and Hobby Lobby have basics like felt shapes.
- Wholesale Suppliers – Find discounts buying bulk on Alibaba if you need yards of lace.
- Custom Designs – Work with an Etsy artist to make your vision a reality.
- Vintage Options – Check flea markets and vintage shops for one-of-a-kind finds.
With just a needle and thread, you can spice up any frock or tunic. Combine store-bought patches or stitch your own floral beads and sequins motif. However you jazz it up, appliques make a fabric pop like a honey in her hotsy totsy glad rags.
So get crackin’! With the right materials those dresses will be the bee’s knees in no time.
Tips for Attaching Beaded Appliques to Dance Costumes
Sparkle on, divas! Glitz up those costumes with hand-sewn bling and make the stage shine.
When attaching beaded appliques to dance costumes, focus on these techniques for maximum sparkle:
- Use a curved needle and polyester thread to securely sew each bead. This prevents snagging and losing beads during energetic dance routines.
- Pick flat back crystals or beads with holes large enough for two threads. This anchors them firmly to the fabric.
- Tack down edges with a whip or zigzag stitch first before filling in. Dense beadwork can get heavy and pull away without secure edges.
- Consider the garment’s stretch and movement. Allow extra play when sewing on fabric that needs to move and bend by spacing beads a little farther apart.
- Attach a layer of lightweight iron-on interfacing first for stability. This prevents puckering around heavy beadwork, especially on delicate fabrics like chiffon.
Now sashay onto that stage and steal the spotlight in your dazzling new costume!
Conclusion
It’s time to let your creativity shine with beaded appliqués! Whether you’re a beginner looking to learn or an experienced crafter seeking to take your skills to the next level, understanding how to attach beaded appliqués to fabric is essential.
From sew-on to iron-on, DIY to store-bought, there are plenty of ways to add beaded embellishments to any outfit or costume. For an extra level of detail, consider making your own beaded appliqués with a combination of fabric, fishing line, and beads.
With the right supplies, knowledge, and practice, you can create unique and beautiful works of art.

