This site is supported by our readers. We may earn a commission, at no cost to you, if you purchase through links.
It’s not about natural talent or fancy equipment. It’s about building muscle memory through repetition and learning to see problems before they become permanent stitches.
Most beginners give up because they expect flawlessness too soon, but the sewists who stick with it understand that every wonky seam and puckered hem is teaching their hands something valuable. These ten essential skills will take you from frustrated beginner to confident maker.
Table Of Contents
- Key Takeaways
- Why Sewing Skills Are Important
- Essential Sewing Tools and Materials
- Learning Basic Sewing Techniques
- Practicing Sewing Projects
- Developing Attention to Detail
- Learning From Mistakes and Problem Solving
- Seeking Inspiration and Learning From Others
- Building a Sewing Library and Reference Materials
- Developing Time Management and Organization Skills
- Embracing Creativity and Experimentation
- Frequently Asked Questions (FAQs)
- Conclusion
Key Takeaways
- Sewing mastery comes from repetition and muscle memory, not natural talent—expect your first fifty attempts at any technique to be rough, but trust that consistent practice will eventually make your hands work without conscious thought.
- The right tools matter more than you think: sharp fabric scissors (never used on paper), appropriate needles for your fabric type, quality thread, and accurate measuring tools are the foundation that separates frustrating projects from enjoyable ones.
- Mistakes are your best teacher—most beginners quit because they expect perfection too soon, but every wonky seam teaches your hands something valuable, and learning to troubleshoot problems (like tension issues, cutting errors, or fitting challenges) builds real competence.
- Real growth happens outside your comfort zone: once you master the basics, intentionally push yourself with one new challenge per project—whether that’s working with unfamiliar fabrics, trying pattern alterations, or attempting techniques that make your hands shake a little.
Why Sewing Skills Are Important
Mastering sewing skills unlocks financial independence and creative freedom you won’t find elsewhere. With 84% of sewing professionals being women and skill accessibility requiring only a high school education, this craft creates real pathways to self-employment. Sewing skills empower women to achieve financial stability, enhancing their self-worth and enabling them to support their families.
When you develop basic sewing skills, you’re building more than a hobby—you’re reducing environmental impact by extending clothing life and keeping textiles out of landfills.
Improving sewing skills also fosters mental wellbeing through mindful, focused work that builds confidence and patience.
Building sewing skills connects you to community building through shared knowledge, while developing sewing skills gives you control over fit, style, and quality—making every stitch an investment in yourself.
Essential Sewing Tools and Materials
Before you start any project, you need the right gear in your corner. Having quality tools makes the difference between fighting with your fabric and actually enjoying what you create.
Let’s look at the must-have items that’ll set you up for success.
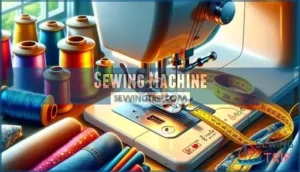
Sewing Machine
Your sewing machine is the workhorse of your creative space, and getting comfortable with it is the first real step toward making projects you’ll actually be proud of. Here’s what you need to focus on:
- Machine maintenance – Clean lint from the bobbin area and oil your machine regularly to keep it running smoothly.
- Tension adjustment – Properly thread your machine and adjust tension settings to prevent puckering or loose stitches.
- Needle selection – Match your needle type and size to your fabric weight for clean, professional results.
- Stitch regulation and presser feet – Test stitch length on scraps and swap presser feet for different techniques.
Scissors
Once your machine is humming along nicely, you’ll need a sharp pair of fabric scissors to turn those patterns into actual pieces worth sewing. Invest in quality tools with comfortable grips that fit comfortably in your hand. Use good scissors exclusively for cutting fabric—paper dulls blades fast.
Blade sharpness makes all the difference when measuring and cutting fabric, especially with delicate or thick fabric types. Keep a second pair for paper and patterns. Consider specialty scissors like pinking shears for finishing seams.
Regular maintenance tips: wipe blades clean and store them properly to protect the edges.
Needles
Just like those sharp scissors need the right blade for each job, needles aren’t one-size-fits-all either. Your needle selection depends on fabric choice and what you’re sewing. Universal needles work for woven fabrics, while stretch needles work with knits without damaging them. Sharp needles excel with delicate silks. Needle sizes range from 60/8 for lightweight fabrics to 110/18 for heavy materials. Match your needle types to your thread pairing and fabric weight. Change needles every 8-10 hours of sewing—dull needles cause skipped stitches and snags.
Here’s what to keep on hand:
- Universal needles (sizes 70/10-90/14) for everyday cotton and linen projects
- Ballpoint or stretch needles for knits and jersey fabrics
- Sharp/microtex needles for silk, chiffon, and precise topstitching
Master needle threading basics and proper needle position in your machine for smooth stitching every time.
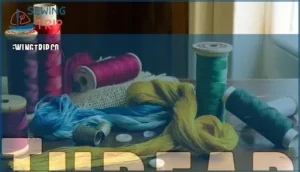
Thread
Think of thread as the workhorse that holds your entire project together—without the right choice, even perfect stitches can unravel. Thread types matter more than you might expect.
All-purpose polyester thread works for most fabrics, while cotton thread suits natural fibers best. Thread weight affects your results—lighter weights like 50wt work for delicate fabrics, while heavier 30wt thread is suitable for topstitching.
Thread quality is important too. Brands like Gutermann and Coats & Clark won’t shed lint or snap mid-seam. Match your thread color to your fabric for invisible seams, or contrast it for decorative details. Keep embroidery thread separate for special projects.
Thread tension problems often start with poor thread choices or tangled spools. Store thread away from sunlight to prevent brittleness. Smart thread selection sets you up for success before you even start sewing.
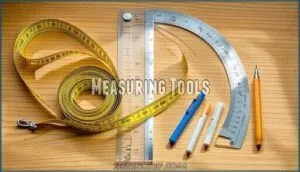
Measuring Tools
Accurate measurements stand between you and a garment that actually fits—off by even a quarter inch, and you’ll be ripping seams instead of wearing your creation. Measuring tools turn guesswork into precision. Here’s what you need:
- Tape measure – flexible for body measurements and curved edges
- Seam gauge – perfect for checking seam allowance width and marking hems
- Rulers variety – clear gridded rulers for straight cuts and accurate seam allowance
- French curve and hip curve – essential for pattern drafting and alterations
Your measuring tape should be 60 inches long with both metric and imperial markings. Keep marking tools like chalk or fabric pens nearby for transferring accurate measurements to fabric. Double-check your numbers before cutting—measuring twice saves fabric and frustration.
Learning Basic Sewing Techniques
Once you’ve got your tools in hand, it’s time to put them to work. Mastering a few foundational techniques will give you the confidence to tackle almost any project.
Here are the core skills every sewist needs to practice.
Sewing Straight Lines
Straight lines might seem simple, but they’re the backbone of every sewing project you’ll ever tackle. Consistent stitching starts with proper fabric preparation and correct machine tension. Here’s what helps:
- Use your sewing machine grid or an adjustable seam guide foot for grid alignment
- Practice on scrap fabric with tape guides to build sewing accuracy
Master these basics, and seam accuracy becomes second nature.
Sewing Curves
Curves separate confident sewists from those who avoid fitted garments—but they don’t have to be intimidating once you understand how fabric moves and stretches around bends.
Start by clipping curves after stitching to release tension, then practice grading seams to reduce bulk. Ease stitching helps you control fullness, while curve templates guide your accuracy. Pin perpendicular to your stitching line, and slow down as you approach the bend—your machine will follow your guidance.
| Technique | Purpose |
|---|---|
| Clipping curves | Releases tension and allows fabric to lay flat on concave curves |
| Grading seams | Reduces bulk by trimming seam allowances to different widths |
| Ease stitching | Controls fullness when joining curved pieces with slight gathering |
| Facing curves | Creates clean finishes on necklines and armholes without visible seams |
These sewing techniques build your confidence with every curved seam you complete.
Sewing Seam Allowances
Seam allowances might seem like a minor detail, but they’re the invisible framework that holds every project together—mess them up, and even the most beautiful fabric won’t hang or fit the way you imagined.
Mastering seams and stitches starts with maintaining a consistent seam allowance throughout your project. Most patterns use 5/8 inch, but you’ll need accurate measurement tools like a seam gauge to verify your work. Watch the guide marks on your machine’s throat plate rather than the needle itself—this keeps your sewing accuracy sharp.
For curved seam allowances, you’ll need to clip and trim seam allowances to reduce bulk before pressing seams flat for a professional finish.
Sewing Different Types of Stitches
Your sewing machine probably has a dozen stitch options you’ve never touched, but learning just a handful of them can completely change what you’re able to create. Start with the straight stitch—it’s your workhorse for seams and topstitching. The zigzag stitch prevents raw edges from fraying and works beautifully on stretchy fabrics.
Mastering seams and stitches means understanding how stitch length and tension adjustment affect your results. Test different stitch types on scrap fabric first, especially when trying decorative stitches or working with unfamiliar materials.
Fabric compatibility matters—delicate silk needs different machine stitches than heavy denim. As you gain confidence with basic seam types, you’ll discover which specialty feet make specific stitches easier to execute.
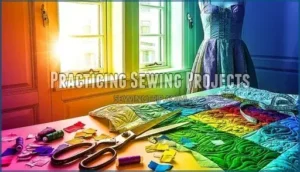
Practicing Sewing Projects
Learning to sew is one thing, but getting good at it? That happens through hands-on practice. You need real projects to build your skills, test what you’ve learned, and discover where you still need work.
Here’s how to practice effectively and grow your abilities with each project you complete.
Simple Sewing Projects for Beginners
One of the best ways to build confidence at the machine is to tackle projects that feel achievable from the start. These beginner projects help you practice sewing basics while creating something useful:
- Easy Pillowcases – Perfect for mastering straight seams
- Simple Scrunchies – Quick wins that teach elastic techniques
- Fabric Coasters – Great for practicing corners and topstitching
- Tote Bags – Build skills with straps and box corners
- Beginner Quilts – Introduce piecing and pressing techniques
Each project strengthens your sewing skills without overwhelming you. Start simple, and you’ll develop the sewing techniques needed for more complex work.
Gradually Increasing Difficulty
After you’re comfortable with those starter projects, it’s time to build on what you know. Skill progression happens when you push yourself just beyond your current abilities. Maybe you add a zipper to your next tote bag, or try a garment with darts instead of sticking to rectangular shapes.
This approach to improving sewing skills prevents learning plateaus that stall many sewists. Research shows that 65% of learners advance at their own pace rather than following rigid schedules, which aids continuous learning and practice.
The key isn’t jumping from pillowcases to fitted blazers overnight. Instead, focus on mastering basics first, then layer in one new challenge per project. Understanding your current sewing level can help you choose appropriate projects.
This adaptive curriculum approach helps you tackle project complexity without feeling overwhelmed, building sewing skills that stick.
Trying Different Types of Fabrics
Each fabric you work with teaches you something new about tension, needle choice, and manipulation techniques that books can’t quite capture. Cotton Poplin and Cotton Lawn are great starting points because their stable weave structures and predictable drape qualities make them forgiving for beginners.
As you progress, try these fabric types to expand your skills:
- Knit fabrics (jersey, interlock) teach you about fabric stretch materials and require different needle choices and manipulation than woven fabrics like quilting cotton or linen, which have minimal give but showcase precise seam work beautifully.
Understanding fiber content and fabric blends helps you anticipate how materials behave under your presser foot, building confidence with each new textile you tackle.
Experimenting With Different Techniques
Once you’re comfortable with different fabrics, pushing yourself to try unfamiliar techniques is where sewing transforms from following instructions to creating something uniquely yours.
Fabric manipulation like pleating or gathering adds dimension that flat seams can’t achieve. Pattern hacking lets you merge two designs or reshape necklines to fit your vision. Embellishment techniques—appliqué, beading, or decorative topstitching—personalize store-bought patterns. Mixed media approaches combine unexpected materials like leather with cotton. Couture methods, such as hand-picking zippers or understitching facings, improve your work. Each new sewing technique you master builds your sewing skills and confidence.
Try these approaches to expand your repertoire:
- Start with one unfamiliar technique per project to avoid overwhelm
- Practice couture methods on scraps before tackling your garment
- Combine fabric manipulation with embellishment techniques for unique textures
- Document what works in a notebook for future reference
- Challenge yourself monthly with a technique outside your comfort zone
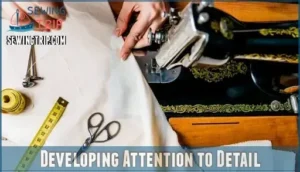
Developing Attention to Detail
The little details separate handmade from homemade. Small mistakes in cutting, marking, and finishing add up to a project that looks rushed or sloppy.
Here are four areas where careful attention makes all the difference.
Precision in Cutting Fabric
Think of fabric cutting like slicing a birthday cake—one crooked cut throws off every piece that follows. Sharp scissors or a rotary cutter are your starting point, but accuracy goes deeper than that. Fabric prep matters—press out wrinkles before you measure twice, cut once. Always place your fabric on a cutting mat with grainline accuracy in mind. Pattern weights hold everything steady without shifting layers, while fabric stabilization prevents stretching during cuts.
Master these cutting techniques to keep your projects on track:
- Position fabric aligned with grainline before securing with pattern weights
- Use rotary cutter with firm, continuous pressure for clean edges
- Protect your cutting mat by rotating it regularly and storing it flat
- Test fabric behavior on scraps first when working with slippery or stretchy materials
- Keep blades sharp—dull tools create jagged edges that compromise seam accuracy
Accurate Pinning and Marking
Pins and marks are the invisible roadmap that keeps your fabric aligned and your seams exactly where they belong. Without them, even the most careful sewing techniques fall apart. Start with quality sewing tools—long pins with glass heads won’t melt under your iron, and they’re easier to spot than shorter ones. For marking tools, choose based on fabric types: tailor’s chalk works on cotton, while washable markers suit lighter materials. When pinning techniques matter most, place pins perpendicular to your seam line so you can sew right over them without stopping.
Pattern matching requires strategic pinning to keep stripes, plaids, or prints aligned across seams. Try this approach:
- Match pattern markings at seam edges first, then pin at 2-inch intervals along the seamline, checking alignment after each pin placement to catch shifts before they become sewing mistakes.
These sewing tips transform guesswork into precision cutting and stitching every time.
Seam Finishing Techniques
Raw edges on seams can unravel faster than you’d expect, but the right finishing technique stops fraying before it starts. A serger creates professional clean finishes in seconds, but zigzag stitches work just as well if you’re working with what you have. French seams hide raw edges inside themselves—perfect for delicate fabrics. Flat-felled seams add durability to jeans and workwear.
Match your seam finishing methods to your fabric type and seam allowances. Facing seams need different seam finishing and construction than exposed edges. Practice various seam finishing techniques on scraps before committing to your project—you’ll discover which methods suit your style and fabric best.
| Technique | Best For | Skill Level |
|---|---|---|
| Serger options | Knits, stretch fabrics | Beginner-friendly |
| Binding methods | Curved edges, quilts | Intermediate |
| Hand finishes (pinking, overcast) | Wovens, vintage projects | Beginner |
Pressing and Ironing
Your iron isn’t just another tool—it’s the secret weapon that separates homemade projects from professional-looking garments. Steam usage and proper iron temperature settings protect delicate fabrics while shaping seams beautifully.
Press seams open after stitching them, using a pressing cloth when needed for fabric care. A cordless iron gives you freedom to maneuver around curved areas.
Invest in pressing tools like a tailor’s ham for darts and sleeve rolls for narrow spaces—these simple additions transform your pressing technique and deliver that crisp, professional finish.
Learning From Mistakes and Problem Solving
Every sewist runs into problems—that’s just part of learning. The key isn’t avoiding mistakes, but knowing how to spot them and figure out what went wrong.
Let’s look at the most common issues you’ll face and how to solve them.
Identifying and Fixing Common Sewing Mistakes
Mistakes are your best teacher for building troubleshooting skills and problem-solving confidence. When you spot crooked seams or puckered fabric, take a moment to figure out what went wrong. Cutting inaccuracies account for roughly 38% of assembly errors, while seam allowance deviations can throw off garment size by up to 3 cm.
Here’s what to watch for:
- Fabric shrinkage happens when you skip pre-washing—up to 57% of homemade garments shrink noticeably after their first wash.
- Needle selection matters more than you’d think—dull or incorrect needles cause over 37% of fabric damage in sewing.
- Seam finishing prevents unraveling and strengthens your work by about 34% compared to unfinished edges.
Learning from sewing mistakes turns frustrating moments into real growth.
Troubleshooting Machine Issues
Machine issues can stop a promising project in its tracks, but knowing how to diagnose and fix them quickly will save you hours of frustration. Start by checking your sewing machine manual—it’s your best troubleshooting guide. Most problems trace back to three common culprits:
- Thread tension problems cause loopy stitches or thread breaks
- Bobbin issues create bird’s nests or skipped stitches underneath
- Feed dogs not moving lead to fabric bunching or staying in place
Regular sewing machine maintenance prevents most motor problems and needle problems before they start.
Finding Solutions to Fit and Construction Problems
When your carefully stitched garment doesn’t fit quite right or a seam puckers unexpectedly, don’t panic—every sewing challenge is just a puzzle waiting for the right solution.
Start with Muslin Mockups to spot fitting issues before cutting your good fabric. Pin alterations directly on your body or dress form, marking where you need design adjustments.
Pattern alterations like adding darts or tweaking seam allowances often fix garment fit problems without major changes.
Study construction techniques through sewing references when you’re stuck, and don’t hesitate to ask experienced sewers for advice on problemsolving tricky garment construction.
Seeking Inspiration and Learning From Others
No one becomes a great sewist in a bubble. The sewing community is full of people who’ve figured out clever solutions, shared their hard-won lessons, and pushed techniques forward.
Here’s how you can tap into that collective knowledge and keep your skills growing.
Following Sewing Blogs and Social Media Accounts
Learning from the sewing community online transforms your skills faster than practicing alone. Sewing blogs and social media accounts offer a treasure trove of techniques, troubleshooting advice, and influencer recommendations that guide your sewing journey.
- Discover pattern walkthroughs and fabric selection tips that solve common sewing solutions
- Follow content analysis from experienced sewists who share step-by-step processes
- Track platform trends to stay current with techniques gaining momentum
- Engage through community interaction where campaign impact shows what really works
Joining Sewing Communities and Forums
Real learning happens when you connect with people who share your struggles, celebrate your wins, and understand why you stayed up until midnight unpicking a zipper for the third time.
Real growth in sewing comes from connecting with people who share your struggles, celebrate your wins, and understand the late-night frustrations
Online support groups and local sewing communities give you access to skill sharing and project feedback you can’t get anywhere else.
You’ll find collaboration opportunities, discover sewing solutions to problems you haven’t even encountered yet, and build connections that fuel lifelong learning on your sewing journey.
Taking Sewing Classes or Workshops
Sometimes the fastest way to level up isn’t figuring it all out on your own—it’s learning directly from someone who’s already mastered what you’re struggling with. Sewing classes and workshops give you structured, project-based learning in a classroom environment where you can build sewing skills with hands-on guidance. You’ll receive instructor feedback adapted to your skill level, learn sewing techniques that work for beginners and beyond, and discover networking opportunities with fellow sewists who share your passion.
Here’s what makes classes worth it:
- Immediate corrections prevent you from practicing mistakes that become bad habits
- Access to professional equipment lets you test machines and tools before investing
- Real-time troubleshooting solves problems in minutes instead of hours of frustration
Attending Sewing Events and Expos
Stepping into a sewing expo feels like entering a wonderland designed specifically for people who dream in fabric and thread. You’ll discover vendor booths packed with patterns, notions, and fabrics that instantly spark new project ideas.
Networking opportunities abound as you chat with fellow sewists who share practical tips for improving sewing skills. Watch live demonstrations where exhibitors showcase inventive tools and sewing techniques perfect for sewing beginners.
Workshop benefits extend beyond the classroom—you’ll gain hands-on skill enhancement while trend spotting the latest developments in the sewing world, all while building sewing skills that last.
Building a Sewing Library and Reference Materials
Building a solid reference collection will support your sewing journey for years to come. You’ll want books that explain techniques clearly, patterns that match your skill level, and a personal system for tracking what you learn.
Let’s look at three ways to build your sewing library.
Essential Sewing Books for Beginners
Your sewing education deserves a solid foundation, and the right beginner sewing guide makes all the difference. Reference guides like "The Sewing Book" by Alison Smith pack over 300 sewing techniques with 2,000+ photos for visual learning.
Consider these essential types:
- Extensive references – "Reader’s Digest Complete Guide to Sewing" covers sewing basics from seams to tailoring with 700+ illustrations.
- Project-based books – "School of Sewing" by Shea Henderson offers 12 beginner projects with photo-driven sewing tutorials for beginners.
- Technique-focused guides – "Sewing 101: Master Basic Skills and Techniques" provides structured skill building from foundational to functional projects.
These resources transform confusion into confidence through clear instructions and practical application.
Collecting Sewing Patterns and Magazines
Building a collection of sewing patterns isn’t just about hoarding paper—it’s about creating a personal library of possibilities you can revisit again and again. Start with magazine subscriptions and indie designers for fresh inspiration, then explore vintage patterns for unique details.
Consider these options:
- Digital patterns for instant downloads and easy pattern storage
- PDF patterns you can print at home for quick pattern making
- Vintage patterns offering timeless silhouettes and pattern alterations practice
- Multi-size patterns that simplify pattern layout and grading
- Pattern reading tutorials to master markings and symbols
Mix free and paid sewing patterns to build confidence in pattern drafting while developing your signature style.
Creating a Personal Sewing Notebook or Binder
Your personal sewing notebook becomes the secret weapon that transforms scattered scraps of knowledge into a powerhouse reference you’ll reach for every time you thread a needle. Think of it as your sewing skills headquarters where Project Tracking meets Inspiration Storage.
Here’s what to include:
- Swatch Library with fabric samples and notes for Pattern Organization
- Sewing techniques pages featuring step-by-step sewing guides
- Skill Reflection sections documenting what works and what doesn’t
- Sewing tips for beginners collected from classes and online tutorials
This hands-on approach keeps essential sewing for beginners resources organized and accessible.
Developing Time Management and Organization Skills
Good sewing isn’t just about technique—it’s about staying organized and managing your time wisely. Without a system, projects pile up, supplies disappear, and frustration takes over.
Here’s how to keep your sewing life running smoothly so you can focus on what matters: actually creating.
Planning Sewing Projects and Setting Deadlines
Think of a sewing project without a plan like heading out on a road trip with no map—you might eventually get somewhere, but you’ll waste time, energy, and probably a lot of fabric along the way. Timeline creation keeps your sewing productivity on track. Start by defining your project scope and realistic deadlines that match your skill level. Smart resource allocation prevents mid-project surprises.
- Break complex projects into smaller tasks with checkpoints to track progress
- Build contingency planning into your schedule for inevitable adjustments or problem-solving moments
Organizing Sewing Supplies and Materials
A chaotic stash of thread, fabric scraps, and buttons might feel creative, but it’s actually slowing you down every time you hunt for that one spool or pattern piece. Smart workspace organization transforms frustration into flow. Use clear storage solutions like labeled plastic bins for sewing notions and modern sewing tools and notions. Inventory management becomes simple when everything has its home.
| Storage Category | Recommended Solution | Best For |
|---|---|---|
| Thread & Bobbins | Wall-mounted racks or drawer organizers | Quick color matching and thread selection |
| Sewing Tools & Clips | Magnetic strips or countertop caddies | Frequently used scissors, sewing clips, rulers |
| Fabric & Scraps | Clear stackable bins with labels | Sorting by color, type, or project |
| Patterns & Notions | Binders or hanging file folders | Easy retrieval and space optimization |
Mobile sewing kits in portable containers let you work anywhere while maintaining order.
Creating a Sewing Space or Studio
Once your supplies are sorted and stored, the next challenge is setting up a physical space where your sewing can actually happen. Look for an area with good natural light or add adjustable task lighting for comfortable visibility on fine details. An ergonomic setup matters—position your sewing machine at elbow height to avoid shoulder strain during long sessions.
Space optimization starts with measuring your available area and choosing sewing equipment that fits, from compact machines to fold-down cutting tables. Mount inspiration boards above your workspace to keep patterns and ideas visible. Store essential sewing tools within arm’s reach using vertical storage solutions like pegboards or wall-mounted organizers for modern sewing tools and notions.
Managing Multiple Sewing Projects at Once
With multiple projects calling your name at once, the trick is learning to run your sewing life like a well-oiled machine instead of letting it run you. Try these sewing tips for WIP Management:
- Project Prioritization – rank projects by deadline or excitement level
- Staging Supplies – gather materials for each project in labeled bins
- Time Boxing – schedule focused sewing sessions for specific projects
- Batch Sewing – group similar sewing techniques across projects to save time
This approach transforms chaos into sewing project success.
Embracing Creativity and Experimentation
Sewing becomes truly rewarding when you let your creativity shine through. This means stepping away from rigid patterns and exploring new ideas that reflect your personal style.
Here’s how you can embrace experimentation and make sewing more exciting.
Personalizing Sewing Projects With Embellishments
Embellishments turn plain projects into showstoppers, and the best part is you don’t need fancy skills to get started. Try simple decorative stitches on your machine first, then explore appliqué techniques by cutting shapes and stitching them onto fabric.
Add bead embroidery or fabric painting for texture and color. Hand-sewing techniques like embroidery or fabric manipulation give you complete control.
Mix media by combining ribbons, buttons, and trims. Practice different placements on scrap fabric before committing to your finished piece.
Trying New Sewing Techniques and Styles
Branching out from your usual routine reveals opportunities you didn’t know existed. Try pattern hacking by modifying existing patterns to create something entirely new, or dive into garment construction techniques like setting sleeves or inserting zippers. Mastering sewing techniques in different styles—from Japanese sewing methods to French seams—builds skill diversification that makes you a more confident sewist.
Improving sewing skills means getting comfortable with discomfort—that’s where real growth happens.
- Fabric mixing: Combine unexpected materials like knits with wovens for modern designs
- Technique adaptation: Apply quilting methods to garment construction or vice versa
- Fabric manipulation techniques: Experiment with pleating, gathering, or smocking for texture
- Style experimentation: Switch between fitted garments and flowing pieces to stretch your abilities
Upcycling and Repurposing Materials
Old clothes lying in your closet aren’t just fabric waiting for the trash—they’re raw materials ready for transformation. Pull apart worn jeans to harvest denim for patches, or reshape oversized shirts into modern tops through altering garments.
Sustainable fashion starts with creative reuse—turn fabric scraps into patchwork quilts or practice zero-waste patterns by maximizing every inch. Textile waste drops when you see potential instead of problems. Sustainable fabrics already exist in your wardrobe, waiting for your next upcycling project.
Pushing Boundaries and Stepping Outside Comfort Zones
Growth happens the moment you swap safe sewing patterns for something that makes your hands shake a little. Fear overcoming starts when you tackle challenge projects that push your skills forward. Try learning pattern drafting and alteration, work with unconventional materials like leather or vinyl, or tackle design challenges that demand sophisticated sewing techniques.
Creative exploration means embracing innovation in sewing:
- Attempt garments with complex construction methods you’ve never tried
- Mix fabric types in unexpected combinations
- Draft your own patterns instead of buying them
- Sew without instructions to build problem-solving skills
- Enter skill expansion contests that force you beyond your comfort zone
Overcoming sewing challenges transforms intimidation into confidence.
Frequently Asked Questions (FAQs)
How do you learn to sew?
Learning to sew isn’t as seam-ple as it looks, but it’s totally doable. Start with online tutorials covering sewing basics like straight stitches and seam allowances. Practice projects help you build sewing skills gradually.
Choose beginner-friendly fabrics like cotton. Find sewing mentors or join communities for guidance on sewing techniques for beginners.
What skills do you need to learn to sew more professionally?
You’ll need pattern alteration and fitting techniques to nail custom fit. Focus on fabric selection, seam finishes, and design elements.
Mastering sewing techniques and complex sewing techniques guarantees achieving professional sewing results with a professional finish.
What are the best sewing tips for beginners?
Start with the basics: practice straight lines on scrap fabric, test thread tension and stitch length before cutting patterns, and press seams as you sew.
Master grainline basics for proper fabric selection and always create a mockup first.
Is sewing a good skill?
Yes, sewing is an excellent skill. It offers a creative outlet for self-expression and promotes sustainable fashion through mending and upcycling.
Additionally, sewing provides stress relief, builds community connections, and improves employability in fashion-related fields.
Do you need to know everything to start sewing well?
You don’t need every sewing tip or complex technique to begin. Focus on sewing basics and sewing fundamentals first. Ideal standards stop more beginners than lack of skill.
Master straight stitches, understand your machine, and start small projects.
Why should you learn to sew?
Picture yourself mending your child’s torn favorite shirt instead of tossing it—that’s the magic of sewing. Basic sewing skills provide creative expression, while beginner sewing projects build confidence for life.
You’ll save money, customize garments perfectly, embrace sustainable fashion, and discover therapeutic benefits.
Is sewing a talent or skill?
Sewing is primarily a skill, not an innate talent. While some people show natural creative expression or fine motor coordination, anyone can develop sewing skills through practice and dedication.
Mastering sewing techniques comes from acquired expertise and skill development, not nature vs. nurture.
What’s the hardest thing to sew?
Custom jackets with fitted garments top the difficulty chart. Complex curves, intricate details, and pattern matching demand precision.
Delicate fabrics, zipper insertion, and complex closures add further challenges. You’re mastering sewing seams while avoiding common sewing mistakes at every turn.
How to get good at sewing fast?
Focus on efficient practice drills like sewing straight lines with guides. Pick quick projects for beginners, practice sewing techniques daily on scraps, and master your sewing machine settings. This focused skill acquisition helps you avoid common pitfalls faster.
Can I learn sewing by myself?
Absolutely. Self-teaching resources like online sewing courses make learning to sew accessible from home. Focus on practice project selection, start with beginner sewing tips, and master basic sewing techniques and tips.
Staying motivated through challenges helps you build confidence steadily.
Conclusion
Is it true that only people with artistic flair can sew well? Not even close. The reality is that learning how to be good at sewing comes down to showing up consistently, making mistakes without ego, and trusting that your hands will eventually know what to do before your brain does.
Your fiftieth buttonhole won’t look like your first—and that’s exactly the point. Keep stitching, keep fixing, keep learning. The garments you create six months from now will prove that persistence beats flawlessness every single time.
- https://www.bhf.org.uk/what-we-do/news-from-the-bhf/news-archive/2017/june/bhf-exposes-uk-sewing-skills-shortage-to-launch-the-big-stitch-camapaign
- https://www.kayeteede.com.au/news/sewing-a-timeless-art
- https://economictimes.com/news/international/world-news/youngsters-in-us-lack-basic-sewing-skills-study/articleshow/44825524.cms
- https://blog.bernina.com/en/2023/04/sewing-gadgets-part-1-measuring/
- https://blog.spoonflower.com/2022/09/01/apparel-fabric-picks/

