This site is supported by our readers. We may earn a commission, at no cost to you, if you purchase through links.
To change the needle on your Singer Sew Mate sewing machine, start by disconnecting it from power. Lower the presser foot, then raise the needle to its highest position.
Loosen the needle screw by turning it counterclockwise, and pull out the old needle. Inspect the new needle carefully, ensuring it’s appropriate for your Sew Mate and shows no bends.
Insert the new needle with the flat side facing the rear, then tighten the screw clockwise, being careful not to overtighten.
With the needle properly aligned, you’re ready to continue sewing. For more detailed guidance on needle handling and machine maintenance, keep reading.
Table Of Contents
- Key Takeaways
- How to Change Needle on Singer Sew Mate?
- Turn Off the Machine for Safety
- Lower the Presser Foot
- Raise the Needle to the Highest Position
- Loosen the Needle Screw by Turning It Counterclockwise
- Pull the Old Needle Out
- Check the New Needle for Bends
- Tighten the Needle Screw by Turning It Clockwise
- Frequently Asked Questions (FAQs)
- Conclusion
Key Takeaways
- Lower the presser foot before changing the needle to create a safe and accessible working environment.
- Raise the needle to its highest position to make needle replacement easier and ensure proper alignment with the thread guide.
- Loosen the needle screw by turning it counterclockwise before removing the old needle and inserting a new one.
- Tighten the needle screw by turning it clockwise, being careful not to overtighten and damage the needle or needle clamp.
How to Change Needle on Singer Sew Mate?
To change the needle on your Singer Sew Mate 5400 sewing machine, follow these steps:
- Turn off the power to the machine.
- Raise the presser foot lifter and turn the hand wheel toward you to raise the needle to the highest position.
- Lower the presser foot.
- Loosen the needle screw by turning it counterclockwise (toward you).
- Remove the old needle and discard it.
- Insert the new needle with the flat side facing away from you and push it all the way in until it stops.
- Tighten the needle screw by turning it clockwise (away from you) until it’s snug.
- Replace the presser foot and turn the machine back on.
Remember to change the needle every 6 to 8 hours of sewing time for best performance. Singer recommends using different types of needles for various fabrics, such as ballpoint needles for stretch fabrics and regular point needles for non-stretch fabrics.
Turn Off the Machine for Safety
Before you embark on the needle change procedure for your Singer Sew Mate, let’s curtail the power flow. Disconnect the plug from its electrical outlet to avert any jolting encounters. It’s akin to preparing a race car prior to entering the circuit—safety prevails!
With the power cords detached, you have an unobstructed pit stop to manipulate the needle threader and perform a cursory cleaning of your machine.
Bear in mind, a seamless sewing experience hinges upon a pristine, unplugged machine and a new needle.
Lower the Presser Foot
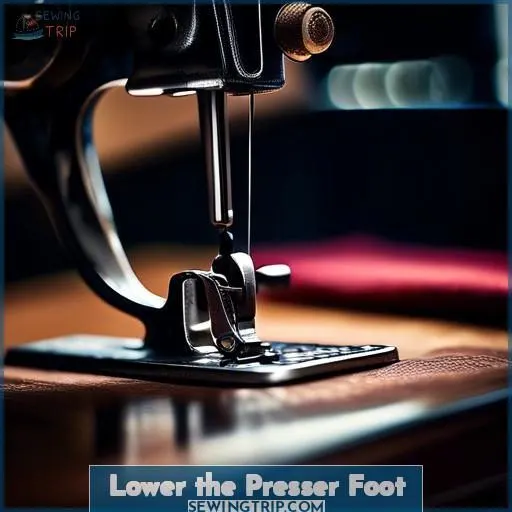
Lowering the presser foot is an essential step in changing the needle on your Singer Sew Mate sewing machine. The presser foot lever, located at the front of the machine, controls the height of the presser foot. To lower the presser foot, follow these steps:
- Locate the presser foot lever at the front of the machine.
- Push the lever down to lower the presser foot.
- Once the presser foot is fully lowered, you can safely remove the old needle and insert the new one.
Additionally, the presser foot functions as a guide for the needle, ensuring that the stitching is accurate and even. The presser foot is available in various types, such as all-purpose, satin, zipper, and sew-easy, among others, each designed for specific sewing tasks.
When you’re ready to change the needle, make sure to lower the presser foot first to create a safe and accessible working environment.
Raise the Needle to the Highest Position
To elevate the needle to its topmost point on your Singer Sew Mate Sewing Machine, adhere to these instructions:
- Deactivate the machine for protection.
- Lower the presser foot.
- Raise the needle to its topmost point.
To accomplish this, rotate the handwheel in your direction until the needle bar ascends to its topmost point. Slightly loosen the needle clamp thumb screw, then cautiously remove the old needle. Ensure that the new needle is inserted with its flat side facing the rear of the machine, as this is the suggested position for contemporary sewing machines. Securely tighten the needle clamp thumb screw once the new needle is in place.
Elevating the needle to its topmost point is crucial for several reasons. Firstly, it enables you to effortlessly replace the needle without inadvertently sewing through your fingers. Secondly, it assists in guaranteeing that the needle is correctly aligned with the thread guide, which can prevent skipped stitches or other problems. Lastly, it allows you to more easily thread the machine and prepare for sewing.
When working with a Singer Sew Mate Sewing Machine, it’s recommended to begin with a modern machine before switching to vintage models. The Singer Fashion Mate 7256 is a suitable choice for beginners, as it provides a balance of features and simplicity, along with a DVD guide for thorough instructions. It also has an automatic needle threader, adjustable needle position, and 70 stitch options, which can be beneficial for various sewing projects.
Loosen the Needle Screw by Turning It Counterclockwise
To loosen the needle screw on your Singer Sew Mate sewing machine, you should turn it counterclockwise. The needle screw is a small component that holds the needle in place and needs to be loosened before you can remove the old needle and insert a new one.
The needle screw is typically located near the needle clamp or on the needle plate itself. If you’re having trouble loosening the screw, you may need to use a screwdriver or other tool specifically designed for sewing machine needles.
Remember to be gentle to avoid damaging the screw or the needle clamp.
Pull the Old Needle Out
Now that you’ve loosened the needle screw, it’s time to remove the old needle. Here’s how:
- Needle Disposal: Dispose of the old needle safely, as per your local regulations.
- Needle Types: Familiarize yourself with the different needle types and sizes for various fabrics and stitching techniques.
- Needle Maintenance: Regularly check your needle for bends or damage, as this can affect your stitch quality.
Check the New Needle for Bends
Before you plunge back into your sewing escapade, verify that your new needle isn’t causing deviations. Needle configuration matters; a rectilinear projectile is what you require.
Dimensions and composition are crucial too—ensure it’s an appropriate match for your Singer Sew Mate, a reliable ally for any sewing enthusiast. A piercing needle tip is mandatory; it’s the distinction between flawless stitches and a tangled disaster.
Rest the needle on a level surface; if it oscillates, it’s destined for disposal. Adhere to a respected needle brand to preserve the integrity of your fabric sanctuary.
Tighten the Needle Screw by Turning It Clockwise
To tighten the needle screw on your Singer Sew Mate sewing machine, follow these steps:
- Hold the needle in place with one hand.
- Use a screwdriver to turn the needle screw clockwise, tightening it.
- Avoid overtightening the screw, as this could damage the needle or needle clamp.
Frequently Asked Questions (FAQs)
How often should I change my sewing machine needle?
Treat your needle like a loyal friend – change it up every 8-12 hours of use. This keeps your seams smooth and your projects humming along. Trust your machine, not that worn-out needle!
What type of needle should I use for sewing jersey or stretch fabrics?
For sewing jersey or stretch fabrics, you’ll want to use a stretch or ballpoint needle. These flexible needles won’t snag delicate fibers and maintain a smooth stitch. Easy peasy!
How do I adjust the tension on my sewing machine?
To adjust your machine’s tension, simply turn the tension dial. Start by making small adjustments – it’s a delicate dance! Too tight, and your fabric may pucker. Too loose, and stitches will be uneven. Just keep tweaking until it’s silky smooth.
What should I do if my sewing machine is skipping stitches?
If your machine’s skipping stitches, it’s likely a needle issue. Check that the needle’s secure and aligned properly. Give it a gentle tap – problem solved! Those pesky thread tangles are no match for your expert touch.
How do I fix thread bunching up under my fabric when sewing?
Try adjusting your thread tension – it may be too tight. Also, check your bobbin tension and make sure your needle is properly inserted. A simple tweak should stop that pesky thread bunching in no time!
Conclusion
Mastering the skill of changing the needle on your Singer Sew Mate sewing machine is a breeze once you’ve got the hang of it. A sharp, properly installed needle is key to achieving flawless stitches every time you sit down at your machine.
Keeping your sewing machine in tip-top shape is the secret to sewing success. Don’t hesitate to refer back to this guide on how to change the needle on your Singer Sew Mate whenever you need a refresher.

