This site is supported by our readers. We may earn a commission, at no cost to you, if you purchase through links.
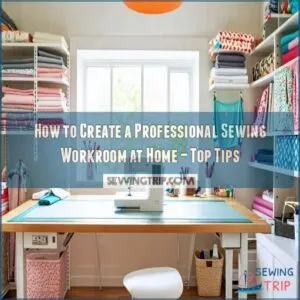 Creating a professional quality sewing workroom at home is like tailoring your perfect little creative sanctuary.
First, make sure you’ve got great lighting; a window nearby does wonders for matching colors.
Your sewing table should be at a comfortable height to keep those aches at bay—who needs more excuses to skip a project, right?
Organize with shelves and bins to prevent your fabric stash from turning into a mountain.
Invest in essentials like sharp scissors and a reliable sewing machine.
Think of this as crafting your own clothes-making adventure, where comfort meets efficiency.
Ready to take creativity to the next level?
Table Of Contents
- Key Takeaways
- Designing Your Workroom Space
- Essential Tools for a Professional Sewing Workroom
- Setting Up Your Sewing Machine Station
- Ironing Systems for a Professional Finish
- Measuring Systems and Tools for Accuracy
- Storage Solutions for a Productive Workroom
- Workroom Table Construction for Durability
- Managing Your Time and Finances Effectively
- Ongoing Education and Training for Success
- Creating a Profitable Business From Your Workroom
- Frequently Asked Questions (FAQs)
- Conclusion
Key Takeaways
- Organize your sewing space with shelves and clear bins to keep fabric and notions tidy, making it easier to find what you need when inspiration strikes.
- Prioritize good lighting by planning for natural light and using task lamps to ensure you see colors and details correctly.
- Invest in essential tools like a comfortable worktable, sharp scissors, and a reliable sewing machine for a smooth creative process.
- Manage time and finances using tools like QuickBooks to simplify tracking and budgeting, allowing you to focus more on sewing.
Designing Your Workroom Space
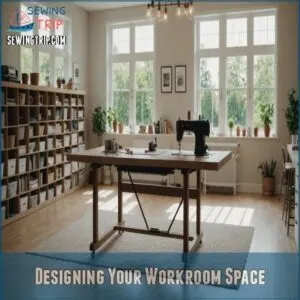
Designing your sewing workroom space is like finding the perfect layout for a cozy book nook—it’s all about comfort and functionality.
Make sure you’ve got enough lighting and clever storage solutions to keep chaos at bay, so you can focus on creating fabulous designs without tripping over fabric bolts!
Size and Layout Considerations
Designing your sewing workroom is like tailoring a suit—ensure it fits perfectly!
Start by considering workroom flow and traffic patterns.
To create an efficient sewing setup, consult the manual for your machine’s specific threading and tension recommendations, learn how to set up sewing properly. Place your sewing machine and tools within easy reach for an ergonomic setup.
To maximize sewing space, consider a modular setup with adjustable height furniture, and then plan your workstation layout to maximize sewing space, using clever sewing storage solutions.
Remember, the goal is to create a space where your creativity can truly shine!
Lighting Essentials for a Sewing Room
Before you tackle sewing projects, think about your room’s lighting.
Good natural light is ideal, especially near windows to match thread colors.
When the sunlight fades, employ overhead lighting paired with task lamps to keep your sewing zone bright.
Adjusting the color temperature of your sewing machine’s lighting can prevent mishaps, bringing your creative visions to life with ease.
Maintaining a Clean and Organized Workspace
Imagine your sewing workroom as a quilt—each piece holds a place.
Declutter with care: donate unused fabric, recycle paper patterns, and tidy your ironing station.
Here are a few tips to keep things neat:
- Time Management: Set a weekly cleaning routine.
- Workroom Layout: Optimize space with shelves.
- Storage Solutions: Use clear bins for easy access.
You’ll sew in style!
Essential Tools for a Professional Sewing Workroom
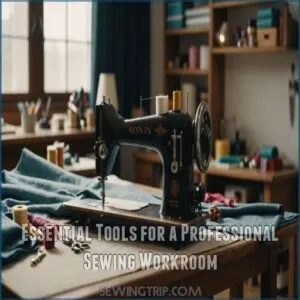
Now that you’ve planned your sewing studio’s layout and lighting, incorporating features like modular wall units, let’s talk tools!
A good worktable is key; think about height for comfort.
Sharp fabric shears and rotary cutters are must-haves for precise cutting.
Don’t forget about proper storage solutions – shelves, cabinets, anything to keep things organized.
Good lighting is also important, as is a well-stocked sewing kit.
Investing in quality tools pays off in the long run – it’s like upgrading your kitchen knives; you’ll work faster and create better projects.
Consider your sewing budget and explore DIY or upcycled options for some items.
Happy sewing!
Setting Up Your Sewing Machine Station
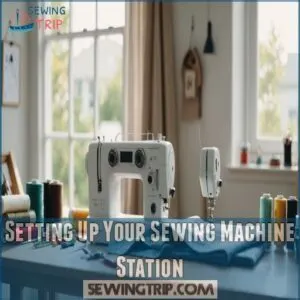
When setting up your sewing machine station, think of it as creating a cozy, efficient hub where creativity meets functionality.
Choose the right machine for your needs, and arrange your tools and accessories like a master chef organizing their kitchen—everything within reach and ready for action!
Choosing The Right Sewing Machine for Your Needs
Once you’ve gathered your essential tools, consider investing in one of the best easy to use sewing machines that suits various sewing tasks and skill levels. Let’s pick a sewing machine that suits you.
Think about your budget, the types of projects you plan, and required features.
Do you fancy home decor or creating garments?
There’s a machine for that! Popular brands offer a range of options—consult industry experts or explore online courses to find the perfect fit for your sewing community.
Setting Up a Walking Foot Machine
Getting your walking foot machine set up can feel like threading a needle in a hurricane, but fear not.
For a more efficient sewing experience, consider investing in a dedicated sewing machine table to keep your machine stable and organized.
Start by removing the presser foot holder and attach the walking foot, ensuring the lever rests atop the needle clamp screw .
Adjust foot pressure and tension for even stitches, and select a suitable needle.
Enjoy precise seams and professional quality right at home.
Using a Direct Drive Electronic Machine
Consider adding a direct drive electronic machine to your sewing station—it’s a game changer!
With features like auto-thread cutter, auto-backstitch, and auto-foot lift, you’ll breeze through projects.
Consider investing in a machine with a foot pedal for even more precision, especially for tasks like quilting or embroidery with computerized sewing machines.
Enjoy precise sewing speed control and hassle-free needle threading.
It’s quieter, vibrates less, and saves energy, making it perfect for any sewing task.
Who knew a machine could be your new best friend?
Ironing Systems for a Professional Finish
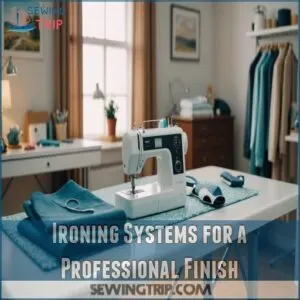
To achieve that crisp, professional finish on your sewing projects, investing in a reliable ironing system is a game-changer.
Whether you’re eyeing a boiler iron for constant steam or considering budget-friendly alternatives, choosing the right tool will make your fabrics behave—and your projects shine like a pro.
Boiler Iron Systems for Constant Steam
Boiler iron systems offer you the delicious promise of constant steam, which transforms your ironing from a chore into an art form.
Imagine those stubborn wrinkles vanishing like a bad haircut.
With constant steam, you’re not just ironing; you’re crafting a masterpiece.
A good boiler system delivers consistent steam, making fabrics softer and easier to press.
Reviews rave about how these systems outperform traditional dry heat methods.
Keep your iron in tip-top shape by regularly checking for limescale buildup—a small step in iron maintenance that pays big dividends over time.
Reliable Irons for Workrooms on a Budget
With a little savvy, you can achieve professional-looking results without breaking the bank.
Many budget-friendly iron options exist! Look for irons with multiple temperature settings for different fabrics.
A reliable, albeit less expensive, iron can last a long time with proper care; avoid tap water—use distilled water to prevent mineral buildup.
Consider steam iron alternatives like a squirt bottle for extra steam; this can extend the life of your iron considerably.
Regular cleaning and proper storage are key to extending its lifespan. Don’t forget to check your iron’s manual for specific care instructions.
Remember, quality doesn’t always mean a huge price tag!
Troubleshooting minor issues, like inconsistent steam, can often be solved with simple cleaning.
You’ll master the art of ironing on a budget in no time!
Measuring Systems and Tools for Accuracy
Accuracy in your sewing projects starts with the right measuring systems and tools.
Whether you’re using a trusty 60-inch ruler or digital forms for precision, these tools will save you from fabric mishaps and measurement mayhem—because nobody enjoys a curtain that looks like it belongs in a funhouse!
Using a Consistent Measuring System
Precision in sewing begins with a consistent measuring system, ensuring everything fits like a glove.
Prioritize accuracy by sticking to one system, whether metric or imperial.
Here’s a quick checklist to guide you:
- Use a reliable measuring tape.
- Invest in a clear ruler for straight lines.
- Keep a sewing gauge handy.
- Consider MMS for organized measurements.
Printable Forms and Digital Documentation
To keep your sewing projects on the right track, use MMS Forms for precise measurements—a stitch in time saves nine!
Digital Measurement tools enhance accuracy, while Workroom Software like Seamless Workroom makes sure you never lose track of details.
Go paperless, and streamline your workflow with digital documentation.
Your workroom will become a powerhouse of efficiency and creativity!
Essential Rulers and Measuring Tools
Now that we’ve tackled digital documentation, let’s focus on the tools you’ll physically handle: rulers and tape measures.
A clear ruler, essential for straight lines and seam markings, is your new best friend.
Tape measures wrap around curves beautifully, perfect for garment fitting.
Don’t forget fabric cutting tools; they guarantee measuring accuracy.
Investing in specialized tools like a seam gauge or French Curve can also elevate your sewing game, especially when paired with the right measuring tools from our essential list Measuring Tools for Sewing.
Equip yourself—think of it as upgrading your sewing toolkit.
Storage Solutions for a Productive Workroom
Maximizing your workroom storage can turn fabric chaos into harmony; think of it as a game of Tetris, but with shelves and bins!
With a bit of creativity in shelving and clear labeling, you’ll conquer clutter and boost your productivity.
Shelving Units and Adjustable Storage
As you set up your sewing workroom, shelving units and adjustable storage are your best friends.
You can explore a wide range of storage solutions, including efficient and stylish options like those offered by EverySimply, for your sewing supplies.
Consider DIY storage or budget solutions like wire shelves that can fit any space.
Customize shelves to organize tools efficiently, ensuring every item is within reach.
This storage organization optimizes space but also adds flair, making your workroom a hub of creativity and productivity.
Storing Fabrics and Notions
With your shelves organized, let’s tackle fabric and notions.
Knowing what are notions in sewing helps you categorize them as embellishments or helps, making storage more efficient.
Rolling fabrics saves space, especially for larger pieces.
Use clear bins for notions – it’s amazing how much easier finding things becomes!
Consider a sewing cabinet with drawers; they’re surprisingly versatile.
Protect your fabrics from dust and light.
A garment rack’s great for hanging bolts, keeping everything neat and accessible.
Remember, a well-organized space boosts your creativity!
Labeling and Organizing Your Storage
After you’ve found the perfect spot for storing fabrics, keeping notions and tools organized lets you work more efficiently.
Use bin labeling and clever storage systems to keep everything in its place.
DIY storage solutions, like using clear bins for easy visibility, can make a world of difference.
Remember, a well-organized workroom sparks creativity and keeps frustration at bay.
Workroom Table Construction for Durability
Building a workroom table that stands the test of time requires sturdy materials like OSB plywood and lumber, ensuring it can handle all your creative projects.
Add a smooth finish with polyester batting and canvas, and you’ll have a durable surface ready for whatever sewing adventure you take on—even if it involves wrestling with yards of fabric like a pro!
Building a Worktable With OSB Plywood and Lumber
Got storage sorted? It’s time to construct a worktable that’s both sturdy and practical. OSB plywood paired with lumber is your secret weapon against wobbly tables.
Consider adding some decorative elements to your worktable and sewing room from sewing room decor stores that offer a variety of products, such as sewing room decor.
Focus on these key points to build a worktable that stands the test of time:
- Worktable Stability: Use solid lumber legs and braces for support.
- Tabletop Finishing: Consider adding a durable finish that enhances the wood’s beauty.
- OSB Plywood Alternatives: MDF or particleboard can work if OSB isn’t available.
- Table Height: Choose a height that lets you work comfortably, like Goldilocks—not too high or low!
Adding a Smooth Surface With Polyester Batting and Canvas
Creating a smooth work surface with polyester batting and canvas transforms your crafting table into a dream come true.
Using various polyester batting types provides a plush feel that resists wear and tear, while canvas alternatives add durability.
To achieve the same comfort and precision in your quilting projects, you need to know how to sew batting to fabric.
Imagine pinning without snagging—it’s like sewing on a cloud.
Start by laying the batting evenly over your table, then stretch the canvas over and staple tightly at the back.
This combination enhances work surface durability but also supports precise pinning techniques.
Voilà, a table so smooth, you’ll never look back!
Managing Your Time and Finances Effectively
Balancing your sewing workroom ambitions with time and finances can feel as challenging as threading a needle in dim light, but it’s all about the right tools and strategies.
Use QuickBooks for seamless client proposals and invoices, and rely on mobile apps to make financial management a breeze—just like cutting fabric with sharp scissors.
Using QuickBooks for Client Proposals and Invoices
Imagine this: QuickBooks transforms your professional sewing workroom by managing proposals and invoices seamlessly.
With its powerful features, you can:
- Utilize invoice templates to impress clients.
- Enhance client communication and stay organized.
- Track proposals effectively, like tracing a complex pattern.
- Use budgeting tools to balance creativity and costs.
Take control, sew confidence, and weave financial clarity into your business operations!.
Bookkeeping and Financial Analysis Tools
Smooth sailing with QuickBooks invoices? Now, let’s tackle your finances!
Explore user-friendly accounting software like FreshBooks or QuickBooks for expense tracking and budgeting tips.
Mastering profit margins becomes easier with the right tools.
Consider free options too – many offer basic accounting features.
Remember, accurate bookkeeping is key to a thriving business.
Don’t be afraid to try different financial software until you find what works best for you.
Mobile App Templates for Financial Management
Want to boost your workroom’s efficiency?
Mobile app templates for financial management can make budgeting a breeze!
Track expenses effortlessly, analyze profits, and forecast income like a pro.
Keep tabs on cash flow with apps designed to sync your data in real-time.
Let these tools simplify your financial tasks so you can focus more on crafting beautiful creations without the headache!
Ongoing Education and Training for Success
To keep your sewing workroom in tip-top shape, never stop learning—think of it as the needle and thread that ties your skills together!
Explore industry conferences, online courses, and stay updated with the latest design trends.
To make sure your sewing game remains sharp and exciting.
Attending Industry Conferences and Workshops
Attending industry conferences and workshops offers you golden opportunities for growth.
You’ll get to:
- Networking: Connect with peers and experts.
- New Trends: Stay up-to-date with the latest happenings.
- Industry Insights: Learn directly from thought leaders.
- Learning Techniques: Discover innovative business strategies.
These events empower you with the tools and insights needed for success.
Plus, who doesn’t love a chance to swap sewing stories?
Online Courses and Instructors for Continuous Learning
Conferences broaden your horizons, but online learning platforms are your go-to for ongoing sewing education.
Platforms like Craftsy and Domestika offer classes to enhance your sewing techniques, update your fabric knowledge, and brush up on business skills.
For example, parents can also consider online sewing classes specifically designed for kids, such as Stitch School online sewing classes.
Platforms like Craftsy and Domestika offer classes to enhance your sewing techniques, update your fabric knowledge, and brush up on business skills.
| Platform | Focus | Benefits |
|---|---|---|
| Craftsy | Sewing basics | Flexible membership |
| Domestika | Fabric skills | Multilingual options |
| Fair Fit | Continuous skills | Lifetime access |
Fuel your passion with these tools!
Staying Up-to-Date With Design Trends and Techniques
To keep your sewing skills sharp and stylish, immerse yourself in the latest design trends and techniques.
Check out industry magazines and inspiring design blogs.
Attend trade shows to discover new fabrics.
Tap into online resources for fresh ideas and tutorials.
Here are some steps:
- Subscribe to industry magazines
- Follow inspiring design blogs
- Regularly browse online resources for updates
Creating a Profitable Business From Your Workroom
You’ve got your sewing workroom set up, so why not turn it into a money-making venture without leaving home?
With smart pricing strategies and a bit of marketing magic, you can transform your passion for sewing into a profitable business that fits your lifestyle.
Setting Goals and Pricing Strategies
Continuous learning is fantastic, but now let’s get down to brass tacks: pricing!
Define your target market .
Analyze your costs; this includes materials and time.
Determine your profit margins – you deserve to make money!
Experiment with different pricing structures, like service packages, to see what works best.
Remember, reasonable goals are attainable goals!
Marketing and Advertising Your Services
You’ve set your pricing—now let’s chat about getting the word out.
Use Social Media for creative posts showcasing your work; think of it as your digital boutique.
Sprinkle in Client Testimonials to add authenticity.
Attend Networking Events; they’re like sewing circles but with business cards.
Create Online Portfolios to showcase your skills and use Targeted Ads to reach potential clients efficiently.
Building a Client Base and Growing Your Business
Jumpstart your sewing business by weaving together a solid client base.
Networking is key—think social events or online forums.
Encourage referrals by offering discounts for word-of-mouth promotions.
Build a strong online presence through social media to showcase your creations.
Implement clever marketing strategies and focus on client retention by delivering exceptional service.
Remember, a happy client is like a walking billboard!
Frequently Asked Questions (FAQs)
How do you make a sewing room?
When setting up your sewing room, it’s essential to consider the size of the table and ensure it provides enough space for materials optimal sewing table size. Equip your sewing room with a sturdy table, efficient lighting, and clever storage solutions for fabric and tools.
Customize the space to fit your needs, whether you’re using a spare bedroom or a cozy closet nook.
What makes a good sewing room?
A good sewing room includes natural light, ergonomic furniture, and clever storage solutions like shelves or a pegboard.
Keep it tidy, adaptable, and inspiring, so when creativity strikes, your space is ready to rock and roll! .
What are some tips for sewing in a dedicated room?
Wow, a dedicated sewing room! Organize zones for different crafts. Maximize wall space for storage and design. Keep it tidy; only essential tools nearby. Enjoy your creative haven!
How do you make a sewing workshop more productive?
Start by organizing your materials—group similar items together and store them where you use them.
Keep your workspace visually clear and clutter-free.
Using labels makes sure everything has a place, boosting productivity and creativity.
How to make home sewing look professional?
Achieving professional-looking sewing at home involves precise cutting, choosing quality fabric, and ensuring seams are straight.
Don’t forget to press often, and use matching thread for a polished finish.
Remember, details make all the difference! .
How do you make a perfect sewing room?
Did you know that organized spaces can boost your creativity by 20%?
Create your perfect sewing room by maximizing storage with pegboards, choosing ergonomic furniture, and ensuring good lighting. Consider incorporating a sewing desk with cubbies or a sewing cabinet, such as those found in sewing room furniture, to balance table features with budget for a cost-effective sewing setup.
Don’t be afraid to personalize with decor.
Can you make a living sewing from home?
You can definitely make a living sewing from home.
Channel your creativity into selling custom pieces online, hosting sewing classes, or designing unique patterns.
It’s not all pin cushions and needles, but the rewards stitch up nicely.
How can I make my sewing business profitable?
Only about 50% of small businesses survive past five years.
Boost profitability in your sewing business by diversifying income streams, like teaching workshops or selling patterns.
Invest in smart marketing to attract and keep loyal customers.
How can I maintain good workroom lighting?
Combine overhead fill light with focused task lighting near your machine to banish those pesky shadows. A good lamp makes all the difference! Even late-night sewing becomes a breeze.
What are tips for reducing fabric waste?
Consider reusing fabric scraps for small projects like patchwork or quilting.
Adopt creative upcycling ideas, such as transforming old clothes into new items.
Organize clothing swaps with friends.
These actions reduce fabric waste considerably.
How do I handle noise reduction in my workroom?
To reduce noise in your workroom, try using insulated walls or adding heavy curtains.
Rugs can dampen sounds, and sealing gaps prevents noise leakage.
It’s like creating your own quiet sewing sanctuary without breaking the bank!
What are safe practices for cutting and sewing?
Picture yourself crafting with confidence.
Make sure you have sharp blades and store tools safely to avoid mishaps.
Always cut away from your body and keep wrists straight.
Trust me, these habits transform sewing into a safe, enjoyable experience.
How can I effectively organize project supplies?
Organize your project supplies by using labeled containers and clear bins for easy access.
Store fabric by color or type.
Hang tools on pegboards.
Use portable storage carts.
It’s a crafty way to stay tidy!
Conclusion
Creating your professional quality sewing workroom at home transforms dreams into reality, inspiration into masterpieces, chaos into creativity.
With thoughtful planning on lighting, organization, and essential tools, you’ll make the most of every stitch.
Enjoy setting up your machine station, organizing your fabrics, and managing time and finances effectively.
Seek out continuous learning to keep evolving.
Your sewing adventure awaits, where comfort meets efficiency and every piece you craft feels like an accomplishment.
Ready to get started?

