This site is supported by our readers. We may earn a commission, at no cost to you, if you purchase through links.
 To cut pants into shorts without sewing, grab your pants and let’s get clever with those scissors.
First, wash and dry the pants to avoid shrinkage surprises.
Choose sharp scissors or sewing shears for a clean cut.
Put the pants on and mark where you’d like the shorts to end.
Remember, cut a bit longer to fold a no-sew hem using fabric glue or hem tape for a clean finish.
Repeat on the other leg for symmetry and voilà—custom shorts!
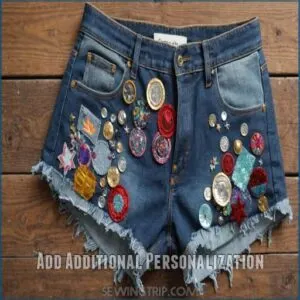
And if you’re feeling creative, embellish with patches or sequins.
Now, those shorts have a story, and you’re the author!
Table Of Contents
Key Takeaways
- Wash and dry your pants first to avoid shrinkage surprises and ensure a perfect fit, similar to the pre-washing step for preparing pants for hemming. Wash and dry your pants first to avoid shrinkage surprises and ensure a perfect fit.
- Use sharp scissors to cut slightly longer than your desired length, allowing for a folded hem.
- To prevent fraying and achieve a professional finish, consider using techniques such as overlocking sergers. Prevent fraying by applying fabric glue or hem tape for a clean, no-sew finish.
- Personalize your shorts with embellishments like patches or sequins using fabric glue for a unique look.
Prepare Your Pants for Cutting
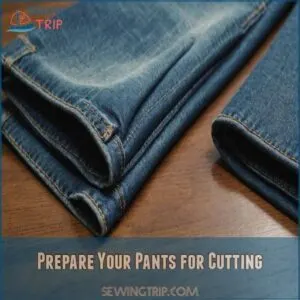
Before you start cutting your pants into shorts, wash and dry them to make sure they’re clean and preshrunk.
Grab a pair of sharp sewing scissors or a box cutter to make sure your cuts are precise.
Wash and Dry The Pants
Start by giving your jeans a good wash and dry before cutting.
This pre-washing step helps to shrink the fabric, so your DIY shorts fit perfectly.
Consider the fabric type and use cool water temperatures to avoid over-shrinking, and check out the best jeans wash products to get the job done right jeans care products.
Choosing the right drying methods helps the denim maintain its quality, setting the stage for upcycling those old pants into stylish shorts.
Choose The Right Cutting Tools
Picture yourself ready to get started with DIY fashion.
Choosing the right tool for cutting pants into shorts is key.
Here’s your cutting arsenal:
- Scissors: Basic but effective for a clean cut.
- Box cutters: Perfect for precise lines.
- Fabric shears: Ideal for denim and frayed edges.
- Rotary cutters: Great for smooth, straight cuts.
Determine The Desired Length
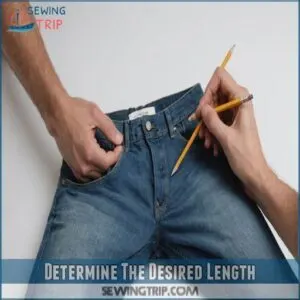
Before you start cutting, it’s important to try on your pants and figure out the style you want for your shorts, whether it’s knee-length or a classic summer fit.
Use a pencil or washable marker to mark where you want to cut, ensuring the marks are even and straight for the best results.
Try on The Pants for Fit
This is where you decide on the perfect leg length for your DIY cutoffs.
Consider your comfort level: how high should they sit on your hips?
Check the waist fit—too tight or too loose?
Note how much room you want around your thighs.
A few tries will help you nail the perfect pants fit by first mastering their original length, which can be adjusted through a process known as hemming pants. before you cut.
Remember, you’re customizing these cutoffs, so make them uniquely yours!
Decide on The Shorts Style
Let your imagination run wild while deciding on your shorts style.
Do you want a casual vibe or something trendy?
To achieve a perfect fit and structure, consider using cotton fabric like poplin or twill, and learn how to sew shorts from scratch for inspiration.
Consider these styles:
- Cuffed shorts: Roll ‘em up for that classic summer feel.
- Distressed look: Go edgy with ripped shorts.
- Culottes: For a relaxed, chic touch.
- High-waisted skinny jeans shorts: Perfect for a flattering fit in any DIY fashion adventure!
Mark The Desired Length
First, try on your pants and decide on the leg length you want.
Use measuring tools for accuracy, and refer to your favorite shorts for inspiration.
You can find a suitable washable fabric marker to mark a precise cut line.
Mark with a washable marker for a precise cut.
Here’s a quick guide to help:
| Item | Purpose |
|---|---|
| Measuring tools | Guarantee accurate leg length |
| Reference shorts | Guide your desired style |
| Washable marker | Mark the cutting line |
| Desired style | Influences the shorts’ look |
Cut The Pant Legs
Grab your sharp sewing scissors and a ruler to make a precise cut on the pant legs slightly longer than your desired final length.
This little extra length is perfect for creating a neat hem later, ensuring you won’t end up with shorts that are too short.
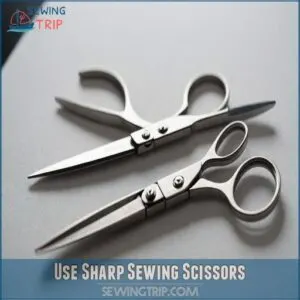
Use Sharp Sewing Scissors
Sharp scissors are your trusty sidekick when turning jeans into shorts.
They glide through the fabric like butter, making clean cuts.
You can find a variety of sharp sewing scissors online at sharp sewing scissors.
Remember:
- Scissors Safety: Keep fingers away from the blades.
- Fabric Types: Denim needs sturdy scissors.
- Cutting Tips: Use long, steady cuts.
- Scissor Maintenance: Keep them sharp with regular sharpening.
Ready to embrace the no-sew hem revolution?
Cut Slightly Longer for Hem
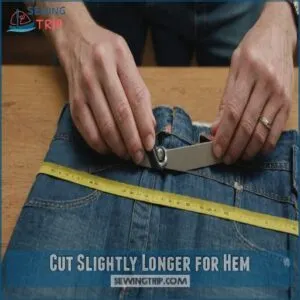
While you’re channeling your inner tailor, remember to cut those pants slightly longer than you envision for your shorts.
This extra hem allowance is your secret weapon for achieving the perfect hem style later.
Consider the fabric weight and the custom fit you’re aiming for.
It’s like adding sprinkles before the frosting—lay the groundwork for a polished finish.
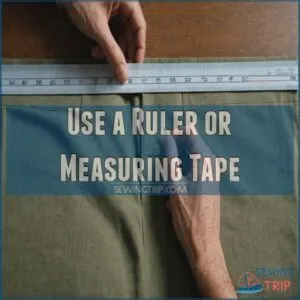
Use a Ruler or Measuring Tape
You’ve cut slightly longer to allow for hemming, but measuring accurately is your next move.
Grab a ruler or measuring tape to mark the fabric for precise length.
This step guarantees straight cuts and even hems.
Marking fabric like this keeps your summer fashion sleek.
Keep this DIY guide handy for that wardrobe update you’re planning!
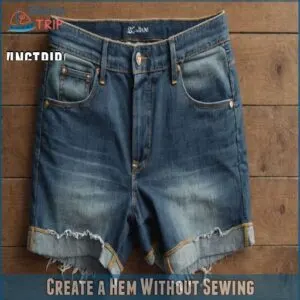
Create a Hem Without Sewing
Ready to finish your awesome new shorts without even touching a needle?
We can achieve a similar no-sew hemming technique for pants by utilizing methods like fabric adhesive tape, which offers a quick fix for emergency alterations. We’ll show you how to create a perfect, no-sew hem using simple techniques and materials you probably already have!
Use Fabric Glue or Hem Tape
Snipping your jeans into shorts but hate sewing?
Grab a few types of fabric glue or hem tape alternatives.
Both work like magic, with a simple squeeze or strip that doesn’t need a needle.
Check out this sustainable fashion hack!
Weighing glue vs. tape?
Think durability.
DIY tips abound, perfect for those DIY fashion trends or upcycled clothing masterpieces.
Fold The Hem for a Neater Look
Let’s make those hems tidy.
First, fold the fabric up twice to hide the cut edges.
This simple step can give your denim a polished, professional look without even threading a needle.
Here’s what you do:
- Flatten the fabric: Make sure it’s smooth.
- Align the edges: Keep them even.
- Fold with care: Make it straight.
Unleash your creativity—your shorts deserve it!
Apply Even Pressure
Once you’ve folded the hem, it’s time to make it secure.
Firmly press along the hem’s edge using even pressure while applying fabric glue or hem tape.
This prevents fraying and keeps edges clean.
Imagine you’re squeezing your favorite oversized or thrifted denim; they deserve the perfect finish!
| Tasks | Materials | Emotions |
|---|---|---|
| Apply even pressure | Fabric glue | Satisfaction |
| Prevent fraying | Hem tape | Confidence |
| Secure edges | Denim shorts | Joy |
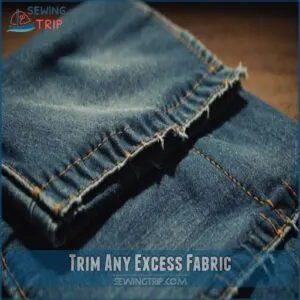
Trim Any Excess Fabric
Once you’ve cut your shorts, grab your trusty fabric scissors to tidy up any stray bits hanging around.
Snipping away loose threads and excess fabric will give your shorts a polished finish, making them ready to wear in no time.
Use Fabric Scissors
Choosing the right fabric scissors can make or break your fashion crafting project.
With sharp edge tips, they’re perfect for trimming excess fabric.
Scissor safety is key, so mind those fingers!
Maintain your tools well, because a dull blade’s no friend to precision.
Whether refining a raw hem or creating a garment masterpiece, effective fabric cutting tips matter.
Remove Loose Threads
Although no one wants a messy hem, removing loose threads keeps your DIY fraying from going overboard.
Grab fabric scissors and carefully trim any excess fabric.
Use thread trimming tools or tweezers for precise thread removal, ensuring a neat finish.
This small step prevents further fraying, aligning your shorts with summer wardrobe trends while maintaining a handmade fashion feel.
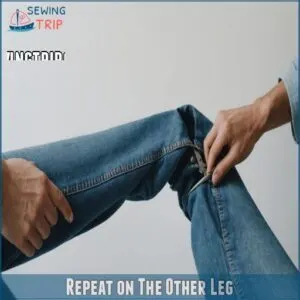
Repeat on The Other Leg
Now, just repeat the same process on your other leg! Make sure both legs are the same length and you’re good to go – you’ve officially made shorts!
Ensure Symmetry
You’ve trimmed away the extra fabric, so now it’s time for some clever symmetry work.
Lay your pants flat, then fold one leg over the other.
Use your markings as guides to match each cut.
Are the sides even?
Visualize the final look and compare both legs.
This guarantees a balanced pair of personalized shorts, perfect for those summer outings!
Double-Check The Length
Always double-check the length to avoid ending up with unplanned hot pants.
Follow these steps to guarantee accuracy:
- Length Adjustments: Measure each leg using a visual reference, like your favorite shorts.
For a more professional finish, consider the classic trousers method, where the hem is ½" off the floor, as seen in hemming pants for beginners.
- Hem Allowance: Add extra for a hem.
- Try-On Test: Slip them on and check the final length.
- Final Length Check: Confirm both legs match perfectly!
Add Additional Personalization
Now that you’ve got your shorts ready, why not make them uniquely yours?
Grab some fabric glue and add embellishments like patches or sequins to show off your style without ever picking up a needle.
Use Fabric Glue for Embellishments
Why not jazz up your shorts using fabric glue for embellishments? This no-sew approach offers endless DIY embellishment ideas.
Consider these tips and inspirations:
| Ideas | Tips |
|---|---|
| Fabric Glue Safety | Read labels carefully. |
| Application Styles | Use sparingly for safety. |
| Alternative Glues | Try fabric tape too. |
| Embellishment Inspo | Use gems, paint, ribbons. |
| Techniques | Press lightly for bonding. |
With these simple techniques, your creativity knows no bounds!
Add Patches or Sequins
Now that your embellishments are ready, let’s jazz things up with patches or sequins.
Adding custom or decorative elements can elevate your shorts, and if you want to take it to the next level, you can even create a pocket with a custom or decorative element, like a patch pocket.
Here’s how:
- Patch Placement: Choose spots that pop.
- Sequin Patterns: Pick designs that dazzle.
- Fabric Compatibility: Make sure your patches suit the shorts fabric.
- Adhesive Types: Use fabric glue for hassle-free DIY embellishments.
Unleash your creativity and watch your shorts transform!
Wear and Enjoy Your New Shorts
Once you’ve transformed your pants into stylish shorts, try them on to make sure they fit comfortably.
Adjust as needed and enjoy your new creation for any casual outing or sunny day adventure.
Check The Fit
Sweet satisfaction awaits! Slip on your new shorts. Does everything feel right? Check the fit!
| Area | Too Tight? | Too Loose? |
|---|---|---|
| Waist | Adjust the waist. | Add a belt. |
| Hips | Recut slightly. | Enjoy the room! |
| Thighs | Try a different cut. | Perfect comfort! |
Length’s good? Awesome! You’ve mastered the art of DIY shorts. Enjoy the comfort and freedom of your creation!
Make Any Necessary Adjustments
You’ve tried them on—do they fit just right?
If not, it’s time to tweak and consider using some waist adjustment techniques like stretching with warm water.
Check for fit issues around the waist or hips and adjust the hem length to suit your style.
Make sure leg symmetry, smoothing any rough spots, and tackle fraying based on your fabric type.
Little adjustments can make those shorts your go-to summer wear!
Tips and Variations
Explore your creative side with tips and variations that let you transform any old pants into stylish shorts.
Whether you’re experimenting with different fabrics or aiming for a specific look, these ideas will help you repurpose your wardrobe with flair.
Experiment With Different Fabrics
After checking the fit, experiment with different fabrics to master your own style.
Try lightweight cotton for a breezy feel or stick with denim for durability.
Pay attention to fabric texture and stretch factor—these affect comfort.
Want something bold? Color variations and print options let your creativity run wild, making each pair truly yours.
Consider The Desired Look
Think about your desired style—are you going for relaxed with fraying at the edges or a polished look with neat cuffs?
Play around with length too; shorter shorts scream summer fun, while longer ones offer more coverage.
If you like a bit of distress, try tearing slightly.
Your creativity shines here, and it’s as simple as snip, fold, and wear!
Repurpose Old Pants
Don’t let those old pants gather dust.
Transform them with these repurposing ideas:
- Cut them into shorts, perfect for summer strolls and backyard barbecues.
- Use fabric scraps for patches on other clothes, creating a unique flair.
- Make a stylish tote bag or pillow cover.
Embrace DIY fashion and sustainable style while giving secondhand clothing a fresh start!
Frequently Asked Questions (FAQs)
Can you make cut-off shorts without sewing?
Imagine this: you can transform pants into stylish cut-off shorts without sewing!
Grab sharp scissors, mark your desired length, and cut carefully.
To prevent fraying, use fabric glue or leave them rugged for a cool, distressed look.
How do you cut shorts from jeans?
First, wash and dry your jeans and decide the length for your shorts.
Mark the jeans, cut with sharp scissors, then try them on.
Adjust as needed, and fray the edges by washing them.
Enjoy your new shorts!
How do you cut a pants Hem?
Want to cut a pants hem?
First, measure your desired length and mark it.
Cut with sharp scissors, leaving an extra half-inch.
Fold neatly for a clean look.
It’s like giving your clothes a fresh new vibe!
Can you make shorts from a pants pattern?
Isn’t it funny that pants patterns seem too long?
You can easily transform them into shorts.
Just shorten the length in your pattern, and don’t forget to adjust for hems or fraying effects.
Happy sewing!
Can you shorten a trouser pattern?
Shortening a trouser pattern is a cinch!
Simply adjust the length on the pattern itself, measure carefully to make sure a perfect fit, and mark your new hemline.
This tweak gives you control over your style effortlessly.
How do you cut shorts?
Imagine you’re transforming old jeans into trendy shorts.
First, wear them to mark your desired length.
Lay them flat; cut straight with sharp scissors, leaving extra for adjustments.
Finish edges with fabric glue or let them fray.
Can I use fabric glue instead of sewing?
When assessing the damage of a hole by evaluating its size, shape, and location, particularly with delicate fabrics, a ladder stitch for gap closing or overcast stitch for frayed edges might be necessary, reinforcing frayed edges. Fabric glue’s a great alternative to sewing for a quick fix. It works well for securing edges, but it mightn’t be as durable as stitches. Give it a try!
How do I prevent fraying without sewing?
Boost your creativity by using fabric glue to prevent fraying, giving edges a clean finish.
Apply glue along the fabric edge, pressing firmly.
Let it dry, ensuring your DIY shorts stay chic and effortless!
What tools are needed for a clean cut?
You’ll need sharp sewing scissors or a box cutter for a precise, clean cut on denim.
A ruler or measuring tape helps mark straight lines.
While a pencil or washable marker is perfect for marking before cutting.
How do I get a perfectly straight cut?
To get a perfectly straight cut, first ensure you have the right tools like a jeans needle and straight stitch plate, which are also crucial for hemming jeans on a flatbed sewing machine. Lay your pants flat on a table and use a ruler as a guide.
Mark the cut line with chalk, then carefully cut along the line with sharp scissors for precision.
What if my pants are too big/small?
Back in the good ol’ days, adjusting pants was a breeze.
If they’re too big, try adding a belt or using fabric glue to pinch and secure.
For snug pants, consider stretching techniques or fabric inserts.
Conclusion
Now you’re a pants-to-shorts conversion whiz, as if you traveled back to a time when sewing machines were scarce.
With these easy steps, you’ve mastered how to cut pants into shorts without sewing.
No more boring wardrobe; you’ve got a fashionable and unique piece that speaks to your creativity.
Remember to play around with embellishments like patches to make it truly yours.
Wear your new creation with pride and a touch of style!

