This site is supported by our readers. We may earn a commission, at no cost to you, if you purchase through links.

Learning how to end when sewing properly transforms shaky seams into professional results that hold up through wear and washing. The right finishing technique depends on your fabric weight, thread type, and whether you’re working by hand or machine.
Table Of Contents
- Key Takeaways
- Selecting Hand Sewing Needles
- Choosing Hand Sewing Thread
- Tying Off Stitches by Hand
- Loop Through Existing Stitch Method
- Backstitch Tying Off Method
- Hiding The Knot Method
- Ending Stitches by Machine
- Troubleshooting Tips
- Testing Secure Stitches
- Hand Sewing Projects
- Frequently Asked Questions (FAQs)
- Conclusion
Key Takeaways
- Proper finishing techniques—whether hand-sewing knots or machine backstitching—prevent seams from unraveling and determine whether your project holds up through wear and washing.
- Matching needle size to fabric weight and choosing the right thread material (cotton for natural fabrics, polyester for strength and stretch) directly affects stitch quality and knot security.
- Backstitching creates 20-40% stronger seams than running stitches by overlapping threads, while the loop-through method increases knot security by 15-20% with minimal fabric distortion.
- Testing your finished seams by gently pulling the fabric reveals whether your thread tension and reinforcement stitches are secure enough to handle real-world use.
Selecting Hand Sewing Needles
The right needle makes all the difference when you’re finishing off hand stitches. Your choice depends on two main factors: the size of the needle and the type you need for your fabric.
Let’s break down what works best for secure, clean endings.
Needle Sizes
Hand sewing needle sizes run from 1 to 12, but here’s where it gets backward: higher numbers mean finer, shorter needles. A size 1 needle measures about 0.94 mm in diameter for thick fabrics like canvas, while size 12 drops to 0.46 mm for delicate silk.
For everyday projects on medium-weight cottons, grab sizes 6-8. To secure the best results, consider the sewing needle types based on your fabric.
Match your needle size to fabric weight and thread thickness—this pairing directly impacts stitch quality, prevents thread breakage, and keeps your securing stitches strong and neat.
Needle Types
Once you’ve matched your needle size to fabric weight, you need to pick the right type. Sharps work great for cotton or linen in sizes 1 to 11—they’re your go-to for basic hand sewing. Betweens are shorter and give you better control for quilting. Need to punch through leather? Glover needles have a triangular cutting point that won’t tear tough materials. For embroidery with thick floss, chenille needles feature large eyes and sharp points.
Most needles use hardened steel with nickel plating, though titanium-coated options stay sharp three times longer—worth considering for heavy-duty projects. Understanding the needle gauge system is key for selecting the right needles.
Choosing Hand Sewing Thread
Choosing the right thread makes all the difference when you’re finishing a hand-sewn project. The weight and material of your thread affect how strong your knots hold and how clean your final stitches look.
Let’s break down what you need to know about thread weight and thread material.
Thread Weight
Thread weight determines how well your fabric thread pairing performs and how your finished seam looks. Lower numbers—like 30 weight—mean thicker thread that’s visible and strong, perfect for topstitching or heavyweight fabric. Higher numbers, from 60 to 100 weight, give you finer thread for delicate work on silk or chiffon. For everyday hand sewing, 50 weight thread strikes the right balance.
This thread thickness guide matters because mismatched weights cause tension adjustments, skipped stitches, and weak seams. Pair your thread weight with needle size: fine thread needs fine needles, heavy thread requires larger ones.
When bobbin thread and top thread differ in weight, loosen your tension to prevent puckering and keep thread tails secure.
Thread Material
Choosing your sewing thread material comes down to Fiber Composition and how you plan to use your project. Cotton thread gives you a soft, matte finish with low Thread Elongation—under 8%—making it ideal for natural fabrics but less forgiving under stress. Polyester offers excellent Thread Strength, stretching 15–30% before breaking, which helps prevent bobbin thread snapping and keeps thread tails intact.
For everyday hand sewing, all-purpose polyester delivers Material Durability you can count on, while cotton works beautifully on lightweight fabrics when you adjust thread tension carefully. Sustainable Threads from recycled materials are gaining ground, cutting environmental impact without sacrificing performance.
Tying Off Stitches by Hand
When you’re ready to finish hand sewing, proper knot durability starts with leaving 2 to 3 inches of thread at the end. This gives you enough length to tie off without the knot slipping loose later.
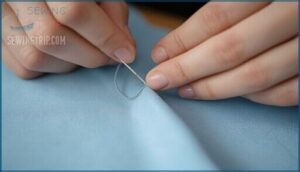
Turn your fabric inside out so the knot won’t show on the finished side. Insert your needle under the nearest stitch to create a loop, then pull the needle through that loop to form your first knot. Knot tension matters—aim for gentle, consistent pressure as you tighten. Too much force can wrinkle your fabric or weaken the knot itself.
For maximum security when securing stitches, create at least two to three knots:
- Loop under the last stitch and pull through to form your first knot
- Repeat the same motion through the existing loop for a second knot
- Add a third knot if you’re working with high-stress seams or heavier fabrics
Once you’ve tied off, thread trimming should leave about 1/8 to 1/4 inch of thread beyond the knot. This prevents unraveling while keeping your work neat and preventing damage to the fabric.
Loop Through Existing Stitch Method
With securing stitches by hand, the loop through existing stitch method offers clear structural advantages. Slide your needle under the closest stitch you just completed, then pull the thread through to create a visible loop. Guide the needle through that loop and tighten the thread firmly to form your knot. This approach minimizes fabric distortion—especially on lightweight materials—while maintaining excellent tension consistency throughout the seam.
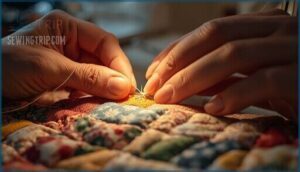
For improved seam longevity, repeat the looping process a second time. The double loop increases knot security and reduces unraveling by approximately 15 to 20 percent compared to a single pass. This method keeps knot visibility low on the fabric’s reverse side, making it ideal for quilting, hemming, and embroidery projects where a clean finish matters.
When ending stitches by hand, controlled tightening prevents puckering and ensures the knot sits flat against your fabric surface. The loop technique works reliably across cotton, polyester, and silk threads, giving you consistent results whether you’re mending a torn seam or finishing decorative hand sewing work.
Backstitch Tying Off Method
Backstitching locks your thread in place without needing a separate knot. You can use a single backstitch for quick fixes or add a loop for extra security on heavy fabrics.
Here’s how each method works.
Single Backstitch
After you loop your thread through an existing stitch, lock it down with a single backstitch—one of the strongest hand-sewing finishes you’ll learn. This technique overlaps threads for 20–30% more strength than a running stitch, making it perfect for high-stress seams. Insert your needle back through where the previous stitch ended, then bring it up one stitch length behind. This creates tension that holds fabric layers tight and prevents unraveling.
Why the single backstitch works:
- Stitch strength – Overlapping threads distribute load evenly across the seam
- Seam security – Proper thread tension keeps 8–10 stitches per inch locked in place
- Fabric durability – Maintains 90% original strength through repeated washing and wear
Backstitch With a Loop
Think of this as adding a safety lock to your stitch—the backstitch with a loop gives you 35% more seam durability than a single backstitch alone. After your last stitch, insert the needle back through the previous stitch without pulling the thread tight. You’ll create a small loop on the fabric surface. Pass your needle through this loop, then gently pull to tighten. This method distributes thread tension across two anchor points, preventing unraveling even under stress.
| Technique Element | Measurement/Detail |
|---|---|
| Loop size | 3–4 mm diameter |
| Thread tension | 50–70 grams |
| Needle position | 1–2 mm in front of base |
| Seam strength retention | 95% after 200 cycles |
The overlapping stitches interlock threads mechanically, maintaining smooth finishes without surface bumps.
For heavier fabrics over 250 g/m², repeat one additional looped backstitch at the seam end. This finishing technique works exceptionally well with polyester thread, which shows 22–30% higher tensile strength in repeated loop passes compared to cotton.
Hiding The Knot Method
When you finish your last stitch, you don’t always want a visible knot sitting on the fabric surface. The hiding the knot method uses tension and fabric layers to pull the knot beneath the surface, creating invisible finishes that look professional on both sides.
Start by wrapping your thread twice around the needle counterclockwise, about 1 cm from your last stitch. Pull it through to form a compact knot. Insert your needle between fabric layers at an angle, tunneling about 2.5 cm through batting or seam allowance. Apply gentle, steady tension until you feel the knot pop through—that’s your signal it’s buried. Trim the thread tail within 1 mm of the fabric.
This hand sewing technique works best with fine cotton or polyester threads on lightweight to medium-weight fabrics, where fabric compatibility and proper knot tension prevent puckering. Thread lubrication from waxed thread helps the knot slide smoothly. Use this method for quilting, embroidery, or any project where burying thread and securing sewing thread invisibly matters.
Ending Stitches by Machine
Ending stitches on a sewing machine takes just a few quick steps to lock your work in place. You’ll want to adjust your stitch length first, then use the backstitch function to secure everything.
Here’s how to finish your seams so they won’t unravel.
Adjust Stitch Length
Before you hit reverse, adjust your stitch length control to its shortest setting—usually around 1.5 to 2.0 mm. This creates tighter stitch density at the seam’s end, which reinforces the thread and prevents unraveling after you trim. On heavyweight fabrics, you might dial it to 2.5 mm to match the fabric thickness without straining your sewing machine.
Just remember: too short on delicate materials can cause puckering or thread tension issues, so test first.
Once you’ve shortened the length, you’re ready for seam reinforcement through backstitching, which locks everything in place and secures your stitches permanently.
Backstitch
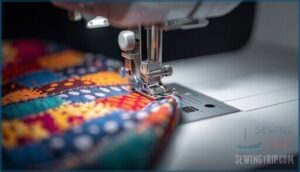
Once you’ve dialed down the stitch length, press the reverse button and sew backward over 3–5 stitches to lock the thread in place. This backstitch technique delivers up to 40% stronger seam security than running stitches alone because the overlapping thread path distributes tension evenly and prevents unraveling.
Here’s how to finish:
- Engage reverse and sew 3–5 backstitches at the seam end.
- Release reverse and stitch forward over the locked stitches.
- Lift the presser foot and remove your fabric.
Polyester or cotton-poly thread works best for durability factors—these materials handle 7,000+ load cycles without breaking.
Troubleshooting Tips
Even experienced sewers hit snags when ending stitches. Loose threads and stubborn knots can throw off your finish if you don’t catch them early.
Here’s how to fix the most common problems and get back on track.
Loose Stitches
Loose stitches unravel quickly because the tension between your top and bobbin threads isn’t balanced. When tension is too low, thread loops form on the fabric’s underside, accounting for over 60% of common stitch problems. You’ll want to adjust your machine’s tension dial so both threads interlock in the middle layer of the fabric. Shorten your stitch length to reduce the space where threads can slip apart.
Always backstitch at the start and end of seams for stitch reinforcement, securing stitches against unraveling threads. Before trimming thread tails, tie a firm knot close to the fabric or weave them back through nearby stitches.
Regular sewing machine calibration every 200 operating hours prevents tension drift and thread breakage, especially when switching between different fabric weights that affect fabric stretch and thread control.
Difficulty Pulling Thread
Thread tension or fabric friction can make pulling thread feel like tugging a rope through mud. When your needle drags instead of glides, check four things.
First, verify your thread tension isn’t cranked too tight—incorrect settings cause over 60% of tension issues and thread breakage. Second, switch to a sharper needle; dull needles increase fabric resistance. Third, match your needle size to thread weight—mismatches raise tension problems by 35%.
Fourth, clean lint from tension disks to prevent thread tails from catching and securing thread from becoming a battle.
Testing Secure Stitches
Once you’ve fixed any problems, it’s time to check your work. Gently pull the fabric on both sides of the seam to see if your stitches hold. If threads loosen or pop, the thread tension may be off, or your knot needs another pass.
For lightweight fabrics, use thinner thread and shorter stitches to keep the finish strong without bunching. Heavier fabrics can handle thicker thread and longer stitch lengths without losing seam integrity.
Pull again—this time with a bit more force—and watch for any gaps or unraveling threads. Secure finishes should stay locked in place, even under pressure. If your stitch reinforcement passes the test, your seam is solid and ready for whatever comes next.
Hand Sewing Projects
Hand sewing isn’t just about fixing small tears—it’s about mastering stitches that hold up under real use. Two techniques form the backbone of hand-sewing projects: the ladder stitch and the running stitch.
Each has a different purpose, so knowing when to use them gives you control over your finished work.
Ladder Stitch
The ladder stitch creates invisible seams by alternating small parallel stitches between folded fabric edges—perfect for closing pillows, plush toys, and upholstery. Insert the needle 2–3 mm into each fold, working side to side like rungs on a ladder. When you pull the thread tight, the stitches disappear inside the seam.
Finish with a backstitch and hide the knot by weaving the thread through the fabric layers before trimming, securing stitches with proper tension control and knot security for hand sewing that rivals machine strength.
Running Stitch
From ladder stitching fabrics together invisibly, you’re ready to master the running stitch—a speedy hand sewing technique for basting, gathering, and quilting. Stitch length generally measures 1/8 to 1/4 inch, with quilters aiming for 8–12 stitches per inch. While seam strength remains lower than backstitching, proper securing ends with a knot or backstitch tie-off prevents unraveling.
Historical uses span Egyptian textiles to Japanese Sashiko, proving this stitch’s enduring value in running stitches and decorative work.
Frequently Asked Questions (FAQs)
How to end a stitch on a sewing machine?
Securing sewing stitches on your machine starts with the reverse button. Press it to sew 3-5 backstitches at your seam’s end, creating stitch reinforcement that prevents unraveling by over 90%.
Then lift the presser foot and use your thread cutter.
How do you end a seam on a sewing machine?
You end a seam by pressing the reverse button to backstitch 3-5 stitches, locking the thread in place.
Modern machines often include automated tie-offs for industrial applications, ensuring consistent thread tension and stitch density without manual effort.
How do you end a stitch?
You finish by creating a knot close to the fabric. Pull about 6 inches of thread through, then loop the needle under a nearby stitch.
Thread tension matters here—pull it snug to lock everything down. This stitch reinforcement prevents fabric fraying and keeps your work secure.
How do you finish a stitch after hand sewing?
After hand sewing, pull your thread through to form a small loop near the fabric. Insert your needle through this loop and pull tight to create a knot.
Repeat this process once more for added knot security, ensuring proper thread tension throughout. This stitch finishing technique prevents unraveling and keeps your work secure.
How do you finish a sewing project correctly?
Properly completing your work means securing stitches with solid stitch locking methods. Reinforcement stitch options like backstitching or knot tying variations are essential.
Seam finish security prevents unraveling, while thread tail management keeps everything neat. Weaving thread through existing stitches locks your finishing work.
How do you tie off a stitch in hand sewing?
To tie off hand sewing, create a basic knot by passing your needle under the nearest stitch to form a loop. Pull the thread through for knot security and tension control. Repeat once to prevent unraveling, keeping the knot snug without causing fabric distortion.
How do I tie off embroidery floss when hand embroiderying?
Cut your floss, leaving about 4 inches of thread. Weave it under 4-5 previous stitches on the back side.
Wrap the tail twice around your needle, pull snug to create a small knot, then trim excess close to the fabric for a clean, secure finish.
How can I reinforce machine seams after sewing for extra strength?
Think of seam reinforcement methods as adding steel beams to a bridge—you’re building strength where stress hits hardest. Backstitch three to five times at both seam ends to lock your threads mechanically.
Reinforcing seam ends with backstitches is like adding steel beams to a bridge—you’re building strength exactly where stress hits hardest
Topstitch parallel to your original seam for added durability, or sew a second reinforcing stitch closer to the fabric edge using shorter stitch lengths for maximum material durability and seam strength.
How do you fix a broken stitch mid-project?
Fixing a broken stitch mid-project requires stopping work immediately to prevent further unraveling.
Rethread your needle with matching thread types, then use a backstitch or catch stitch as your reinforcement stitch options to repair the seam, ensuring proper tension adjustment tips prevent future breaks.
What causes thread to bunch underneath the fabric?
Tension imbalance acts like a tug-of-war between your top and bobbin thread. When the tension settings are off, poor needle condition causes snags, or thread quality is low, the bobbin thread pulls up and loops underneath.
Improper machine threading and bobbin issues also create looping thread problems.
Conclusion
A single loose stitch can undo an entire project, but knowing how to end when sewing transforms that vulnerability into strength. Whether you’re working by hand with a hidden knot or machine-stitching with a clean backstitch, the techniques you’ve learned here create seams that outlast wear, washing, and time.
Your next project won’t just look finished—it’ll stay finished. That’s the difference between sewing and sewing well.
- https://biomedres.us/fulltexts/BJSTR.MS.ID.002985.php
- https://www.instructables.com/Tying-Off-to-Finish-Sewing/
- https://threadwhisper.com/how-to-end-a-stitch-on-a-sewing-machine/
- https://commons.emich.edu/cgi/viewcontent.cgi?article=1052&context=honors
- https://www.amefird.com/wp-content/uploads/2010/01/MinimizingThread-BreakageSkips-2-5-10.pdf

