This site is supported by our readers. We may earn a commission, at no cost to you, if you purchase through links.

If you’re machine-savvy, a serger with the correct tension provides a clean edge. More hands-on? Try a hand-rolled hem for an elegant touch.
Table Of Contents
- Key Takeaways
- Preparing Silk for Edge Finishing
- Cutting Silk Without Fraying
- Machine Sewing Silk Edges
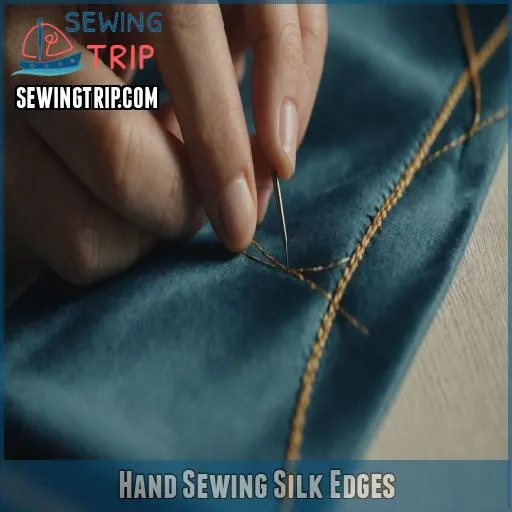
- Hand Sewing Silk Edges
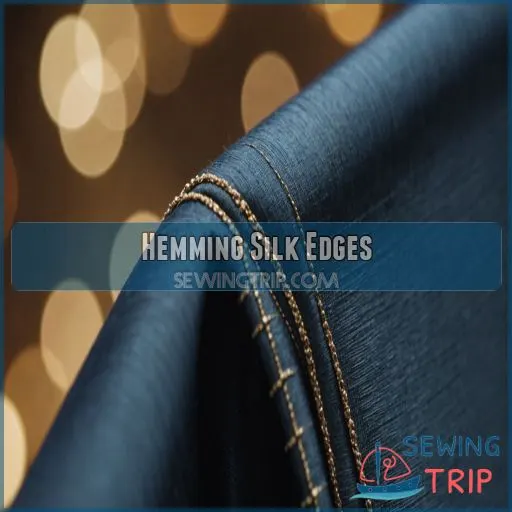
- Hemming Silk Edges
- Finishing Seams on Silk
- Overlocking Silk Edges
- Binding Silk Edges
- Edge Finishing Techniques for Sheer Silk
- Tips for Pressing Silk Edges
- Frequently Asked Questions (FAQs)
- Conclusion
Key Takeaways
- Don’t let silk’s slippery nature get you down—try using a rotary cutter for precise cuts and tackle one layer at a time to prevent fraying. Think of it as slicing through a luxurious cake without messing up that perfect frosting.
- Mastering machine sewing? Adjust your stitch length to match the silk’s weight, and consider using a walking foot to stop the fabric from slipping around like a mischievous cat on a shiny floor.
- For those elegant finishes, go hands-on with a hand-rolled hem or a whipstitch. It’s like crafting invisible seams with a magician’s flair, making your silk look effortlessly polished.
- When pressing, treat silk like a VIP. Use a pressing cloth and avoid steam to prevent catastrophic mishaps. It’s all about gentle pats, not fierce handshakes, to keep the fabric looking pristine.
Preparing Silk for Edge Finishing
Preparing silk for edge finishing can feel like trying to tame a silky, slippery beast, but with the right tools and techniques, you’ll be a pro in no time.
Choose the right thread and needles, and give that fabric a good press to keep wrinkles at bay.
Understanding Silk Fabric Types
Silk comes in a variety of weights, drapes, and textures that can make all the difference in your sewing projects.
Generally, you’ll find lightweight silks like chiffon and georgette have a soft, flowing drape, while heavier silks like dupioni and taffeta have more structure.
Understanding the unique properties of each silk type will help you achieve a flawless finish.
Choosing the Right Thread for Silk
When finishing silk edges, thread choice matters.
Opt for a thread weight matching your silk’s delicacy, ensuring it doesn’t overpower the fabric’s sheen.
A color that blends well aids invisibility – a thread that’s strong yet not bulky.
Imagine trying to fit a rhino in a tutu; balance is key!
Choose wisely, and silk edges will perform pirouettes!
Selecting the Best Needles for Silk
Think of your needle as a chef’s knife in sewing silk. Choose wisely for that Bellevue camisole or Newell slip skirt.
- Needle size: Tiny like 60/8 for delicate Richdale tap shorts.
- Fabric weight: Lighter needle for lighter silk.
- Needle type: Use microtex for sharpness.
- Needle sharpness: Replace frequently.
- Thread compatibility: Test tension for Hong Kong seams.
Pressing Silk to Prevent Wrinkles
Let’s tackle wrinkle prevention like a pro!
Before pressing your silk, make sure the iron temperature is a whisper, not a shout.
Always use a pressing cloth to shield the fabric—treat it like a VIP.
Steam? It’s like a bull in a china shop; avoid it.
Cutting Silk Without Fraying
Cutting silk without fraying can be a tricky task, but with the right techniques, you’ll be slicing through that luxurious fabric like a pro.
Start by using a rotary cutter for precise, clean cuts, and remember to tackle one layer at a time to prevent shifting and uneven edges.
Using Rotary Cutters for Precise Cuts
Preparing silk for edge finishing requires precision.
Consider a rotary cutter your right-hand man for silk!
These handy tools slice through fabric like butter, but remember rotary cutter safety comes first—keep those fingers clear!
Blade sharpness matters, too; dull blades invite fabric slippage.
Use a quality cutting mat to save your table and perfectly layer your silk for a clean cut.
Cutting Silk One Layer at a Time
Cutting silk layer by layer feels like handling butterfly wings—one wrong move, and poof! So, protect against slippage by arranging your silk on a sturdy cutting mat.
Rotary cutter tips help make sure clean cuts without fraying. Sharp tools work wonders.
Trust me, single layer cuts keep your fabric pristine and gorgeous. Just like mastering the perfect soufflé!
Transferring Pattern Markings to Silk
Once you’ve got your silk ready, transferring pattern markings accurately is a game changer.
Fabric pens or tailor’s chalk are your trusty sidekicks for this task.
Meanwhile, consider using fine-point tools for precision.
It’s like drawing on your favorite snack without ruining it! Just be gentle—silk’s delicate nature means heavy lines are a no-go.
Preventing Fabric Shifting While Cutting
Secure your silk fabric on a cutting mat or board to prevent shifting as you slice through it with your rotary cutter.
Pattern weights can also help hold the fabric in place.
Take your time and make smooth, controlled cuts – rushing can lead to uneven edges and fraying.
With a little care, you’ll achieve clean, precise cuts every time.
Machine Sewing Silk Edges
When you’re working with silk, mastering machine sewing techniques like using a walking foot attachment can help you achieve smooth and polished edges.
It’s like being a fabric whisperer—silk is tricky, but with the right stitch length and tools like a walking foot, you’ll have it tamed and looking flawless in no time!
Choosing the Right Stitch Length for Silk
So, you’ve got your silk fabric ready to sew, huh? Let’s talk about stitch length. Adjust it based on fabric weight – shorter for lighter silks, longer for heavier ones.
Think of it like dancing; sometimes you need tiny steps, sometimes big leaps!
A stitch length test on scraps saves headaches.
And remember, don’t let needle size impact your rhythm!
Preventing Fabric Layers From Shifting
Getting the stitch length right is just half the battle with silk.
Keeping it from slipping around more than butter on a hot day is the real trick!
Try pinning at angles or using fabric weights to tame those rebellious layers.
Adjust machine tension to keep seams smooth.
Embrace pressing tools for precision—silk’s like a fussy cat needing pampering!
Using a Walking Foot for Even Fabric Feed
When sewing delicate silk, a walking foot is a game-changer for smooth fabric feeding. This nifty tool grips both fabric layers evenly, preventing pesky slippage and making sure your stitches stay perfectly aligned. Say goodbye to wavy seams and hello to a professional finish! Just be sure to adjust your stitch length and tension for the best results.
- Prevents fabric shifting
- Maintains even feed
- Eliminates puckering
- Ensures straight stitches
- Ideal for sewing silk knits
Finishing Raw Edges With a Serger
Finishing silk edges with a serger is like knitting socks—a little tricky but oh-so-satisfying.
Start by adjusting the serger settings for thread tension; silk’s delicate!
Match your fabric types with suitable edge finishes.
Here’s a quick troubleshooting table:
| Problem | Solution |
|---|---|
| Puckering | Loosen thread tension |
| Fraying | Use tighter stitch width |
| Skipped Stitches | Check needle size |
| Uneven Edges | Slow down machine speed |
| Wavy Finish | Reduce foot pressure |
Hand Sewing Silk Edges
When you’re hand sewing silk edges, you’ll want to make those seams look as invisible as a magician’s trick.
With techniques like blind stitching and a touch of patience,
you’ll soon transform your silk into a masterpiece that even your cat would hesitate to nap on.
Using a Blind Stitch for Invisible Edges
When machine sewing can’t cut the mustard, hand sewing steps up like a trusty sidekick, starting with a blind stitch.
This nifty technique makes seams vanish into thin air.
Grab your needle and thread—blind stitch variations await!
Practicing on scraps tames wild threads.
Blind stitch applications and alternatives abound, so stitch cunningly for hidden magic!
Creating a Hand-Rolled Hem on Silk
Crafting a hand-rolled hem on silk is a delicate dance, but with a little practice, you’ll be twirling through the process.
Start by machine stitching 1/2 inch from the cut edge, then carefully trimming close to the stitching.
Gently roll the edge over, securing it with tiny, invisible stitches.
The result? A beautifully finished silk scarf that’s ready to shine.
Using a Whipstitch for a Simple Edge Finish
Looking for a quick and reliable edge finish? Try a whipstitch!
This technique works wonders on silk and is easy to master.
Arm yourself with sharp needles and silk thread for smooth sailing.
Whipstitching makes for tidy edges without fraying, perfect for finishing touches.
Adding a Decorative Edge With a Pick-Up Stitch
If you’re wrapping up with the whipstitch, why not add a flourish with a pick-up stitch? It’s like the cherry on top.
- Pick-up stitch variations: Experiment and find your style.
- Stitch tension control: Too tight, you’re in hot water!
- Thread color choices: Match, contrast—go wild.
- Fabric suitability: Silk loves finesse.
Hemming Silk Edges
If you’re trying to hem silk edges, getting a perfect finish can be as satisfying as finding a forgotten $20 in your pocket.
Whether you’re an expert or just silk-curious, these tips will help you manage that slippery fabric and master a professional hem with ease.
Creating a Narrow Hem on Silk
Creating a narrow hem on silk is a delicate process, but with the right techniques, you can achieve a professional-looking finish.
Start by determining the hem allowance based on the garment type, then press the doubled fabric up along the marked line.
Fold over again along the finished hem line and secure with machine or hand stitching for a clean, polished edge.
Using a Baby Hem Foot for a Fine Finish
Getting a flawless finish with a baby hem foot is as easy as pie! Here’s how:
- Adjust your sewing machine settings for silk fabric types, checking the settings for silk fabrics.
- Press the foot lightly to prevent puckering.
- Guide the fabric edge smoothly through the hem foot.
- Edge stitch carefully to secure the hem.
Voilà! Your edges are neatly hemmed.
Making a Hand-Rolled Hem on Silk
Ah, the charm of making a hand-rolled hem on silk! You’ll want a needle and some patience as your sidekicks.
Chat with your silk on its favorite side (the wrong one).
Tuck those edges, roll them delicately, and stitch away with love.
This durable hem promises elegance on various silk fabric types.
Consider it the ribbon-cutting ceremony for your project!
Using a Serger for a Rolled Hem
A hand-rolled hem on silk is pure artistry, but if you’re itching for speed, try using a serger for a crisp rolled hem.
Set the serger correctly for silk, and consider using a stabilizer to keep the fabric steady.
Watch for troubleshooting issues like fabric puckering.
With practice, you’ll whip up rolled hems like a pro, adding silky smooth finesse to every project.
Finishing Seams on Silk
Sewing silk requires a deft touch to achieve a professional finish.
From French seams to Hong Kong finishes, we’ll walk you through the best techniques to make your silk projects shine.
Using a French Seam for a Clean Finish
A french seam offers a crisp, professional edge and is excellent for lightweight and delicate silks.
Here’s the scoop:
- Use a short seam allowance. Start with a small allowance, then trim a bit after stitching the first seam.
- Pressing is key. Always open seams after each step.
- Avoid serged seams for a neat, seamless finish.
Creating a Hong Kong Seam for a Decorative Finish
While a French seam dresses silk with sophistication, spice things up with a Hong Kong seam!
Jazz up your project by using contrasting fabrics for binding, turning a hidden element into a highlight.
Choose your binding options wisely, ensuring you keep seam allowances precise.
Fiber-friendly stitching techniques guarantee that your edges don’t just hold but enchant!
Using a Serged Seam Allowance for a Quick Finish
After exploring Hong Kong seams, let’s unravel the quick magic of serged seam allowances for silk. Picture a serger as your secret weapon, swiftly whisking away fraying edges.
- Adjust serger settings: Tailor for silk’s delicate nature.
- Thread tension: Find the sweet spot.
- Seam allowance: Keep it neat.
- Fabric types: Embrace versatility.
- Overlock stitches: Finish fearlessly!
Pressing Seams Open for a Flat Finish
When pressing silk seams, you’ll want to press them open for a flat, professional finish.
Use a pressing cloth to protect the delicate fabric from scorching, and adjust your iron temperature accordingly – a low setting is best to prevent damage.
Pressing seams open creates a smooth, streamlined look that’s perfect for silk garments.
| Fabric Weight | Iron Temperature | Pressing Tool |
|---|---|---|
| Lightweight Silk | Low | Pressing Cloth |
| Midweight Silk | Medium | Tailor’s Ham |
| Heavy Silk | Medium-High | Seam Roll |
Overlocking Silk Edges
Overlocking silk edges might sound like rocket science, but it’s actually your fabric’s best friend when it comes to avoiding fraying.
Just imagine the chaos at the edges—avoid it by choosing the right overlock stitch, and your silk will thank you for the chic, tidy finish!
Understanding the Benefits of Overlocking
Understanding overlocking is like finding the holy grail of fabric finishing. Overlock stitches can transform your silk projects with:
- Durability: They strengthen seams, making garments withstand wear and tear.
- Bulk Reduction: Minimize bulk for a sleek look.
- Seam Finish: Achieve a polished, professional touch.
- Versatility: Work across various fabric types, making them indispensable in your sewing toolkit.
Choosing the Right Overlock Stitch for Silk
So, you’re mastering silk edges with overlocking! Choosing the right overlock stitch is like matchmaking. You need a stitch type that suits your silk’s weight, adjusting stitch tension for that perfect harmony.
Here’s a handy guide:
| Stitch Type | Best For |
|---|---|
| Narrow Hem | Light silk |
| Rolled Hem | Sheer silk |
| Flatlock | Heavy silk |
| Stretch | Knit silk |
Now, you’re ready to stitch with confidence!
Using a 3-Thread Overlock for a Narrow Edge
You’ve got the right idea with using a 3-thread overlock to finish those silk edges! This narrow stitch is perfect for delicate fabrics, as it secures the raw edge without adding bulk.
Just be sure to:
- Adjust your overlock tension for the silk weight
- Choose a smooth polyester or silk thread
- Test your settings on a scrap first
Preventing Overlocking Errors on Silk
Sometimes, overlocking silk can feel like taming a wild horse.
To prevent errors, make sure needle selection suits the fabric’s delicacy. Adjust tension so it’s just right—not too tight, not too loose.
Stabilize your fabric with tissue paper.
Play around with stitch length and lightly lower feed dog pressure.
Binding Silk Edges
Binding silk edges can feel like taming a mischievous cat—tricky, but rewarding when done right.
You’ll use techniques like Hong Kong binding and bias binding to give your project a polished, professional finish.
Choosing the Right Binding Technique for Silk
Overlocking silk was a blast, right?
Now, to choose the right binding technique for silk, consider your fabric’s personality.
Want a smooth, sturdy finish? Bias binding might be your silk’s bestie.
For those craving a bit more flair, explore contrasting colors.
Using a Hong Kong Binding for a Decorative Edge
Elevate your silk projects with a Hong Kong binding – a decorative edge finish that adds a touch of elegance.
This technique involves encasing the raw edge in a contrasting fabric strip, creating a beautiful, professional-looking result.
Choose a complementary silk or satin binding for a cohesive look.
Follow these steps:
- Cut binding strips on the bias.
- Fold and press the binding.
- Stitch the binding to the raw edge, encasing it neatly.
Creating a Bias Binding for a Silk Edge
Creating bias binding for silk edges is like choosing the perfect shoes for an outfit—it pulls everything together stylishly.
Use silk bias tape, selecting colors that complement your fabric.
Opt for bias binding types that fit your project, and consider the width for secure binding.
Your choice of binding methods will ultimately give your silk that polished, elegant finish.
Attaching Binding to Silk With a Blind Stitch
Now that you’ve crafted that perfect bias binding, let’s tackle the attachment part using a blind stitch. To maintain elegance, a blind stitch hides your sewing like a magician’s disappearing act.
Use a special blind stitch foot, aligning the edge of the binding.
It’s your secret to ensuring silk binding seems like it’s effortlessly floating.
Edge Finishing Techniques for Sheer Silk
When finishing the edges of sheer silk, you’ll want techniques that are both practical and delicate, like using a baby narrow hem or creating a hand-rolled hem.
Don’t worry, your hard work will pay off when your fabric drapes beautifully with impeccable edges.
Using a Baby Narrow Hem for a Fine Finish
For a fine, delicate finish on sheer silk, the baby narrow hem is your go-to technique.
Determine the perfect hem allowance, then machine stitch close to the folded edge using an edge-stitching foot.
Trim any excess fabric, then roll the edge over and stitch again for a polished, whisper-thin hem that lets the silk’s beauty shine through.
Creating a Hand-Rolled Hem on Sheer Silk
From mastering the baby narrow hem, let’s embrace the art of the hand-rolled hem for sheer silk. It’s like rolling the perfect burrito: practice makes perfect.
To start:
- Machine stitch ½ inch from the edge.
- Trim closely, avoiding “oops” moments.
- Gather and roll the edge with gentle persistence.
This will give your silk project grace and elegance!
Tips for Pressing Silk Edges
Pressing silk can feel like taming a wild cat, but with the right techniques, you can master it gracefully.
Use a pressing cloth and press from the back to protect your delicate fabric from scorching, ensuring flawless edges with ease.
Pressing From the Back to Prevent Scorching
To avoid turning your intricate silk into a scorched nightmare, always press from the back. Think of it as giving your fabric a gentle pat, rather than a fierce handshake.
| Emotion | Mistake | Solution |
|---|---|---|
| Regret | Silk scorching | Press from back |
| Frustration | Wrong heat settings | Lower temperature |
| Relief | Seam wrinkles | Light, backward press |
| Confidence | Smooth finish | Consistent technique |
Keep heat settings low and treat it gently—your silk will thank you!
Using a Pressing Cloth to Protect Silk
You’ll want to use a pressing cloth when working with delicate silk fabrics.
This protects the fabric from direct heat and prevents scorching or shiny marks.
Look for a pressing cloth made of cotton or silk organza – these allow you to see the fabric beneath while shielding it from the iron’s heat.
Take it slow and use a light touch for best results.
Ironing Polyester Vs. Silk Satins
Ironing silk versus polyester? It’s like comparing a gentle pat to a roaring lion’s paw! Remember these for silk satin:
- Ironing temperature is low; silk’s sensitive.
- Steam use? Rarely—it’s a quick sauna silk didn’t ask for.
- Heat damage can shrink your precious fabric faster than a marshmallow in a bonfire.
Setting Pressing to Prevent Wrinkles
Even if silk appears wrinkle-free, skipping proper pressing is like inviting creases to a party!
Use a low iron temperature and pressing cloth to protect this delicate fabric.
Avoid setting steam to full blast—it can dampen silk’s glorious shine.
Choose pressing tools wisely based on fabric type.
With care, your silk’s elegance won’t unravel.
Frequently Asked Questions (FAQs)
How to stop silk from fraying?
Ah, the relentless fray of silk is like a determined squirrel in autumn!
Tame that chaos by using French seams or serging.
Try fray stop liquid on edges for an invisible shield against the silk’s unraveling dreams.
How to finish the raw edge of satin?
To tackle satin edges, try a French seam for elegance or use a zigzag stitch to prevent fraying.
A serged seam is your all-rounder, making your satin projects look polished and professional.
Happy sewing!
Can you cut silk without it fraying?
It’s like taming a wild horse—silk frays easily unless you control it.
Use pinking shears for a zigzag edge, or apply clear nail polish to seal cut edges and halt fraying.
It’s simple yet effective!
Should I overlock silk?
You don’t have to overlock silk – that’d just add bulk.
Instead, try a French seam or Hong Kong finish to encase the raw edges and prevent fraying.
It’s a breeze once you get the hang of it!
What are the best edge finishes for stretchy or knit silk fabrics?
Stretchy or knit silk fabrics benefit from edges finished with a zigzag stitch or a serger for a neat look.
Seam allowances don’t require much—just enough to stop unraveling, like fencing in a bouncy trampoline.
Can you recommend edge finishes for heat-sensitive silk fabrics?
Taming heat-sensitive silks? A gentle hand-sewn hem works wonders—like a soft whisper sealing the fabric’s fate.
Avoid steam presses; opt for a cool iron with a trusty pressing cloth.
Your silk will thank you gracefully!
Are there any hand-sewn edge finishes effective for those without a machine?
Think sewing silk edges without a machine is like juggling jelly? Fear not! Master the hand-rolled hem. Use fine needlework to roll edges neatly, keeping tension just right, and you’ll achieve polished, fray-free silk finishes.
Hand-rolled hems are a great way to finish delicate fabrics like silk.
How do I prevent fabric from getting sucked under the plate when finishing silk edges?
To prevent fabric from getting sucked under the plate when finishing silk edges, stabilize it with tissue paper or a fabric scrap underneath.
Use a straight stitch plate or walking foot to improve fabric handling. (Source)
What edge finish techniques work best for sheer or lightweight silk fabrics?
You’ll love a narrow baby hem or a classic French seam for finishing sheer silk fabrics.
They keep your edges smooth as butter while avoiding fraying.
Test these techniques on scraps first, ensuring a flawless finish.
Conclusion
Did you know that 90% of sewing enthusiasts find silk edges challenging to master?
Despite its slippery nature, you’re now equipped with the know-how to finish silk edges like a pro.
Whether you’re rolling hems by hand or overlocking with precision, these expert tips will help your silk projects stay beautiful and fray-free.
So grab your needles and serger, embrace the silk challenge, and let your creations shine with a flawless finish.

