This site is supported by our readers. We may earn a commission, at no cost to you, if you purchase through links.
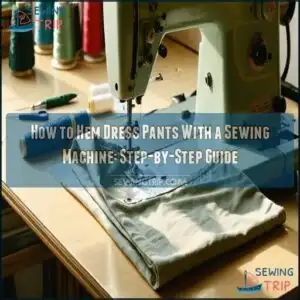
Start by removing the old hem with a seam ripper and ironing the fabric flat. Put the pants on to mark your desired length—don’t forget to factor in about an inch for the hem!
Trim any extra fabric carefully.
Set your sewing machine to a blind hem stitch and attach the blind hem foot. Fold, press, and pin the hem securely, making sure the raw edge stays tucked away.
Slowly sew along the fold, keeping an even stitch. A sharp crease from ironing will seal the deal for a professional finish!
Table Of Contents
- Key Takeaways
- Preparing Pants for Hemming
- Essential Tools and Supplies
- Ironing Techniques for a Crisp Hem
- Setting Up Your Sewing Machine
- Sewing a Blind Hem Stitch
- Mastering The Blind Hem Stitch
- Hemming Curves and Corners
- Tips for a Nearly Invisible Hem
- Finishing and Inspecting Your Hem
- Common Mistakes to Avoid When Hemming Pants
- Frequently Asked Questions (FAQs)
- Conclusion
Key Takeaways
- Remove the old hem carefully with a seam ripper, iron the fabric flat, and mark the new length while wearing the pants.
- Set your sewing machine to a blind hem stitch, attach the blind hem foot, and fold the hem securely before stitching.
- Press the folded hem with an iron to create a sharp crease and ensure a polished look.
- Use matching thread and adjust the machine settings for a nearly invisible hem that blends seamlessly.
Preparing Pants for Hemming
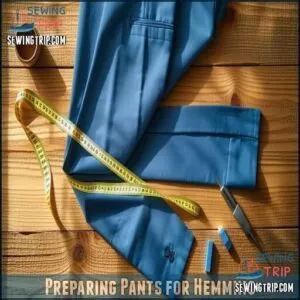
Before hemming your pants, you’ll need to remove the old hem and mark the new length precisely.
Remove the old hem carefully and measure evenly for a clean, custom fit that looks polished and professional.
Take your time measuring and marking both legs evenly to guarantee a polished, professional finish.
Removing Old Hems and Stitches
When tackling clothing alterations, the first step is removing the old hem.
Your seam ripper is a must-have for this job. Carefully slide it under each stitch, cutting threads without harming the fabric. Gently tug loose strands to prevent damage.
Tweezers help with stubborn thread remnants. Inspect for leftover threads to keep things smooth.
This step guarantees a clean slate for your clothing repair or adjustments.
Measuring and Marking Hem Allowance
Before starting your pants hemming tutorial, grab a sewing gauge and tape measure to verify accurate length.
Slip on your regular shoes and stand naturally.
This builds a clear picture of where the hemline should fall for professionally made dress pants.
Use tailor’s chalk for consistent marking—precision is key.
Draw a guideline to define the hem allowance, making sure the line is straight and even across both pant legs.
Always double-check your measurements; even a small difference can throw off hem evenness.
Allocate extra fabric visually and guarantee crease consistency by folding outward before marking.
With careful measuring and attention to detail, you’ll achieve a polished, custom-fit look without frustration.
Cutting Off Excess Fabric
Once your measurements are perfect, it’s time to trim the excess fabric with ease and precision. A sharp finish begins with fabric scissors to avoid fraying and guarantee clean edges.
- Leave extra allowance: Keep 1–2 inches for adjustments or folded hems.
- Cut with care: Follow the marked line with slow, smooth cuts to maintain cutting precision.
- Stick to consistency: Hold the scissors at the same angle for even edges.
Use a serger if your fabric frays easily, then trim threads for tidiness. Clean cuts lay the groundwork for professional-looking hems using your sewing machine.
Essential Tools and Supplies
To hem dress pants like a pro, you’ll need the right tools and supplies to make the job easier.
A sewing machine with a blind hem stitch, sharp scissors, and a sliding gauge are just a few essentials that keep your hems neat and professional-looking.
This approach ensures that your work is efficient and the outcome is satisfactory, with the right tools being crucial for a professional finish.
Sewing Machines With Blind Hem Stitch
When hemming dress pants, a sewing machine with a blind hem stitch is your go-to tool. It helps you achieve crisp, nearly invisible stitches that look professional.
You’ll want one designed for precision and ease, especially when working with different fabric types. Choose a machine with adjustable stitch length and tension settings. These features guarantee the stitching matches your fabric type, avoiding puckers or uneven seams.
A blind hem foot guarantees proper foot alignment, which keeps your hem straight and stitches discreet. Pair this with thread matching to create results so polished no one will guess you used a machine.
Many tailors also source tools for this task online. With the right sewing machine and careful settings, your finished hem will blend seamlessly, giving your pants a refined, refined look.
Rotary Cutters and Seam Rippers
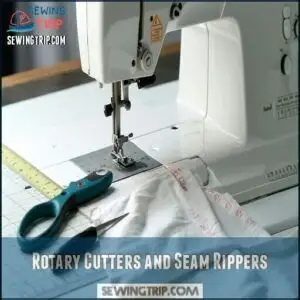
A sharp rotary cutter and a reliable seam ripper are game-changers for hemming dress pants.
A rotary cutter guarantees clean, precise cuts—no jagged edges to ruin your work. Keep blades sharp for smooth slicing and to avoid fabric damage.
Use a seam ripper to quietly undo old stitches; choose one with ergonomic handles for comfort. Rotary cutter supplies are available online.
Rotary Cutter Safety tip: always replace dull blades to prevent accidents. With these tools, your sewing machine hemming projects will feel polished and professional.
Sliding Sewing Gauges for Accurate Measuring
In the context of hemming dress pants, a sliding sewing gauge is like your personal hemming assistant.
This small but mighty tool guarantees precise measurements, making every step of your sewing machine hem predictable and polished.
With a sliding gauge, you can:
- Perfect hem allowances and create even, consistent measurements across both pant legs.
It’s not just about accuracy—it’s about turning a hemming pants guide into results you’ll love.
You can find a variety of models online.
Whether marking seam lines, measuring hem depths, or working with tricky fabric curves, this tool guarantees professional-level precision.
For extra versatility, use it with alternative gauges like tailor’s chalk or seam marking tools to align stitches perfectly.
Master your hem allowance and add confidence to your dress pants hemming routine with this essential tool.
Ironing Techniques for a Crisp Hem
Pressing your hem properly guarantees a sharp, professional finish that lasts. With the right techniques and steady ironing, you’ll keep the fabric smooth and the crease crisp.
Pressing the hem with care creates lasting creases and ensures your pants look sharp, polished, and professional.
Folding and Pressing The Hem Allowance
Folding fabric properly is key to mastering dress pants hemming. Use a hem gauge to fold the fabric to the marked depth, guaranteeing crease consistency. An iron set to the correct ironing temperature is vital—press firmly and use steam for a crisp double-fold technique.
| Step | Action | Result |
|---|---|---|
| Mark Hem Depth | Fold fabric precisely | Accurate fold |
| Set Iron Temperature | Use steam when pressing | Razor-sharp creases |
| Check Symmetry | Verify matching folds | Polished appearance |
Effort here pays off!
Turning Raw Edges for a Professional Finish
Taming raw edges is key to a polished hem that lasts.
To prevent fraying while hemming dress pants, follow these steps for a clean finish that looks professional:
- Fold the raw edge under by 3/4 inch and press firmly.
- Use a sewing machine to secure with a neat, straight stitch.
- Try edge serging or bias binding for extra fray prevention.
- Trim loose threads for a razor-sharp, finished look.
Your hems will stand out with crisp, durable edges!
Pressing The Folded Hem for a Sharp Crease
Pressing your folded hem sets the stage for polished dress pants.
Set your iron to match the fabric type and apply steady pressure.
Steam is your ally—use it for crisp, even results.
Avoid iron marks by using a thin cloth as a barrier.
| Steam Tips | Prevent Marks | Fabric Setting | Crease Consistency |
|---|---|---|---|
| Add light bursts | Use a pressing cloth | Check label | Press evenly |
| Avoid oversteaming | Glide smoothly | Low for synthetics | Double-check edges |
To achieve the best results, remember to press evenly and check label for the right fabric setting, ensuring crisp, even results with steady pressure.
Setting Up Your Sewing Machine
To get started, set your sewing machine to the blind hem stitch and attach the blind hem foot.
Adjust the stitch length and tension to match your fabric so the hem looks clean and secure.
Choosing The Blind Hem Stitch Setting
Mastering the blind hem stitch on your sewing machine starts with dialing in the right settings. Precision is key to achieving a professional look when hemming dress pants.
Focus on these adjustments:
- Match the stitch length to the thickness of your fabric. A shorter stitch works best for lightweight materials, while thicker fabrics need longer stitches for smooth results.
- Adjust the tension carefully—too tight, and the fabric puckers; too loose, and the hem may not hold.
- Fine-tune foot pressure and needle type for your fabric. This guarantees smooth fabric feed and consistent stitching.
For best results, consider using a blind hem foot if available for your machine. Practice on scrap fabric first. Each test helps you find the ideal sewing machine settings for perfect, seamless dress pant hems.
Attaching The Blind Hem Foot
Attaching the blind hem foot to your sewing machine is a small but vital step in hemming dress pants successfully. Start by raising the needle and presser foot to their highest positions. Align the metal guide on the blind hem foot with the sewing machine’s markings to guarantee precise foot alignment. Secure it in place by pressing the release button and lowering the presser foot.
Use the fabric guide to position your pants evenly for the blind hem stitch. Tighten any screw adjustments if needed to avoid loose fittings.
Before starting your blind hem pants project, practice test stitching on scrap fabric. This confirms proper tension settings and avoids surprises mid-project.
Adjusting Machine Settings for a Secure Stitch
With the blind hem foot ready, it’s time to fine-tune your sewing machine.
Start by adjusting the stitch length and thread tension to prevent puckering or gaps.
Use a needle type suited for your fabric, ensuring smooth stitches, and check the sewing machine tension, foot pressure, and feed dogs for balance.
Proper machine settings transform hems from messy to flawless, so don’t skip test runs on scrap fabric to confirm.
Sewing a Blind Hem Stitch
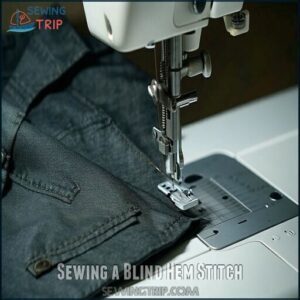
Using a blind hem stitch gives your pants a clean, professional look without visible seams.
With the right machine settings and careful alignment, you’ll secure the hem while keeping it nearly invisible from the outside, which provides a clean, professional look.
Aligning The Hem With The Blind Hem Foot
When aligning the hem with your sewing machine foot, precision is key.
Gently guide the folded edge along the blind hem foot’s guide. For flawless fabric alignment, use a sample scrap first, and check stitch visibility.
Keep tension smooth but firm for even results. **1.
** Always adjust the sewing machine presser foot correctly to secure fabric and prevent slipping—neatly finish hemming dress pants every time!
Starting From an Inside Seam for a Hidden Stitch
Start your stitches at the inside seam to keep them hidden. This small step helps with seam concealment and makes your invisible hem truly polished.
Align the crease carefully under the sewing machine’s blind hem foot, ensuring proper fabric fiber positioning. By stitching slowly and maintaining focus, you’ll create a professional finish.
Invisible stitching elevates hemming dress pants effortlessly!
Using The Blind Hem Stitch for a Secure Finish
Creating a secure blind hem stitch on dress pants is easier with the right approach.
Use your sewing machine’s blind hem foot for precise foot alignment and adjust thread tension to match fabric types.
Follow these steps for a polished finish:
- Fold and pin your hem evenly.
- Align the fabric under the blind hem foot.
- Sew slowly, ensuring stitch visibility is minimal.
- Lock stitches at the start and end.
- Practice techniques on scraps for confidence.
For best results, use this stitch on medium-weight fabrics.
Mastering The Blind Hem Stitch
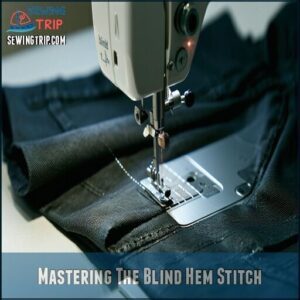
If you’re ready to perfect your technique, mastering the blind hem stitch will give your pants a clean, polished look.
By combining straight and zigzag stitches, you’ll create a nearly invisible seam that’s both secure and professional.
Combining Straight and Zigzag Stitches
You’ve mastered the blind hem stitch—now let’s level up your hemming skills with an unbeatable combination: the straight stitch and zigzag stitch. Together, they provide seam reinforcement while keeping your dress pants looking sharp.
The straight stitch gives clean, precise lines that define your hem, while the zigzag stitch adds fabric stability and prevents fraying. This duo is perfect for tricky materials or when you want to add subtle decorative effects.
Here’s why combining these stitches is a game-changer:
- Guarantees strong, flexible seams
- Blocks unraveling on delicate fabrics
- Balances tension effortlessly
- Offers stylish yet practical finishes
- Works for many sewing techniques
For best results, consider using a blind hem presser foot to guarantee precise fabric alignment. Experimenting with tension balance and thread colors on your sewing machine will elevate your hemming dress pants game.
Locking Stitches for an Extra Secure Hem
Reinforcing the hem is the final step to prevent unraveling and keep your dress pants looking sharp.
- Use backstitching methods to strengthen the seam’s start and end.
- Try knotting techniques, like the “stitch in place” method, for extra durability without adding bulk.
- Adjust your stitch length for clean, tight reinforcement.
These simple steps guarantee your hems stay put, even through wear and washes. With a bit of practice, you’ll master this essential sewing skill!
Hemming Curves and Corners
Hemming curves and corners might seem tricky, but it’s easier if you take it step by step.
You’ll need to handle the fabric carefully, pressing and adjusting as you go, to keep it smooth and even.
Navigating Pants Legs and Cuffs
Handling pants legs and cuffs can feel tricky, but it’s all about paying attention to details.
Whether dealing with leg width variation or hemming cuffed pants, a steady hand keeps things polished.
Here’s how to keep your hems on point:
- Pin evenly around the leg for balanced fabric flow.
- Use your sewing machine’s free arm—perfect for tight spaces like cuffs.
- Adjust stitch tension to maintain clean, smooth seams.
- Match leg lengths precisely to guarantee pant leg symmetry.
With these steps, hemming dress pants feels effortless!
Turning and Pressing Hem Corners
When working on curved hems and corners, precision matters.
To perfect mitered corners and angled seams on dress pants, grab your sewing machine and focus on careful ironing and folding.
Use the table below for guidance:
| Challenge | Issue | Quick Fix |
|---|---|---|
| Fabric Bunching | Cluttered Corners | Clip curves carefully |
| Seam Bulk | Thick Layers | Grade and fold smoothly |
| Uneven Seams | Puckered Edges | Press corner reinforcement |
Slow down, neatening corners with patience.
Curved hems create a polished finish!
Tips for a Nearly Invisible Hem
To create a nearly invisible hem, you’ll want to choose thread that matches your fabric and blends seamlessly.
Adjust your stitch length carefully so the stitching holds well without standing out on the outside of the pants, to ensure a nearly invisible hem.
Matching Thread Colors and Fabric Texture
Matching your thread to the fabric is key to creating a nearly invisible hem. It’s all about color matching and texture blending.
- Pick a thread weight and texture that matches your fabric weave.
- Slightly darker thread tones often blend better than lighter shades.
- Test thread color in natural light and on different angles.
- Consider subtle thread sheen for added elegance.
This attention to detail guarantees flawless stitch visibility. Perfect for hemming dress pants!
Adjusting Stitch Length for a Blending Hem
Fine-tuning the stitch length is key when hemming dress pants with a sewing machine.
A few tweaks will guarantee a clean, professional blind hem stitch.
- Consider fabric and thread: Lightweight fabrics need shorter stitches (around 1.5mm), while thicker ones do better with 2.5mm. Match thread to the fabric type.
- Balance tension and density: Keep tension slightly loose to avoid puckering. Test stitch density on a scrap piece first to practice stitches.
Patience matters—small, even adjustments create a hem so smooth nobody will guess it wasn’t store-bought!
Regular cleaning helps prevent inconsistent stitch lengths.
Finishing and Inspecting Your Hem
Once you’ve finished sewing, it’s time to check your work and make sure everything looks neat.
Carefully smooth out the hem, inspect it for puckers or creases, and adjust as needed for a polished finish.
Folding and Unfolding The Hem
Start by smoothing out the fabric completely flat, guaranteeing a 1-2 inch seam allowance for precision.
For the Initial Fold, align the fabric’s edge carefully, then use Double Folding to hide raw edges and create a clean look.
Press firmly to set a sharp, professional Crease Setting.
Consistently check Hem Consistency and keep the Edge Alignment even.
A steady iron and patience will guarantee your dress pants look polished and ready to impress.
Inspecting for Puckers, Ripples, and Creases
After folding the hem, make sure your hard work looks flawless—it’s time to inspect for issues like puckers, ripples, or creases that can ruin Hem Smoothness.
A quick Visual Inspection can save headaches later:
- Run your fingers over the seam – Feel for bumps or uneven areas that might cause distortion.
- Hold pants up to bright light – Look for ripples or any Crease Removal needs.
- Stretch the fabric gently – This reveals hidden puckers and checks for fabric shifting.
- Compare both legs – Confirm they’re the same length so nothing seems lopsided.
Fix problems with a pressing session using a steam iron. With patience, you’ll turn small errors into pro-level hems!
Common Mistakes to Avoid When Hemming Pants
It’s easy to make small errors when hemming pants, but they can lead to uneven, puckered results.
Knowing what to watch for will save you time and guarantee your hem looks clean and professional.
Avoiding Puckering, Distortion, and Over-Tightening
Keep your hems smooth by mastering tension control on your sewing machine.
Adjust the thread tension carefully, ensuring fabric relaxation during stitching. Use a ballpoint needle for stretch fabrics and lower the presser foot pressure for delicate ones.
One common issue is using incorrect needles, which can damage fabric. Test on scrap fabric first—it’s like stretching before a workout.
To achieve professional results, it is crucial to identify and address common sewing issues, such as puckers, distortion, over-tightening, and uneven seams, by applying the right solutions, including loosening thread tension, balancing stitch length, reducing feed dog pressure, and adjusting the presser foot.
Solving Issues With Fabric Slipping and Seam Gapping
Fabric slipping and seam gapping can ruin your dress pants.
Here’s how to fix it:
- Use plenty of pins for a firm fabric grip.
- Attach a walking foot to your sewing machine for steady feeding.
- Adjust tension and stitch density for smooth seams.
- Choose a fine needle type to avoid pulling threads.
- Lightly press with steam to stabilize edges before hemming.
These steps guarantee clean, even hems every time, and by following them, you can ensure smooth seams and avoid fabric slipping.
Frequently Asked Questions (FAQs)
How do you sew a hem?
Ever wondered why hems can make or break pants?
To sew one, fold fabric twice, press for crispness, and sew along the edge with matching thread.
Backstitch ends for durability, Precision’s your best friend here!
How do you Hem a pant in a sewing machine?
Start by measuring and marking the desired hemline.
Cut off extra fabric, leaving a seam allowance.
Press and pin the fold.
Use a sewing machine with matching thread to stitch near the fold evenly.
How do you Hem dress pants?
To hem dress pants, measure and mark the length.
Fold the fabric twice for a clean edge, and press it.
Use a sewing machine to stitch close to the folded edge evenly.
Can You Hem dress pants without a sewing machine?
Like piecing together a puzzle, you can hem dress pants without a machine by hand sewing.
Use a needle, matching thread, and a blind hem stitch for a neat, nearly invisible finish.
Can You Hem dress pants yourself?
You can absolutely hem dress pants yourself!
With a little patience and basic tools like scissors, pins, and an iron, you’ll adjust the length perfectly.
Just measure carefully, follow guidelines, and enjoy your custom-fit pants, it’s all about having the right patience.
How do you stitch a pants Hem?
Place the folded hem under your sewing machine needle, align it evenly, and sew around the edge using a straight stitch.
Keep the fabric taut, remove pins as you go, and backstitch securely.
Can you hem dress pants on a sewing machine?
Using a sewing machine makes hemming dress pants quick and precise.
Mark your length, fold the fabric, press the hem, pin it, and sew with matching thread for a clean finish.
This process allows for a precise and efficient way to hem dress pants.
What is the best stitch for hemming on a sewing machine?
The best stitch for hemming on a sewing machine is a blind hem stitch.
It’s nearly invisible from the outside, giving a polished look.
Practice first on scrap fabric to get the tension perfect!
What stitch to use for hemming pants?
Use a straight stitch for hemming pants with a sewing machine.
It’s precise, durable, and works for most fabrics.
Keep stitches close to the folded edge, about 1/8 inch, for a clean finish.
What is the rule for hemming pants?
Hemming pants isn’t rocket science, but precision counts.
Measure twice, mark evenly, and make certain both legs align.
Always leave enough fabric for a double-folded hem, and test with your shoes for the perfect length.
Conclusion
Did you know, about 65% of people tailor their own wardrobe at some point?
Hemming dress pants with a sewing machine gives you a professional look without the price tag.
By following this step-by-step guide, you can confidently remove the old hem, measure your new length, and use a blind hem stitch for a polished finish.
Take your time, check your measurements, and let the machine do the work. You’ve got this—custom-fit pants are just a stitch away!
- https://www.thesewingdirectory.co.uk/blind-hem-tutorial/
- https://www.sewessential.co.uk/blog/five-ways-to-machine-stitch-hems/
- https://www.asg.org/blind-hem-stitch/
- https://madamsew.com/blogs/sewing-blog/your-guide-to-invisible-hemming?srsltid=AfmBOorg6tmGK2nbLPKhyyJJCeb1Oh4UeRTmm7Fd9HVGZe19Mh_jwucK
- https://takingitupanotchsewing.com/2014/07/12/basic-hems-part-one/

