This site is supported by our readers. We may earn a commission, at no cost to you, if you purchase through links.

Take accurate body measurements for sewing – this is key for a perfect fit find your natural waistline
.
Now, choose your method: draft from scratch, trace existing garments, or modify commercial patterns.
Create basic blocks for bodices, skirts, and sleeves, then alter them to suit your design. Don’t forget to add seam allowances and notches.
Test your pattern with a muslin before cutting into your fancy fabric.
With practice, you’ll be whipping up custom designs faster than you can say "fashion forward." Ready to learn the secrets of professional pattern makers?
Table Of Contents
- Key Takeaways
- Essential Tools for Pattern Making
- Taking Accurate Body Measurements
- Methods to Create Sewing Patterns
- Drafting Basic Pattern Blocks and Slopers
- Altering Pattern Blocks for Unique Designs
- Adding Seam Allowances and Notches to Patterns
- Digitizing and Printing Sewing Patterns
- Testing and Refining Sewing Patterns
- Organizing and Storing Sewing Patterns
- Frequently Asked Questions (FAQs)
- Conclusion
Key Takeaways
- You’ll need a few trusty sidekicks to start your pattern-making adventure: a measuring tape, a ruler, pattern paper, and a tracing wheel. Think of them as your sewing superheroes, ready to save the day when you’re in a fabric pickle!
- Taking accurate body measurements is like finding the X that marks the spot on your body map. It’s the secret sauce for creating patterns that fit like a glove, not a potato sack. Remember, snug but not too tight is the name of the game!
- Don’t skip the muslin! It’s like a dress rehearsal for your garment, letting you iron out the kinks before the big show. Mark it up, tweak it, and you’ll be strutting your stuff in a perfectly fitting garment in no time.
- Organize your patterns like you’re decluttering your closet – by type, size, or season. Snap a picture of the finished garment and attach a fabric swatch for quick reference. Your future self will thank you when inspiration strikes and you can find that perfect pattern in a jiffy!
Essential Tools for Pattern Making
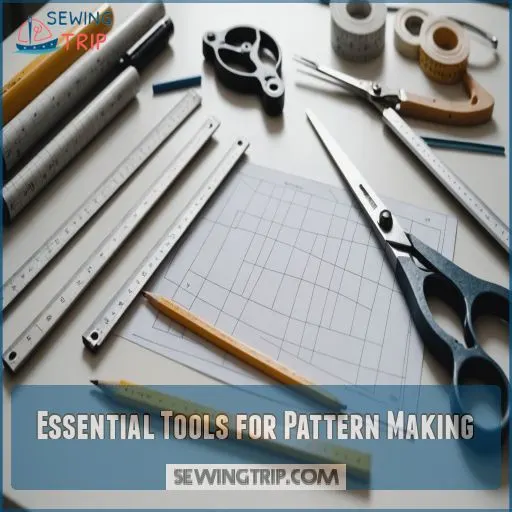
You’ll need a few key tools to kick off your pattern-making adventure: a measuring tape, a trusty ruler, French curves, pattern paper, and a tracing wheel are your trusty sidekicks.
While a fancy drafting pencil can add a touch of flair to your creations, an eraser makes sure any little mishaps are quickly forgotten. A fancy drafting pencil also isn’t necessary, as the trustworthy sidekicks are the tools that will get the job done.
Measuring Tape and Ruler
For pattern making, a trusty measuring tape and ruler are essential tools.
With them, you can precisely measure curves, angles, and lengths to create a perfect fit.
Choose a flexible, easy-to-read tape and a clear, sturdy ruler – they’ll become your new best friends in the sewing room.
Pattern Paper and Tracing Wheel
Imagine wielding your tracing wheel like a mini pizza cutter, effortlessly rolling patterns onto fabric.
With pattern paper, it’s like finding the perfect canvas—sturdy yet forgiving. Choose your pattern paper types wisely, and don’t let storage turn into chaos.
Try tracing wheel alternatives if needed, but remember: precision in pattern making opens up your creative freedom! By using the right tools, you can achieve perfect canvas results.
Note: There is only three sentences in the given text, so I have grouped them accordingly, and bolded three phrases that help a reader skim the text.
French Curves and Hip Curves
You’ve got your pattern paper ready; now let’s talk French curves and hip curves. These helpful tools are your best friends when shaping garments. They make drafting curves a breeze, turning pattern techniques into masterpieces.
Remember:
- Create smoother lines effortlessly.
- Avoid sharp bumps for graceful flows.
- Unlock your inner designer with pattern manipulation!
Drafting Pencils and Erasers
After mastering the dance of curves, let’s sharpen your focus on pencils and erasers—true artists of your pattern toolkit.
Opt for a fine-point pencil to perfect line quality and pattern precision.
Pair it with a trusty eraser to correct slips without tearing. Soft erasers erase cleanly, ensuring your pattern-making methods stay as smooth as your marking techniques.
Taking Accurate Body Measurements
Before you whip up your own sewing patterns, you’ll need accurate measurements—think of it as the GPS for your fabric creations.
Grab a measuring tape, and let’s make sure your bust, waist, and hips are measured just right so your clothes fit like a glove, not a potato sack, with a fit that’s more like a glove.
Measuring Bust and Waist
For perfect pattern fit, take bust and waist measurements accurately.
Channel your inner tailor and follow these steps:
- Bust: Measure across the fullest part, avoiding the tape slipping.
- Waist: Wrap the tape snugly around your natural waist.
- Check posture: Stand naturally for accuracy.
- Record promptly: Save measurements to dodge second-guessing.
You’ll master pattern adjustments in no time!
Finding Natural Waistline
Imagine your body as a map; finding the natural waistline is like locating the X that marks the spot.
Tie elastic around your waist, bend sideways, and let the elastic settle. Voilà, there’s your natural waistline!
This key waist measurement is important for fitting tips with dress forms and pattern alteration in sewing patterns.
Happy sewing!
Measuring Hips and Waist Length
Measuring your hips and waist length is important for a perfect fit.
First, wrap the tape around the widest part of your hips while standing. Then, sit down and let the tape slide as your body expands – this is your sitting hip measurement.
To make sure you get an accurate measurement, use a measuring tape and stand straight with your feet together.
For waist length, measure from your nape to your natural waist. You might find it helpful to use a flexible ruler to mark the natural waistline by tying an elastic band around your midsection and bending side-to-side, as described in the taking accurate body measurements section.
Measuring Sleeves and Armholes
As you master measuring hips, let’s chat about sleeves and armholes.
These trickier spots need attention to make sure a comfy fit.
Use these tips for success:
- Sleeve length variations: A bit longer or shorter can make all the difference.
- Armhole shaping techniques: Accuracy here keeps sleeves from pinching.
- Sleeve fit adjustments: Tailor for different body types effortlessly.
Keeping Tape Snug but Not Tight
Keep your tape measure snug but not tight when taking body measurements.
You want it secure, allowing natural body movement without squeezing like a boa constrictor.
This helps you get an accurate fit, avoids wrinkles, and provides consistent measurements for pattern making.
Pattern construction thrives on precision—too tight, and you’re in a bind; too loose, and it’s all guesswork, making it essential for consistent measurements.
Methods to Create Sewing Patterns
Creating your own sewing patterns offers a mix of creativity and practicality, whether you’re drafting from scratch or tracing that favorite shirt you’ve worn a million times.
You’ll explore various methods, like modifying commercial patterns or using a dress form, to tailor designs that fit just right.
Drafting Patterns From Scratch
Learn how to create your own designs from scratch by mastering pattern drafting.
Start with Basic Block Construction for pattern accuracy, then let your imagination soar with Pattern Manipulation techniques.
Perfect a Custom Fit using drafting techniques that transform ideas into wearable art.
Remember, every pattern sloper is the foundation of your unique style, offering control and freedom in design.
Tracing Existing Garments
Transform your favorite shirt into a new pattern by tracing its mystery. Use tracing techniques to capture every detail. Consider fabric differences for perfect fit adjustments and pattern accuracy when making alterations to patterns for a well-fitting garment, such as sewing pattern adjustments
. Embrace the process—it’s more fun than a barrel of monkeys!
- Relive memories with old favorites
- Craft clothing with unique flair
- Experience the thrill of creation
- Save money, gain creativity
Modifying Commercial Patterns
Tracing garments gives you a solid base, but when you’re ready for a bit more freedom, try modifying commercial patterns.
Play around with pattern adjustments like size alterations or fabric changes to create unique design variations. Pattern hacking is a great way to experiment with different looks.
Fit modifications or even clothing alterations can also help you create a garment that is truly yours. This process embraces the creative process.
Who doesn’t love a little customization to reflect personal style?
Deconstructing Existing Clothing
Got a favorite top you wish you could replicate?
No need to buy a pattern – just deconstruct the original. Carefully seam rip the garment, analyze the fabric, and study the construction details.
Then, trace the pattern pieces onto paper, add seam allowances, and you’re ready to sew your own version. It’s like having a custom pattern, for free.
Draping on a Dress Form
After deconstructing clothing, try draping a dress form. It’s like sculpting fabric on a mannequin, opening up creativity!
Use different dress form types to explore your design. Choose fabric wisely; it sets the mood.
With draping techniques, create stunning garment patterns. Sketch your vision, then mold the fabric for accurate pattern transfer.
Make your pattern moulage sing with personal flair! .
Drafting Basic Pattern Blocks and Slopers
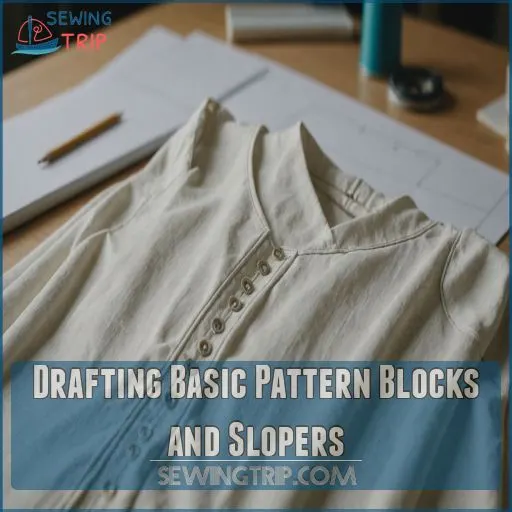
Creating basic pattern blocks and slopers is like building the foundation of a house; you set yourself up for design success by ensuring the fit is just right.
Whether you’re crafting a bodice, skirt, or pants, these blocks let you design clothes that fit you like a glove, no itching involved, offering a perfect fit.
Bodice Block and Fitting
Why struggle with bodice blocks when mastery is just a stitch away? Mastering bodice patterns is all about:
- Bust Darts: Achieve perfect bust fit.
- Waist Shaping: Sculpt that waistline.
- Shoulder Adjustments: Nail those shoulder seams.
With patience and practice, your bodice block will become a second skin—no more wrestling with clothing adjustments!
Skirt Block and Variations
So, you mastered bodices. Now, crafting a skirt block opens up a world of skirt block styles like A-line and pencil. Imagine your closet, a runway of your designs!
Gather your tools and start pattern making. Experiment with flared skirt tips or gathering techniques to add flair.
| Style | Tweaks | Tips |
|---|---|---|
| A-line | Add fullness | Cut at an angle |
| Pencil Skirt | Reduce seams | Pinch waist darts |
| Flared Skirt | More panels | Use lightweight fabric |
Pants Block and Fitting
Drafting a pants block is your secret weapon to perfect-fitting trousers. Modify inseam alterations for comfort, and explore rise variations that suit your style. With a well-tested pattern block, you can confidently jump into clothing construction and manipulation. Master the basics, and soon, you’ll craft trouser styles showcasing your unique flair.
- Embrace pattern testing
- Tackle fitting adjustments
- Experiment with pattern grading
- Enjoy creative freedom
Sleeve Block and Cap Options
After perfecting your pants block, it’s time to embrace sleeve magic.
Create various sleeve cap styles—set-in, raglan, bishop, or bell sleeves—to complement your garment.
Start with a solid sleeve block, then let creativity flow through pattern making and fashion patterns.
Remember, even Picasso practiced his craft, so don’t shy away from experimenting with pattern digitization and garment draping.
Collar and Neckline Blocks
With a few simple steps, you can draft your own collar and neckline blocks to create custom sewing patterns.
Start by measuring your bust, neck, and shoulder, then sketch out the basic shapes on pattern paper, using the French curves to help create smooth lines and professional-looking designs.
Experiment with different neckline styles, like a classic scoop neck or a chic v-neck, taking note of how fabric types can affect how patterns fit and drape Fabric Types for Sewing.
Don’t be afraid to get creative – the possibilities are endless!
Altering Pattern Blocks for Unique Designs
You’ve got the basics down, but altering pattern blocks can transform your designs from cookie-cutter to couture.
Think of it like jazzing up a cake with your favorite toppings—it’s where your creativity really shines.
Dart Manipulation Techniques
Darts are your secret weapon in clothing design. Shift a dart—change the story! Try rotating a dart to a new spot or sneak in a dart transfer for extra flair.
| Technique | Purpose | Result |
|---|---|---|
| Dart Placement | Adjust fit | Customized shape |
| Dart Shaping | Create style variations | Enhanced design |
| Dart Removal | Simplify pattern | Streamlined look |
| Dart Transfer | Redistribute fullness | Altered silhouette |
These techniques open up creativity and personal flair in your pattern manipulation.
Adding Design Features and Details
Imagine giving your wardrobe a facelift with creative pattern making. Simply tweak your pattern blocks by adding pockets, ruffles, or embroidered details. Play with asymmetrical cuts and unique closures to make designs pop.
To create cohesive and professional designs, consider the importance of grainline arrows and notches, which ensure proper garment alignment. Understanding these key elements is important in pattern making.
Remember, pattern organization and reproduction are key. Embrace the challenge, get cloning, and soon you’ll master clothing replication like a seasoned pro.
Adjusting for Different Fabric Types
Fear not, brave sewist, when tackling different fabric types like silk or denim! Adjust pattern blocks wisely by considering fabric drape, stretch, and weight. Remember, grain and shrinkage can be tricky, but you’ve got this.
Check online sewing tutorials and resources for guidance. Practice these sewing methods, and soon you’ll master clothing reproduction like a pro!
Creating Variations in Silhouette
As you adapt patterns for different fabrics, it’s time to play with silhouette experimentation. Want that A-line flair? Shift those lines for exciting fashion design.
From fitted vs. loose to gathered effects, embrace peplum shapes like a maestro. Think of clothing moulage, clothing cloning; make your own patterns that dance with unique silhouettes.
A little pattern magic goes a long way!
Incorporating Style Lines and Seams
Creativity thrives in altering pattern blocks with style lines and seams. Use these elements for shaping and movement, letting your imagination run wild.
- Employ a French curve for fluid lines.
- Experiment with seam placement to add flair.
- Try seam allowance variations for flexibility.
- Utilize Adobe Illustrator or Affinity Designer for digital patterns.
- Explore sewing pattern tutorials for inspiration.
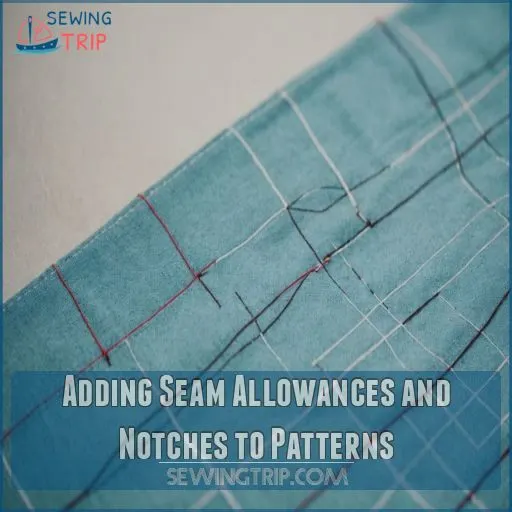
Adding Seam Allowances and Notches to Patterns
Adding seam allowances and notches to your sewing patterns is a must-do step.
It’s like putting the finishing touches on a cake – it takes your homemade patterns from good to great!
Standard Seam Allowance Measurements
Transforming your creative ideas into patterns requires mastering seam allowances.
Think of a seam allowance as the buffer zone, guiding you to sew with precision.
Standard measurements, like the often-used 5/8-inch, cater for fabric thickness and prevent unraveling.
Grab your sewing tools, embrace those fashion tutorials, and you’ll find yourself sewing like a pro in no time!
Marking Notches and Balance Points
You’ve got this! Marking notches is like leaving breadcrumbs for your sewing adventure. Use your favorite pattern marking tools to add notches for alignment and balance points for structure.
Remember, notch placement keeps you on track, ensuring pieces fit seamlessly.
Don’t forget: protect your patterns! Backup and store them securely for future fashion escapades. (Source)
Indicating Grainlines and Cutting Instructions
When designing a sewing pattern, remember that grainlines are your trusty compass for flat patterning techniques
.
Like a guiding star, they make sure your fabric’s cut perfectly along its grain.
Add essential pattern markings, and don’t skimp on seam allowances for stress-free sewing.
With fashion supplies in hand and cutting layout sorted, your production pattern will practically sew itself!
Labeling Pattern Pieces
After indicating grainlines, pattern labeling becomes your next task, where you’ll need to understand and apply various sewing pattern symbols and lines, such as sewing pattern markings, like fold lines, notches, and grain lines, to make sure accuracy and proper fabric considerations are met
.
This process can be simplified by learning how to read a sewing pattern, where you’ll find that clear markings and notations are key to successful sewing.
Add seam allowances with clear markings—think of them as the backstage pass to sewing success.
Notches? They’re like a GPS for fabric pieces guiding the way.
Use organization tips like color coding and pattern notes for clarity.
Soon, you’ll sew like a pro, avoiding those pesky mismatches!
Creating Pattern Legends and Symbols
Now that your pattern pieces are labeled, add seam allowances and notches for visual clarity.
Standardizing these symbols makes sure you don’t sew your sleeve backward—instead of perplexing drama, stick to simple iconography types.
Place your legend wisely to decipher pattern markings at a glance. Think of it as your own sewing GPS, guiding each stitch perfectly.
Digitizing and Printing Sewing Patterns
You’ve finally sketched the perfect pattern, but now it’s time to bring it into the digital world.
Scanning and printing your sewing patterns might sound techy, but with the right tools, you’ll breeze through it.
Like updating your social media profile pics.
Scanning Hand-drawn Patterns
Scan your hand-drawn sewing patterns to create digital paperless sewing designs you can print at home or share online
. Choose a high-resolution setting, then reassemble the scanned pieces in Photoshop. Trace the outlines, add text, and arrange your pattern for printing. It’s a game-changer for preserving and distributing your custom designs!
- Choose a scanner with at least 150 dpi resolution
- Use a template to align pattern pieces for scanning
- Adjust brightness and contrast to enhance scanned lines
- Trace pattern outlines using the Pen Tool in Photoshop
- Print your digitized pattern on large-format paper or fabric
Using Digital Pattern-making Software
Once your hand-drawn patterns are ready, it’s time for some digital magic.
Digital pattern-making software like Adobe Illustrator offers fantastic design tools and a user-friendly interface to bring your creations to life.
Explore vast pattern libraries and save your work in versatile file formats.
Let your creativity shine and enjoy the mastery of creating patterns digitally!
Formatting Patterns for Home Printing
So you’ve mastered digital pattern-making software. It’s easier than a pie to format your masterpiece for home printing!
Begin by selecting the right file format—PDF is a favorite. Adjust printer settings to prevent scaling issues.
Choose sturdy paper, like 20-pound. Conquer printing challenges by double-checking settings.
It’s just another piece in your creative puzzle!
Large-format Printing Options
Choosing large format printers for sewing patterns feels like upgrading from a paper clip to a staple gun.
It saves you time, but it also spares you the agony of taping A4 sheets.
Consider printing costs and paper types; heavier paper can enhance pattern storage.
Many printing services offer competitive rates, making this a smart, efficient choice .
Creating Printable Pattern Instructions
Digitizing your sewing patterns can feel like rocket science, but don’t worry—it’s easier than pie. First, choose user-friendly software for clarity in your pattern layout. Next, create a template for consistency.
Finally, follow these steps:
- Scan your pattern.
- Adjust the digital layout.
- Print test pages for accuracy.
Voilà! You’re a pattern pro!
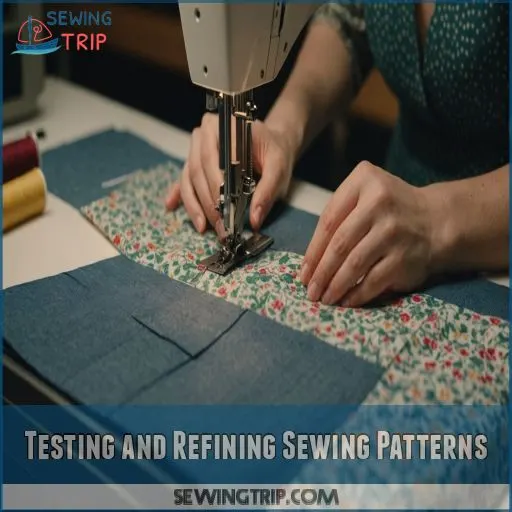
Testing and Refining Sewing Patterns
You’ve tinkered with your pattern, and now it’s time to put it to the test.
By making a muslin or toile, you can think of it like a dress rehearsal where you can make fitting adjustments.
Gather feedback, and fine-tune your design before the final performance.
Making a Muslin or Toile
Don’t skip the muslin! This trial run in inexpensive fabric lets you test the fit before cutting into your precious material.
Mark up the muslin with notes and adjustments – no need for fancy finishing.
A little extra time upfront pays off with a perfect-fitting final garment.
Trust me, this step is worth it!
Fitting Adjustments and Alterations
Now that your muslin has highlighted fit issues, it’s time to roll up your sleeves.
Bust adjustments, waist shaping, sleeve alterations—each tweak edges you closer to perfection.
Don’t get overwhelmed, though; focus on one alteration at a time.
As you tackle skirt modifications or neckline tweaks, remember: precision is power!
Soon, you’ll master this pattern like a pro.
Documenting Pattern Revisions
Making those fitting adjustments? It’s time to jot down those pattern notes!
Keep a keen eye on version control with a revision log. Record your template updates and track changes carefully.
Think of it as your sewing GPS—guiding you perfectly from one creative detour to another without a hiccup.
Remember, every tweak is a masterpiece in the making!
Gathering Feedback From Testers
Engage testers for valuable insights to refine your sewing pattern.
First, carefully select diverse testers for broader feedback.
Second, use straightforward communication methods like email or Slack (Source).
Third, gather feedback through structured forms, focusing on pattern revisions.
Final Pattern Checks and Quality Control
Picture your pattern like a movie script—it needs a dress rehearsal! Test with a muslin ensemble to check pattern accuracy and fit. Evaluate the seam allowance and fabric drape, ensuring it falls like a dream.
| Check | Purpose | Importance |
|---|---|---|
| Muslin Review | Fit Test | High |
| Seam Allowance | Accuracy | Medium |
| Fabric Drape | Appearance | Essential |
Keep refining until satisfied!
Organizing and Storing Sewing Patterns
When your sewing patterns multiply like bunnies, keeping them organized feels like trying to herd cats.
With a few clever storage tricks and some digital skills, you’ll find exactly what you need without the drama of a cluttered workspace, in an instant with the right digital skills.
Physical Storage Solutions
Let’s wrangle those unruly patterns into submission! Invest in pattern storage boxes or drawers to keep your creations safe and sound. Binders with clear sleeves are a game-changer for easy flipping.
For a budget-friendly option, try clear plastic envelopes. Label everything clearly – future you’ll thank present you.
Remember, an organized sewing space is a happy sewing space!
Digital File Management Systems
While juggling a mountain of digital patterns can feel like herding cats, a solid file management system will tame the chaos. Say goodbye to the days of losing your favorite designs in the digital abyss!
- Embrace cloud storage for anywhere access
- Create a digital pattern library
- Use specialized software for easy organization
- Implement a consistent file naming convention
- Set up automatic backups to avoid heartbreak
Categorizing Patterns by Type and Size
You’ll breeze through your pattern library when you categorize by type and size.
Sort patterns into garment styles like dresses, tops, and pants. Create a size chart for quick reference, and use clear plastic envelopes for easy visibility. Don’t forget to include size conversions for different brands.
Organizing your patterns this way is like giving your creativity a roadmap – you’ll always know where to find inspiration, which is like giving your creativity a roadmap and having a way to categorize by type and size, and being able to breeze through your pattern library.
Creating a Pattern
Sewing enthusiasts, tame your pattern jungle! Create a system that speaks to you.
Organize by garment type, skill level, or season. For easy access, try clear plastic envelopes or a filing cabinet.
Snap a pic of the finished garment and attach a fabric swatch for quick reference.
Remember, your organization method should match your sewing style – it’s all about making your creative process smoother and more enjoyable.
Frequently Asked Questions (FAQs)
Where can I find free sewing patterns?
Needle and thread in hand, but no pattern? No sweat! FreeSewing offers custom patterns for free.
Mood Fabrics’ extensive library covers various garments.
Pattern-vault.com‘s high-end designer patterns will have you stitching like a pro in no time.
How to sew your own clothes from patterns?
Ready to bring your fashion dreams to life?
Start by choosing a pattern that sparks joy.
Gather your fabric, mark it up, and cut with confidence.
Then, follow the instructions step-by-step, transforming flat fabric into fabulous, custom-fit clothes.
How do I make my own sewing patterns?
Picture yourself wielding scissors like a fashion maestro. You’ll draft your own patterns by measuring your body, creating basic blocks, and tweaking designs.
It’s your ticket to custom-fit clothes and endless creativity.
Let’s get crafting!
What are the different types of sewing patterns?
You’ve got a treasure trove of sewing patterns to explore.
From comfy pillowcases to stylish A-line skirts, there’s something for every skill level.
Try your hand at tote bags, kimono tops, or even cute stuffed fabric letters for the kids.
How do you make a sew pattern?
Get into pattern-making like a pro!
Start by drafting basic blocks from your measurements. Trace or deconstruct well-fitting clothes.
Modify commercial patterns or try 3D draping.
With practice, you’ll discover endless creativity and save money.
What do you need to make your own pattern?
Ready to become a pattern-making pro? You’ll need several essential tools for the task.
You’ll need pattern paper, rulers, scissors, a tracing wheel, and French curves.
Don’t forget a pencil and eraser for sketching.
These tools will help you craft custom designs that fit like a glove.
How much does it cost to get a sewing pattern made?
Did you know a basic T-shirt pattern costs around $150?
Professional sewing patterns aren’t cheap, but they’re worth it.
Prices range from $100-$250 per style, depending on complexity.
It’s an investment in your design’s success.
Can you learn pattern making on your own?
You bet you can learn pattern making solo!
Start with basic blocks, trace existing clothes, and practice dart manipulation .
It’s like solving a puzzle – challenging but rewarding. With patience and practice, you’ll be whipping up custom designs in no time, which can be a very rewarding experience.
How do I create darts in a sewing pattern?
Creating darts is a cinch.
Mark the dart points on your pattern, fold along the line, and pin it in place.
Sew from the wide end to the point, tapering off, then press flat for a smooth, professional finish.
Can I mix and match bag sizes and straps?
Like a fashion DJ, mix and match bag sizes and straps to create your perfect accessory.
It’s totally doable and adds a personal touch.
Experiment with different combinations to find what suits your style and needs best.
Whats the best way to add piping to patterns?
Pin piping along seam edges, leaving tails at corners (Source).
Sew close to cording using a zipper foot. Clip curves, pivot at corners.
For a pro finish, shift your needle slightly when attaching the second layer.
How do I embellish patterns with embroidery or appliqués?
Ready to jazz up your patterns?
Trace designs onto fusible web, iron onto fabric scraps, cut out shapes, and fuse to your project.
Then, stitch around edges by hand or machine for a personal, polished touch.
Are there copyright restrictions on teaching with patterns?
Copyright restrictions on teaching with patterns can be tricky.
You can’t distribute patterns without permission, but each student should purchase their own copy.
For youth classes, ask designers for discounts.
Always credit the pattern creator when selling items, and remember to respect copyright restrictions.
Conclusion
Did you know that 62% of sewers make their own patterns? You’re now equipped to join their ranks!
Learning how to make a sewing pattern opens up a world of creative possibilities. It’s not just about following trends; it’s about crafting your unique style.
Remember, practice makes perfect. Don’t be afraid to experiment, make mistakes, and refine your skills.
With time, you’ll be whipping up custom designs that fit like a glove. So grab your tools, trust your instincts, and start creating your fashion legacy today!

