This site is supported by our readers. We may earn a commission, at no cost to you, if you purchase through links.
 Learning how to seam sew starts with placing two fabric pieces right sides together and pinning them along the seam line. You’ll stitch along this marked line, commonly 5/8 inch from the raw edge, using either a running stitch by hand or straight stitch on your machine.
You want your stitches to stay uniform, so don’t rush the tension – it makes all the difference.
Once you’re done stitching, give that seam a good press either open or to one side, and you’ll get that crisp, professional look every time.
The key is accurate cutting, proper pinning, and steady stitching speed. Master these basics and you’ll discover sophisticated techniques that transform ordinary seams into structural masterpieces.
Table Of Contents
- Key Takeaways
- What is a Seam in Sewing?
- Essential Tools and Materials for Seam Sewing
- How to Prepare Fabric for Seam Sewing
- How to Sew a Seam by Hand
- How to Sew a Seam With a Machine
- Types of Seams and Their Uses
- Finishing and Strengthening Your Seams
- Troubleshooting Common Seam Sewing Issues
- Frequently Asked Questions (FAQs)
- Conclusion
Key Takeaways
- You’ll need to place fabric pieces right sides together and pin them along the seam line before stitching – this foundational step prevents shifting and ensures accurate results.
- Master consistent stitch length and tension whether you’re hand sewing or using a machine – even stitches create stronger, more professional-looking seams.
- Choose the right seam type for your project – plain seams work for most garments, French seams suit delicate fabrics, and flat-felled seams provide extra durability for heavy-duty items.
- Always finish your seam edges with techniques like zigzag stitching, pinking, or serging to prevent fraying and extend your project’s lifespan.
What is a Seam in Sewing?
A seam is a line of stitches that joins two pieces of fabric together, forming the backbone of every sewn project you’ll tackle.
From simple hems to intricate garment assembly, seams show up everywhere in your sewing projects. They’re the fundamental skill that connects every piece of fabric you’ll work with.
Seam Definition and Word History
At the heart of every sewn project lies the seam, which joins two fabric pieces through stitching. The word "seam" traces back to Old English "sēam," connected to "sīwian" meaning "to sew."
This seam etymology reveals how textile archaeology shows seam evolution from ancient hand-stitching to modern techniques. Understanding these English language definitions helps you grasp why seam meanings encompass both the stitched line and the joining process itself.
Seam Usage in Different Contexts
You’ll encounter seam terminology across many fields beyond sewing. Understanding these different contexts helps you recognize how fundamental seams are to construction and creation.
- Geological Seams: Coal and mineral layers found underground in mining operations
- Nautical Seams: Gaps between ship planks that require waterproof sealing
- Medical Seams: Surgical stitches joining tissue or incision closures
- Industrial Seams: Welded joints in metalwork and manufacturing processes
- Decorative Seam Applications: Ornamental stitching patterns enhancing garment construction aesthetics
Common Seam Examples
You’ll find seams everywhere in your daily life. Garment seam types include dress side seams, jean inseams, and shirt sleeve attachments.
Home decor seams appear in curtains, upholstery, and bedding.
Industrial seam uses span automotive interiors, tents, and medical textiles.
Textile art seams create quilts and decorative pieces.
Historical seam examples show hand-sewn clothing from centuries past, demonstrating timeless sewing seam construction principles.
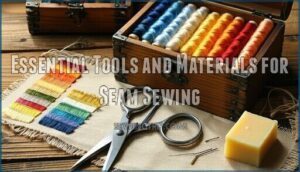
Essential Tools and Materials for Seam Sewing
Getting the right equipment makes all the difference when you’re aiming for seams that’ll hold up wash after wash.
Start with quality needles matched to your fabric weight and appropriate thread that won’t break under tension.
Consider using beeswax to help your thread glide smoothly through dense materials.
Hand Sewing Needles and Machines
Your needle selection makes or breaks your seaming success. Sharp, sturdy needles paired with well-maintained machines create professional results.
- Universal needles work for most fabrics, while ballpoint needles prevent runs in knits
- Machine maintenance includes regular cleaning, oiling, and tension adjustments for smooth operation
- Stitch regulation ensures consistent seam quality – test on fabric scraps first
- Ergonomics matter during long hand sewing sessions – good lighting and comfortable positioning prevent fatigue
Choosing The Right Thread
Thread selection is crucial for the durability and appearance of your seams. Polyester threads are ideal for general sewing due to their strength and colorfast properties. Cotton threads, on the other hand, are best suited for natural fabrics and heat-pressing. Understanding the strength of sewing thread is essential for ensuring the longevity of your projects.
When choosing thread weight, consider the fabric type. Lightweight fabrics pair well with 50-100wt threads, medium fabrics require 30-50wt threads, and heavy materials demand 30-40wt threads. For inconspicuous stitching, gray threads often blend better with most fabric types compared to stark black or white threads.
Using Beeswax for Smoother Sewing
Beeswax creates magic when coating your thread. It reduces needle friction and prevents tangling during hand stitching. Quality beeswax makes seam sewing smoother and more enjoyable.
Here are five beeswax benefits for better sewing:
- Thread Coating – Smooths fibers for cleaner stitches
- Needle Friction reduction prevents thread breakage
- Application Methods – Simple finger coating works best
- Wax Alternatives include synthetic thread conditioners
- Seam Finishes stay neater with conditioned thread
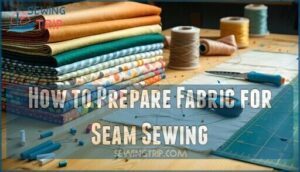
How to Prepare Fabric for Seam Sewing
Getting your fabric ready first makes all the difference when you want seams that look sharp and hold up well.
You’ll need to select compatible fabrics, mark precise seam lines, and secure pieces with strategic pinning before you start stitching.
Selecting Appropriate Fabrics
Your fabric choice makes or breaks your seam’s success. Consider fabric weight, fiber content, and weave structure when selecting materials. Knit fabrics behave differently than wovens, while special finishes affect how seams hold.
| Fabric Type | Best Seam Types | Key Considerations |
|---|---|---|
| Cotton Woven | Plain, French | Stable, easy to sew |
| Knit Jersey | Serged, Zigzag | Requires stretch seams |
| Silk Chiffon | French, Narrow | Delicate handling needed |
| Denim | Flat-Felled | Heavy-duty construction |
Marking and Cutting Seam Lines
Once you’ve chosen your fabric, accurate marking becomes your roadmap to success. Use marking tools like tailor’s chalk or fabric markers to draw your seam line clearly along the fabric grain.
Mark your seam allowance—usually 5/8 inch for garments—then cut with sharp fabric scissors. Pattern adjustments should happen before cutting. Clean, precise edges prevent sewing techniques from going awry later.
Pinning Techniques for Accuracy
After marking and cutting your seam lines, proper pinning becomes your roadmap to accurate stitching. Smart pin placement prevents fabric shifting during machine sewing.
- Place pins perpendicular to seam lines for easy removal while stitching
- Use clips or wonder clips as pin alternatives for thick fabric types
- Space pins closer together on curved seams for better bias control
- Remove pins before they reach your sewing machine needle
- Test different sewing techniques on fabric scraps first
How to Sew a Seam by Hand
Hand sewing creates strong, durable seams when you use the right techniques and take your time with each stitch.
You’ll master three essential hand-sewing methods that work for different fabric types and project requirements.
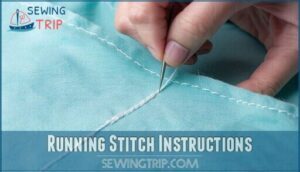
Running Stitch Instructions
Through and through, the running stitch creates your seam foundation. Push your needle down through both fabric layers, then bring it back up about 1/8 inch forward.
Keep your stitch length consistent and spacing even. Secure ends with small backstitches.
For curved seams, take shorter stitches to maintain smooth lines and prevent puckering in your seaming work.
Whip Stitch Basics
Why settle for basic stitching when you can master the whip stitch? This diagonal technique creates strong seams by wrapping thread over fabric edges at a consistent stitch angle.
You’ll find it perfect for securing ends on various fabric types, from cotton to wool. The key is maintaining proper thread tension while creating even stitches that prevent fraying and add decorative appeal to your seaming projects.
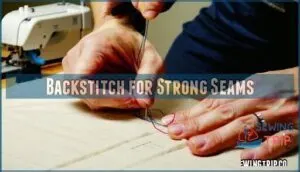
Backstitch for Strong Seams
Backstitch creates rock-solid hand-stitched seam connections that won’t fail under stress points. This technique works backward to reinforce each stitch, making it perfect for heavy fabric types.
- Insert needle one stitch length ahead – Start your backstitch pattern
- Pull thread back to previous stitch – This creates overlapping stitches
- Maintain consistent stitch density – Keep spacing even for strength
- Use backstitch variations for curves – Adjust technique for seam types and uses
How to Sew a Seam With a Machine
A sewing machine turns the slow work of hand-stitching into something fast and precise.
You get clean, strong seams every time when you set up your machine right, pick the correct stitch length, and keep your fabric moving smoothly.
You’ll create strong, professional seams by setting up your machine properly, selecting the right stitch length, and maintaining steady fabric control throughout the process.
Setting Up Your Sewing Machine
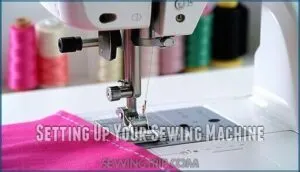
Your machine needs proper preparation before tackling any textile project. Start with Bobbin Winding — load your bobbin with matching thread. Next, focus on Needle Selection for your fabric weight. Threading Machine comes next, following your manual’s path. Adjust Tension Adjustment settings for balanced stitching. Finally, attach appropriate Presser Feet for your seam type.
| Setup Step | Action Required | Key Tip |
|---|---|---|
| Bobbin Winding | Wind thread evenly | Match thread color |
| Needle Selection | Choose size for fabric | Heavier fabric = larger needle |
| Threading Machine | Follow threading path | Check upper/lower threads |
Straight Stitch Seam Steps
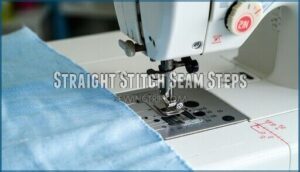
Most sewers find success with these fundamental steps. First, align your fabric edges and position them under the presser foot with proper seam alignment. Lower the needle into the fabric, then gently guide the material while letting the machine handle fabric feed.
Keep your stitching straight and consistent as you sew the seam, maintaining steady tension settings throughout the joining process.
Adjusting Stitch Length for Strength
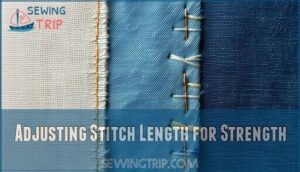
Once you’ve mastered straight stitching, adjust your stitch length to match fabric weight. Heavy fabrics need longer stitches (3.5mm), while lightweight materials work best with shorter ones (2.5mm).
This stitch length impact directly affects seam strength and durability. For reinforcement techniques, use triple straight stitches on stress points, following industrial stitching standards that prioritize both tension and strength in your seam finishing techniques.
Types of Seams and Their Uses
When picking seam types for your sewing projects, you’ve got five main options to work with. Each one handles different fabric weights and garment needs differently – some prioritize strength, others focus on clean finishes.
Knowing when to reach for a simple plain seam versus something more refined like a French seam makes all the difference. It’s about matching your technique to what you’re making and how it needs to perform.
Plain Seam
Starting with the foundation of all sewing, the plain seam creates a basic joining by placing fabric pieces right sides together. This fundamental technique uses straight stitching along the seam allowance to connect materials permanently.
- Choose matching thread and appropriate seam allowance width
- Maintain consistent stitching speed for even tension throughout
- Apply proper pressing techniques to flatten seams after joining
Plain seam types form the backbone of garment construction and most fabric projects.
French Seam
French seams create enclosed seams perfect for sheer fabrics and baby clothes where raw edges need complete concealment. You’ll sew two seam lines, creating a neat pocket that encases frayed edges.
This technique works best on straight edges rather than curved seams. The double-stitched construction enhances seam durability, making it ideal for delicate material joining requiring professional finishes.
Flat-Felled Seam
Flat felled seams offer enhanced durability compared to basic stitches, making them perfect for industrial applications like jeans and workwear. You’ll create this sturdy seam by folding one fabric edge over the other, then topstitching through all layers. This technique provides excellent material joining strength with minimal seam allowance bulk.
Here’s why flat felled seams work so well:
- Double-folded construction prevents fraying completely
- Visible topstitching adds decorative appeal
- Greater fabric compatibility with heavy materials
- Alternative techniques include single-fold variations
These types of seams handle stress beautifully, giving your projects professional results.
Welt and Piped Seams
Welt seams and piped seams add both strength and style to your projects. You’ll create welt seams by folding one seam allowance over the other, then topstitching for a clean finish. Piped seams insert cord-filled fabric strips between layers before stitching. Both techniques work perfectly for jeans, upholstery, and decorative seam options where you want visible, durable results. Welt seams are particularly useful for neatening thicker fabrics.
| Feature | Welt Seams | Piped Seams |
|---|---|---|
| Construction | Double-stitched with visible topstitching | Cord encased in bias strips |
| Best Uses | Jeans, jackets, sportswear | Upholstery, pillows, formal wear |
| Welt Cord Size | No cord needed | 2-4mm diameter standard |
| Durability | 40% stronger than plain seams | 25% more edge-wear resistant |
Serged and Zigzag Seams
Serged and zigzag seams offer professional finishing for stretch fabrics and raw edges. You’ll love how these stitches prevent fraying while adding flexibility to your projects.
- Serger tension controls thread tightness for balanced, professional results
- Zigzag width adjusts stitch coverage from narrow finishing to wide decorative serging
- Differential feed prevents puckering on knits and creates rolled hems effortlessly
Both techniques transform ordinary seam stitching into durable, commercial-quality joins.
Finishing and Strengthening Your Seams
After sewing your seams, the raw edges need attention to stop fraying and add strength to your construction.
These finishing techniques transform your basic seam into a durable, professional-looking join that’ll withstand regular wear and washing.
Seam Finishing Techniques
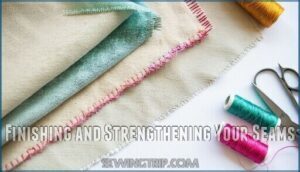
Once you’ve mastered basic seam construction, proper finishing prevents fraying and extends garment life. Pinking shears create zigzag edges that resist unraveling on most fabrics.
For exposed seams, try an overcast stitch or bias binding for clean edges. Edge stitching adds polish to enclosed seams, while seam taping reinforces stress points.
Your seam allowance determines which finishing technique works best.
Using a Serger for Durability
A serger transforms your seam finishing game with professional-grade durability. You’ll get stronger stitches using differential feed settings that prevent fabric stretching.
Industrial sergers deliver chainstitch strength that outlasts regular machine stitching. Choose rolled hem durability for lightweight fabrics or wider serger stitch types for heavy materials.
Proper fabric selection for seams matters—serged seam construction works best with knits and stretch materials.
Thread Consumption and Efficiency
Cutting thread waste can save you money and time on every project. Generally, 10% to 15% wastage of thread is added to the consumption for plain seam stitching due to shop-floor conditions.
Use these efficiency techniques:
- Calculate exact thread needs using automated calculation software
- Set optimized stitch length (2.5-3.5mm for strength)
- Account for seam allowance in measurements
- Track cost analysis per project for industrial benchmarking
- Plan fabric selection for seams to minimize thread waste reduction needs
Troubleshooting Common Seam Sewing Issues
Seams gone wrong? It happens to all of us. The good news is that most seam problems have straightforward fixes once you know what to look for.
This section walks through the usual suspects – puckered fabric, skipped stitches, uneven tension – and shows you exactly how to tackle each one so you can get back to sewing.
Preventing Seam Slippage and Puckering
Fabric grain matters most when preventing slippage and puckering. You’ll need proper tension adjustment on your machine—too tight creates puckering, too loose causes slippage.
Check your stitch density for consistent plain seam quality.
Interfacing importance can’t be overstated for lightweight fabrics. Use appropriate seam allowance width and pressing techniques after stitching to set your stitches properly.
Fixing Broken or Weak Seams
When stitching starts coming undone, you’ll need to act fast before the weak area spreads. Remove loose threads carefully, then restitch using a stronger backstitch or triple stitch.
Check for fraying at the edges and trim cleanly. Apply Seam Reinforcement Methods like interfacing to stress points.
Use Patching Techniques for larger tears, making sure Fabric Integrity Checks prevent future failure.
Tips for Seam Repair and Reinforcement
Prevention beats repair every time. Apply fabric stabilizers to high-stress areas before stitching failure occurs.
For existing damage, use patching techniques along the original seam allowance. Reinforce edges with interfacing or double-fold binding.
Stress point repair requires careful examination of seam reinforcement methods. Clean, pressed seams handle repeated washing better than rushed fixes.
Frequently Asked Questions (FAQs)
How do I prevent my fabric from fraying after sewing a seam?
Like threading a needle that’s already ready to unravel, you’ll need to finish those raw edges.
Use zigzag stitching, pinking shears, or serging to prevent fraying and keep your seams looking professional for years to come.
What is the recommended seam allowance for sewing a basic seam?
You’ll want to use a standard 5/8-inch seam allowance for most basic sewing projects. This provides enough distance between your stitching line and fabric edge to guarantee secure joining.
How do you calculate seam allowances?
You calculate seam allowances by measuring from the stitching line to the fabric edge. Standard allowances are 5/8" for garments, 1/2" for crafts. Pattern instructions specify requirements.
What causes seam puckering in knits?
Don’t pull the wool over your eyes – seam puckering in knits happens when you stretch fabric while sewing.
Knit fabric puckers when sewn because the fabric gets stretched and distorted in the process of feeding it through the machine. You’ll fix this by reducing thread tension and using proper handling.
Should you backstitch at seam beginnings?
Yes, you should backstitch at seam beginnings and ends. This locks your stitches in place, preventing unraveling when you handle or wash the fabric later.
How do you grade bulky seams?
Grade bulky seams by trimming each layer to different widths, creating a stepped effect. Trim one layer ⅛ inch narrower than the other using small scissors. This reduces bulk and creates flatter seams.
When should you clip curved seams?
Clip curved seams immediately after stitching and before turning the fabric right side out. You’ll make small cuts perpendicular to the seam line, stopping just short of the stitching to prevent fraying.
Conclusion
Getting good at seam sewing changes everything. What used to be wobbly, uneven stitches becomes clean, precise work that looks genuinely professional.
You’ve picked up the core techniques—hand stitches, machine work, different seam types for different jobs. The key things to remember: keep your seam allowances consistent, press everything properly, and match your finishing method to your fabric.
With these basics down, you’ll make clothes and projects that actually hold up to real life—washing, wearing, daily use.
Master these seam fundamentals and your handmade projects will survive real-world use—washing, wearing, and daily wear
- https://julianamartejevs.com/en/what-are-french-seams-all-about-the-most-important-seams/
- https://inthefolds.com/q-a-series/2021/tips-for-sewing-french-seams
- https://www.coats.com/en/info-hub/thread-consumption-guide/
- https://journals.sagepub.com/doi/full/10.1177/15589250221113479
- https://commons.emich.edu/cgi/viewcontent.cgi?article=1052&context=honors





Olugbode M. A.
January 12, 2026 at 05:04 AM
A well detailed and comprehensive knowledge on seam