This site is supported by our readers. We may earn a commission, at no cost to you, if you purchase through links.
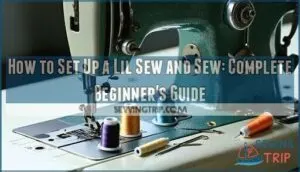
First, unpack everything and check your starter kit – you’ll find bobbins, thread, and presser feet.
Wind your bobbin using the built-in winder, then pop it into the bobbin case.
Thread your machine following the numbered guides on top.
Don’t worry if it feels like solving a puzzle at first – everyone fumbles through this step.
Select your stitch, lower the presser foot, and you’re ready to create magic.
The real secret isn’t just getting started, though – it’s mastering those little tricks that transform frustration into pure sewing joy.
This process requires patience and practice to overcome initial frustration.
Table Of Contents
Key Takeaways
- You’ll need to wind your bobbin first – Place the thread on the spool pin, guide it through the tension disc, and wind it at a steady speed to avoid tangles before dropping it into the bobbin case with the thread unwinding counterclockwise.
- Threading your machine properly prevents most problems – Follow the numbered guides on top, hold both threads while turning the handwheel to catch the bobbin thread, and test your threading on scrap fabric before starting your actual project.
- Quality thread and regular maintenance keep you sewing smoothly – Use good thread that won’t snap mid-project, clean lint after each use, oil moving parts monthly, and check the needle condition regularly to prevent jams and skipped stitches.
- Start with simple projects to build confidence – Begin with easy items, such as scrunchies, drawstring bags, or placemats, using lightweight cotton fabric and basic straight stitches before tackling more complex sewing challenges.
Unboxing Your Machine
Opening your Lil Sew and Sew is like unwrapping a present that’ll change your crafting game forever.
Your first stitch is the moment everything clicks—pure sewing magic waiting to happen!
Start with workspace preparation—clear a sturdy table near good lighting and an outlet for power connection.
Carefully lift your sewing machine from the box, then tackle component identification. You’ll find the machine, foot pedal, power cord, needles, bobbins, and that all-important manual.
Give everything an initial inspection for shipping damage.
Before diving into sewing machine setup, spend time with the manual overview—it’s your roadmap to success. Locate key parts like the handwheel, tension dial, and stitch selector. These lil sew instructions will save you headaches later.
Connect the foot pedal and plug in your machine. Now you’re ready for the real sewing machine setup instructions adventure ahead.
Winding The Bobbin
Now that you’ve got your Lil Sew and Sew out of the box, it’s time to tackle bobbin winding – think of it as filling up your sewing machine’s gas tank! This step in your sewing machine setup might seem tricky at first, but it’s actually pretty straightforward once you get the hang of it.
Start by placing your thread spool on the spool pin. Here’s your bobbin winding checklist:
- Check spindle size compatibility – your bobbin should fit snugly on the winder
- Guide the thread through the tension disc from right to left for proper bobbin tension control
- Wind at a steady, moderate pace to avoid winding speed effects that create uneven thread
- Keep light finger pressure on the thread to prevent avoiding thread tangles
- Stop when the bobbin’s nearly full – overfilling causes jamming
Following these lil sew instructions for sewing machine threading will set you up for smooth stitching ahead!
Inserting The Bobbin
You’ve wound that bobbin like a pro, so now it’s time to get it settled into its new home. The Lil Sew and Sew uses a drop-in bobbin system, which means you’ll place it directly into the bobbin case without any fussy threading gymnastics.
Open the bobbin cover plate and you’ll see the bobbin case waiting for you. Drop your wound bobbin in with the thread unwinding counterclockwise – this bobbin thread direction is essential for smooth stitching.
Pull the thread through the tension slot, giving it a gentle tug to check the bobbin tension adjustment feels right. The thread should pull with slight resistance, not too tight or loose.
Snap that cover plate back on and you’re golden! Correct bobbin placement prevents those annoying bobbin issues that can turn your sewing session into a wrestling match.
Starting to Sew
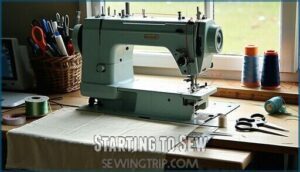
Ready to make your first stitches? Here’s where the magic happens! Hold both threads while turning the handwheel to catch the bobbin thread. Now you’re set for some serious stitch practice.
Before diving into simple projects, test your threading basics on scrap fabric. This beginner sewing step saves you from heartache later.
Here’s your starting checklist:
- Start with lightweight cotton for easier fabric selection
- Use basic needle types (size 11 works great)
- Keep your foot pedal pressure light and steady
- Guide fabric gently—don’t force it through
This sewing machine setup moment feels like learning to ride a bike. Take it slow, let the machine do the heavy lifting, and remember: every expert was once a beginner. Your sewing machine guide journey starts with this first stitch, where you begin to make your first serious stitch practice and understand the importance of a good sewing machine setup.
Choosing a Stitch
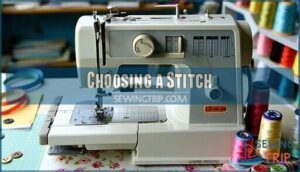
Now that you’ve got your machine threaded and ready, it’s time to master stitch selection – the secret sauce that’ll make your Lil Sew and Sew shine like a pro.
Your mini machine’s stitch selector dial is like having a toolbox at your fingertips, each stitch type designed for specific project needs.
Think of straight stitches as your reliable workhorses – perfect for basic seams and construction.
Zigzag stitches are your fabric-saving heroes, preventing fraying and adding stretch.
Decorative stitches? They’re your creative playground for adding personality to projects.
Here’s how to nail stitch functionality every time:
- Match fabric type to stitch patterns – lightweight fabrics love shorter stitch length settings, while heavy materials need longer ones
- Test stitch settings on scraps first – this saves you from heartbreak on your actual project
- Adjust stitch types based on your fabric’s personality – knits prefer ballpoint needles and zigzag stitches
Your Lil Sew and Sew becomes unstoppable when you understand these fundamentals.
Sewing Tips
Now that you’ve got your Lil Sew and Sew humming along, let’s talk about the smart little tricks that’ll save you from those "why won’t this work?" moments we all face.
You’ll want to grab quality thread and learn a few jam-busting secrets that’ll keep your machine happy and your projects looking sharp.
Using Quality Thread
Quality thread makes all the difference in your Lil Sew and Sew adventures! Think of cheap thread as that friend who bails on you – it’ll snap mid-project.
Quality thread is like a reliable best friend – it won’t let you down when you need it most!
Thread Weight Matters for different fabrics, while Thread Fiber Types affect your Stitch Quality Impact. Good thread tension prevents those frustrating Thread Breaks that’ll have you muttering under your breath.
Many sewists find success when using all-purpose thread options for a variety of projects.
| Thread Type | Best For |
|---|---|
| Polyester All-Purpose | Cotton, blends, everyday projects |
| Cotton Thread | Natural fabrics, quilting |
| Heavy-Duty Thread | Denim, canvas, thick materials |
Preventing Jams
While nobody likes dealing with thread jamming, you can avoid most headaches by checking your thread quality and needle condition regularly.
Keep your bobbins tension balanced and remove lint after each project—it’s like brushing your teeth for your machine.
Oiling machine parts prevents skipped stitches, and proper sewing machine maintenance beats constant sewing machine troubleshooting every time.
Incorrect tension can lead to frequent sewing jams.
Troubleshooting Issues
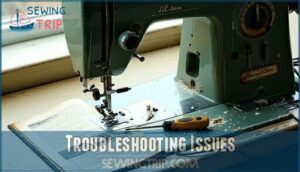
Even the best sewers hit snags sometimes, and your Lil Sew and Sew might throw you a curveball or two. Don’t panic when troubleshooting becomes necessary – these hiccups happen to everyone.
Start with the basics when sewing machine troubleshooting gets tricky. Check your threading path first, then examine your needle for damage. Thread tension problems often cause the most headaches, so adjust those dials gradually.
Here’s your troubleshooting toolkit:
- Skipped Stitches: Replace your dull needle and rethread completely
- Thread Bunching: Clean lint from the bobbin area and check tension settings
- Motor Issues: Let your machine cool down if it’s been running hot
Needle Problems and tension troubles usually have simple fixes. Take a deep breath, work methodically, and you’ll be back to sewing smoothly. Regular maintenance helps prevent dust and debris buildup.
Projects for Beginners
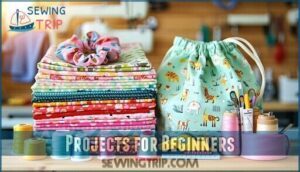
Now that you’ve tackled those pesky problems, let’s get your hands dirty with some fun sewing for beginners! Your Lil Sew and Sew is ready to create magic, so let’s start with simple sewing projects that’ll build your confidence without breaking your brain.
Think of learning to sew like learning to ride a bike – you wouldn’t start with tricks, right? Begin with easy sewing projects using cotton fabric and basic straight stitches. Master sewing machine basics through beginner projects that teach fundamental skills while creating useful items.
Many beginners start with forgiving fabric choices like cotton or fleece.
Start small, dream big! These beginner projects and sewing projects kids can tackle will have you stitching like a pro:
- Hair scrunchies – Perfect fabric selection guide practice with fun prints
- Drawstring bags – Great for easy pattern reading and straight seams
- Simple placemats – Build confidence with basic alterations and hemming
- T-shirt tote bags – Learn upcycling clothing while creating something practical
Is This Machine for You?
After mastering those beginner projects, you’re probably wondering if this mini sewing machine fits your long-term needs. Let’s break it down honestly.
| Perfect For | Not Ideal For |
|---|---|
| Skill Level: Complete beginners learning basics | Heavy-duty alterations or thick fabrics |
| Project Size: Small repairs, simple crafts, kids’ clothes | Large quilts or professional garments |
| Space Constraints: Apartments, dorms, travel sewing | Dedicated sewing rooms with space for full-size machines |
This Budget Friendly portable sewing machine shines for easy sewing projects and occasional Sewing Frequency. If you’re testing the waters or need something compact, the Lil Sew and Sew delivers.
However, you can purchase Lil Sew Sew products online. However, ambitious sewers outgrow it quickly.
Frequently Asked Questions (FAQs)
How to make your Mini sewing machine sing?
You’ve discovered something magical!
Keep your mini machine humming by threading it properly, cleaning lint regularly, and using quality thread.
Oil moving parts lightly, maintain proper tension, and practice consistent stitching rhythms.
How do you thread a sewing machine?
You’ll start by placing thread on the spool pin, then guide it through the tension discs and thread guides.
Next, thread the needle from front to back, leaving some slack underneath.
How to sew a quilt with a sewing machine?
Cut fabric squares, arrange your quilt pattern, and pin layers together.
Use straight stitches to sew quarter-inch seams, connecting pieces row by row.
Add batting and backing, then quilt with decorative stitching patterns.
How to put feet on a sewing machine?
Like snapping puzzle pieces together, you’ll lift the presser foot lever, align the new foot’s shank with the holder.
Then lower it until you hear a satisfying click—it’s easier than threading a needle!
What should I know before buying a sewing machine?
Consider your budget, space constraints, and sewing goals first.
You’ll need features like adjustable stitch length, reliable tension control, and included accessories.
Don’t forget about ongoing costs like needles, thread, and maintenance supplies.
How do you use a stitch selector on a sewing machine?
Find your stitch selector dial near the machine’s front.
Turn it to your desired setting – straight stitch for seams, zigzag for edges.
The dial clicks into position, showing you’re locked in and ready to sew perfectly.
How Do I Change the Needle on the Lil Sew and Sew?
Changing your needle is like swapping out a dull pencil—it makes all the difference!
First, turn off your machine and raise the needle.
Loosen the needle clamp screw, remove the old needle, and insert the new one with the flat side facing back, ensuring a proper fit to make the process efficient and effective.
What Accessories Are Included With the Lil Sew and Sew?
Your Lil Sew and Sew comes packed with essentials: power cord, foot pedal, bobbins, needles, and a handy threader.
You’ll also find presser feet and thread spools ready to tackle your first projects right out of the box, with essentials like these making it easy to get started.
How Do I Clean and Maintain the Lil Sew and Sew?
Like tending a trusty old gramophone, you’ll keep your machine humming beautifully.
After each project, brush away lint and dust from the needle area.
Oil moving parts monthly following your manual’s guidance for smooth, reliable stitching.
How to set up a sewing machine step by step?
Unpack your machine and gather accessories in a well-lit workspace.
Connect the foot pedal, insert the needle, wind the bobbin, thread both upper and lower paths.
Then test-stitch on scrap fabric, ensuring that all components are working correctly, with the foot pedal functioning as expected.
Conclusion
Ready to transform that intimidating machine into your creative companion?
Learning how to set up a Lil Sew and Sew might feel overwhelming at first, but you’ve got this!
Remember, every expert seamstress started exactly where you’re now.
Take your time with each step, don’t rush the threading process, and celebrate those first wobbly stitches.
Soon you’ll be confidently tackling projects that seemed impossible just days ago, and your sewing adventure starts with that very first stitch! You’ll be making progress and having fun, and that’s the key to a successful sewing journey, with every expert seamstress having started in the same place.
- https://synvestcapital.com/how-to-write-a-sewing-business-plan/
- https://www.scribd.com/document/630370666/How-to-Write-a-Sewing-Business-Plan
- https://bizee.com/articles/how-to-start-a-clothing-business-from-home
- https://www.sewendipitous.com/Starting-Your-Own-Quilting-Business_b_85.html
- https://likesew.com/blog/complete-fabric-store-business-plan

