This site is supported by our readers. We may earn a commission, at no cost to you, if you purchase through links.
 Setting up your sewing station doesn’t have to feel like rocket science.
Start by connecting your machine’s power cord and foot pedal.
Thread a fresh needle and wind your bobbin with matching thread.
Find a well-lit space with enough room to spread fabric comfortably.
Clean surfaces prevent snags and frustration.
Install the bobbin, thread your machine following the numbered guides, and select straight stitch.
Test on scrap fabric first.
Organization is your best friend here—keep scissors, seam ripper, and pins within arm’s reach.
Getting how to set up sewing right from the start saves hours of headaches later.
The secret lies in understanding your machine’s personality quirks.
This approach will help you avoid frustration and ensure a smooth sewing experience, making organization a key factor in your success.
Table Of Contents
Key Takeaways
- You’ll set up your machine faster by connecting the power cord and foot pedal first, then threading a fresh needle and winding your bobbin with matching thread before testing on scrap fabric.
- You’ll create a functional workspace by finding a well-lit area with enough room to spread fabric comfortably, keeping surfaces clean to prevent snags and frustration.
- You’ll stay organized and work more efficiently by keeping essential tools like scissors, seam ripper, and pins within arm’s reach of your sewing machine.
- You don’t need expensive equipment to start—focus on quality basics and build your setup gradually as your skills and budget grow.
Setting Up Your Sewing Machine
Setting up your sewing machine doesn’t have to feel like solving a puzzle. Start with machine assembly by placing your machine on a stable surface and plugging it in.
Your sewing machine setup becomes effortless when you take it one simple step at a time.
Follow your sewing machine setup guide to identify key components. Begin needle insertion by selecting the correct size for your fabric weight. Next, tackle bobbin winding by following the directional arrows on your machine.
Thread the upper mechanism according to your sewing machine setup steps, ensuring proper thread tension for smooth stitching. Test your speed control settings on scrap fabric before starting any project.
This sewing machine setup for beginners approach builds confidence. Remember, sewing machine threading becomes second nature with practice.
Sewing Machine Basics
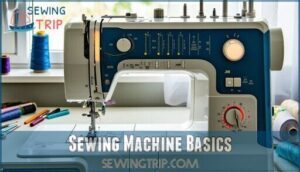
You’ll need to master five essential controls before you can start your first sewing project. These basic functions control your machine’s power, stitching, and thread handling for successful sewing results.
Power Switch
Finding your sewing machine’s power switch marks the first step toward creative freedom.
Locate the main switch, usually positioned on the right side or front panel.
Before flipping it on, check your power connection and make certain the power cord sits securely in the outlet.
The illuminated display confirms proper voltage control and circuit breaker safety during your sewing machine setup steps.
Understanding the machine parts basics is essential for effective troubleshooting and ideal use of your sewing machine.
Connect Foot Pedal to The Machine
Foot Pedal Setup transforms your sewing experience from manual hand-cranking to smooth, controlled stitching. Locate the pedal connection port on your machine’s right side or back panel. Your sewing machine manual guide provides specific port locations.
Follow these Pedal Connection Tips:
- Insert the power cord firmly into the designated pedal port
- Confirm the connection clicks securely into place
- Position your foot pedal on a stable, non-slip surface
- Test Pedal Speed Control with gentle pressure variations
- Practice Cord Management by routing cables away from your workspace
Understanding the carbon disk mechanism is vital for superior foot pedal performance. Machine Calibration occurs automatically once connected properly.
New Needle and New Thread
Fresh supplies make all the difference in your sewing journey.
Install your new needle by loosening the needle clamp and sliding it up until it stops. Choose thread that matches your needle size—heavier fabrics need thicker thread.
Wind your bobbin evenly for smooth stitching. Quality thread types like polyester or cotton prevent breakage and guarantee consistent stitch quality throughout your projects.
Understanding proper needle selection techniques is vital for achieving the best results in your sewing projects.
Finding The Straight Stitch
Most machines feature a stitch selection dial or buttons displaying various stitch types.
Look for the straight line symbol – it’s usually marked as "1" or appears as a simple dash.
Turn your dial to this position or press the corresponding button. Your stitch length and stitch width should automatically adjust to default settings, creating perfect straight stitches for basic sewing projects.
Reverse Button/knob for Backstitching
Your backstitch control secures every seam professionally.
Locate the reverse lever or knob on your machine’s front panel.
Press and hold while stitching to create reverse stitch patterns that lock thread ends.
This backstitch technique prevents unraveling by reinforcing seam beginnings and endings.
Master this knob adjustment during your sewing machine setup for reliable stitch settings and professional results.
Creating Your Sewing Space
You’ll need a dedicated workspace that meets three key requirements for successful sewing projects.
Your sewing area must have adequate size for your machine and materials, proper lighting to see your work clearly, and a clean surface that stays free from dust and debris.
The workspace requirements include having adequate size, which is crucial for comfortable working conditions.
Size
Spacious sewing areas transform your creative journey. You’ll need three distinct zones: a sewing table for your machine, cutting surface for fabric dimensions, and ironing station.
Consider your machine size when planning – larger quilting machines require more room than compact models. Your sewing workspace should accommodate comfortable movement between stations.
Effective storage solutions like clear bin systems can help maintain a clutter-free environment.
Essential space requirements for your sewing studio:
- Dedicated sewing area with 120+ square feet for ideal productivity
- Cutting table measuring at least 36×60 inches for large fabric pieces
- Storage zones for thread length organization and bobbin capacity supplies
- Clear pathways between workstations to prevent workflow interruptions
Light
Good lighting transforms your sewing machine setup from frustrating to fantastic.
Natural light from windows provides the best color accuracy for matching threads and fabrics. Position your sewing machine table near a window when possible.
For evening sessions, proper lamp selection becomes essential.
- Choose LED options with adjustable brightness levels and proper color temperature (5000K-6500K daylight bulbs work best)
Task lighting directly illuminates your needle area, reducing eye strain during detailed work.
Combine overhead fixtures with focused sewing machine lighting for ideal sewing workspace visibility. Multiple light sources eliminate shadows that hide stitching mistakes.
Using the right sewing lamp options can greatly improve your overall sewing experience.
Cleanliness
Clean fabric scraps and thread bits accumulate quickly around your workspace.
Clean workspace, clear mind – tidy up those fabric scraps for smoother sewing sessions ahead.
Regular maintenance keeps your machine running smoothly—use a cleaning brush for lint removal from feed dogs and bobbin areas.
Wipe down surfaces weekly to prevent dust buildup, and machine cleaning and oil application every forty hours maintains perfect thread tension.
A tidy space equals better sewing results, and following a proper sewing machine cleaning routine is essential for extending the life of your sewing machine.
Budget Considerations
Setting up your sewing space doesn’t have to drain your wallet. Smart budget planning helps you create a functional workspace without overspending. Start with cost estimation for your basic needs: a decent sewing machine, cutting table, and storage solutions.
Here’s your financial roadmap:
- Set realistic spending limits – Allocate 60% for your machine, 25% for workspace furniture, and 15% for initial sewing supplies
- Track every expense – Use a simple spreadsheet for expense tracking to avoid budget surprises
- Compare prices relentlessly – Research price comparison across multiple retailers before purchasing sewing equipment
- Start small, grow smart – Begin with essential items in your sewing kit, then expand gradually
Financial management becomes easier when you prioritize needs over wants. A basic sewing machine from $200-500 works perfectly for beginners. Repurpose existing furniture as cutting surfaces. Transform mason jars into thread storage. Your sewing space grows with your skills and budget, not against them. When selecting a machine, consider the cheap sewing machine options to find the best fit for your budget and needs.
Organizing Your Sewing Tools
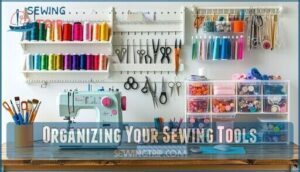
Transform your sewing chaos into an organized haven that’ll make you actually want to create. You’ll work faster and feel less frustrated when every tool has its designated spot.
Start with the essentials. Group similar items together – all your cutting tools in one area, measuring tools in another. Tool boxes work perfectly for small items like buttons and bobbins. Storage bins can hold larger supplies like fabric remnants and interfacing.
Your workspace layout determines everything. Place frequently used items within arm’s reach of your machine. Supply caddies on wheels let you move tools around as needed.
Here’s a simple organization system:
| Basic Setup | Advanced Setup |
|---|---|
| Thread rack, scissor holder | Multiple sewing kits by project type |
| Pin cushion, seam ripper | Dedicated storage bins for each technique |
| Measuring tape, rulers | Rolling supply caddies with compartments |
Your sewing accessories deserve better than a jumbled drawer. Invest in compartmentalized sewing organization solutions that grow with your skills.
Choosing Your Storage Style
You’ll need to decide how to store your sewing machine and supplies when you’re not using them.
Your storage choice depends on your available space and how often you plan to sew.
Packing Up Your Machine and Tools
Proper packing transforms your sewing setup from chaos to organized bliss. You’ll need systematic storage solutions that protect your investment while keeping everything accessible.
Start with your sewing machine storage tips – always unplug cords and lower the presser foot before packing.
- Machine Storage: Wrap your machine in bubble wrap, then place it in the original box for maximum protection.
- Tool Boxes: Use labeled containers to organize scissors, pins, and measuring tools by category.
- Sewing Kits: Pack thread, bobbins, and needles in portable cases for easy transport.
- Travel Cases: Invest in padded carriers that accommodate your machine and essential accessories.
- Accessories Bags: Store presser feet and attachments in dedicated pouches to prevent loss.
This sewing machine organization system guarantees you’re ready for any project.
Preferred Storage Accessories
Once you’ve mastered packing your machine, consider storage accessories that match your sewing style.
Storage bins keep larger supplies visible, while sewing boxes protect delicate notions. Tool cases organize smaller accessories efficiently.
Effective sewing machine storage solutions can greatly improve your overall sewing experience.
| Storage Type | Best For | Key Features |
|---|---|---|
| Storage Bins | Fabric scraps, batting | Clear visibility, stackable |
| Sewing Boxes | Thread, bobbins, needles | Compartmentalized, portable |
| Tool Cases | Scissors, rulers, markers | Secure closure, foam inserts |
| Drawer Organizers | Mixed notions, buttons | Adjustable dividers, shallow depth |
Choose sewing furniture that complements your room’s layout and workflow needs.
Frequently Asked Questions (FAQs)
How to set up a sewing machine?
Ready to tackle your first sewing project?
Start by unpacking your machine, identifying key parts like the needle and presser foot.
Then thread the bobbin and upper thread before testing on scrap fabric.
Is setting up a sewing machine a good idea?
Setting up your sewing machine is absolutely worth it.
You’ll gain creative freedom, save money on alterations, and develop a valuable skill.
Plus, there’s something deeply satisfying about creating something beautiful with your own hands, which can bring a sense of fulfillment.
How do I learn to sew with a sewing machine?
Start simple by selecting straight stitches and practicing seams on fabric scraps.
Master threading your machine first, then gradually tackle curved lines, corners, and basic patterns.
You’ll build confidence through consistent practice.
How do you assemble a sewing machine?
Most sewing machines arrive partially assembled. You’ll attach the presser foot, insert the needle properly, wind the bobbin, thread both upper and lower sections, then test basic stitches.
How do you sew without a sewing machine manual?
Think most machines share common features? You’re right! Study your machine’s buttons, dials, and threading path. Check online for your model’s manual. Practice basic stitches on scrap fabric first.
How do you attach a sewing machine to a base?
Position your machine on the base platform, aligning the mounting holes.
Insert bolts through the designated slots and tighten with the provided wrench.
Check that the machine sits level and secure before connecting power.
How often should I oil my sewing machine?
Oil your sewing machine every 40 hours of operation to keep it running smoothly.
Check your manual for specific oil points, but focus on moving parts like the hook race and needle bar mechanisms.
What causes thread tension problems while sewing?
Like a telegraph operator adjusting wire tension, you’ll face thread problems when your machine’s tension dial is wrong.
Needle’s damaged, or thread quality’s poor.
Check these three culprits first before troubleshooting further.
When should I replace my sewing needle?
Replace your sewing needle after every 8-10 hours of continuous use or when you notice skipped stitches, fabric pulls, or dull popping sounds.
A fresh needle guarantees clean, precise stitching and prevents fabric damage.
How do I clean lint from feed dogs?
Think of lint as dust bunnies hiding in corners—they love feed dogs too.
Turn off your machine, remove the needle plate, and gently brush away debris using a small cleaning brush or tweezers.
Conclusion
Perfect—you might think learning how to set up sewing requires expensive equipment, but you can start with basic supplies.
You’ve now mastered the essentials: machine setup, workspace organization, and tool arrangement. Your sewing station reflects your unique style and needs.
Remember, you don’t need everything at once. Start small, build gradually, and focus on quality basics.
With your foundation solid, you’re ready to tackle any project. Your sewing journey begins with proper setup—everything else follows naturally.
- https://www.seamwork.com/creativity-and-mindset/the-ultimate-guide-to-setting-up-your-sewing-space
- https://stitchobsessed.com/how-to-set-up-a-sewing-machine/
- https://shannonssewandsew.com/beginners-guide-setting-up-sewing-machine/
- https://arrowsewing.com/blog/how-to-set-up-a-sewing-machine/
- https://www.gathered.how/sewing-and-quilting/sewing/sewing-for-beginners-guide

