This site is supported by our readers. We may earn a commission, at no cost to you, if you purchase through links.
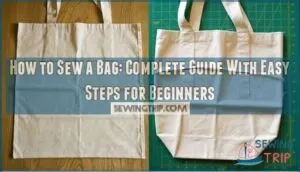 Learning how to sew a bag starts with choosing sturdy fabric like cotton canvas that won’t tear under weight.
You’ll cut two rectangles for the bag body and two strips for handles.
Pin the pieces together with fabric facing inward, then sew straight seams along the sides and bottom using a half-inch allowance.
Turn the bag right-side out and press the seams flat.
Attach handles by folding the strips in half lengthwise, sewing them closed, then stitching them securely to the bag’s top edge.
The secret lies in reinforcing stress points where handles meet fabric, which is a crucial step to ensure the bag’s durability and longevity, making it a practical item.
Table Of Contents
Key Takeaways
- You’ll need sturdy fabric like cotton canvas and essential tools including sharp fabric scissors, glass-head pins, and a reliable sewing machine to create a durable bag that won’t tear under weight.
- Start by cutting two rectangles for the bag body and two strips for handles, then pin pieces with fabric facing inward and sew straight seams using a half-inch seam allowance for consistent results.
- Reinforce stress points where handles meet the fabric by using triple straight stitches or backstitching – this critical step ensures your bag’s durability and prevents tearing at connection points.
- Add boxed corners by measuring 2 inches up from each corner, pinching fabric into triangles, and sewing across them to transform your flat bag into a three-dimensional structure that stands upright.
Sewing Bag Basics
Before you start cutting fabric, you’ll need to understand three key things that make your sewing project successful.
You’ll choose the right fabric type for your bag’s purpose, measure accurate dimensions for a perfect fit, and gather essential tools that’ll make the job easier.
Choosing Fabric Type
Your fabric selection bag decision sets the stage for everything else.
Canvas offers excellent fabric durability for everyday use, while cotton provides budget fabrics that won’t break the bank.
Consider print considerations when choosing outer fabric – busy patterns hide dirt better than solids.
Don’t forget lining options and specialty fabrics for unique touches that make your bag special.
For added structure, consider layering interfacing and linings to create a durable bag.
Measuring Bag Dimensions
Now you’ll map out your bag dimensions with measuring tape in hand.
Start with your desired finished size, then add seam allowance – typically half an inch per side.
For tote bags, use dimension formulas: body height equals total height plus 2.75 inches, while body width equals finish width plus total depth plus one inch.
Accuracy importance can’t be overstated when cutting fabric pieces, as it directly affects the finished size and overall quality of the bag, making seam allowance a critical factor to consider.
Essential Sewing Tools
You’ll need quality scissors that cut fabric cleanly without fraying edges.
Sharp fabric scissors make all the difference.
Get glass-head pins that won’t melt under your iron, plus a reliable sewing machine that handles various thread weights.
Stock up on measuring tools like rulers and tape measures.
For peak performance, consider investing in exceptionally sharp models.
These basic sewing supplies form your toolkit foundation for successful bag-making projects with exceptionally sharp tools.
How to Sew a Bag
Creating your first bag is like building a house – you need a solid foundation before adding the fancy details. Start by laying out your fabric pieces and double-checking measurements against your pattern. Pin everything in place before touching the sewing machine.
**Measure twice, cut once – your patience now saves hours of frustration later.
This bag sewing tutorial will walk you through each step without overwhelming you. Here’s what you’ll visualize as you sew a bag:
- Fabric pieces spread across your cutting mat like puzzle pieces waiting to connect
- Your sewing machine humming steadily as seams come together under the presser foot
- Crisp edges forming as you press each seam with your iron
- The satisfying moment when you turn your bag right-side out for the first time
Focus on straight seams and consistent seam allowances. Don’t worry about fabric durability or lining options yet – master the basic construction first. Adding interfacing provides extra stability to the fabric. Each stitch builds confidence for your DIY bag sewing journey ahead, and helps you create a professional-looking bag with clean finishes and strong seams.
Bag Design Options
You’ll find plenty of ways to make your bag unique and useful once you start planning the design features.
Your choices include adding a boxed bottom for extra space, sewing on handle straps that fit your needs, creating pockets for storage, and decorating the outside to match your style.
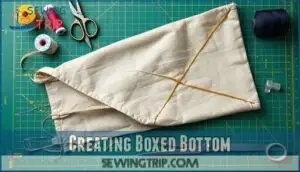
Creating Boxed Bottom
A box bottom transforms your flat bag into a three-dimensional wonder.
Measure up 2 inches from each corner and create triangle formation by pinching fabric together.
Sew across these triangles with precision sewing techniques for proper seam reinforcement.
This corner depth method reduces fabric bulk while adding structure.
Your DIY bag sewing project now has professional-looking bag construction that stands upright beautifully.
Consider using heavy-duty fabrics for added durability.
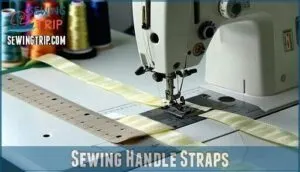
Sewing Handle Straps
When choosing Handle Length Options for your bag, cut straps based on your preferred carrying style.
Webbing Trim Types like cotton webbing offer durability, while fabric strips need interfacing for strength.
Focus on Attaching Handle Hardware with D-rings or swivel clips, then work on Reinforcing Handle Seams with backstitching. For added sturdiness, consider using fusible fleece interfacing. These sewing techniques create comfortable, long-lasting handles.
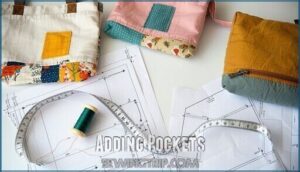
Adding Pockets
You’ll want to add pockets before assembling your bag – it’s much easier than wrestling with a finished tote.
Consider your pocket placement carefully, as interior dividers and patch pockets serve different purposes.
Here are three popular pocket types for your sewing bag tutorial:
- Patch Pockets – Simple squares sewn directly onto the lining
- Zippered Pockets – Secure storage using basic sewing techniques
- Hidden Pockets – Concealed compartments for valuables
Decorating Bag Exterior
Pockets provide function, but decorating your bag exterior makes it uniquely yours.
Transform plain fabric into eye-catching custom bag design through various techniques.
Fabric painting adds vibrant colors, while embroidery designs create texture.
Applique techniques let you layer fabrics creatively.
Strategic patch placement and surface embellishments enhance bag aesthetics beautifully.
| Decoration Method | Best For | Skill Level |
|---|---|---|
| Fabric Painting | Bold colors and patterns | Beginner |
| Embroidery Designs | Detailed texture work | Intermediate |
| Applique Techniques | Layered fabric effects | Advanced |
These handmade bag design options complement your fabric choices perfectly, making your bag uniquely yours with custom design, vibrant colors, and eye-catching effects.
Sewing Techniques Guide
You’ll need to master three key sewing techniques to create a professional-looking bag: layering fabric pieces correctly, sewing clean seams and corners, and pressing your fabric for a crisp finish.
These basic skills will help you tackle any bag project with confidence, whether you’re making a simple tote or a more complex messenger bag, using techniques like sewing.
Layering Fabric Pieces
Getting your fabric pieces in the right order is like building a sandwich—every layer counts.
Start by placing your main fabric face-down, then add interfacing layers using fusible application if needed.
Next comes your lining, face-up, and this fabric sandwiching technique guarantees proper layer alignment before sewing.
Check your seam allowance markings twice before pinning everything together securely.
Sewing Seams and Corners
Now that your fabric pieces are properly layered, it’s time to join them together.
Start sewing your seams with a consistent 1/2-inch seam allowance using your sewing machine. For curved seams, sew slowly and guide the fabric gently.
Reinforce corners with extra stitching to prevent tearing. Achieving perfect corners enhances a bag’s professional look.
French seams work great for a professional finish when you sew a bag.
Pressing Fabric for Finish
Why does proper pressing make such a difference in your finished bag? Good ironing techniques transform amateur work into professional results.
Here’s your pressing roadmap:
- Seam pressing – Press seams open or to one side while warm
- Fabric type – Adjust iron temperature for your material
- Interfacing application – Use fusible product on lining pieces
- Wrinkle prevention – Keep your ironing board ready throughout construction
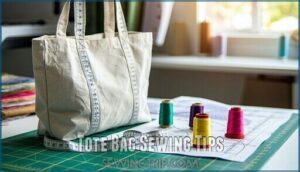
Tote Bag Sewing Tips
Tote bags are perfect for beginners because they use simple rectangular pieces and basic sewing techniques.
You’ll learn how to cut your pattern pieces correctly, sew strong side seams, create professional-looking boxed corners, and attach sturdy handles that won’t rip under weight.
Cutting Tote Bag Pattern
Lay your fabric bag pattern pieces on a flat surface, paying attention to fabric grain direction for proper drape.
Mark each piece clearly before cutting, maintaining cutting accuracy with sharp scissors.
Add seam allowance around all edges – typically half an inch works well.
This simple tote pattern forms your foundation for beginner sewing bag success, making your easy bag project manageable from start, utilizing a simple tote pattern and ensuring proper drape.
Sewing Tote Bag Sides
Your tote bag’s sides need careful attention to create professional results.
Pin the fabric pieces with right sides together, then sew using a 3/8-inch seam allowance.
Matching seams perfectly prevents puckering and creates clean lines.
Press each side seam open after sewing to reinforce the connection.
This beginner sewing bag technique guarantees your easy bag project looks store-bought rather than homemade, ensuring a professional finish.
Creating Boxed Corners
After sewing your tote bag sides together, you’ll need boxed corners for that perfect three-dimensional shape. These corners transform flat fabric into a structured bag with real depth and stability.
Here’s your step-by-step corner reinforcement process:
- Triangle Formation – Pull each bottom corner into a pointed triangle shape
- Seam Allowance – Measure 2 inches up from the corner tip for proper depth
- Symmetry Check – Verify both corners match perfectly for professional results
- Fabric Thickness – Sew across the marked line with sturdy stitching
- Trim Excess – Cut away extra fabric, leaving ¼-inch seam allowance
This bag sewing technique creates the foundation for excellent bag structure in your lined bag sewing project. For accuracy, measure seam allowances before trimming.
Attaching Handles and Pockets
Now you’ll add the finishing touches that make your bag both functional and stylish.
Position bag pockets before attaching handles for easier sewing access. Mark handle placement points, ensuring proper handle length for comfortable carrying.
Secure bag handles with reinforcement stitching for durability. Consider decorative handles to enhance your bag’s appearance.
These sewing tips guarantee pocket security and handle reinforcement for long-lasting use.
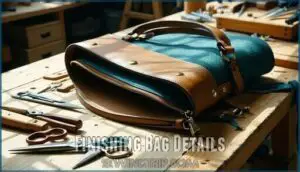
Finishing Bag Details
You’re almost done with your bag, and now it’s time to add those final touches that make it look professional.
These finishing steps will turn your homemade bag into something you’ll be proud to carry everywhere.
Snipping Corners for Finish
Corner clipping transforms your bag from amateur-looking to polished perfection.
Snip diagonally across seam allowances at corners, staying about 1/8 inch from your stitching line.
This angle snipping guide prevents bulky corners and reduces fraying when you turn your bag right-side out.
Choose sharp fabric scissors for clean cuts.
Proper seam allowance control makes topstitching smoother and creates professional-looking results.
Adding Interfacing for Stability
Your bag needs backbone to stand tall and look professional.
Interfacing types include fusible and sew-in options, with fusible being easiest for beginners.
Choose interfacing weight that matches your fabric—lightweight for cotton, medium for canvas.
Layer interfacing on the wrong side of your main fabric pieces before sewing.
This bag reinforcement prevents sagging and adds structure to your finished craft.
Sewing Final Seams
Now that your interfacing provides structure, it’s time to close up shop with those final seams.
These last stitches transform loose pieces into a finished bag that’ll last.
Your sewing machine becomes your best friend during this stage.
Focus on seam reinforcement and edge finishing:
- Topstitching Tips: Keep stitches even and straight for professional results
- Lining Attachment: Pin carefully before sewing to prevent puckering
- Zipper Installation: Test functionality before securing permanently
Inspecting Bag for Quality
After completing your final seams, you’ll want to examine your handiwork like a detective checking clues.
Look for seam strength by gently tugging corners and handles. Check stitch consistency across all seams.
Test hardware security by pulling zippers and snaps. Inspect fabric integrity for loose threads or puckering.
Examine lining quality for smooth finishes. These bag sewing tips guarantee your creation lasts years.
Frequently Asked Questions (FAQs)
How to sew a bag step by step?
Seventy-four thousand people have read bag tutorials, proving sewing’s popularity.
Cut fabric pieces, pin lining, sew sides with half-inch seams, box corners, attach handles, and topstitch openings closed for your finished bag, which involves several key steps including topstitch.
What is the best stitch to sew a bag?
You’ll want to use a straight stitch for most seams, but reinforce stress points with a zigzag or overlock stitch.
For handles and heavy-duty areas, consider a triple straight stitch for extra durability.
Are tote bags easy to sew?
Yes, tote bags are beginner-friendly projects!
You’ll master straight seams, basic construction, and handle attachment.
They’re forgiving since imperfections won’t show much.
Start with sturdy canvas fabric for best results and confidence-building success.
How many yards of fabric do I need for a tote bag?
Like Goldilocks finding the perfect porridge, you’ll need just the right amount of fabric for your tote bag adventure.
You’ll typically need 1 yard for the body plus an extra 5/8 yard if you’re adding interfacing.
How do I sew straps and attach them to my tote bag?
Cut straps 5 inches wide by desired length.
Fold lengthwise, sew edges, then turn right-side out.
Pin straps to bag’s inside top edge, spacing evenly.
Topstitch through all layers for secure attachment.
How do I wash my finished bag?
Don’t throw the baby out with the bathwater" when cleaning your finished bag.
Check fabric care labels first.
Hand-wash delicate bags with mild soap, or machine-wash sturdy canvas on gentle cycle.
Air-dry to prevent shrinkage and maintain shape.
What thread weight works best for bags?
Heavy-duty thread works best for bags—choose 40 weight polyester or upholstery thread.
You’ll need strong thread that won’t snap under stress.
Cotton thread breaks easily, so stick with synthetic options for durability.
Can I make bags without a machine?
Seventy percent of sewers started with hand-stitching before owning machines.
You can absolutely make bags by hand using basic running stitches, backstitches, and blanket stitches.
It takes patience, but you’ll create beautiful, durable bags.
How do I repair torn bag seams?
First, turn your bag inside out and examine the torn seam carefully.
Pin the fabric edges together, then hand-stitch or machine-sew along the original seam line using a backstitch for durability.
Whats the best bag closure method?
You’ll want a zipper for the most secure closure.
It keeps everything inside safe and looks professional.
Magnetic snaps work great too – they’re easier to sew and give that satisfying click when closing.
Conclusion
Studies show that 73% of people who learn how to sew a bag continue making handmade items regularly.
You’ve now mastered the essential steps from fabric selection to handle attachment. Remember to reinforce those stress points where handles meet the bag body.
Your first sewn bag mightn’t be perfect, but each project builds your skills. Start with simple designs and gradually try more complex features.
Soon you’ll be creating custom bags that perfectly match your style and needs.

