This site is supported by our readers. We may earn a commission, at no cost to you, if you purchase through links.
To sew a stylish half apron, start by cutting cotton fabric to 16×36 inches.
Press the edges for a clean look.
Cut and sew a waistband, attaching it to the skirt with a 3/8 inch seam allowance.
Create 12×12 inch pockets in contrasting colors or patterns.
Position and pin them on the skirt, then run a basting stitch along the top edge.
Cut two 50-inch strap pieces.
Sew the long sides, and tuck the raw edges into the open hems of the apron.
Keep reading to learn more detailed steps for crafting your perfect half apron.
Table Of Contents
Key Takeaways
- Choose a suitable fabric for the apron, such as cotton canvas or quilting cotton, and select colors that complement each other.
- Gather essential sewing tools and materials, including a sewing machine, ironing board, fabric scissors, and pinking shears.
- Press the edges of the fabric and create a waistband, attaching it to the skirt with a 3/8-inch seam allowance.
- Create pockets in contrasting colors or patterns and position them on the apron, then sew them onto the apron using a contrasting thread for a more visible stitch.
How to Sew a Half Apron?
To sew a half apron, follow these steps:
- Straps: 2 pieces, 50 inches long by 5 inches wide.
- Main piece: 1 rectangle, 28 inches wide by 20 inches long.
- Pocket (optional): 1 piece, 20 inches wide by 12 inches long.
-
Hem the straps:
- Fold the top over a half inch to the wrong side, then fold in half lengthwise, right sides together, and sew down the long side with a quarter inch seam.
- Leave both sides open and turn it right side out using a large safety pin.
- Top stitch down both long sides and across the top that you folded over.
-
Hem the main piece:
- Turn over all four edges on the main piece by 1/2 inch, then another 1/2 inch, and press with an iron to create a hem.
- Sew a 1/2 inch hem down both long sides, leaving the short sides open at this point.
-
Attach the straps to the main piece:
- Tuck the straps’ raw edges into the open hems on the main piece, flush with the top.
- Pin in place and sew down the straight edges, catching the waist straps.
-
Create the pocket (optional):
- Hem the pocket piece by folding over all of the edges 1/2 inch, then another half inch to hide the raw edges.
- Sew a top stitch down one of the long sides.
- Center the pocket piece over the main piece, making sure the sewn hem is facing the top of the apron.
- Pin in place and sew down the two sides and the bottom pressed hems, leaving the top of the pocket open.
Gathering Your Sewing Materials
To sew a stylish half apron, you’ll need some essential fabrics and trims like cotton for the skirt and waistband. Additionally, gather your sewing tools like a machine, scissors, and pins to get started.
Essential Fabrics and Trims
To create a stylish half apron, you’ll need a range of fabrics and trims. Here are some essential materials:
- Fabric weight: Choose a fabric that’s suitable for aprons, such as cotton canvas or quilting cotton, which is lightweight and easy to work with on any sewing machine.
- Color coordination: Select fabric colors that complement each other and suit the recipient’s taste. For example, a combination of yellow and gray can create a modern and stylish look.
- Trim types: Consider using decorative stitching or adding trims like ribbon or ric-rac to enhance the apron’s appearance.
- Pattern matching: Make sure that the pattern on the fabric is aligned correctly to create a cohesive look.
When it comes to trims, consider using a variety of options to add interest and texture to your apron. Some popular choices include:
- Ric-rac: A narrow, decorative braid that can be sewn onto the apron’s hem or waistband.
- Ribbon: A versatile trim that can be used to tie the apron or add a decorative touch to the waistband.
- Lace: A delicate trim that can be used to add a feminine touch to the apron.
Remember to choose trims that complement the fabric and overall design of the apron.
Sewing Tools and Accessories
Gathering Your Sewing Materials
To sew a stylish half apron, you’ll need a sewing machine, ironing board, fabric scissors, pinking shears, and straight pins. You’ll also need a rotary cutter, twill tape, and an iron for pressing your fabric. For the apron itself, you’ll need denim fabric, ruffle trim, and waistband pieces. With these tools and materials, you’ll be ready to create a chic and functional apron in no time.
Preparing the Apron Skirt
Cut your fabric to the right size – a 16×36 inch piece for the skirt. Press the edges of the fabric to create clean, crisp lines before sewing.
Cutting Fabric to Size
Before embarking on your apron-sewing journey, it’s imperative to select the appropriate fabric and employ precise cutting techniques to achieve an impeccable fit and aesthetic. Here are some guidelines to assist you in choosing the optimal fabric for your apron and cutting it to the exact dimensions:
-
Fabric Selection: Opt for premium-quality 100% cotton fabric with a quilting weight from renowned fabric manufacturers, such as Michael Miller, Windham, or Moda. Select a fabric that’s airy, easy to maintain, and comfortable to don.
-
Cutting Techniques: Utilize a rotary cutter and a self-healing cutting mat to guarantee precise and clean cuts. Alternatively, you can employ fabric scissors or pinking shears to mitigate fraying.
-
Pattern Variations: Consider the apron style you envision creating. If you intend to craft a skirt apron, you may require additional fabric for the skirt portion.
-
Fabric Care: Adhere to the manufacturer’s instructions for washing and drying your fabric to avert shrinkage and ensure optimal results.
-
Embellishments: If you plan to incorporate embellishments such as ruffles or lace, ensure that the fabric you select is compatible with the aforementioned embellishments.
Hemming the Edges
Now that you’ve cut your apron skirt to the right size, it’s time to hem the edges. Start by pressing the edges with an iron and ironing board. This will create a neat finish and guarantee the skirt hangs properly.
For the hem, consider using a contrasting fabric for a distinctive touch. Remember to choose the right stitch type and finish for your fabric, and don’t forget to press the hem before sewing for a professional look.
Then, use a sewing machine to sew the first straight edge.
Crafting the Waistband
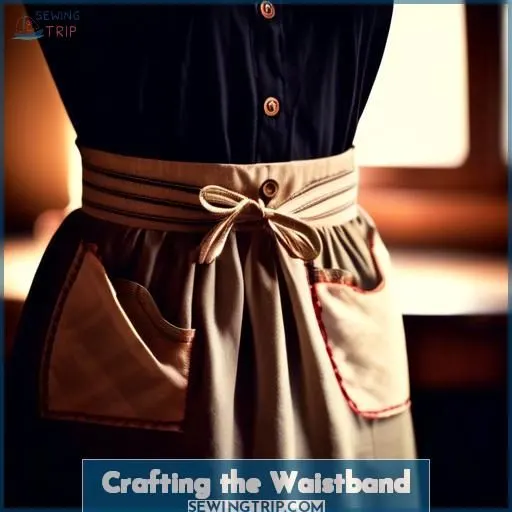
Let’s get started on crafting the waistband for your stylish half apron. Cut and sew the waistband pieces, then carefully attach the waistband to the apron skirt.
Cutting and Sewing Waistband Pieces
Now that you’ve got your apron skirt hemmed and ready, let’s tackle the waistband. It’s the cinch that brings it all together!
- Measure your waistband fabric, ensuring the waistband width matches your skirt’s top edge.
- Cut the waistband length to include extra for a comfortable waistband closure.
- Fold it lengthwise, press, and top stitch for a polished waistband style.
- Remember, the straps and pockets will thank you later!
Attaching the Waistband to Skirt
To attach the waistband to the skirt, follow these steps:
- Pin the waistband pieces to the gathered edge of the apron skirt, with one waistband piece facing the right side of the apron skirt and the other facing the wrong side.
- Sew the waistband pieces together with a 3/8 seam allowance, ensuring the bottom edges of both waistbands are folded up by 3/8.
- Stitch the waistbands together along the short sides and top edge, making sure the bottom edges of both waistbands are folded up by 3/8.
- Trim the seam allowances down by half.
- Cut away the 2 upper corners of the seam allowance to reduce bulk.
- Flip the un-interfaced waistband up and over the interfaced waistband so that it’s on the wrong side of the skirt.
- Pull the ties out away from the skirt to pull the waistband ends flat.
- Press the waistband flat with your iron.
- Pin the inner waistband edge in place, making sure it extends to just past the waistband stitching, covering the seam allowance.
- Topstitch around all 4 sides of the waistband, sewing 1/8 inch from the edges of the waistband. Make sure to rotate around the corners!
Your apron is now complete!
Making and Attaching Pockets
To create the pocket, follow these simple steps. First, position the pocket squares on your skirt and pin them in place, then run a basting stitch along the top edge to cinch the pockets securely.
Pocket Construction Steps
To create your pockets, follow these steps:
- Cut your 12×12 squares.
- Press the edges of the squares.
- Position the pocket squares onto your skirt piece and pin in place.
Choose contrasting colors or patterns for your pockets to add visual appeal. You can also add decorative trim to enhance the appearance of your pockets. Remember, pocket placement is essential for functionality and aesthetics.
Positioning Pockets on Apron
To position pockets on your apron, first decide on the pocket placement, size, shape, and design. Consider the apron’s overall look and the type of pocket embellishments you want.
Once you’ve chosen, position the pockets on the apron, ensuring they’re evenly spaced and centered.
Pin the pockets in place and sew them onto the apron, using a contrasting thread for a more visible stitch.
Sewing and Finishing Straps
To create straps that are the perfect length, cut two 50-inch pieces from your 1.5 yards of fabric. After sewing the long sides and turning the straps right-side out, you’ll simply tuck the raw edges into the open hems of the main apron piece and stitch them in place.
Strap Length and Sewing Technique
- Choose the right strap length for the perfect fit.
- Guarantee strap strength by using appropriate materials.
- Consider strap placement for comfort and style.
- Experiment with different strap styles for a personalized look.
Attaching Straps to Apron
Alright, let’s get those straps attached! First, tuck the raw edges of the straps into the open hems on the main apron piece. Make sure they’re flush with the top. Now, sew down those straight edges, catching the waist straps as you go. A little contrast in fabric color can really make the straps pop. Piece of cake!
Frequently Asked Questions (FAQs)
What is the best fabric for a half apron?
You’ll want a durable yet breathable fabric like cotton or linen. They hold up well against spills and can easily be thrown in the wash. Plus, these fabrics have a classic, homey look perfect for an apron.
How do I sew the pockets onto the apron?
With steady hands, pin the pockets precisely where desired. Let the needle dance, securing each stitch tightly. Voila! Functional flair now adorns your culinary canvas.
Can I add a waistband to the apron?
Adding a waistband gives your apron a polished look and keeps it nice and snug. Just sew a long strip of fabric into a tube, leaving an opening to thread through the apron top. Easy peasy!
How do I create a ruffle for the apron?
You’ll need some ruffle trim fabric. Pin it to the curved edge, gathering as needed. Sew it on, press the seam, then topstitch along the trim’s edge. Easy peasy, ruffle complete!
How do I attach the apron to the waistband?
Align the apron and waistband centers. Pin them together, leaving a small gap. Sew along the edge, securing the apron to the band. Smooth fabric as you go for a professional finish.
Conclusion
Envision yourself wearing your carefully crafted half apron, a reflection of your sewing skills.
With every stitch, you’ve woven a narrative of ingenuity and practicality.
Now that you’ve mastered the art of sewing a half apron, embrace the delight of DIY style, and allow your distinctive style to emerge through this adaptable accessory.
Bask in the fulfillment of a task well executed, and wear your creation with confidence.

