This site is supported by our readers. We may earn a commission, at no cost to you, if you purchase through links.
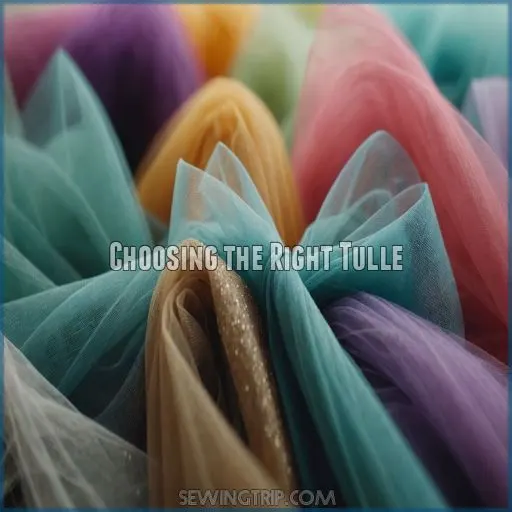
Choosing the right tulle is the first step, as its weight and stiffness define fluffiness.
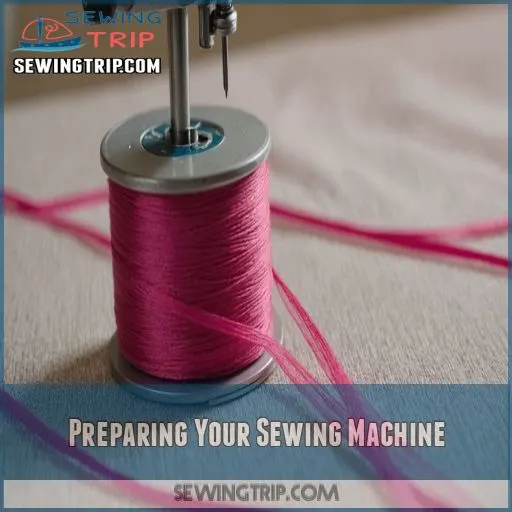
Preparing your sewing machine by adjusting the tension and using a ruffling foot for gathering tulle quickly is essential.
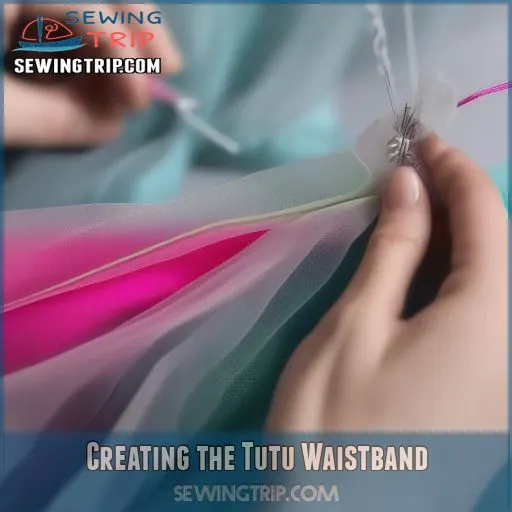
Measure and cut your waistband fabric, adding elastic for flexibility.
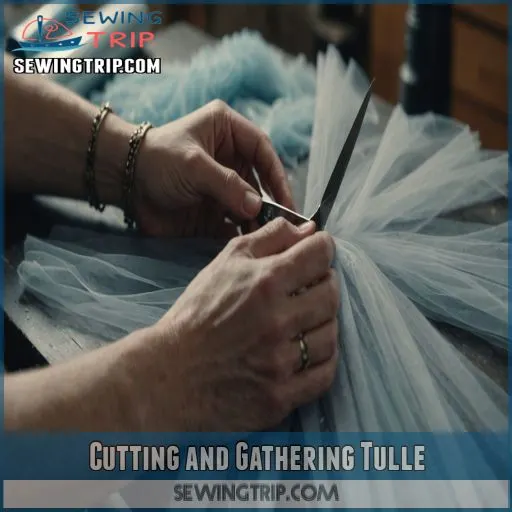
When cutting tulle, precision is key, and gathering can be done either with a foot or by hand.
Assemble by layering, stitch the sections together, and add a cozy lining for comfort.
The magic in tutu-making is truly about experimentation and flair—get those creative juices flowing!
Table Of Contents
- Key Takeaways
- Choosing the Right Tulle
- Preparing Your Sewing Machine
- Creating the Tutu Waistband
- Cutting and Gathering Tulle
- Assembling the Tutu Skirt
- Adding a Crochet Headband Trim
- Adding Glitter Sequins for a DIY Tutu
- Finishing the Tutu
- Tips and Tricks for Sewing a Tutu
- Troubleshooting Common Tutu Sewing Issues
- Frequently Asked Questions (FAQs)
- Conclusion
Key Takeaways
- Start with the right tulle: Choose wisely between light and stiff tulle for that perfect balance of fluffiness and comfort. Think of it as picking the right pillow – soft, supportive, yet ready to keep its shape through all those twirls.
- Machine settings matter: Adjust your sewing machine like a boss. Use a smaller needle, adjust the tension, and, if you’re feeling adventurous, try a ruffling foot. It’ll save you time and tulle-taming tears.
- Keep it comfy: When measuring for the waistband, remember a snug fit doesn’t mean squeezing like a boa constrictor! Add a tad extra for comfort – it’s like wearing a favorite pair of stretch pants, just more twirly.
- Add personality with trims and sparkles: Give your tutu that extra pizzazz by adding crochet trims or sequins. It’s like icing on a cake – fun, fabulous, and guaranteed to make your creation shine bright like a disco ball!
Choosing the Right Tulle
Choosing the right tulle can make or break your tutu, turning a simple skirt into a fluffy fairy tale.
You’ll want to pick a fabric that’s stiff enough to hold its shape but soft enough so it won’t feel like you’re wrapped in sandpaper!
Understanding Tulle Fabric Types
When making a tutu skirt, understanding tulle fabric types can make or break your project. Here’s what to keep in mind:
- Weight and Stiffness: Light tulle creates airy layers, while stiffer tulle adds volume.
- Color: Tulle offers a palette like a candy store.
- Texture and Care: Opt for easy-care tulle to avoid laundry drama.
Selecting the Best Tulle for Your Tutu
To nail the perfect tutu, think of tulle as your paintbrush. Choose softness for comfort, a playful color that captures your child’s state of mind, and check the width for desired fluff. Weight impacts drape, and price can surprise! Avoid static cling—ever tried sewing while wrestling electrostatic force? That’s a safety pin nightmare!
Tulle Considerations:
| Tulle Aspect | Tip | Emotional Effect |
|---|---|---|
| Softness | For comfort and coziness | Warmth and happiness |
| Color | Match your child’s mood | Excitement and creativity |
| Width | Choose for fluffiness | Fullness and pride |
| Price | Enjoy plenty of options | Joy without breaking bank |
How to Measure and Cut Tulle for a Tutu
Measure the tulle width to match your desired skirt length – double the length for full volume.
Fold the tulle in half lengthwise to save time and make sure the layers are even.
Use a rotary cutter and cutting mat for clean, precise cuts.
With the right tools, cutting tulle is a breeze!
Preparing Your Sewing Machine
You’ll want your sewing machine ready to tackle the delicate tulle, so let’s make sure it’s properly set up.
Tips on using a ruffling foot and avoiding tulle snafus will help you breeze through this project without tangling your thread or your nerves!
Using a Ruffling Foot for Gathering Tulle
Imagine your sewing machine armed with a ruffling foot—it’s like adding wings to a plane. This nifty tool speeds up gathering tulle, effortlessly creating those playful, fluffy layers.
Ruffling foot benefits are plentiful, but if you’re fresh out, alternatives exist!
Try a long stitch length and manually pull bobbin threads; it’s time-consuming but works wonders.
Adjusting Your Sewing Machine for Tulle
After mastering the ruffling foot, your sewing machine needs some love to handle tulle and properly adjust its settings.
Use a smaller needle size, like an 11, and adjust tension and stitch length to avoid puckering.
Decrease foot pressure for smooth sailing.
If troubleshooting issues arise, don’t fret—tulle’s finicky nature’s all part of the show. Happy stitching!
Tips for Preventing Tulle From Getting Caught
By adjusting your sewing machine’s tension and using the right needle, you can prevent tulle from getting caught and bunched up, which can happen if you don’t have the right sewing machine tension settings.
Opt for a sharp, fine needle and lightweight thread to glide smoothly through the delicate fabric.
Take it slow, and don’t be afraid to experiment until you find the perfect settings.
Creating the Tutu Waistband
Creating a comfortable waistband for your tutu is all about the right measurements and materials.
With these tips, you’ll have a waistband so secure and flexible it could double as yoga pants—just maybe not for the downward dog!
Measuring the Waist for a Comfortable Fit
You’ve prepped your sewing machine, so let’s measure your waistband for a fit that’s snug but not a boa constrictor.
Grab your measuring tape and find out the waist size.
Add a few inches for some wiggle room.
Trust me, that little bit of elastic adds just enough flexibility for all those spins and twirls!
Cutting and Sewing the Waistband Fabric
Waistband sizing is important, so grab that thick knit fabric and let’s get cutting!
Measure it to match your child’s waist, adding a tad extra for comfort like icing on a cake.
With those fabric choices, remember: neatness counts.
Sew the seam with precision, using effective sewing techniques to make sure smooth finishing touches like an overcast stitch.
Voil!
Adding Elastic for a Flexible Waistband
Adding the right amount of elastic is key for a tutu waistband that fits comfortably and flexes with ease.
Measure the child’s waist, then cut the elastic 4-5 inches shorter.
Sew the elastic ends together, distribute the gathers evenly, and voila – a customized, stretchy waistband that’ll keep your tutu secure all day long.
Cutting and Gathering Tulle
When cutting and gathering tulle, you’ll need patience and precision, plus a little creativity.
Tulle gathering requires careful crafting of each layer, like you’re building a tulle cloud!
Whether you’re using a ruffling foot or your trusty hands, achieving that full, fluffy look means carefully crafting each layer like you’re building a tulle cloud!
Cutting Tulle Into Sections for a Full Tutu
With your waistband ready, it’s time to cut the tulle into sections. Precision is your best friend here for that full, fluffy look! Think about these tips when you start:
- Tulle width: Pick wisely for desired flair.
- Cutting tools: Sharp scissors or a rotary cutter.
Skirt length: Double it!
- Layer count: Go for volume or subtlety.
- Section size: Keep it consistent for even layers!
Gathering Tulle Using a Ruffling Foot
After cutting the tulle into sections, it’s time to work your magic with the ruffling foot.
This handy attachment makes gathering tulle a breeze.
Adjust the gathering tension based on your tulle’s thickness for even results.
Gathering Tulle by Hand for a More Delicate Look
If you prefer a more delicate, handcrafted look, gather the tulle by hand. Simply run a long, loose stitch along the edge of each tulle piece, then gently pull the bobbin thread to create soft, billowy gathers. This technique takes a bit more time but yields a beautifully textured tutu:
- Use a sharp needle and sturdy thread
- Pull the bobbin thread slowly and evenly
- Adjust gathers as needed for a balanced look
- Embrace the organic, handmade aesthetic
Assembling the Tutu Skirt
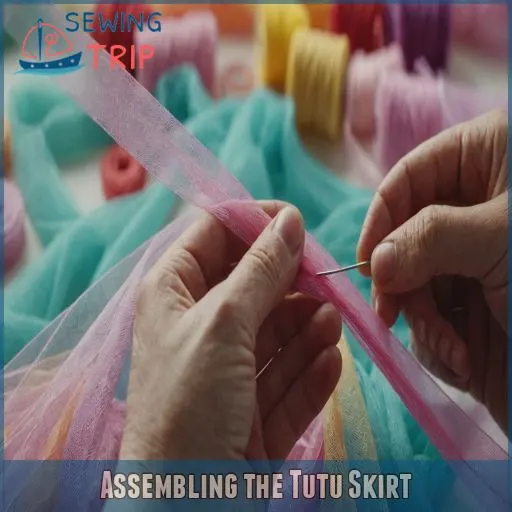
You’re about to bring your tutu to life by layering and sewing together the fluffy tulle.
Adding a comfy lining will make sure it’s as comfortable as it’s delightful to twirl in, so get ready to make those dreams of a fairy tale skirt a reality!
Layering Tulle for a Full and Fluffy Tutu
Creating a tutu skirt is like a dance where each tulle layer adds fullness and flair.
Begin with different tulle types stacked neatly.
| Layers | Tulle Type | Skirt Length |
|---|---|---|
| 1st | Soft | 18 inches |
| 2nd | Stiff | 16 inches |
| 3rd | Glitter | 14 inches |
Repeat till you’ve built a tutu worthy of pirouettes!
Sewing the Tulle Layers Together
Now that you’ve got your tulle layers packed like fluffy clouds, it’s time to stitch them together.
Secure the edges while ensuring the tulle layer length remains consistent.
Stitch evenly (no bunching allowed!).
Use a straight or zigzag stitch whatever tickles your fancy.
Aim for even distribution as you sew, and your tutu will soon be tutu-tally amazing!
Adding a Lining for a Comfortable and Smooth Finish
Once you’ve gathered the tulle layers, it’s time to add a lining for a smooth, comfortable finish.
Choose a soft, breathable lining fabric that’s slightly shorter than the tulle.
Hem the lining, then stitch it to the top of the tulle skirt.
This cozy layer will keep your little one comfy all day long.
Adding a Crochet Headband Trim
Adding a crochet headband trim gives your tutu a charming, custom touch that’ll make it look like it came straight from a fairy tale.
Crochet headband trim will give your tutu a charming, custom touch that’ll make it look like it came straight from a fairy tale.
Don’t worry if you’re new to crochet; we’ll walk you through selecting the perfect pattern and sewing it on with ease.
Selecting the perfect pattern and sewing it on with ease are made easy, even for beginners.
Choosing the Right Crochet Pattern for Your Tutu
Feeling a little yarn-happy? You’re about to add the cherry on top of your tutu masterpiece with a crochet headband trim!
Pick the right crochet pattern by considering:
- Stitch types and complexity.
- Tutu pattern styles that complement.
- Creative headband design ideas.
- The perfect color combinations and yarn weight.
It’s all about flair!
Sewing the Crochet Trim to the Tutu Waistband
Fastening the crochet trim to the tutu’s waistband isn’t just about stitchery; it’s like finishing touches on a masterpiece.
Choose crochet trim types that complement your tutu’s color.
Carefully attach the trim securely, ensuring it doesn’t wobble like a loose tooth.
For trim placement ideas, explore DIY trim options that match your creative vision.
Brilliant, right?
Tips for Adding a Professional Finish
To give your crochet-trimmed tutu a polished look, neatly hem the lining fabric, ensuring a smooth, even finish.
Tidy up any loose threads, and consider adding a closure like a snap or hook-and-eye for easy on and off.
These small details elevate your handmade tutu to a professional-grade piece.
Adding Glitter Sequins for a DIY Tutu
Give your tutu a dazzling makeover by adding some glitter sequins to create a truly sparkling masterpiece.
Choosing the right sequins and placing them creatively can bring your tutu to life in a way that’s as fabulous as it’s fun!
Whether you’re aiming for subtle shine or standout sparkle, you can make your tutu truly your own.
Choosing the Right Glitter Sequins for Your Tutu
After adding a crochet headband trim, you’re ready to jazz up your tutu with glitter sequins.
Think of them as the sprinkles on your sundae!
Choose sequins that match your color scheme and play around with sizes and density for a balanced look.
Whether it’s subtle sparkles or a bold statement, the right sequin choice makes magic.
Applying Glitter Sequins to the Tutu
Got your sequins ready? It’s time to jazz up your tutu! Sequin placement is key, so spread them evenly. Use glitter glue or a heat press to stick them on securely. Play around with sequin size and color combos—go big or go home, right? Remember, a little creativity never hurt anyone!
- Use contrasting colors
- Cluster sequins for a pop
- Spread them for subtle shimmer
Tips for Adding a Touch of Sparkle
Sprinkling glitter sequins adds a touch of whimsy to your tutu.
Choose a sparkly fabric or embroidered patches to sew onto the tulle.
Apply the sequins with a steady hand, ensuring they’re evenly distributed for maximum dazzle.
Embrace the glitz – your tutu will shine brighter than a disco ball!
Finishing the Tutu
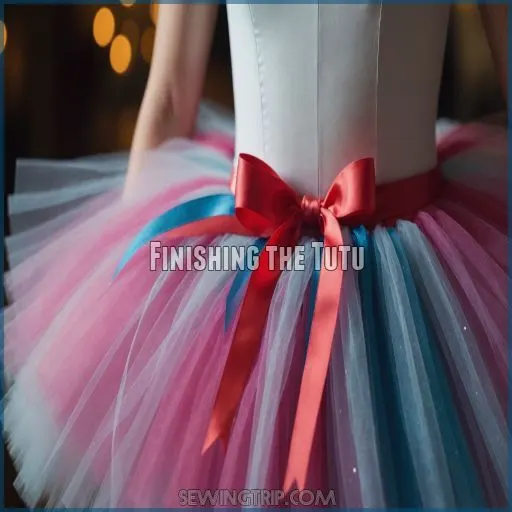
You’re almost at the finish line, ready to add those final touches that make your tutu not just wearable but comfortable and easy to slip on!
Let’s make your creation sparkle with a professional lining hem and a user-friendly closure, transforming your DIY project into a masterpiece.
Hemming the Lining for a Professional Finish
Tutu sparkling like stardust? Ensuring the lining looks equally stellar is a piece of cake!
Choose a smooth lining fabric, set your sewing machine to a gentle stitch, and hem the edge for that professional finish using a serger.
Iron it skillfully; it’s not just hem-tastically neat, it’s the cat’s pajamas!
Your tutu’s ready to twirl confidently.
Adding a Closure for Easy on and Off
To add a closure for easy on and off, consider these simple options:
- Zippers vs. hooks: Zippers provide a sleek finish, while hooks offer a charming, vintage flair.
- Velcro waistband: Velcro is great for quick adjustments, like a magic wand.
- Button closure: Buttons add a touch of whimsy and tradition to your tutu.
Choose the closure that suits your style!
Tips for a Smooth and Comfortable Finish
Hemming the lining creates a smooth, comfortable waistband.
Secure the elastic ends neatly – no bulky knots.
Double-check seams for any stray threads or loose ends.
A quick press with a hot iron will give your tutu a polished, professional look.
Now you’re ready to twirl and dance in your handmade masterpiece!
Tips and Tricks for Sewing a Tutu
Sewing a tutu might seem like taming a cloud, but with the right tips and tricks, you’ll have it dancing on your first try.
Get ready to unravel the secrets to perfect stitches and unruffled tulle, turning any tutu project into a masterpiece without the hassle.
Using the Right Thread and Needle for Tulle
When sewing a tutu, using the right thread and needle combo can be a game-changer! Choose:
- Thread Weight: Thin, lightweight threads reduce bulk. Better bounce, less hassle!
- Needle Size: Opt for a 70/10 or 75/11 to glide through delicate tulle.
- Stitch Length: Set around 2-3mm for that comfortable, flexible feel.
Happy sewing!
Preventing Tulle From Fraying and Unraveling
Imagine tulle edges unraveling like a secret spilling out.
Fray prevention is your best friend!
Try heat sealing by lightly running edges through a candle flame.
Not a fan of fire? Fabric glue or a tight stitch finish works wonders too.
Experiment, find your groove, and keep those tutu edges looking as crisp as morning toast!
Tips for Sewing a Tutu Quickly and Efficiently
Sewing a tutu can be a breeze with the right tricks up your sleeve. Start by selecting the perfect tulle – not too stiff, not too flimsy. Adjust your machine settings for smooth stitching, and master the waistband with a touch of elastic. Layer the tulle with precision for a full, fluffy look. Finally, add those finishing touches to make your tutu shine.
Choosing the Right Tulle
- Choose the right tulle for your project.
Optimizing Sewing Machine Settings
- Optimize your sewing machine settings.
Crafting a Comfortable Waistband
- Craft a comfortable, flexible waistband.
Layering Tulle
- Layer the tulle with care and efficiency.
Troubleshooting Common Tutu Sewing Issues
Even when making tutus, unexpected hiccups happen!
From struggling with uneven layers to a waistband that’s gone rogue, let’s tackle these common tutu troubles with a sprinkle of humor and a dash of practical tips to keep your project on track.
Fixing a Tutu With Uneven Layers
Uneven layers can make your tutu look like a lopsided pancake. To fix this, use your expert eye to adjust the tulle length and layer distribution. Check for gathering issues, ensuring the skirt fullness is consistent. Sew even layers with care! Want a laugh? Tulle’s like a cat—sometimes it just won’t cooperate!
Tulle length and layer distribution are key factors in creating a balanced tutu.
Adjusting tulle length and redistributing layers are essential for achieving a balanced and symmetrical look.
Gathers and skirt fullness also play a crucial role in the overall appearance of a tutu.
| Problem | Solution | Tip |
|---|---|---|
| Tulle length | Trim excess evenly | Use sharp scissors |
| Layer distribution | Rearrange overlapping layers | Pin in place before sewing |
| Gathering issue | Adjust gathers manually | Gently tug on threads |
| Skirt fullness | Add or remove layers | Balance for desired fullness |
Repairing a Tutu With a Broken Waistband
Struggling with a rebellious tutu waistband? It feels like wrestling with an elastic beast! Don’t throw in the towel just yet.
For a DIY fix, remove the old waistband, and replace it with a fresh elastic.
Use your sewing machine to secure it. You’ll extend the tutu’s lifespan, and keep your little one twirling happily!
Tips for Preventing Common Tutu Sewing Mistakes
To prevent tutu mishaps, be mindful of tulle fraying, uneven layers, and elastic stretching.
Adjust stitching tension to ensure the waistband fits snugly but flexibly.
With a little practice, you’ll sew up a perfectly fluffy tutu – no more frustrating tangles or sagging skirts and you can follow this step-by-step guide!
Frequently Asked Questions (FAQs)
How many yards of tulle do I need for a tutu?
You’ll need around 5-8 yards of super-wide, soft tulle to create a fabulous tutu.
This generous amount guarantees your skirt has that lush, voluminous look you’re after.
Trust us, you can never have too much tulle!
Is it easy to sew a tutu?
Sewing a tutu is like weaving magic with ease as long as you’re patient.
It may seem fiddly, but once you gather and stitch the tulle layers, you’ve crafted a fluffy masterpiece fit for a dancing dreamer.
What is the best way to sew tulle?
When sewing tulle, keep it wrinkle-free by using a low-heat iron.
A rotary cutter offers cleaner cuts.
If tulle behaves like a squirrel on caffeine, hand-baste layers first to keep them in line.
How many layers should a tutu have?
A tutu typically looks best with 10 to 12 layers of tulle, creating that delightful puffiness every dancer loves.
Think of it as your fluffy cloud of elegance, transforming simple spins into a twirling masterpiece.
What type of tulle provides the most volume?
Soft, airy tulle with a 6-inch width provides the most voluminous, cloud-like effect for your tutu.
Its lightweight yet full-bodied texture creates the signature tutu silhouette that’ll have you twirling with delight.
How can I ensure my tutu fits perfectly?
Get the perfect tutu fit by measuring the waist accurately and adding a few extra inches for flexibility.
Adjust the elastic to be snug but comfortable; in other words, tight enough to stay put, loose enough to twirl.
Can I wash a tutu in a machine?
Washing a tutu in a machine might seem like a fun adventure until you see the tangled, wrinkled mess.
Stick to gently hand-washing in cool water with mild detergent, and you’ll keep that tutu twirling beautifully.
What are the suitable elastic types for tutus?
You’ll need elastic that’s flexible yet durable.
Opt for 1/4 or 3/8 inch wide elastic, which suits most tutus perfectly.
It provides a snug fit without squeezing, allowing your tutu to twirl effortlessly.
How do I make a tutu more durable?
Breathe life into your tutu with a few clever tricks!
Reinforce the waistband with sturdy elastic, and layer the tulle for a fluffy, long-lasting look that’ll have you twirling with confidence.
Sewing magic, at your fingertips!
Conclusion
Did you know that over 70% of homemade tutus are sewn with love but just a bit too much fabric?
Fear not! With this guide on how to sew a tutu, you’re now equipped to create the fluffy tulle skirt of your dreams.
Remember, it’s all about the right tulle, precise cuts, and a sprinkle of creativity.
Enjoy the dance of sewing, have fun layering, and don’t forget that a tutu with a touch of sparkle can always brighten the day!

