This site is supported by our readers. We may earn a commission, at no cost to you, if you purchase through links.
 Learning how to sew clothes can be a real game-changer, giving you freedom to create pieces that fit just right.
First, you’ll need some essentials: fabric scissors, a trusty sewing machine, and a handful of pins. Don’t forget a seam ripper—it’s the sewing world’s eraser!
Start with a simple pattern; think of it as a map to your stylish destination. When you take measurements, remember, nobody’s perfectly symmetrical, and that’s okay!
Choose fabrics that speak to you, but maybe skip the velvet for your first try—trust me on this. Ready to stitch your story? Let’s dive deeper next!
Table Of Contents
- Key Takeaways
- Preparing to Sew Clothes
- Understanding Patterns and Measurements
- Working With Fabric
- Interfacing and Stabilizing Fabric
- Sewing Tucks, Darts, and Pleats
- Constructing Garment Sections
- Assembling and Finishing Garments
- Adding Closures and Embellishments
- Pressing and Finishing Techniques
- Troubleshooting and Perfecting Techniques
- Frequently Asked Questions (FAQs)
- Conclusion
Key Takeaways
- Start Small, Dream Big: Begin with simple patterns and practice on scrap fabric. It’s like riding a bike—wobbly at first, but soon you’re off and running! Don’t rush; enjoy each stitch and celebrate your triumphs.
- Tools of Your Trade: Invest in essentials like a trusty sewing machine basics, sharp scissors, and a seam ripper—your sewing world’s eraser
. These are your trusty sidekicks on your sartorial journey.
- Measure Twice, Sew Once: Accurate measurements are your secret weapon for achieving perfect fits. Grab that tape measure and record your body’s measurements. Remember, you’re not a potato sack; you’re a custom-fit masterpiece in the making!
- Press for Success: A good press is the icing on the cake—or rather, the steam on the seam! It transforms your work from homemade to couture. Watch those wrinkles disappear, and let your garment shine.
Preparing to Sew Clothes
To kick off your sewing adventure, gather essential supplies like a reliable sewing machine, fabric scissors, and a trusty stitch un-picker.
Don’t worry if your first project doesn’t rival a designer’s—it’s all about enjoying the process and learning as you go!
Essential Sewing Supplies
Sewing’s a breeze when you’ve got the right tools! First up, grab some sharp fabric scissors – they’re a must-have.
Next, measure like a pro with a flexible tape measure.
Don’t forget those essential sewing needles, both for hand and machine work.
A good needle threader will make threading your needles a breeze.
And a trusty seam ripper? It’s a lifesaver when you need to undo a stitch or two.
Choosing the Right Sewing Machine
With your essential supplies sorted, let’s pick the perfect sewing machine essentials
.
Consider these factors:
- Features: Look for stitch types and adjustable stitch length.
- Budget: Find models that balance cost and capability.
- Brands: Popular brands include Janome and Brother.
- Maintenance: Regular upkeep extends your machine’s life.
Choosing wisely boosts your sewing projects!
Basic Notions and Tools
Great choice on the sewing machine!
Now, let’s get those essential tools ready. Start with a trusty pair of fabric scissors; they’re your best friends here.
Add pins—think of them as tiny assistants—and don’t skip a seam ripper for inevitable oops moments.
Thread selection matters too; match it to your fabric for that polished look.
Happy sewing!
Understanding Patterns and Measurements
Understanding patterns and measurements is essential to sewing clothes that fit just right.
You’ll learn to take accurate measurements, choose patterns that suit your style, and make necessary adjustments so your creations don’t end up as "fashion fails.
Types of Sewing Patterns
Before you start sewing fabric, understanding types of sewing patterns is key.
Choose beginner patterns from Indie pattern companies for creative flair or explore vintage patterns for timeless designs.
Consider versatile patterns, like those for a classic oxford button up shirt, that offer short or long sleeve options and cater to different body types.
Try pattern drafting to craft something unique, or learn about pattern adjustments for that perfect fit.
Fabric choices abound online and in sewing fabric stores, with tips on cutting slippery fabrics sewing hacks online fitting every sewing fabric project
.
Taking Accurate Measurements
Ever wonder why your favorite jeans fit so perfectly?
It’s all about taking accurate body measurements. Grab a tape measure, stand tall, and record your bust, waist, and hips.
These numbers, not your clothing size, determine pattern sizing and fitting adjustments.
Trust me, well-sized patterns and seam allowances make the sewing process smooth and your clothes fabulous!
Understanding Pattern Sizing and Adjustments
Figuring out pattern sizing involves a blend of art and science. You’ll explore size charts for guidance, but don’t ignore the quirks of your body shape. Alterations can be necessary, such as adjusting shoulder seams or style lines. Remember, the waist seam isn’t just decorative—it’s your secret weapon for crafting the perfect fit.
- Size charts: decode like a treasure map.
- Shoulder seams: tweak for perfect fit.
- Style lines: emphasize or diminish features.
- Waist seam: your fit’s unsung hero.
Working With Fabric
Choosing the right fabric is really important for your sewing projects.
You’ll need to think about the fabric type, weight, and material based on the garment you’re making.
Don’t forget to properly prepare and cut the fabric before sewing.
Choosing the Right Fabric Type
When choosing fabric, think about its weight, drape, and texture—you don’t want heavy wool for a summer dress!
Opt for cotton or linen for breathability, and trust thrift stores for sustainable options.
Remember, fabric care instructions matter, so you don’t end up shrinking your masterpiece.
Mixing scraps can add unique flair while keeping things eco-friendly.
Preparing and Cutting Fabric
After selecting the perfect fabric, it’s time for the fun part: preparing and cutting it.
Pre-wash and iron your fabric, checking grainlines as you go.
Use trusty weights to hold the fabric steady, ensuring your pattern placement stays true.
Sharp cutting tools are essential—think of them as your sewing secret weapons! Ready, set, snip!
Understanding Grainlines and Symmetry
Mastering grainlines and symmetry in sewing is like finding the secret ingredient in your favorite dish. Align fabric direction with pattern alignment for a balanced garment. Seam placement affects fit, so get it right to avoid that dreaded twist. And remember, print matching is key to avoiding wardrobe mishaps.
Understanding fabric grainlines is important, as cutting along the grain prevents stretching or distortion, preserving design integrity, by following the fabric’s straight grain or cross-grain Understanding Fabric Grain. Additionally, proper grain alignment makes sure seams lie flat and curved edge stitching is precise
.
- Think of grainlines as fabric traffic rules.
- Imagine symmetry as your sewing GPS.
- Seam placement: the compass for flawless fit.
- Make print matching your fashion superpower.
Interfacing and Stabilizing Fabric
Interfacing can be a game-changer when sewing clothes, giving structure to areas like collars, cuffs, and waistbands to keep them looking sharp.
You’ll find both fusible and non-fusible options, so pick the right type and weight for your project to avoid floppy fabrics and achieve a polished finish.
What is Interfacing and When to Use It
Interfacing is the unsung hero in sewing, giving structure to fabrics where you need it most.
It acts like a trusty backbone, stabilizing your garment while adding shape and durability. Choose between fusible and non-fusible types—fusible works with heat, non-fusible is sewn in—to match your fabric weights and needs with confidence.
Types of Interfacing and Application Methods
Choosing between fusible and non-fusible interfacing is like picking the right dance partner—one needs heat, the other prefers a needle and thread.
Pay attention to weight and color, matching them to your fabric’s needs.
Common mistakes include applying fusible interfacing to textured fabrics—it won’t stick.
Remember, mastering application techniques means practice, patience, and occasionally, a little humor.
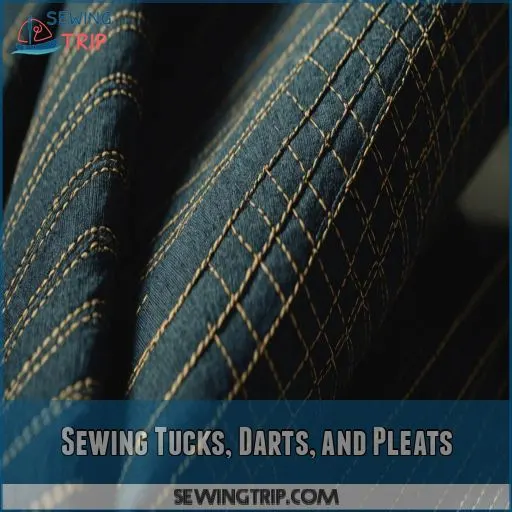
Sewing Tucks, Darts, and Pleats
Sewing darts, tucks, and pleats can add shape, texture, and visual interest to your homemade garments.
Don’t be intimidated – with a little practice, you’ll be creating professional-looking details that’ll make your clothes stand out with visual interest.
Sewing Darts for a Flattering Fit
Once you’ve stabilized your fabric, let’s sew darts for that perfect fit. A well-placed dart shapes the fabric, adding elegance and ease.
Here’s what to keep in mind:
- Dart placement: Aim toward the fullest part of the curve.
- Dart shaping: Create a gentle slope for natural effects.
- Dart types: Choose from bust, waist, or shoulder darts.
It’s a straightforward path to chic clothes!
Creating Professional-Looking Tucks
Mastering tucking techniques starts with the right fabric choice—think lightweight or medium-weight fabrics.
Carefully mark your tucks to make sure even spacing. Use pressing tips for crisp folds, pressing each tuck before sewing.
Select a straight stitch type and adjust machine settings for a clean finish. Remember, the magic’s in the details, so take a deep breath and enjoy the clean finish.
Sewing Pleats for Added Texture
Professional tucks set the stage for sewing pleats, a fantastic way to add texture and depth to your clothing.
Choose fabric wisely—lightweight, natural fibers work best.
Experiment with pleat types, such as knife or box, and pay attention to pleat placement and depth for balance.
Maintenance is key—press and stitch to keep them crisp and enduring.
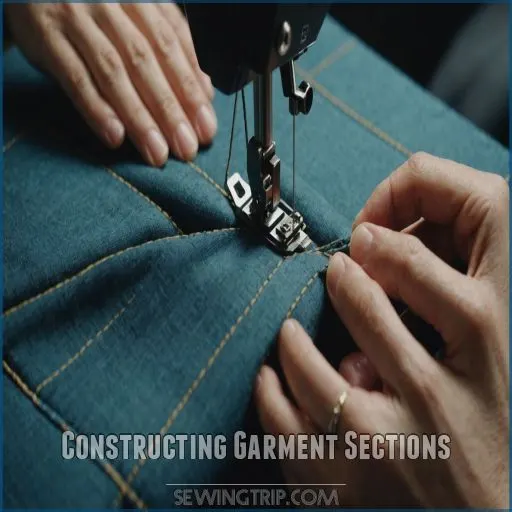
Constructing Garment Sections
To construct garment sections, you’ll master sewing style lines and seams, creating waist, center front, and back seams, and attaching pockets and zippers.
Think of it as assembling a puzzle where every piece counts, and remember, even seasoned sewers have sewn themselves into unfortunate corners.
Sewing Style Lines and Seams
Tucks, darts, and pleats add depth—now onto constructing with style lines and seams!
Carefully consider your seam allowance and embrace topstitching for added flair.
Use different stitching techniques to join sections smoothly, creating clean style lines.
Don’t forget pressing seams; it’s like giving your garment a spa day.
Practice seam finishes, keeping your work durable and professional.
Creating Waist, Centre Front, and Centre Back Seams
When creating waist, center front, and center back seams, treat seam allowances like precious gold. Make sure they’re equal on both pieces, so when stitching, everything aligns like a well-rehearsed dance.
Using Fabric Preparation, prewashing and ironing fabric beforehand can prevent shrinkage and make sure accurate seams.
With seams constructed this way, pressing techniques can make seams flat, then finish with topstitching for a polished look.
Remember, matching seams is key—they’re like shoe laces keeping your fit together.
Attaching Pockets and Zippers
Now that you’ve mastered sewing seams, it’s time to add some pockets and zippers! These handy features can transform a simple garment into something truly special. Start by choosing the right zipper type and pocket placement to suit your project.
- Zipper types: Invisible, regular, and decorative
- Pocket placement: Side, patch, and inseam
Then, follow these steps to install them with precision. You’ve got this!
- Zipper installation: Pinning, basting, and topstitching
- Pocket variations: Bound, faced, and welt
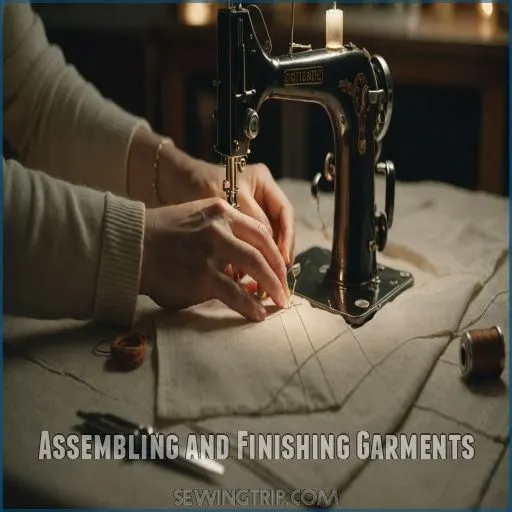
Assembling and Finishing Garments
Now that you’ve mastered constructing the various sections of your garment, it’s time to bring them together.
Sewing shoulder and side seams, attaching sleeves and collars, and finishing hems and edges are the next steps.
Don’t worry if it feels like a jigsaw puzzle—it’s all about aligning seams and adding those perfect finishing touches for a polished look.
Sewing Shoulder Seams and Side Seams
Carefully align your garment pieces, right sides together, to sew shoulder seams. Use precise pinning techniques, aligning fabric edges to honor seam allowances.
When sewing shoulder seams, keep in mind the shoulder fit, taking into account the type of alteration needed, such as adjusting shoulder seams for a better silhouette.
After sewing, serge or finish edges for a clean look. Pressing seams to the back adds polish, while a touch of humor—like saying, "It’s getting seam-serious!"—keeps the process light-hearted and engaging.
Attaching Sleeves and Collars
Attaching sleeves and collars can feel like a puzzle in the sewing world.
Start with sleeve types like puff or bell, ensuring accurate sleeve insertion by pinning to the armhole’s edge.
For collars, align and attach at the neckline, considering various collar styles like Peter Pan or mandarin.
Each seam finish adds polish, so embrace each step with confidence!
Finishing Hems and Edges
When finishing hems and edges, a variety of techniques await your creativity.
Try these to enhance your garment’s flair:
- Hemming Techniques: Master blind stitch secrets for seamless edges, eliminating visible threads.
- Serging vs. Zig-Zag: Discover which suits your fabric to prevent fraying.
- Edge Finishes: Add decorative flair while stopping fabric fraying, adding both style and durability.
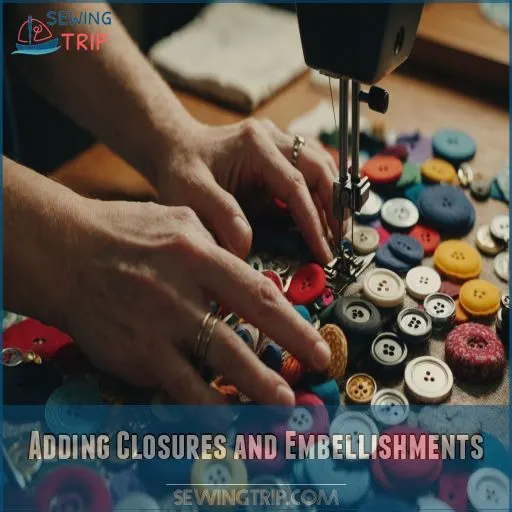
Adding Closures and Embellishments
Now that your garment’s structure is taking shape, it’s time to spice it up with closures and embellishments.
Master inserting zippers, sewing buttonholes, and adding trims to give your creations a unique flair and make them truly stand out.
Sewing Buttons and Buttonholes
Imagine conquering buttonhole placement and mastering button types like a pro.
Start by stabilizing your fabric; then try manual or automatic buttonhole techniques.
Practice makes you confident when tackling buttonhole finishing and troubleshooting.
Don’t fear the challenge—remember, even sewing mishaps can lead to creative solutions. Plus, who doesn’t love a good buttoning success story?(Source).
Creating Zippers and Zipper Pouches
Zippers are a breeze once you get the hang of them!
Start by trimming the ends, then pin the zipper right-side up to your fabric. Sew it on, being careful around the pull.
Next, assemble the pouch, creating a gusset for a flat bottom.
Press well, and you’ve got a polished zipper pouch in no time!
Adding Embellishments and Trims
Spruce up your garments with embellishments and trims to make them truly yours.
Consider these tips:
- Use vintage trims for a timeless touch—perfect on denim or cotton.
- Master basic embroidery techniques for unique embellishments on any fabric, like those found in the sewing machine stitches library
.
- Plan embellishment placement carefully; it’s like seasoning a dish—too much can overpower the original flavor.
Pressing and Finishing Techniques
You’ve stitched your masterpiece, but don’t skip the magic of pressing, which transforms wrinkled fabric into a polished work of art.
Grab your iron and a pressing cloth, and use these simple yet effective techniques to give your garments that professional, just-off-the-runway finish.
Importance of Pressing in Sewing
After sewing buttons and embellishments, pressing adds the magic touch, transforming your garment from a humble creation into a polished masterpiece.
Use pressing tools wisely on different fabric types to make sure seams lie flat and avoid wrinkles.
This step helps your clothes look store-bought, emphasizing professional seam finishing.
Enjoy the satisfying result of mastering this important sewing basic stitches technique
.
Basic Pressing Techniques and Tools
A well-pressed seam can make you feel like a tailoring wizard.
Use pressing tools like a steam iron and tailor’s ham to tackle those tricky curves. Ironing involves sliding the iron, while pressing means lifting it.
Never skip seam finishing; it keeps your garment looking sharp and polished, just like magic!
Keep pressing surfaces clean and smooth too.
Finishing Touches for a Professional Look
Master the art of sewing with flawless finishing touches.
Polish your hems using careful pressing techniques—don’t rush, let the iron do the talking! Achieve clean seam finishes and impeccable topstitching that give garments a pro vibe.
Buttonholes should look like tiny windows—straight and snug.
Remember, how you finish is the secret sauce to standout homemade clothing!
Troubleshooting and Perfecting Techniques
Even the most experienced sewists can sometimes end up with a sleeve that’s inside out or a seam that’s gone rogue.
Don’t fret; with a few handy tricks and a sprinkle of patience, you’ll fix these common hiccups but also perfect your sewing skills like a pro, and become a sewing pro with time.
Common Sewing Mistakes and How to Fix Them
When sewing, you may encounter common mistakes like inaccurate cutting, fabric stretching, or skipped stitches.
To fix these issues, be sure to:
- Use the right sewing tools like sharp scissors and a seam ripper
- Know your precise body measurements to achieve a perfect fit
- Measure twice and cut once to avoid cutting errors
Tips for Improving Sewing Skills and Speed
Boost your sewing proficiency by creating an efficient workspace; think of it as your fabric battlefield.
Organize tools for easy access—time saved here, stitches gained there.
Practice regularly, using shortcuts like chain piecing or rotary cutting for speed.
Remember, each crooked stitch tells a story—your story. So embrace trial and error; it’s your seamstress journey.
Advanced Techniques for Expert Sewers
Once you’ve picked up speed, tackle advanced techniques to perfect your sewing.
Troubleshooting is your superhero skill here. Whether you’re wrestling with knits or drafting patterns, precision is key.
Here’s a toolbelt for deeper mastery:
- Sewing with knits
- Tailoring techniques
- Couture sewing secrets
- Sustainable sewing practices
- Pattern drafting expertise
Step up and show your flair!
Frequently Asked Questions (FAQs)
Should you sew your own clothes?
Sewing your own clothes lets you craft garments perfectly fitted to your style and fit, like painting your wardrobe with your unique brush.
Start with easy patterns, enjoy the process, and gradually build your skills and confidence .
How do I start sewing clothes if I’m intimidated?
Start with simple projects like elastic-waist pants, explore YouTube for tutorials, and start with a trusted pattern.
Experiment with scrap fabric.
Gaining confidence is key, and remember: trial and error is part of the journey (Source).
How do I learn to sew my own clothes?
For instance, after having a baby, you may find that none of your pre-pregnancy clothes fit.
Rather than feeling discouraged, you can sew your own custom-fitted dresses that flatter your current shape and are easy to breastfeed in.
How do I make sewing clothes easier?
Grab a simple pattern, read it thoroughly, and pin fabric with precision.
Practice on scrap material, trying a stitch or two. Mistakes are just stepping stones, so enjoy the journey!
More tips? Join a sew-along.
Can you sew clothes as a beginner?
Crafting your own garments is like painting your unique canvas—it’s entirely possible as a beginner.
Start with simple patterns, like pajama pants, and use stable fabrics like linen.
Remember, practice and patience lead to perfection.
How to sew clothing by hand?
Start by mastering a straight stitch, like the running stitch, to join fabric pieces.
Add a whip stitch to secure edges neatly.
With practice, you’ll sew clothes by hand that fit like a glove and treasure the process.
How can I learn to sew clothes at home?
While it’s amusing that sewing clothes isn’t an innate skill, you can learn at home.
By choosing beginner patterns and watching YouTube tutorials, like Stitch Collective, you can gain a better understanding of the sewing process.
Additionally, practicing on thrift store fabric allows you to test your skills without wasting expensive materials.
How do you sew step by step for beginners?
First, choose a simple pattern like a boxy top.
Measure carefully, cut your fabric, and pin pieces together.
Use a sewing machine for seams, checking thread tension.
Practice on scrap fabric helps iron out kinks (Source).
How do I choose sewing machine needles?
Imagine you’re a detective solving a sewing mystery: choose needles by matching their size and type to your fabric and thread.
Use finer needles for delicate fabrics, larger ones for heavier materials, and test on swatches.
Whats the best way to match seams?
You’ll get perfectly matched seams by pressing them well.
This technique guarantees your pattern stays perfectly aligned by nesting them, pinning both sides with fork pins, and sewing slowly over the pins.
How can I maintain my sewing machine?
Keeping your sewing machine in tip-top shape involves regular cleaning, oiling, and routine checks.
Unplug, de-lint after projects, and use quality oil—like pampering a beloved old pet to guarantee smooth, trouble-free sewing adventures .
What are techniques for sewing stretchy fabrics?
Sewing stretchy fabrics involves using a ballpoint needle, narrow zigzag stitch, and reduced presser foot pressure.
Avoid stretching the fabric while cutting, and consider using a walking foot or paper backing for added stability.
How do I sew with delicate fabrics?
Imagine taming a delicate butterfly—it’s all about gentleness.
Use fine pins and Microtex needles, stabilize with a walking foot, and finish seams carefully to prevent fraying.
Your patience will transform these temperamental fabrics into stunning garments .
Conclusion
Feeling overwhelmed by the idea of sewing clothes? Don’t be.
With practice, you’ll turn fabric into something special. You’ve got the basics down—how to sew clothes starts with understanding patterns and cutting fabric properly.
Each stitch gets you closer to your custom wardrobe. Remember, a seam ripper’s your best friend and mistakes mean you’re learning.
Soon, hemming and adding zippers will feel like second nature.
So grab that fabric and start creating! You’ve got this.

