This site is supported by our readers. We may earn a commission, at no cost to you, if you purchase through links.
 You’ll need basic sewing supplies to get started with cosplay: a sewing machine, scissors, measuring tape, and pins.
Start with simple projects like capes or tunics to build confidence.
Choose fabrics that match your character’s look – cotton for everyday wear, stretch fabrics for bodysuits, or shiny materials for armor pieces.
Take accurate measurements and adjust patterns to fit your body type.
Don’t worry if your first attempts aren’t perfect – cosplay sewing is all about learning and improving.
With practice, you’ll develop skills to tackle more complex designs, from magical girl outfits to intricate warrior armor.
Table Of Contents
- Key Takeaways
- Getting Started With Cosplay Sewing
- How to Sew a Cosplay Costume
- Basic Sewing Techniques for Cosplay
- Choosing The Right Fabric for Cosplay
- Building a Cosplay Wardrobe
- Utilizing Armor and Prop Making Techniques
- Mastering Structured Cosplay Techniques
- Working With Patterns and Measurements
- Finishing and Preserving Your Cosplay Costume
- Advanced Cosplay Sewing Techniques
- Frequently Asked Questions (FAQs)
- Conclusion
Key Takeaways
- Start with simple projects like capes or tunics to build confidence and learn basic sewing techniques, such as mastering stitches on different materials with the help of beginner sewing guides. Start with simple projects like capes or tunics to build confidence and learn basic sewing techniques.
- Choose fabrics that match your character’s look and comfort, using affordable options for practice.
- Master essential skills like running and backstitching, pinning, and cutting accurately for well-aligned seams.
- Develop a dedicated cosplay workspace with organized tools and bright lighting to streamline your creative process.
Getting Started With Cosplay Sewing
You’ll find cosplay sewing more manageable when you start with simple projects like accessories or single costume pieces.
Affordable fabric will help you practice essential techniques without worrying about mistakes, whether you’re using a sewing machine or hand-stitching.
Choosing Beginner-Friendly Projects
Ready to start your cosplay journey? You don’t need to jump into complex outfits right away. Start with these beginner-friendly projects that’ll help you build confidence:
- Simple cat ears using basic hand stitching, like the running, back, and slip stitch, can be achieved by understanding what are sewing techniques. Simple cat ears using basic hand stitching
- A flowing cape or cloak to practice straight lines
- An elastic-waist circle skirt for learning garment construction
- Large anime bows to master interfacing
These projects teach essential skills while letting you create something impressive right away.
Selecting Affordable Fabrics
Now that you’ve picked your first project, let’s talk smart fabric shopping.
Start with budget-friendly materials like cotton or polyester from discount stores or during sales.
Many cosplayers hit thrift stores for bedsheets and curtains – they’re perfect for practice pieces.
If you’re working with dark colors, those minor fabric flaws won’t show up in photos.
Remember, even pros started with bargain bin fabrics.
Learning Basic Sewing Techniques
With your fabric choices sorted, let’s build your sewing toolkit.
Start with these foundational techniques that’ll make your cosplay journey smoother:
- Master the running stitch – it’s your go-to for joining fabric pieces
- Practice backstitch for stronger seams that won’t pop during wear
- Learn pinning and cutting techniques to keep your fabric aligned
- Get comfortable with seam allowances and basic pattern markings
These skills work whether you’re hand-sewing or using a machine.
Setting Up a Cosplay Workspace
A dedicated cosplay workspace transforms your creative journey from chaotic to organized.
Set up a multipurpose table at comfortable height for cutting and sewing.
Install bright, adjustable lighting to prevent eye strain during detail work.
Store your tools and materials in clear containers, and keep frequently used items within arm’s reach.
Create a mini photo area for progress shots and final costume reveals.
How to Sew a Cosplay Costume
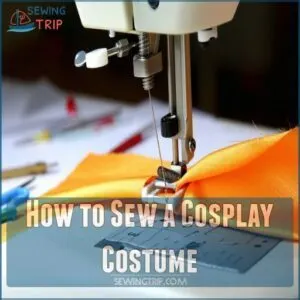
You’ll learn how to cut, assemble, and add details to your cosplay costume using basic sewing techniques like choosing the right thread types for fabrics such as lightweight cottons for tops or heavier woolens for jackets. that work for any character design.
With practice and patience, you’ll transform simple fabric pieces into an amazing costume that brings your favorite character to life.
Cutting and Preparing Fabric
Getting your fabric cut right sets the stage for an amazing cosplay.
Start by washing and ironing your fabric to prevent shrinkage later.
Lay out your pattern pieces following the grain line arrows – this keeps your costume from twisting weirdly.
Double-check measurements before making any cuts, and use sharp fabric scissors to avoid jagged edges.
Remember, careful prep work means fewer headaches during assembly.
Sewing and Assembling Costume Parts
Once you’ve cut your fabric pieces, lay them out in order of assembly to avoid any mix-ups.
Start with the largest sections first, like bodices or skirts, using a straight stitch for sturdy seams.
Pin everything carefully before sewing, and don’t rush – precise stitching now means better-looking costumes later.
Test your seams on scrap fabric to perfect your tension and stitch length.
Adding Details and Embellishments
The perfect cosplay comes alive through its smaller details.
Start with simple embroidery to add character emblems or decorative patterns.
Layer delicate lace and beading for magical girl outfits, or attach sequins to create sparkly accents.
For superhero costumes, sew on patches or appliques to replicate iconic symbols.
These finishing touches transform basic garments into screen-accurate masterpieces that’ll make you stand out at any convention.
Basic Sewing Techniques for Cosplay
You’ll learn how to handle stretchy fabrics, create appliques, and master essential techniques like sewing zippers and buttonholes after understanding the basics of sewing, including choosing the right sewing machine, in this practical guide to cosplay sewing.
Whether you’re starting with a simple cape or working up to a full costume with darts and bows,
you’ll find clear steps to help you bring your favorite character’s outfit to life.
Working With Faux Fur and Stretchy Fabrics
Now that you’ve got your costume design mapped out, let’s talk about handling tricky fabrics.
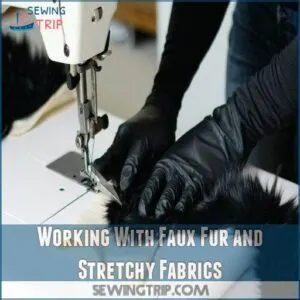
Faux fur requires special care when cutting.
Cut from the back to avoid chopping up the pile, and always brush it between steps.
Stretchy fabrics like spandex or lycra need a different approach.
Use a ballpoint needle and zigzag stitch to maintain flexibility.
Remember to test your stitches on scraps first – you’ll thank yourself later.
Creating Appliques, Patches, and Large Bows
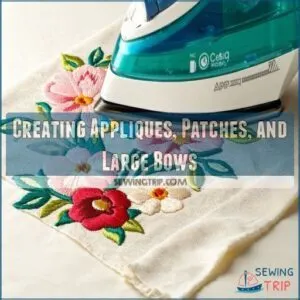
Creating eye-catching appliques starts with selecting the right iron-on backing and fabric.
You’ll want to trace your design onto the backing, cut it precisely, and iron it onto your base fabric.
For patches, use sturdy cotton or felt as your base.
When making large anime bows, lightweight interfacing keeps them perky and structured – no droopy bows in your cosplay!
Simple zigzag stitches secure everything perfectly.
Sewing Darts, Zippers, and Buttonholes
Many cosplayers dread sewing darts, zippers, and buttonholes, but these techniques aren’t as tricky as they seem.
Start with marking dart placement carefully using tailor’s chalk and pins.
When installing zippers, baste the seam first for perfect alignment.
For buttonholes, practice on scrap fabric until you’re confident.
When familiarizing yourself with key components like the needle, presser foot, and tension dial, refer to guides on how to use a sewing machine for beginners. Your sewing machine’s manual often includes helpful guides for these techniques.
Making Capes, Cloaks, and Hoods
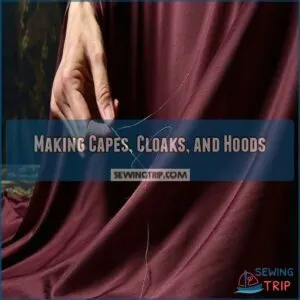
Capes, cloaks, and hoods rank among the most versatile pieces in your cosplay arsenal.
You’ll find them everywhere from fantasy warriors to superhero designs.
Here’s what you need to master these dramatic pieces:
- Choose flowing fabrics like velvet or wool for authentic movement
- Draft a simple circle or half-circle pattern for the cape body
- Add interfacing to hood pieces for better structure
- Reinforce attachment points at shoulders and neck
- Consider adding closures like clasps or ties for adjustability
Choosing The Right Fabric for Cosplay
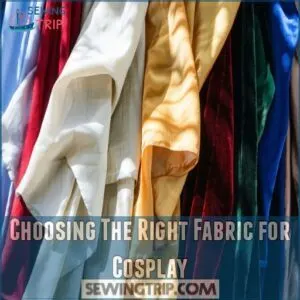
You’ll need to pick the right fabric to bring your favorite character’s costume to life, from sturdy cotton for armor-like pieces to flowing chiffon for magical capes.
Your choice of fabric will affect how comfortable you’ll feel wearing your costume and how well it’ll hold up during long convention days, so it’s worth taking time to learn about different materials.
Selecting Durable and Versatile Fabrics
Now that you’ve got your basic sewing skills down, let’s talk about choosing fabrics that’ll make your cosplay last.
You’ll want materials that can handle the wear and tear of conventions while keeping you comfortable.
Here’s a quick guide to help you pick the perfect fabric for your next project:
| Fabric Type | Durability | Best Used For |
|---|---|---|
| Cotton Duck | High | Armor bases, cloaks |
| Ponte Knit | Medium | Bodysuits, leggings |
| Broadcloth | Medium | Shirts, dresses |
| Drill Cotton | High | Pants, jackets |
Working With Different Fabric Types and Textures
Fabrics are like puzzle pieces in cosplay – each type brings unique qualities to your costume’s success.
Test scrap pieces first to master each fabric’s personality before diving into your main project.
For lightweight chiffons, use a sharp needle and gentle pressure to prevent snags.
For stretchy spandex, invest in a walking foot and ballpoint needles.
Heavy upholstery fabrics need sturdy machines and heavy-duty needles.
Choosing Fabrics for Specific Costume Parts
When you’re diving into cosplay creation, picking the right fabric for each costume piece makes all the difference.
Use cotton twill or denim for sturdy pants and jackets, while satin or silk works perfectly for flowing robes and capes.
Choose spandex or lycra for bodysuits, velvet for royal garments, and leather or pleather for armor-like pieces and belts.
EVA foam pairs well with fabric for structured elements.
Considering Comfort and Mobility
Your perfect costume needs to move with you, not against you.
Beyond choosing the right fabric, consider how your design affects mobility.
Give yourself breathing room in areas that bend and stretch – think shoulders, elbows, and knees.
- Test fabrics by sitting, walking, and reaching – you’ll be doing this all day at conventions
- Build in extra seam allowance for comfort adjustments
- Remember: tight doesn’t mean better fitting
Building a Cosplay Wardrobe
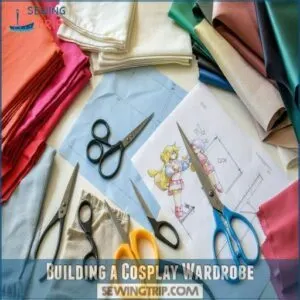
You’ll save time and money by starting with basic costume pieces you can mix and match, like simple dresses, capes, and accessories that work for multiple characters.
Once you’ve got your core pieces ready, you can add special items like armor, props, or detailed embellishments to create different versions of your favorite characters.
Creating a Core Wardrobe of Essential Pieces
Building a solid cosplay foundation starts with versatile pieces you can mix and match, and selecting the right fabric for each piece is essential for creating garments that match the occasion and character style, check the fabric selection guide.
Think of these core items as building blocks that’ll transform into countless character options.
Here’s what experienced cosplayers recommend:
| Essential Piece | Versatility Rating | Characters It Works For |
|---|---|---|
| White button-up shirt | High | School uniforms, sailors, office workers |
| Black leggings | Very High | Ninjas, superheroes, modern characters |
| Basic circle skirt | Medium | Magical girls, school uniforms, vintage looks |
Adding Statement Pieces and Accessories
Now that your core pieces are ready, let’s add the wow factor to your cosplay.
Start by crafting custom props like statement belts or unique headpieces that catch everyone’s eye.
Enhance your look with DIY accessories – think intricate cosplay jewelry, embellished gloves, or detailed badges.
Remember, these finishing touches often become the memorable elements that make your character instantly recognizable at conventions.
Mixing and Matching Costume Parts
Three versatile costume pieces can multiply into countless cosplay combinations.
Start with neutral basics like a white button-down shirt, black pants, or a simple dress that work across different characters.
Layer these foundation pieces with character-specific accessories and details.
Thrifted items in coordinating color palettes extend your options further.
Smart repurposing lets you transform core pieces through creative accessorizing and clever layering techniques.
Creating Alternate Versions of Favorite Characters
Let your creativity run wild by putting a fresh spin on familiar characters.
Design unique interpretations that showcase your personal style while staying true to the character’s essence.
Find inspiration in resources like Genderbent Cosplay Patterns to create bold reimaginings.
Make your cosplay stand out with:
- Steampunk versions of modern heroes
- Gender-bent interpretations of classic characters
- Post-apocalyptic takes on fantasy figures
Mix different elements and timelines to create something truly yours – that’s what makes cosplay so exciting.
Utilizing Armor and Prop Making Techniques
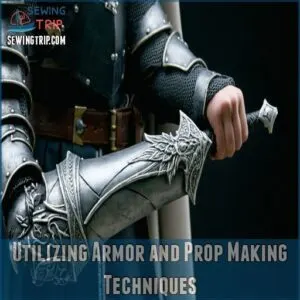
You’ll learn how to create amazing armor and props using materials like EVA foam, Worbla, and resin to bring your character’s gear to life.
With these techniques, you can craft everything from simple swords to complex battle armor.
You can even add special effects like LED lights to make your costume stand out.
Working With EVA Foam, Worbla, and Resin
Making armor and props starts with understanding your materials: EVA foam bends and shapes when heated, Worbla becomes pliable at 90°C, and resin hardens through chemical reactions.
When working with these materials, especially thick layers of foam or Worbla, it’s important to know how to serge thick layers to prevent jamming and achieve a smooth finish.
Start with small test pieces to get comfortable with heat-forming techniques and safety precautions.
EVA foam’s a forgiving material – perfect for beginners.
Remember to work in a well-ventilated area and always wear protective gear when handling heated materials.
Creating Complex Props and Accessories
Props bring your cosplay to life, but complex pieces like weapons and accessories need careful planning.
Start by sketching your design and breaking it down into manageable sections.
Combine EVA foam for larger structures with resin casting for intricate details.
Use 3D printing to create precise, repeatable parts.
Add weathering techniques and prop aging to give your pieces that battle-worn, realistic finish cosplayers love.
Adding LED Lights and Electronics
To bring your cosplay props to life with LED lights, you’ll need a basic understanding of electronics and safety.
Start with a simple circuit design that matches your costume’s energy needs.
Here are five essentials for adding electronics to your props:
- Choose the right battery type (lithium for longer life)
- Use LED strips with adhesive backing
- Install hidden switches for easy access
- Add diffusion materials for softer glow
- Include ventilation holes for heat management
Finishing and Painting Prop Details
With careful attention to detail, you’ll bring your props to life through strategic painting and finishing.
Start with a primer coat, then layer colors using techniques like dry brushing for texture or airbrushing for smooth gradients.
Don’t forget to weather your props with subtle scuffs and battle damage for authenticity.
Mastering Structured Cosplay Techniques
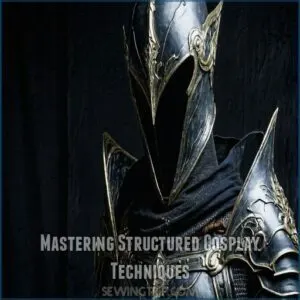
You’ll learn to make impressive costume elements like floating skirts, body armor, and structured hats that keep their shape perfectly.
These techniques will help you create eye-catching details that make your cosplay stand out, from mechanical parts that actually move to gravity-defying designs that wow the crowd.
Creating Gravity-Defying Skirts and Dresses
Creating those stunning, floating skirts seen in anime isn’t magic – it’s all about smart construction.
Start with a circle skirt base, then add layers of petticoats and crinoline for volume.
Consider incorporating gathered tulle layers using this simple tulle sewing tutorial.
Plastic boning sewn into channels helps maintain shape, while strategically placed hoops create that perfect float.
Work in sections, testing the movement as you go.
Remember, gravity-defying doesn’t mean uncomfortable – balance structure with wearability.
Building Body Armor and Exosuits
Body armor and exosuits transform ordinary cosplays into epic masterpieces.
Start by creating a paper template to make sure of proper fit, then transfer your design onto EVA foam.
You can also find various cosplay armor materials and guides online, such as at cosplay armor shops.
Layer foam pieces for depth and durability, using heat to shape curves.
Add articulation points at joints for mobility, and consider wearable electronics for that extra wow factor.
Always test range of motion before finalizing your build.
Making Structured Hats and Headpieces
Structured hats and headpieces can transform your cosplay from good to incredible.
Start by creating a wire frame base that matches your head measurements.
Layer foam or buckram to build volume, then cover with your chosen fabric.
For durability, reinforce stress points with interfacing and add secure elastic straps.
Don’t forget to test the fit frequently – a wobbly crown can really spoil your royal entrance!
Adding Mechanical and Moving Parts
Moving parts can transform a static costume into something extraordinary.
Small servo motors, controlled by Arduino boards, let you create wings that flap, armor pieces that shift, or weapons that light up.
Start with basic LED installations before advancing to more complex mechanisms.
Wire your components carefully, using 3D printed housings to protect delicate parts.
Test everything thoroughly before wearing – nobody wants a malfunction mid-photoshoot!
Working With Patterns and Measurements
You’ll need accurate measurements and the right pattern to create a cosplay costume that fits you perfectly and looks just like your favorite character.
Store-bought patterns or making your own from scratch, you’ll learn how to adjust them to match both your body shape and your character’s design.
Taking Accurate Body Measurements
Taking precise measurements sets the foundation for a perfect-fitting cosplay.
Start with a flexible measuring tape and a friend to help reach tricky spots.
For accuracy, wear fitted clothes or undergarments you’ll use with the costume.
Record your bust (fullest point), waist (natural bend), and hips (widest part).
Don’t pull the tape too tight – you should be able to slide a finger underneath.
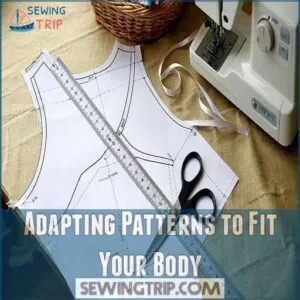
Adapting Patterns to Fit Your Body
When your cosplay pattern doesn’t quite match your measurements, don’t worry – it’s totally normal.
Start by comparing your measurements to the pattern size chart, then make gradual adjustments between sizes using pattern grading techniques.
You can also find various products and tools online, such as those for sewing pattern adjustments, to help you get the best fit.
Focus on key areas like bust, waist, and hips first.
For precise fitting adjustments, use a muslin mockup to test changes before cutting into your final fabric.
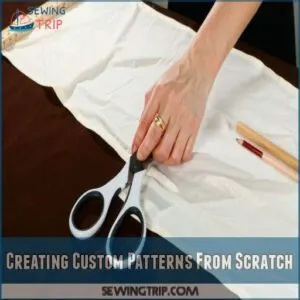
Creating Custom Patterns From Scratch
Learning to draft custom patterns opens up endless cosplay possibilities.
Start by measuring your body carefully and sketching your design on paper.
Create a basic template using muslin fabric, marking key points like darts and seam lines.
Test your pattern with inexpensive fabric before cutting into your final material.
Remember to add seam allowances and label each pattern piece clearly.
Using Pattern Grading for a Perfect Fit
Pattern grading transforms basic sewing patterns into perfectly fitted cosplay masterpieces.
You’ll need to adjust key measurements while maintaining the original design’s proportions.
Think of it like resizing a digital image – everything scales together.
- Measure twice, grade once – accuracy is your best friend here
- Start with small adjustments (1/4 inch at a time)
- Test your graded pattern with cheap fabric first
Once you’ve mastered grading, you’ll never struggle with ill-fitting costumes again.
Finishing and Preserving Your Cosplay Costume
You’ll need to protect your cosplay costume from damage and wear by learning proper cleaning and storage methods that work for different materials.
With regular maintenance and careful handling, you can keep your costume looking fresh and ready for your next convention or photoshoot.
Properly Laundering and Storing Cosplay Costumes
Now that you’ve got your measurements and patterns sorted, let’s keep your cosplay creations looking fresh.
Proper laundering starts with checking fabric care labels and using gentle detergents, especially for delicate nylon fabrics that may require cold water washing.
Store costumes in garment bags or boxes away from direct sunlight, with acid-free tissue paper between folds.
Heavy pieces like armor need dedicated storage space, while delicate items should lay flat to maintain their shape.
Preventing Damage and Wear and Tear
With proper care, your cosplay creations can withstand countless conventions.
Store costumes in garment bags away from direct sunlight to prevent fading and fabric breakdown.
Use fabric protector sprays on delicate materials, and reinforce high-stress areas with interfacing before wear.
Keep props in padded containers, and always transport costumes on hangers rather than stuffing them in bags.
Remember to air out pieces post-convention.
Repairing and Altering Existing Costumes
Your beloved cosplay costume needs a fix? Even small repairs can keep your creation going strong.
Start by patching holes using matching fabric and thread colors.
Replace broken zippers with a seam ripper and steady hands.
For loose buttons, reinforce them with sturdy thread.
When costumes feel tight or loose, adjust side seams and darts to perfect the fit.
Creating a Maintenance Routine
Regular care keeps cosplay outfits ready for their next adventure.
A simple maintenance schedule prevents last-minute costume disasters and extends the life of your favorite pieces.
Here are three game-changing habits:
- Spot-clean stains within 24 hours
- Check seams and attachments monthly
- Store costumes in breathable garment bags with silica packets
Think of it as giving your character’s wardrobe the royal treatment it deserves.
Advanced Cosplay Sewing Techniques
Taking your cosplay skills to new heights starts with mastering advanced techniques that’ll set your creations apart.
Once you’ve got the basics down, try your hand at fabric manipulation like pintucks, pleating, and smocking to add depth and texture.
For a professional finish, focus on precision when cutting, marking, and stitching pieces together, as seen in high-end fashion designs learned from master sewing techniques.
Advanced tailoring tricks like bound buttonholes, welt pockets, and rolled hems give your costumes that professional edge.
Pattern drafting becomes your secret weapon – create custom bodices, transform sleeve shapes, or design intricate armor pieces from scratch.
Mix in some sculpting techniques using interfacing and stabilizers to craft structured elements that hold their shape perfectly.
Want to nail those gravity-defying anime looks?
Experiment with horsehair braid, boning, and hidden support structures.
For armor pieces, combine multiple layers of interfacing with careful topstitching to create dimensional effects that look like metal but wear like fabric.
Frequently Asked Questions (FAQs)
How do you make money cosplaying?
Create cosplay content on social media platforms.
Sell prints or merchandise.
Become a convention guest.
Offer commissioned costumes.
Judge contests.
Host workshops.
Partner with brands for sponsorships to monetize your cosplay skills.
How to make a cosplay?
Like building a puzzle, start with simple costume pieces and gradually expand.
Choose a character you love, gather reference images, pick suitable materials, and combine basic sewing with crafting skills to bring your vision alive.
Should you sew or resew a cosplay costume?
Resewing a cosplay costume can improve fit and authenticity.
You’ll get better results by starting fresh with proper measurements and materials.
But if time’s tight, altering an existing costume works well too.
How do I start sewing a costume?
Start with simple projects like accessories or single costume pieces.
You’ll want to gather basic supplies, choose budget-friendly fabric, and learn fundamental techniques through practice.
A sewing machine can greatly aid beginners who are looking to learn thread tension basics, but it isn’t required to start with.
How long does it take to make a cosplay?
The time to create a cosplay varies based on complexity.
Simple costumes might take a weekend, while intricate ones could need months.
Your skill level and available time will influence the project’s duration.
How does cosplay differ from modern garment sewing?
Making cosplay outfits involves creating fantasy-inspired designs with unconventional materials, unique closures, and dramatic shapes.
You’ll focus more on visual impact than everyday wearability, unlike modern garment sewing’s practical, comfort-first approach.
What Are Some Good Tips for Taking Body Measurements When Making Your Own Patterns?
Wear snug-fitting clothes, stand naturally, and use a flexible measuring tape.
Take measurements in the morning before eating, mark key points with sticky notes, and always add wearing ease when drafting patterns.
What Fabrics Work Best for Making Armor Pieces Like Breastplates and Pauldrons?
For armor pieces, EVA foam proves most effective since it’s lightweight and moldable.
You’ll also want craft foam for flexibility, Worbla for durability, and pleather to create realistic-looking metal textures on breastplates and pauldrons.
How Can You Add LED Lights or Other Electronics to a Cosplay Costume?
In a dazzling twist, you’ll need conductive thread and basic electronics.
Sew LED strips onto fabric using conductive thread, connect to a battery pack, and secure wires discreetly.
Test circuits before final installation.
What Sewing Machine Features Are Most Useful for Sewing With Thick and Tricky Materials?
Look for a machine with adjustable presser foot pressure, walking foot capability, and powerful motor.
Metal internal components guarantee durability when handling thick fabrics.
You’ll want multiple stitch options and needle positions.
Where Can You Find Wig Styling Tutorials Specifically for Cosplay Characters?
You’ll find excellent wig styling tutorials for cosplay on YouTube channels like Arda Wigs’ Education channel or Epic Cosplay Wigs.
They offer step-by-step guides, helping you nail that perfect character look.
They also sprinkle in creativity tips.
How to start sewing your own cosplay?
Start simple by sewing accessories like cat ears or a cape; choose cheap fabric.
Let your creativity guide you, and don’t be afraid to make mistakes—they’re stepping stones.
Each stitch brings you closer to cosplay mastery.
Can you make cosplay without sewing?
You can craft awesome cosplay using no-sew methods. Think clever repurposing of clothes, smart use of adhesives, and readily available materials. It’s easier than you think!
Is it cheaper to make your own cosplay?
Wondering if crafting your own cosplay is cheaper?
Often, yes!
By tailoring each part and repurposing materials, you can cut costs compared to store-bought outfits, adding personal touches that showcase your creativity and resourcefulness.
How much do cosplay makers make?
Cosplay makers’ earnings vary widely.
Hobbyists might make nothing, while professionals can earn $5,000 to $20,000+ annually through commissions, selling patterns, or creating content.
Success depends on skill, marketing, and dedication to growing your brand.
How do you hide seams in tight-fitting costumes?
To hide seams in tight-fitting costumes, use invisible zippers, place seams along natural lines, and press them flat.
Hand-stitch or use blind hems to minimize visibility.
Fabric glue or fusible webbing can also help conceal seams efficiently.
Whats the best way to sew LED lights?
Secure LED lights to fabric using a flexible conductive thread.
Stitch carefully to make small, tight loops.
Make sure your battery pack is accessible.
This setup keeps lights in place and minimizes tangling during movement.
Can I modify store-bought costumes with sewing?
You can easily modify store-bought costumes with sewing.
Adjust the fit, add embellishments like patches or appliques, or incorporate new elements.
This approach personalizes your cosplay and enhances your creativity without starting from scratch.
How to make costume pieces detachable for cleaning?
Think of detachable costume pieces like puzzle pieces—use Velcro strips, snaps, or zippers for easy removal and reattachment.
These fasteners let you mix and match with ease, keeping your garments washable and versatile.
What tools help prevent fabric fraying while sewing?
Use pinking shears to cut fabric; they create a zig-zag edge that resists fraying.
A serger finishes seams quickly, preventing unraveling.
Try a simple stitch like a zig-zag along the raw edge. It’s a lifesaver!
Conclusion
Ready to transform into your favorite characters through cosplay sewing?
With patience and practice, you’re set to master every costume component from basic fabrics to complex props.
Don’t worry if things aren’t perfect at first—it’s all about learning and perseverance.
By focusing on accurate measurements and selecting the right materials, you’ll see your skills grow.
Remember, it’s the journey that makes cosplay truly rewarding.
So grab that fabric, start sewing, and enjoy every creative moment!

