This site is supported by our readers. We may earn a commission, at no cost to you, if you purchase through links.
Master basic hand and machine stitches first, then focus on clean finishes and proper grainline alignment. Don’t rush your measurements or you’ll be seeing more of that seam ripper than you’d like!
Take on one project at a time, celebrate your wins, and learn from mistakes. The secret lies in understanding which techniques work best for different fabric types.
Table Of Contents
Key Takeaways
- Choose quality tools first – You’ll prevent frustration by investing in sharp fabric scissors, a reliable sewing machine, and seam rippers rather than using household scissors that’ll create jagged edges and ruin your projects.
- Master fabric and pattern pairing – You’ll save time and avoid disasters by matching fabric weight to your pattern’s suggestions, checking grainline alignment, and choosing beginner-friendly patterns with simple shapes.
- Focus on one project at a time – You’ll build skills faster and actually complete garments when you resist starting multiple projects, allowing you to learn from mistakes and celebrate each finished piece.
- Practice essential techniques consistently – You’ll achieve professional results by mastering basic hand and machine stitches, proper seam finishes, and accurate measurements before rushing into complex projects.
Choosing Fabrics, Patterns, and Styles for Success
You’ll save yourself countless hours and headaches by choosing the right fabric, pattern, and style combination from the start—trust me, we’ve all learned this lesson the hard way!
Smart fabric choices are your secret weapon—skip the learning curve disasters!
Smart fabric choices that match your pattern’s suggestions and your skill level turn even simple projects into wins you’ll want to show off.
Prioritizing Patterns Based on Measurements
Pattern sizing isn’t your enemy—it’s your secret weapon. Start by taking accurate body measurements using a flexible tape measure, then compare them to the pattern’s size chart rather than assuming your ready-to-wear size.
Most sewing patterns run larger than store-bought clothes, so you’ll often need a smaller pattern size. Choose based on your largest measurement for the best garment fitting results.
Starting With Basic Patterns
Your beginner’s journey starts with simple sewing patterns that build confidence. Choose basic shapes like A-line skirts or straight-seam tops for your first Beginner Projects. These foundational sewing patterns teach essential Sewing Basics without overwhelming complexity.
Many Sewing Classes and online course platforms recommend starting here before tackling complex Garment Fitting. Master Pattern Selection by choosing designs with minimal pieces and clear instructions.
Following Fabric Suggestions on Pattern Envelopes
Before you start cutting, those pattern envelopes hold your roadmap to success. The fabric suggestions aren’t just recommendations—they’re your best friend for achieving professional results.
Trust the designer’s expertise when choosing materials for your sewing patterns.
- Check fabric types listed on the envelope for ideal drape
- Note stretch requirements to guarantee proper fit and function
- Review yardage amounts for accurate fabric selection planning
- Match fabric grainline directions with pattern piece markings
Considering Fabric Weight, Care Instructions, and Properties
Fabric weight determines how your finished project will drape and feel. Lightweight cottons work beautifully for quilting, while heavier denims suit structured garments.
Always check care labeling before you sew—nobody wants their masterpiece shrinking after the first wash!
**Understanding textile science helps with fabric selection.
Different fibers behave uniquely, so matching fabric properties to your project ensures lasting results.
Understanding Sizing Differences in Ready-to-wear
Ready-to-wear sizing drives many home sewers crazy! Store-bought garments use vanity sizing and inconsistent measurements across brands. Your size 10 dress might fit like a 12 in another brand.
When sewing, you’re measuring your actual body for fit analysis, not guessing at sizing variations. Check garment measurements on patterns against your body types and measurements.
Your sewing machine creates perfectly fitted womens garments every time with proper size conversion techniques.
Must-Have Sewing Tools and Equipment
You’ll transform your sewing projects from frustrating disasters to masterpieces when you’ve got the right tools in your arsenal.
Think of quality sewing equipment as your best friend who never lets you down—unlike that dull pair of kitchen scissors you used once and immediately regretted.
Choosing The Right Sewing Machine
Your sewing machine becomes your creative partner, so choose wisely. Beginner sewers benefit from electronic models with automatic threaders and 20-50 stitch options. These machines handle basic sewing skills without overwhelming complexity.
Consider your project frequency—monthly sewers need durable models with reliable bobbin management. Test different sewing machine types at local dealers.
Proper machine maintenance keeps your investment running smoothly for years of creative adventures. When selecting a machine, consider the importance of having the right sewing machine features to guarantee a great sewing experience.
Selecting Quality Sewing Tools
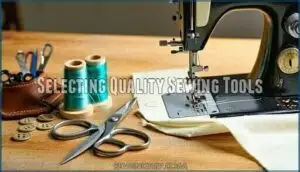
Quality beats quantity when building your sewing arsenal. Invest in essential sewing tools like sharp needles, quality thread, and reliable sewing notions rather than collecting every gadget.
Choose fabric cutters that maintain their edge with proper tool maintenance. Your thread selection impacts every stitch, so don’t skimp here. Remember, good tools make the difference between frustration and flow.
A well-maintained sewing machine is essential for achieving professional results.
Using Dedicated Fabric Scissors
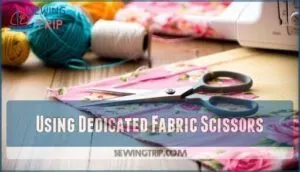
Your scissors are your sewing superhero’s best friend. Never let household scissors near your precious fabric – they’ll create jagged edges that’ll haunt your stitches forever. Invest in dedicated fabric scissors and treat them like gold.
Sharp scissors make clean cuts that sew beautifully together. Proper scissor maintenance tips are essential for extending the life of your sewing tools.
- Fabric Cutting: Keep one pair solely for fabric to maintain razor-sharp edges
- Scissor Maintenance: Oil hinges monthly and store in protective sheaths
- Blade Selection: Choose 8-10 inch blades for versatility in most sewing projects
- Handle Ergonomics: Test grip comfort before buying to prevent hand fatigue during long cutting sessions
Importance of Seam Rippers
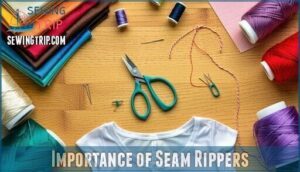
Everyone makes sewing mistakes – that’s where your trusty seam ripper becomes your best friend. This small tool, with its sharp, curved blade, easily removes incorrect stitches without damaging fabric. You’ll use it constantly for thread removal and fabric repair.
| Mistake Type | When to Use Seam Ripper | Pro Tip |
|---|---|---|
| Wrong seam placement | Remove entire seam line | Work slowly to avoid fabric snags |
| Crooked stitching | Pick out uneven sections | Use good lighting for precision |
| Buttonhole errors | Carefully open oversewn holes | Test on fabric scraps first |
Avoiding Household Scissors for Fabric
When you’re tempted to grab those kitchen scissors for fabric cutting, resist the urge. Household scissors dull quickly on fabric, creating jagged edges that fray and compromise sewing accuracy.
Dedicated fabric scissors maintain blade sharpness longer, ensuring clean cuts that preserve your material’s integrity. Your needles will thank you, and your finished projects will look professional instead of homemade.
Essential Sewing Techniques for Quality Results
You’ll discover that mastering a handful of core techniques transforms every project from "homemade" to "handcrafted with pride."
Think of these fundamentals as your sewing superpowers—once you’ve got straight stitching, clean seam finishes, and proper fabric handling down pat, even your trickiest patterns won’t intimidate you anymore.
Mastering Hand and Machine Stitching
Before you tackle quilting or complex projects, you’ll need solid fundamentals. Hand stitching builds muscle memory, while machine work demands proper stitch tension and thread selection.
Master basic running stitches first, then practice consistent seam allowances on your machine. Regular machine maintenance prevents tension headaches, and quality needles paired with appropriate thread make all the difference in your sewing success.
Achieving Invisible Seams and Clean Finishes
Once you’ve nailed your basic stitches, invisible seams become your secret weapon for professional-looking garments. These clean finishes hide raw edges and create polished results that’ll make people think you bought your creation from a boutique.
Use a whip stitch along seam allowances, select appropriate thread colors, and invest in quality notions tools.
Your fabric selection matters too—some materials cooperate better with seam techniques than others.
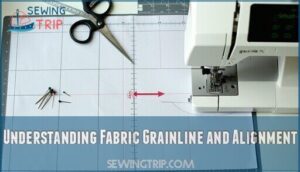
Understanding Fabric Grainline and Alignment
The secret to professional-looking Sewing Projects lies in mastering Fabric Orientation. Understanding Grainline Basics transforms your work—fabric’s lengthwise grain provides stability while crosswise offers stretch.
When placing Sewing Patterns, align grainline arrows parallel to selvage edges for proper drape. This Pattern Alignment prevents twisted seams and warped hems.
Textile Structure matters more than you’d think for Sewing Precision. To achieve ideal results, consider the importance of fabric grain in your sewing projects.
Using The Correct Needles and Threads
Matching thread to fabric isn’t rocket science, but it makes a huge difference. **Use cotton thread for cotton fabrics, polyester for synthetics.
**
Sharp needles work best for wovens, while ballpoint needles prevent runs in knits. For embroidery floss, grab an embroidery needle with a larger eye.
**Single thread reduces tension issues and improves stitch quality.
Managing Sewing Projects Efficiently
You’ll sew better projects when you tackle one at a time instead of juggling five half-finished garments that stare at you from every corner of your sewing room.
Focus on completing each project before starting the next one, and you’ll build skills systematically while actually wearing the clothes you make.
Starting One Project at a Time
You’ll learn to sew faster when you focus on one project at a time. Project planning becomes clearer without juggling multiple patterns.
Time management improves dramatically—you won’t waste hours hunting for the right fabric or matching thread. Goal setting feels more achievable when you see steady progress on a single garment.
Prioritization becomes natural. Focus techniques work better too. Complete one project before starting another.
Learning From Mistakes on Each Project
Every mistake you make becomes your best teacher when you approach it with curiosity instead of frustration. Document what went wrong through project analysis and error correction—was it skipped pressing or incorrect grainline alignment? Join a sewing community for feedback, watch video tutorials addressing your specific issues, and practice mistake prevention techniques.
This skill building transforms quality control from guesswork into mastery. Understanding sewing machine maintenance is essential for achieving professional results and extending the life of your equipment.
Motivation From Completing a Project
There’s nothing quite like the satisfaction that comes from finishing your first handmade garment. Project completion delivers a confidence boost that’s hard to match—you’ve transformed fabric into something uniquely yours.
This personal achievement fuels creative expression and skill building. Each finished piece proves you can learn to sew, joining a supportive sewing community that celebrates handmade items together.
Buying Fabric and Patterns as Needed
Smart shoppers buy fabric and patterns only when they’re ready to start. This approach prevents your fabric storage from overflowing with unused materials that seemed perfect online shopping.
Instead of hoarding sewing patterns and notions tools, focus your sewing budget on current projects. You’ll make better fabric selection choices when you know exactly what garments or accessories you’re creating right now.
Advancing Skills and Avoiding Common Mistakes
You’ve built a solid foundation, but now it’s time to polish your technique and sidestep those sneaky mistakes that can turn a promising project into a learning experience.
Don’t worry—even seasoned sewers still accidentally sew sleeves on backwards or forget to backstitch, so you’re in good company as you hone your skills.
Learning From Errors as Opportunities for Growth
Mistakes aren’t failures—they’re your best teachers. When you sew a crooked seam or misread pattern instructions, pause for error analysis. Ask yourself what went wrong and why.
This growth mindset transforms frustration into progress tracking opportunities. Video tutorials can help with mistake correction, but hands-on experience sews wisdom into your skill refining journey.
Each "oops" moment brings you closer to sewing definition mastery at Sew Modern levels.
Avoiding Rushing and Measurement Mistakes
Patience becomes your best friend when accurate measurements and precision cutting matter most. Rushing through projects leads to crooked seams and wasted fabric. Slow stitching prevents costly mistakes that’ll have you reaching for the seam ripper again.
- Double-check measurements with your measuring tape before cutting
- Keep scissors sharp and cut slowly for clean edges
- Pin carefully and test-fit pieces before final stitching
- Take breaks when frustration builds during hand sewing sessions
Choosing The Right Fabric for Each Project
Fabric selection makes or breaks your handmade items. Understanding fiber content and weave types saves you heartache later. Cotton works great for beginners, while silk demands experience. Match fabric weight to your pattern’s suggestions for best results.
| Fabric Type | Best Projects | Skill Level |
|---|---|---|
| Cotton | Quilts, basic garments | Beginner |
| Knits | T-shirts, leggings | Intermediate |
| Silk | Blouses, formal wear | Expert |
Visit your local Sew Modern shop for texture analysis guidance and color matching help with their notions tools.
Improving Machine Handling and Stitch Consistency
Good machine handling starts with mastering the basics. Adjust your machine tension and stitch length for different fabrics—lightweight needs 1.5-2.0mm, heavy fabric wants 3.0-3.5mm. Control your sewing speed through practice; barefoot pedal work gives better control.
Quality thread and proper fabric feed prevent jams. Take sewing classes or step-by-step video courses to sew consistently.
Understanding sewing machine maintenance is essential for superior performance and preventing common issues.
Celebrating Progress and Completed Projects
You’ve accomplished something outstanding—celebrate it! Document finished garments in sewing journals or create a project showcase for progress tracking. Take photos, reflect on skills gained, and let that satisfaction fuel your next adventure.
Share your work with the quilting community or online sewing school groups for encouragement. **Your growth deserves recognition.
Frequently Asked Questions (FAQs)
How can I choose the right sewing machine within my budget?
Start by setting your budget first, then research machines within that range. Read reviews, visit stores to test different models, and prioritize features you’ll actually use over flashy extras.
What are some common mistakes to avoid when sewing?
Picture Sarah cutting her first dress pattern without checking the grain—her finished garment twisted like a pretzel! You’ll avoid disasters by measuring twice, checking fabric grain, pressing seams properly, and never skipping pins when cutting patterns.
How can I improve my sewing skills and learn from my mistakes?
Practice regularly on scrap fabric, keep detailed notes of mistakes, take classes with experienced instructors, and don’t rush—each error becomes your best teacher when you analyze what went wrong.
What are some tips for managing multiple sewing projects at once?
Create clear containers for each project you’re tackling. Label everything, set deadlines, and rotate between tasks when you hit snags. Keep supplies organized and finish smaller pieces first.
How do I select the right fabric and pattern for my sewing project?
Consider your project’s purpose first. Match fabric weight and drape to the garment type—lightweight cottons for blouses, sturdy denim for jeans.
Choose patterns that complement your skill level and body type.
How do you fix sewing machine tension problems?
Check your upper thread tension dial first – it’s usually the culprit. If stitches loop on top, loosen it. If they’re tight underneath, tighten it. Clean your bobbin case too.
Whats the best way to press seams professionally?
Gentle heat transforms your fabric’s personality—use a pressing cloth and lift your iron instead of dragging.
Press seams open or to one side, letting steam work its magic before setting with dry heat.
How do you handle stretchy or difficult fabrics?
You’ll need ballpoint needles for knits and walking foot for stretchy seams. Use polyester thread, gentle tension, and stretch stitches. Pin sparingly and let fabric feed naturally.
When should you use interfacing or stabilizers?
Ever wonder why some fabrics feel flimsy while others stay crisp? **Use interfacing on button bands, collars, and waistbands for structure.
**
**Apply stabilizers when embroidering or working with stretchy knits to prevent puckering and distortion.
How do you troubleshoot skipped stitches effectively?
First, rethread your needle and check your thread tension—it’s often too tight.
Switch to a fresh needle that matches your fabric weight, then test your stitch length and presser foot pressure.
Conclusion
Threading together all the techniques you’ve learned is like weaving a tapestry – each skill builds upon the last to create something beautiful. Every project teaches you something new, whether it’s handling tricky curves or perfecting your tension.
You’ll discover that knowing how to sew well isn’t just about following instructions; it’s about understanding your materials and trusting your hands. Even experienced sewists make mistakes – they just know how to fix them gracefully and keep moving forward with confidence.
- https://www.mygoldenthimble.com/essential-sewing-techniques-you-should-master/
- https://ctnbee.com/blog/en/basic-sewing-techniques-review/
- https://oliverands.com/community/blog/2017/11/15-tips-to-improve-your-sewing.html
- https://www.contrado.com/blog/most-common-sewing-mistakes/
- https://www.dutchlabelshop.com/en_us/blog/mastering-advanced-sewing-techniques/


