This site is supported by our readers. We may earn a commission, at no cost to you, if you purchase through links.
For manual wire loop threaders, simply insert the diamond-shaped wire through your needle’s eye, pass your thread through the wire loop, then pull the threader back through—dragging the thread along.
Automatic threaders on sewing machines work by positioning your thread in the threading hook, lowering the lever to catch the thread, then pulling it through the needle. Cut your thread at a 45-degree angle and keep it under 18 inches for best results.
The key is gentle, steady pressure—forcing never works and often breaks the delicate threading mechanism.
Table Of Contents
Key Takeaways
- Master the basic technique: Insert the wire loop through your needle’s eye, pass the thread through the loop, then pull the threader back through – this simple three-step process works for most manual threaders and saves time once you get the rhythm down.
- Match your tools to your project: Wire loop threaders work great for basic sewing but break easily, while flat hook threaders last 30 times longer and handle thicker threads like embroidery floss – choose based on what you’re actually sewing.
- Use gentle pressure and proper thread prep: Cut thread at a 45-degree angle, keep it under 18 inches long, and never force the threading process – most breakage happens when you rush or use too much pressure.
- Know when to replace your threader: Watch for bent wire loops, difficulty catching thread, or consistent failures – a $2-5 replacement beats the frustration of fighting with broken equipment during your projects.
Types of Sewing Needle Threaders
Not all needle threaders work the same way, and picking the right one makes a huge difference. From basic wire loops to fancy LED models, each type has its own strengths depending on what you’re sewing and how your hands feel that day.
Manual Wire Loop Threaders
If you’ve ever squinted at a tiny needle eye until your vision blurred, you’ll love the manual wire loop threader—it’s the most basic, affordable tool that turns threading from a frustrating chore into a five-second win.
These simple sewing aids feature a diamond-shaped wire loop that slips right through even the tiniest needle eyes. You just push the loop through, catch your thread, and pull it back—done.
They’re perfect for basic hand-sewing tasks and work beautifully when you maintain proper thread tension to avoid tangles.
Flat Hook Threaders
Flat hook threaders cost a bit more than the wire loop versions, but they’re worth every penny if you’re tired of flimsy threaders snapping mid-project. The flat hook design offers serious durability—perfect for manual threading with thicker embroidery floss or stubborn needle eyes.
These needle threading tools excel at needle compatibility across various sizes, and their hook durability means you won’t constantly replace broken threaders while mastering your threading techniques.
LED-lighted Threaders
Threading a needle in dim light or with aging eyes can feel like trying to find a black cat in a dark room—that’s where LED-lighted threaders step in to save the day.
These handy needle threading tools feature built-in LED lights that brighten your work area, providing essential vision assistance for low light conditions.
The bright beam creates perfect thread visibility, making manual threading straightforward while offering precise needle guidance for accurate results every time.
Automatic and Built-in Threaders
Threading a needle used to be the worst part of sewing—squinting at that tiny eye, fumbling with thread, and losing your patience. Now modern machines have automatic needle threading that actually works. Just position your thread in the guide, pull the lever, and you’re done in seconds.
These lever-operated threading systems are surprisingly clever. They grab your thread and feed it right through the needle eye without any of the usual hassle.
Automatic threading stays reliable when you keep the mechanism clean and properly aligned.
Comparing Durability and Best Uses
When choosing between threader materials, durability tests reveal significant performance gaps. Wire loop threaders fail after roughly 1,900 cycles, while flat hook versions withstand over 56,000 cycles—nearly 30 times longer. That’s why understanding your threading techniques and needle sizes matters for long-term success.
- Wire loops: Best for basic hand sewing with standard threads, but expect frequent replacements
- Flat hooks: Excel with embroidery floss and tight needle threading methods, lasting years
- LED models: Perfect for low-light conditions, combining visibility with reinforced durability
User reviews consistently favor flat hook and LED threaders for serious sewers, though wire versions remain popular for occasional use. For best results, consider using durable threaders to minimize breakage and extend the lifespan of your sewing tools.
How to Use a Manual Needle Threader
Manual needle threaders take the guesswork out of threading needles, especially when your eyes aren’t what they used to be.
You’ll master this handy tool in just a few simple steps, making your sewing projects flow smoothly from start to finish.
Preparing Your Needle, Thread, and Threader
Threading a needle is easier when you’re prepared. Just like you’d get your workspace ready before starting any project, having the right tools makes all the difference.
Grab your needle threader, needle, and about 8 inches of thread. Check your needle eye isn’t bent or damaged—this simple needle care step prevents frustration later.
Keep your threader’s wire loop straight for best threading techniques results.
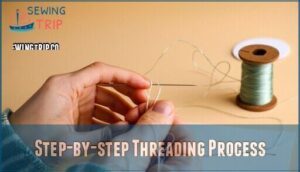
Step-by-step Threading Process
Once you’ve got everything ready, the actual threading becomes as simple as following a dance – just three smooth moves that’ll have your needle ready in seconds.
First, slide your needle threader’s wire loop through the needle’s eye – this gives you eye visibility for better thread management. Next, pass your thread through that wire loop, keeping about four inches of tail for proper needle handling.
Tips for Fine and Delicate Threads
Fine threads can be trickier than a cat trying to thread a needle – they slip, they tangle, and they seem to have a mind of their own. Here’s how to master threading delicate fabric threads:
- Cut thread at an angle – Sharp diagonal cuts prevent fraying and slip through easier
- Keep thread tension light – Too much pull breaks delicate fibers like embroidery floss
- Use proper needle care – Clean, burr-free needles won’t snag fine threads
- Try the "pinch and pull" technique – Hold thread close to the needle threader for better control
Safety and Ergonomic Grip Considerations
Threading needles might seem harmless, but countless sewers have learned the hard way that proper grip and safety can mean the difference between a smooth project and a trip to the first aid kit. Ergonomic design matters when choosing your needle threader – those with comfortable grips reduce finger strain and prevent accidental pricks by 30%.
Keep these things in mind:
| Safety Features | Grip Comfort | Injury Prevention |
|---|---|---|
| Rounded edges | Non-slip coating | Proper hand position |
| Sturdy construction | Ergonomic shape | Controlled pressure |
| Smooth operation | Comfortable size | Steady threading motion |
| Quality materials | Textured surface | Accident reduction focus |
How to Use an Automatic Needle Threader
Automatic needle threaders built into sewing machines take the guesswork out of threading and work perfectly for beginners who struggle with manual methods. You’ll find this handy feature on most modern machines, and once you learn the simple lever-and-hook system, you’ll thread needles in seconds every time.
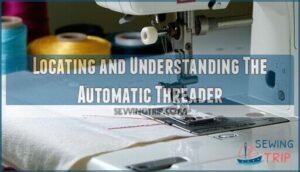
Locating and Understanding The Automatic Threader
Most sewing machines hide their automatic needle threader like a secret weapon – it’s usually tucked right behind or beside the needle, waiting to save you from squinting and fumbling with tiny threads.
You’ll spot a few key parts:
- The threading lever – pulls down to activate the mechanism
- Thread guide hook – catches your thread during the process
- Needle alignment markers – help position everything perfectly
Look for a small metal arm or lever that swings into action when activated.
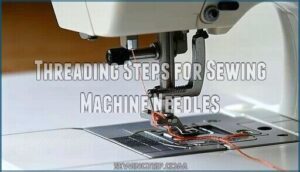
Threading Steps for Sewing Machine Needles
Now that you’ve found your machine’s automatic threader, let’s walk through the actual threading process—it’s like following a dance, where each step flows naturally into the next. First, lower the needle threader lever completely to access the thread guide. Hook your thread onto the guide while maintaining gentle tension. Pull the lever down as far as possible, then turn it toward the machine’s back—this motion allows the hook to pass through the needle eye and grab your thread.
| Step | Action |
|---|---|
| 1 | Lower threader lever, hook thread on guide |
| 2 | Pull lever down fully, turn toward back |
| 3 | Release lever to pull thread through needle eye |
This Operating Needle Threader technique ensures proper Threading Sewing Machine Needles every time, supporting both Stitch Quality Control and Sewing Speed Optimization through consistent needle eye care.
Common Mistakes and How to Avoid Them
Even experienced sewers can turn automatic needle threaders into their worst enemy by making a few simple but costly mistakes. These user errors often lead to threading difficulties, thread breakage, and needle damage when using a needle threader improperly.
Common threading mistakes include:
- Forcing thick threads – Cramming heavy thread through causes 95% of threader breakage and needle damage
- Skipping safety precautions – Not turning off machines during threading upper thread creates injury risks
- Wrong needle sizes – Mismatched needles make needle threading techniques ineffective and frustrating
- Rushing the process – Quick movements cause thread snags and bent threading mechanisms
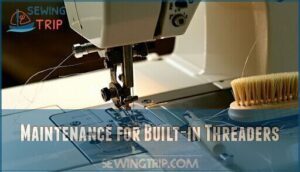
Maintenance for Built-in Threaders
Your sewing machine‘s built-in threader might seem like a set-it-and-forget-it feature, but treating it like your car engine—with regular care and attention—will keep it running smoothly for years to come. Clean the thread guide monthly with a soft brush, and check for bent parts that could damage your needle threading techniques.
| Maintenance Task | Frequency |
|---|---|
| Threader Cleaning | Monthly |
| Device Calibration | Every 6 months |
| Built-in Upkeep Check | Before major projects |
A little regular TLC keeps your sewing machine—and its automatic threader—working like a charm, so you can avoid those surprise repairs.
Troubleshooting Common Needle Threader Issues
Even the best needle threaders can act up sometimes, leaving you frustrated when they break or won’t cooperate with your thread.
Here’s how to fix common problems and keep your threading smooth, so you can get back to the fun part of sewing.
Fixing Broken or Bent Threaders
Nothing kills the sewing mood faster than watching your trusty needle threader snap in half right when you need it most. But don’t toss that bent manual threader just yet—damage assessment can save you money and frustration.
If your threader’s salvageable, start with the wire loop. Use needle-nose pliers to straighten it carefully—go slow to avoid stressing the metal further. Keep a few spares around too, because sometimes a replacement beats a repair.
And here’s the thing: most threader casualties are preventable. Store yours flat instead of tossed in a drawer, and don’t force thick thread through needle eyes that are too small.
Preventing Thread Breakage and Jams
Ever notice how thread seems to have a mind of its own, snapping at the worst possible moment or creating mysterious tangles that would make a sailor jealous? Here’s the thing—most breakage happens when you’re forcing thick thread through tight needle eyes.
Thread tension control is your best friend here. Keep your thread guide clean, check for rough spots around the needle eye that act like tiny thread cutters, and match your thread material to your needle size for smooth sailing.
Choosing The Right Needle and Thread Size
Something as simple as mismatched needle and thread sizes can derail your entire project. Using a needle that’s too small for your thread weight creates skipped stitches in over 65% of cases, while oversized needles leave visible holes that compromise stitch quality. The sweet spot? Your needle eye should be about 40% wider than your thread diameter for ideal sewing performance. Understanding the correct needle size charts is essential for achieving professional results.
- Lightweight fabrics (silk, organza): Use 60/8-70/10 needles with T-18 to T-24 threads for delicate work
- Medium-weight cotton: Pair 80/12-90/14 needles with T-40 threads for balanced performance
- Heavy denim/canvas: Choose 100/16-110/18 needles with T-70 to T-90 threads for durability
- Fine embroidery work: Match 70/10 needles with 50-weight microfilament threads for crisp stitches
- General rule: Thicker fabric thickness requires larger needle sizes and heavier thread weight combinations
When to Replace Your Threader
Like a trusty sewing companion that’s seen better days, your needle threader will eventually show signs it’s ready for retirement. Watch for bent wire loops, frayed threading mechanisms, or difficulty grabbing thread—these breakage signs signal it’s time for replacement.
Threader Type Lifespan Replacement Cost
Regular maintenance schedules can extend threader wear, but when your needle threader lever won’t catch thread or the threading mechanism fails consistently, invest in a new one. Your sewing projects deserve reliable tools.
Essential Tips for Easier Needle Threading
Mastering needle threading doesn’t have to be a battle with tangled thread and pricked fingers.
With the right techniques for managing tension, building your skills, and staying safe, you’ll thread needles like a pro every time.
Managing Thread Tension and Avoiding Tangles
Thread tension troubles can turn your sewing project from zen to chaos faster than you can say "tangled mess." Smart thread control starts with these fiber handling basics:
- Cut thread at a 45-degree angle for cleaner needle threader insertion
Thread tension troubles can turn your sewing project from zen to chaos faster than you can say "tangled mess." Here’s how to keep your thread behaving:
- Cut thread at a 45-degree angle for cleaner needle threading
- Keep working thread under 18 inches—longer means more tangles
- Thread gently. Yanking just makes things worse
- Store spools upright so thread unwinds smoothly
- Toss frayed or old thread that’s past its prime
Get these basics right and you’ll spend less time cursing at knots and more time actually sewing.
Think of needle threading like learning to ride a bike – the more you practice those small motor movements, the smoother and more natural they become. Start with dexterity exercises using larger needles and thicker thread to build muscle memory.
Hand eye coordination improves through repetition – try threading without your needle threader occasionally to strengthen fine motor skills. These threading techniques develop thread control naturally through consistent practice.
Safety Tips to Prevent Finger Pricks
Nobody wants to turn their relaxing sewing session into a trip to the first aid kit, but those tiny needle points can be sneaky little troublemakers if you’re not paying attention. Here are essential safety precautions for injury prevention:
- Choose ergonomic grips – Needle threaders with comfortable grips reduce slipping and accidental finger pricks by 30%
- Work in good lighting – Poor visibility leads to fumbling with your sewing needle and threader materials
- Keep fingers away from needle points – Hold the needle threader firmly while positioning thread, never rush the needle threading techniques
Frequently Asked Questions (FAQs)
Can needle threaders work with embroidery floss?
Most needle threaders work beautifully with embroidery floss. Wire loop threaders handle single strands perfectly, while flat hook models excel with multiple strands and thicker floss materials for intricate needle threading techniques.
What thread weights work best with threaders?
Most needle threaders handle Thread Weight Limits from 12-50 weight effectively.
Fine Thread Options like 60-80 weight need gentle handling, while Heavy Duty Threads require sturdy flat hook threaders for reliable Needle threading techniques.
You’ll find most needle threaders work well with threads between 12 and 50 weight.
Finer threads—think 60 to 80 weight—need a lighter touch, while heavier threads call for sturdy flat hook threaders that can handle the job without bending.
While most needle threaders work with standard needles, Needle Size Compatibility varies considerably. Threading Challenges increase with specialized Sewing Needle Types:
- Universal threaders fit needles sizes 9-18 but struggle with heavy-duty needles
- Fine wire threaders work best with embroidery and quilting needle variations
- Hook-style threaders handle larger needle eyes more effectively than wire loops
- Machine threaders require specific needle threading techniques for each brand
- Heavy-duty threaders accommodate upholstery needles but may damage delicate ones
Needle Eye Variations mean you’ll need different threading approaches for a sewing machine needle. That’s why checking Threader Versatility before purchasing saves frustration later.
Can you use threaders for leather needles?
Most standard needle threaders work with leather needles, though heavy-duty threading requires careful needle eye size matching. Leather needle types with larger eyes accommodate threaders better than fine needles.
| Leather Needle Type | Threader Compatibility |
|---|---|
| Heavy leather needles | Excellent with wire loop threaders |
| Glover’s needles | Good with flat hook threaders |
| Sailmaker needles | May require manual threading |
For hand sewing leather projects, choose threading techniques that match your needle threader to the specific needle eye diameter. Threader adaptation becomes essential when working with thick threads commonly used in leather work.
Are there threaders for specialty craft threads?
You bet your bottom dollar there are! Many specialty craft tools accommodate unique threads that regular needle threaders can’t handle. Decorative threads, metallic thread, and monofilament thread often need specialized needle guides.
- Heavy-duty threaders – Handle thick embroidery floss and yarn
- Precision thread assist tools – Work with delicate silk and specialty fibers
- Magnetic sewing aids – Grip slippery threads like metallic and monofilament
The needle threader lever on some machines even adjusts for different thread weights.
Conclusion
Yesterday’s tangled threads and pricked fingers become tomorrow’s smooth, seamless stitching once you master how to use a sewing threader.
Whether you choose manual wire loops for portability or automatic mechanisms for speed, these simple tools transform frustration into flow.
Practice the techniques, maintain your equipment, and remember—gentle pressure works better than force every time. Your threading struggles are officially behind you.
- https://maggieframestore.com/blogs/maggieframe-news/effortless-needle-threading-a-comprehensive-guide-to-choosing-and-using-the-best-tools
- https://quiltblox.com/the-needle-threader-testing-results-are-in/
- https://www.proficientmarketinsights.com/market-reports/sewing-thread-market-1499
- https://www.electricalsafetyfirst.org.uk/guidance/product-safety/sewing-machines/
- https://www.onlinesafetytrainer.com/sewing-safety-tips-for-beginners/

