This site is supported by our readers. We may earn a commission, at no cost to you, if you purchase through links.
 You’re about to become a wardrobe ninja!
Mastering the art of mending clothes with invisible stitches is a game-changer.
With a few simple techniques, like the ladder stitch and invisible stitch, you’ll be extending the life of your favorite garments and saving money in no time.
By using matching thread colors and the right fabric for patches, you’ll be able to seamlessly blend your repairs.
Say goodbye to unsightly tears and hello to a refreshed wardrobe.
But, be warned, once you start mending with invisible stitches, you might just become addicted to the satisfaction of a perfectly repaired garment.
Table Of Contents
- Key Takeaways
- Mastering Invisible Stitches
- Top 5 Essential Tools for Invisible Mending
- Choosing the Right Materials for Invisible Mending
- Invisible Stitch Sewing Techniques
- Visible Mending: a Creative Approach
- Common Invisible Mending Challenges
- Invisible Mending for Specific Garments
- Taking Your Invisible Mending to the Next Level
- Frequently Asked Questions (FAQs)
- Conclusion
Key Takeaways
- You’re about to become a master of invisible stitches, and with these simple yet powerful techniques, you’ll be extending the life of your favorite garments and saving money in no time – just by learning the Ladder Stitch and invisible stitch.
- To create seamless fixes that are virtually undetectable, you’ll want to choose the perfect thread color and fabric for your patches, considering factors like weight, texture, and color to achieve a harmonious blend.
- When working with delicate or special-care fabrics, you’ll need to finesse your approach – using a matching thread color, a sharp needle, and a gentle touch to prevent snags and damage, especially when mending silk, lace, leather, or velvet.
- Don’t be afraid to experiment and add your own creative flair to your mending projects – whether it’s using recycled materials, embroidered patches, or upcycled textiles, or incorporating decorative stitches, beaded accents, or yarn embellishments to make your repairs truly one-of-a-kind.
Mastering Invisible Stitches
You’re about to become a master of invisible stitches, and your clothes (and the planet) will thank you! By learning the simple yet powerful techniques of ladder stitches and invisible stitches, you’ll be able to mend, repair, and revive your favorite garments with ease.
What is a Ladder Stitch?
You’re about to master the ultimate repair technique – the ladder stitch! This nearly invisible seam is a game-changer for mending holes, sewing up stuffed animals, and repairing tears in clothing.
- Use matching thread color to make the stitch virtually undetectable
- Ideal for delicate or thick fabrics
- Great alternative to the whipstitch
- Perfect for sewing up openings on stuffed animals
- Can be used for mending tears in clothing where sewing from the inside is impossible
What is an Invisible Stitch?
You’ve mastered the ladder stitch, now it’s time to learn its cousin, the invisible stitch! Also known as a slip stitch or blind hem, this hand-sewing technique is perfect for mending tears, sewing on patches, or creating a hem. With a matching thread color, it’s virtually undetectable.
| Stitch Type | Uses | Tips |
|---|---|---|
| Slip Stitch | Mending tears, sewing on patches | Use a matching thread color |
| Blind Hem | Creating a hem, sewing a seam | Keep stitches evenly spaced |
| Invisible Stitch | Mending delicate fabrics, creating a hidden seam | Use a sharp needle and thin thread |
Benefits of Using a Ladder Stitch
- Invisible Seam: Creates a nearly invisible seam, boosting the aesthetics of your project.
- Durable Repair: Strong and long-lasting, ensuring your fabric items withstand the test of time.
- Versatile Application: Suitable for various mending and sewing projects, from toys to clothing, giving you the freedom to fix anything like a pro!
Benefits of Using an Invisible Stitch
Now that you’ve mastered the ladder stitch, let’s talk about the benefits of using an invisible stitch. With this technique, you’ll achieve a professional finish and lasting repairs that are almost undetectable. It’s a discrete fix that saves time and gives your sewing project a clean look. Plus, it’s a sustainable fashion choice that promotes mindful consumption and reduces waste.
Top 5 Essential Tools for Invisible Mending
As you master the art of invisible mending, you’ll need the right tools to make sure your repairs are seamless. Let’s get started with the top 5 essential tools you’ll need to fix anything like a pro, from versatile sewing threads to precision hand needles.
1. Sewing Thread Kit 36 Colors
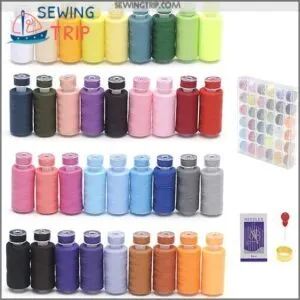
You’re about to become an invisible mending master! First, let’s talk about the Sewing Thread Kit 36 Colors – a game-changer for any sewing enthusiast. With 36 spools of high-quality polyester thread and 36 pre-wound bobbins, you’ll be spoiled for choice. The threads are durable, vibrant, and compatible with most sewing machines. Say goodbye to tedious threading and hello to efficient sewing. This kit is a must-have for anyone looking to elevate their invisible mending skills.
Best For: This kit is best for sewists who want a wide variety of colors and pre-wound bobbins for convenience.
- The thread is durable and vibrant.
- The kit includes pre-wound bobbins, which saves time.
- It’s compatible with most sewing machines.
- The thread may not be strong enough for all projects.
- Some users have reported the thread breaking on certain machines.
- The bobbins may be spun loosely, which can cause the thread to come loose.
2. Sewing Thread 24 Spools Variety Pack
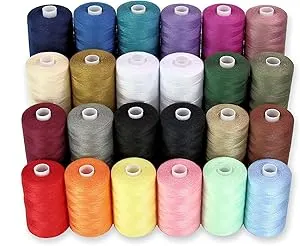
You’re on a roll with your invisible mending journey! Now, let’s talk about the "Sewing Thread 24 Spools Variety Pack". This bundle by BlesSew is a game-changer, offering 24,000 yards of high-quality, 40/2 spun polyester thread in 22 colors, including black and white. With its ample supply, you’ll be well-equipped to tackle extensive sewing projects. Plus, its thoughtfully selected color palette means you’ll find the perfect match for your fabric. Get ready to mend like a pro!
Best For: This thread is best for sewers who need a versatile and affordable thread for a variety of projects.
- Ample supply for extensive projects
- Thoughtfully selected color palette
- Cost-effective for teaching, donations, and volunteer projects
- May not work well on all sewing machines, especially higher-end models
- Some users reported issues with thread thickness and dragging
- May be better suited for lower-end machines or slower sewing speeds
3. Dritz Hand Sewing Needles
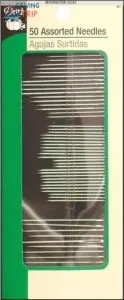
The right tools can make all the difference in mastering invisible mending! That’s where Dritz Hand Sewing Needles come in – a game-changer for any sewing enthusiast. With an assortment of 50 needles in various sizes and styles, you’ll be equipped to tackle any mending task. From Betweens to Tapestry needles, this pack has got you covered. Plus, the nickel-plated steel guarantees durability and longevity. Get ready to take your invisible mending skills to the next level with these trusty needles by your side!
Best For: Dritz Hand Sewing Needles are best for sewers of all skill levels who need a variety of needles for different projects.
- Variety of sizes and styles: You can find the perfect needle for any project, from delicate fabrics to thick materials.
- Durable and long-lasting: The nickel-plated steel ensures that your needles will last for a long time.
- Affordable: This pack of 50 needles is a great value for the price.
- No threader included: Some customers have found that the package may not include a threader.
- May not be suitable for all projects: Not all needle styles are ideal for every project, so you may need to buy additional needles for specific tasks.
- Packaging can be flimsy: Some customers have commented that the packaging can be flimsy and may not protect the needles well during shipping.
4. Singer Assorted Hand Needles 25 Pack
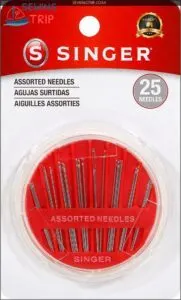
You’re on a roll with your invisible mending journey! Now, let’s talk about the Singer Assorted Hand Needles 25 Pack. This nifty set has got you covered with a variety of needles for different tasks. From betweens to darners, sharps to embroidery needles, you’ll be equipped to tackle any mending job. The compact case keeps everything organized, and the assorted colors will make you smile. Just be gentle with the plastic case – some users have reported it can be a bit flimsy.
Best For: This is a great set for anyone who sews regularly and needs a variety of needles for different tasks.
- Includes a wide array of needle types for versatile projects.
- Compact case keeps the needles organized and easy to store.
- Affordable and convenient for everyday sewing needs.
- Some users have reported the plastic case being flimsy and difficult to open.
- Not ideal for heavy-duty sewing projects.
- May not be suitable for professional tailors or seamstresses who require specialized needles.
5. Pellon Fusible Interfacing White 4 Pack
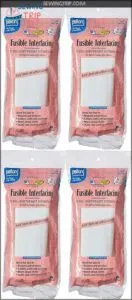
For invisible mending, you want tools that make the process seamless – literally! That’s where Pellon Fusible Interfacing White 4 Pack comes in. This thin, lightweight interfacing is perfect for light to medium-weight fabrics and provides a sturdy base for your stitches. With its easy-to-use fusible backing, you can strengthen your fabric and add structure to your repairs. Plus, it’s machine washable and dry cleanable, making it a low-maintenance addition to your mending toolkit.
Best For: This Pellon Fusible Interfacing is best for people who want to strengthen and stabilize light to medium-weight fabrics for mending and crafting projects.
- Thin and lightweight, barely noticeable on fabric.
- Easy to use with a fusible backing.
- Machine washable and dry cleanable for easy care.
- Some users reported issues with the interfacing not sticking properly.
- The actual width may be slightly less than advertised.
- It might not be suitable for heavier fabrics.
Choosing the Right Materials for Invisible Mending
When you start your invisible mending journey, choosing the right materials is key to achieving professional-looking results that will make your repairs nearly undetectable. By choosing the perfect thread color and fabric for your patches, you’ll be able to create seamless fixes that will breathe new life into your favorite clothes.
Matching Thread Color for Durability
Zero in on the perfect thread color to make your invisible stitches truly invisible! When choosing a thread color, consider the fabric type and stitch tension. For a seamless blend, select a thread that matches the dominant shade of your fabric. Don’t be afraid to experiment with different shades to find the perfect match – it’s worth the extra effort!
Selecting the Right Fabric for Patches
Get ready to patch like a pro!
When selecting fabric for patches, consider the weight, texture, and color.
You want a seamless blend, not a bulky mismatch.
Repurpose old fabrics or scout thrift stores for unique finds.
Think conscious consumerism meets textile art.
For a harmonious patch placement, balance texture contrast and color matching – your garment (and the planet) will thank you!
Understanding Different Types of Fabric
Understanding different fabric types is important for invisible mending.
You’ve got your woven fabrics like cotton and linen, and your knits like t-shirts and leggings.
Then there’s fabric weight: lightweight for lingerie, medium for dresses, and heavyweight for jeans.
Consider fabric weave, care, and stretch too.
Yes, it’s a lot to take in, but trust me, it’s worth it – your sock monkey’s torn ear will thank you!
Working With Delicate or Special Care Fabrics
Working with delicate or special care fabrics requires finesse. When mending silk, use a matching thread color and a sharp needle to prevent snags. For lace, try a tapestry needle to avoid damaging the intricate patterns. Leather and velvet demand a sturdy needle and thread, while sequins call for a delicate touch to avoid dislodging them.
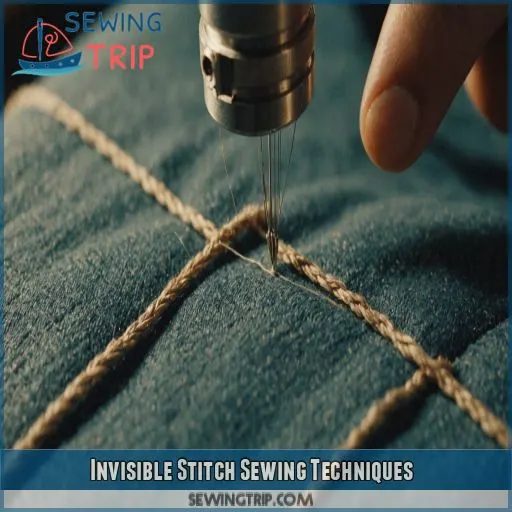
Invisible Stitch Sewing Techniques
You’re about to become a master of invisible stitch sewing techniques, and with these simple yet powerful methods, you’ll be able to mend your clothes like a pro! From the ladder stitch to the invisible hem, you’ll learn the step-by-step guides to make your repairs look seamless – literally.
Step-by-Step Guide to the Ladder Stitch
Time to master the ladder stitch! Now that you’ve got the right materials, let’s put them to use. This stitch is a game-changer for fixing holes in toys, sewing up openings on stuffed animals, and repairing tears in clothing. With a few simple steps, you’ll be a pro at creating nearly invisible seams. Follow along and see the magic happen!
Step-by-Step Guide to the Invisible Stitch
Now that you’ve mastered the ladder stitch, it’s time to tackle the invisible stitch. To start, thread your needle and tie a knot, hiding it in the fold. Then, bring the needle up through the fabric, grabbing a tiny bit of fabric as you go. Keep repeating this process, moving along the seam, until you’ve closed the opening. Easy peasy!
How to Sew an Invisible Hem by Hand
Now that you’ve mastered the invisible stitch, let’s tackle the invisible hem. Hemming by hand can be a game-changer for delicate or special-care fabrics. To start, fold the fabric twice to create a crisp crease, then thread your needle and grab a few threads of fabric just above the fold. Keep your stitches small and even for a professional finish.
Tips for Evenly Spaced Stitches
You’ve mastered sewing an invisible hem by hand, now it’s time to perfect those evenly spaced stitches. Think of it like a game of rhythm – you want to get into a flow. Here are some tips to help you get the hang of it:
- Experiment with different stitch lengths to find your sweet spot
- Pay attention to your stitch tension – not too tight, not too loose
- Choose the right needle size for your fabric type
- Practice drills on scrap fabric to build muscle memory
- Don’t be too hard on yourself – it takes time and patience to develop a consistent stitch.
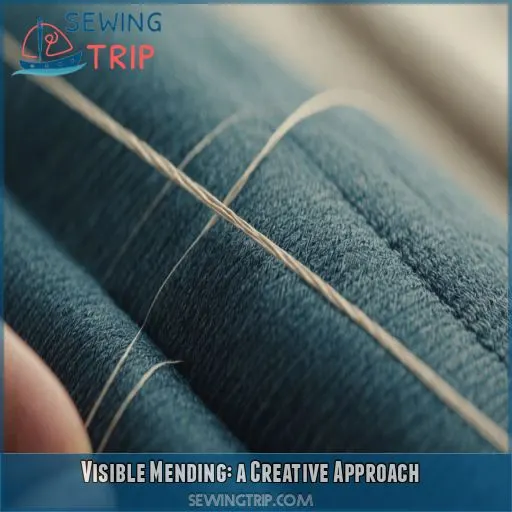
Visible Mending: a Creative Approach
You’re about to discover the creative side of mending – visible mending – where you get to show off your stitches and make them a part of your garment’s unique character. With visible mending, you’ll learn to love the imperfections and turn them into a form of self-expression, making your clothes truly one-of-a-kind.
The Benefits of Visible Mending
You’ve mastered the art of invisible stitches, but now it’s time to flip the script and celebrate the beauty of imperfection with visible mending. This trend is all about embracing the character of your clothes and giving them a second chance. It’s not just about fixing tears, but about creating a statement piece that tells a story.
| Benefits of Visible Mending | Sustainable Fashion | Creative Expression |
|---|---|---|
| Reduces waste | Extends the life of your clothes | Adds a personal touch |
| Saves money | Challenges fast fashion norms | Encourages experimentation |
| Develops a new skill | Fosters a sense of community | Creates a unique style |
| Promotes self-expression | Supports upcycling clothes | Inspires creativity |
Gathering Supplies for Visible Mending
Now that you’re excited about visible mending, it’s time to gather your supplies. Thrifting fabric, repurposing materials, and choosing the right thread can be a treasure hunt. Here are three must-haves to get you started:
- A variety pack of threads to match your fabric
- A set of sharp sewing needles for smooth stitching
- A pair of fabric scissors for cutting with precision
Mastering the Basics of Patching and Darning
Mastering the basics of patching and darning is a breeze.
Start by choosing the right needle.
An embroidery needle is ideal for thicker thread, while a tapestry needle is perfect for mending knitwear with yarn.
Patching is ideal for woven fabrics, while darning is perfect for knitwear.
Use a simple running stitch for both techniques.
Don’t worry if it gets a little wonky – it’s all part of the charm!
Leveling Up With Advanced Darning Techniques
Ready to level up your darning game? Learn advanced techniques like Scotch darning and Swiss darning to tackle tricky repairs. Use a darning mushroom to keep your knitwear repair tidy. Mix in some embroidery darning for a decorative flair. Don’t be afraid to experiment – with practice, you’ll master the art of darning like a pro!
Common Invisible Mending Challenges
You’re doing great with those invisible stitches, but now it’s time to tackle the tricky stuff – uneven fabric, thick or thin materials, and delicate or antique items that require extra TLC. Don’t worry, with some expert tips and tricks, you’ll be able to overcome common mistakes and become a master mender in no time.
Dealing With Uneven Fabric
The uneven fabric conundrum! Don’t worry, friend, we’ve got this. When dealing with uneven fabric, keep these tips in mind:
- Fabric tension: Keep it even to avoid puckering or distortion.
- Seam allowance: Adjust it according to the fabric’s thickness to make sure you have a smooth finish.
- Gathering techniques: Use them to ease excess fabric and create a seamless join.
Working With Thick or Thin Fabric
Thick or thin, fabric can be finicky! When working with thick fabrics, use a larger needle and looser stitch tension to avoid puckering. For thin fabrics, switch to a smaller needle and tighter stitches to prevent tearing. Don’t forget to adjust your thread weight and knot placement accordingly. With these tweaks, you’ll be a master of mending in no time!
Mending Delicate or Antique Items
Mending delicate or antique items requires TLC. Start by gently cleaning the area around the tear to prevent dirt from setting in. For antique fabrics like silk or lace, use a soft-bristled brush to remove debris. Then, choose a matching thread color and employ a gentle mending technique, like the ladder stitch, to preserve the item’s value and integrity.
Overcoming Common Mistakes
The agony of mistakes! Don’t worry, friend, we’ve all been there. To overcome common mistakes in invisible mending, keep these tips in mind:
- Check your thread tension: too tight and it’ll pucker, too loose and it’ll come undone.
- Adjust your stitch length: shorter stitches for delicate fabrics, longer for thicker ones.
- Handle fabric with care: don’t stretch or pull, or you’ll end up with a wonky repair.
Invisible Mending for Specific Garments
You’re ready to put your invisible mending skills to the test on your favorite garments. In this section, you’ll learn how to apply those skills to specific items in your wardrobe, from fixing holes in t-shirts and tops to repairing tears in pants and shorts, and even tackling delicate items like dresses, skirts, socks, and undergarments.
Mending Holes in T-Shirts and Tops
Mending holes in T-shirts and tops can be a real challenge!
Don’t worry, with the right tools and techniques, you’ve got this!
Identify the type of hole – is it a snag, a rip, or a worn-out spot?
Choose a matching thread color and fabric, and select a stitch variation that suits the repair.
Now, get ready to make that hole disappear like magic!
Repairing Tears in Pants and Shorts
Repairing tears in pants and shorts can be a real challenge! Don’t worry, with invisible mending, you’ve got this! Start by examining the tear and choosing a matching thread color. Then, use a ladder stitch or invisible stitch to weave your magic. For larger tears, apply a patch, making sure to secure it with even stitches.
Invisible Mending for Dresses and Skirts
Now that you’ve mastered repairing tears in pants and shorts, it’s time to move on to the fancy stuff – invisible mending for dresses and skirts! Whether it’s a vintage lace dress or a favorite mini skirt, you can fix tears and create invisible hems with ease. Get ready to give your dresses and skirts a new lease on life.
Mending Socks and Undergarments
Now that you’ve mastered invisible mending for dresses and skirts, let’s tackle those pesky sock holes and torn undergarments! Don’t toss them just yet – with a few simple stitches, you can extend their lifespan. Here are some tips to get you started:
- Use a matching thread color to blend with delicate fabrics.
- Mend seams with a whipstitch or ladder stitch for added strength.
- Apply invisible hems to torn edges for a seamless finish.
- Handle lingerie repair with care, using a needle and thread that won’t damage the fabric.
Taking Your Invisible Mending to the Next Level
You’ve mastered the basics of invisible mending.
Now it’s time to take your skills to the next level.
Experiment with different materials, add embellishments, and create a personalized mending style that’s all your own.
Get ready to explore your creativity and make mending a fun and rewarding process.
This process fixes your clothes but also adds a touch of personality to them.
Experimenting With Different Materials
Now that you’ve mastered invisible mending for specific garments, it’s time to get creative! Experimenting with different materials can breathe new life into your repairs. Try using recycled materials, embroidered patches, or upcycled textiles to add a personal touch. Natural fibers like cotton, linen, or hemp work well, while vintage fabrics can add a unique charm to your mending projects.
Adding Embellishments and Decorations
Now that you’ve mastered invisible stitches, it’s time to get creative with embellishments and decorations. Think of it as adding a personal touch to your mended clothes.
- Use embroidery stitches to create decorative patterns or monograms.
- Add decorative patches made from fabric scraps to give your clothes a pop of color.
- Incorporate beaded accents or yarn embellishments to add texture and interest.
Creating a Personalized Mending Style
Now that you’ve mastered adding embellishments, it’s time to create a personalized mending style that reflects your unique taste. Experiment with embroidery patterns, color palettes, and vintage inspiration to upcycle your favorite pieces. As you navigate your mending journey, remember that it’s all about embracing imperfections and having fun. Make each stitch your own!
Sharing Your Mending Creations With Others
You’re hooked on mending and want to share your creations with others. Join the mending community by sharing your projects online through social media, mending groups, or tutorials. Here are some ideas to get you started:
- Share before-and-after pics on Instagram to inspire others.
- Create a YouTube tutorial on a tricky stitch.
- Join a mending Facebook group to connect with fellow enthusiasts.
- Share your favorite mending tips on Twitter.
- Host a mending meetup in your local community.
Frequently Asked Questions (FAQs)
How do you repair invisible stitches?
Ah, the art of repairing invisible stitches! You’re basically a ‘stitch detective’ searching for hidden threads. Gently tease out the broken stitch with a needle, then re-weave the thread, securing it with a tiny knot – voil, good as new!
How to do a hidden stitch on clothes?
To do a hidden stitch on clothes, thread your needle with matching thread, tie a knot, and secure it to the inside seam. Then, weave the needle in and out of the fabric, creating a ladder-like pattern (Source).
What is the invisible mending technique?
You’re about to master the invisible mending technique! This clever method involves using hidden stitches to repair clothes, making the mend virtually undetectable. By using matching thread and carefully placed stitches, you’ll be a pro in no time!
How do you sew a hole without it showing?
You’ve got a hole to fill, literally! To sew it without showing, try the ladder stitch. Thread your needle with matching thread, then weave in and out of the fabric, keeping your stitches small and even.
What type of fabric is best suited for invisible stitches?
You can work invisible stitches on nearly any fabric, but they’re especially great for thin, delicate materials like silk, chiffon, or leather, where visible stitches would detract from the overall look.
Can I use a sewing machine for invisible mending?
Stitching sleuths, listen up! Unfortunately, sewing machines can’t replicate the nuance of invisible mending. Hand-stitching is the way to go for a seamless, professional finish. So, grab your needle and thread, and get cozy with the art of hand-mending.
How do I remove old threads before invisible mending?
You’ll want to gently tease out the old threads with a needle or a seam ripper, taking care not to damage the surrounding fabric. Remove any remaining bits, and you’re ready for invisible mending.
Are invisible stitches suitable for repairing heavy-duty clothing?
You’re about to tackle that torn heavy-duty jacket, and you’re wondering if invisible stitches are up to the task. The good news is, with the right thread and technique, they can be surprisingly effective, even on thick fabrics.
Can I use invisible stitches on stretchy or elastic fabrics?
Conclusion
Did you know that extending the life of your clothes by just nine months can reduce their environmental impact by up to 30%?
You’re saving money and the planet by mastering the art of mending clothes with invisible stitches.
With the ladder stitch and invisible stitch in your toolkit, you’ll be fixing anything like a pro in no time.
Happy mending, and remember, the art of mending clothes with invisible stitches is addictive – you’ve been warned!

