This site is supported by our readers. We may earn a commission, at no cost to you, if you purchase through links.
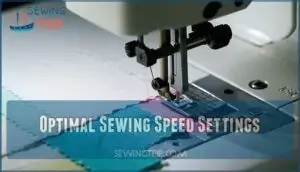
Start with slower speeds for delicate materials like silk or when learning new techniques – this prevents puckering and gives you better control.
Heavier fabrics can handle faster speeds, but don’t rush precision work.
Most machines offer speed controls through foot pedal pressure, speed dials, or electronic settings.
Begin around 50% speed and adjust based on your comfort and fabric response.
Remember, smooth, consistent stitching beats lightning-fast work every time.
The real magic happens when you discover how different speeds transform your stitching quality and creative possibilities.
Table Of Contents
- Key Takeaways
- Sewing Speed Control Basics
- Optimal Sewing Speed Settings
- Adjusting Sewing Machine Speed
- Top 9 Sewing Accessories
- 1. Black Pre Wound Embroidery Bobbins Thread
- 2. Amazon Basics Adjustable Swivel Stool
- 3. New brothread White Prewound Bobbin Thread
- 4. Babylock Brother Blind Hem Presser Foot
- 5. Office Chair Mat for Carpet
- 6. Prewound Bobbins Assorted Colors Sewing
- 7. Janome Blind Hem Foot Attachment
- 8. Brother SA133 Blind Stitch Foot Silverwhite
- 9. Low Shank Binder Sewing Foot
- Sewing Machine Maintenance Tips
- Benefits of Slow Sewing Speed
- Troubleshooting Sewing Speed Issues
- Frequently Asked Questions (FAQs)
- Conclusion
Key Takeaways
- Start slow and adjust based on your fabric – Begin at 50% speed and increase gradually for heavier materials like denim, while keeping delicate fabrics like silk at slower speeds to prevent puckering and damage.
- Match your speed to your skill level – Use slower speeds when learning new techniques or working on precision tasks like curves and corners, as this gives you better control and reduces costly mistakes.
- Control beats speed every time – Consistent, smooth stitching at moderate speeds produces superior seam quality compared to rushing through projects at maximum speed.
- Use your machine’s speed controls effectively – Master foot pedal pressure, speed dials, and motor adjustments to maintain a steady rhythm and prevent thread breakage while extending your machine’s lifespan.
Sewing Speed Control Basics
Understanding your sewing machine’s speed control is the foundation of producing professional-quality stitches every time.
Whether you’re working with a manual machine that relies on your handwheel technique or an electric model with foot pedal precision, mastering these controls transforms your sewing from frustrating to flawless.
Manual Sewing Machine Speed
Manual sewing machines rely entirely on your handwheel control for speed consistency.
You’ll turn the handwheel by hand, making stitch quality dependent on your steady rhythm and mechanical knowledge.
Belt tension affects how smoothly you can maintain ideal sewing speed – too loose creates sluggish operation, while too tight makes turning difficult.
This direct control gives you precise sewing machine speed adjustment for delicate work, allowing for delicate work to be performed with ease.
Electric Sewing Machine Speed
Electric sewing machines give you precise control through foot pedal pressure.
Light pressure delivers slow, deliberate stitches perfect for tight curves, while firm pressure increases speed for straight seams.
Your foot pedal acts like a car’s gas pedal—the harder you press, the faster you’ll sew.
This responsive control maintains stitch consistency and proper fabric feed rate, letting you match your ideal sewing speed to any project, ensuring precise control and allowing for proper fabric feed.
Advanced Motor Speed Adjustment
Advanced sewing machines typically include sophisticated motor speed adjustment features that give you precise control beyond basic foot pedal pressure.
Digital regulation systems let you set programmable speeds for consistent results, while sensor integration automatically adjusts motor speed based on fabric thickness.
These customization options include speed dial presets and motor calibration settings, ensuring ideal sewing speed for any project requirement.
Proper speed control mechanisms are essential for smooth operation.
Optimal Sewing Speed Settings
Finding the right sewing speed transforms your projects from frustrating struggles into smooth, professional results.
You’ll discover how different fabrics, thread types, and stitch techniques require specific speed settings to achieve superior seam quality and prevent costly mistakes.
Factors Affecting Sewing Speed
Several key factors determine how fast you’ll want to run your sewing machine speed control settings.
Getting your sewing speed just right is the secret to flawless stitches and frustration-free projects every time.
Getting the balance right makes all the difference in your stitching quality.
Consider these essential elements when adjusting your ideal sewing speed:
- Fabric Density – Heavy materials like denim need slower speeds than lightweight cotton
- Thread Type – Delicate threads require gentler machine age handling than heavy-duty varieties
- Needle Size – Larger needles work better at moderate speeds to prevent fabric damage
- Stitch Length – Longer stitches allow faster fabric feed rate without compromising quality
Benefits of Controlled Sewing Speed
Controlled sewing speed delivers remarkable benefits that transform your crafting experience.
Looking at the paragraph about controlled sewing speed delivering remarkable benefits, here’s a short engaging blockquote in the same tone:
Master your machine’s rhythm and watch your sewing transform from chaos to craftsmanship.
Precision stitching improves dramatically when you’re not rushing through seams.
Your machine lifespan extends substantially with gentle, consistent operation rather than high-speed stress.
Fabric handling becomes effortless as you maintain better control over delicate materials.
You’ll notice efficiency gains through fewer mistakes and rework.
Seam quality increases substantially when your adjustable speed settings match your project’s needs, making ideal sewing speed your secret weapon, with precision stitching and better control being key to a successful outcome.
Sewing Speed and Fabric Type
Different fabric types demand specific sewing speeds for superior results.
Delicate fabrics like silk require slower speeds (400-600 stitches per minute) to prevent puckering, while heavy fabrics such as denim handle faster speeds up to 900spm.
Knit fabrics need moderate quilting speed with ballpoint needles.
Leather sewing demands patience—use slower sewing machine settings to avoid needle breakage and guarantee clean stitches.
For delicate materials, consider using Microtex sewing needles to minimize fabric damage and achieve superior results.
Adjusting Sewing Machine Speed
You’ll master speed adjustments once you understand your machine’s three main control methods.
Whether you’re using foot pedal pressure, speed dials, or advanced motor controls, the right technique transforms your sewing from chaotic racing to precise stitching.
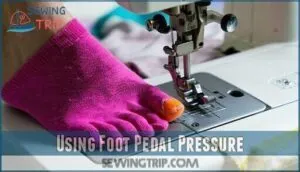
Using Foot Pedal Pressure
Mastering pedal pressure control transforms your sewing experience from chaotic to confident.
Apply gentle, consistent foot pressure to maintain steady sewing speed throughout your project. Heavy pressure creates unwanted speed variation effects, while light touches offer better control.
Check your foot pedal connection regularly and adjust pedal sensitivity adjustments for ideal foot pedal ergonomics.
Your sewing machine speed responds directly to how you handle that vital sewing speed control beneath your foot.
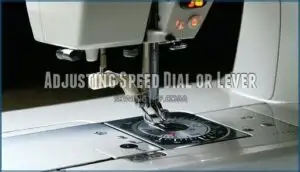
Adjusting Speed Dial or Lever
Many sewing machines feature speed dials or levers for precise sewing speed control beyond basic foot pedal pressure.
Locate your machine’s speed dial, typically marked with increments from slow to fast.
Turn clockwise to increase speed, counterclockwise to decrease.
This dial calibration allows fine-tuning your ideal sewing speed.
Lever mechanics work similarly—push forward for faster stitching, pull back for slower speeds.
These controls enhance your user experience by providing consistent speed increments and a better overall sewing experience with precise sewing speed control.
Motor Speed Adjustment on Advanced Machines
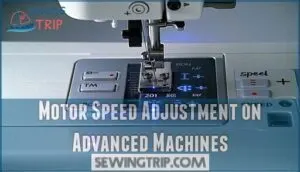
Advanced machines offer Digital Speed Control through programmable speeds and motor calibration features.
You’ll find speed consistency with electronic controllers that maintain ideal sewing speed regardless of fabric resistance. These customization options let you preset specific speeds via the speed dial for different projects.
Your speed adjustment guide becomes simplified with servo motors providing variable control from 500-3,500rpm, ensuring precise motor speed management.
These motors offer energy-efficient circuitry, saving up to 70% electricity compared to older clutch models, which is a significant advantage in terms of energy efficiency.
Top 9 Sewing Accessories
You’ll need the right accessories to achieve maximum sewing speeds and maintain consistent stitch quality throughout your projects.
These nine essential tools will help you control your machine’s performance while ensuring comfort and precision during extended sewing sessions.
1. Black Pre Wound Embroidery Bobbins Thread
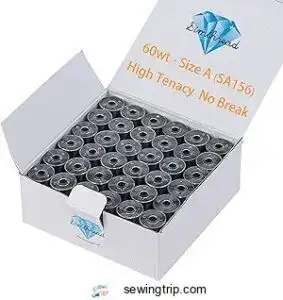
Efficiency becomes your best friend when you’re juggling multiple embroidery projects.
These black pre-wound bobbins pack 128 inches of high-tenacity polyester thread that won’t break mid-stitch or absorb machine oils.
You’ll save hours by skipping the tedious bobbin-winding process, and the consistent machine tension means fewer headaches with thread snags.
Compatible with Brother, Janome, Singer, and most home machines, they’re perfect for dark fabrics where bobbin thread might show through.
At 60 weight, they deliver professional results every time, with consistent machine tension and fewer headaches.
Best For: Busy sewers and embroidery enthusiasts who want reliable, strong black bobbin thread without the hassle of winding it themselves.
- Not compatible with all machines, such as the Ricoma EM-1010.
- Fine thread may not be suitable for heavy-duty sewing seams.
- Poor-quality pre-wound bobbins can lead to lint buildup and seam durability issues.
- Saves significant time by eliminating the need to wind bobbins manually.
- Consistent thread tension improves stitch quality and reduces thread snags.
- Compatible with most home and commercial sewing machines, including popular brands.
2. Amazon Basics Adjustable Swivel Stool
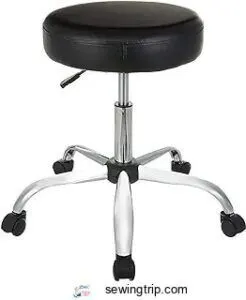
Your sewing posture can make or break your comfort during long sessions.
This adjustable swivel stool features a 360-degree rotating seat with height adjustments from 19.88 to 24.92 inches, letting you find your perfect working position.
The 15-inch padded seat and chrome base support up to 250 pounds while smooth-rolling casters help you move between your cutting table and machine effortlessly.
Best For: Home crafters, office workers, and anyone needing adjustable, mobile seating for tasks at a desk, sewing station, or workshop.
- Comfortable padded seat with easy height adjustment for personalized posture.
- Sturdy chrome frame and smooth-rolling wheels provide stability and mobility.
- Compact, minimalist design fits well in a variety of spaces.
- Seat may feel firm or slippery during longer sessions.
- Weight limit of 250 pounds is lower than some alternatives.
- Lacks armrests, which may reduce comfort for some users.
3. New brothread White Prewound Bobbin Thread
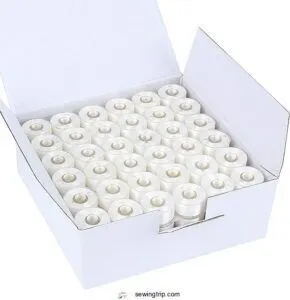
This 144-piece pack delivers exceptional value with high-tenacity polyester thread that maintains consistent tension throughout your projects.
You’ll appreciate the clear plastic sides that prevent oil absorption and distortion while making it easy to monitor thread levels.
Compatible with most Brother, Janome, Singer, and Kenmore machines, these Size A bobbins fit seamlessly into your workflow.
The 60WT thread weight works perfectly for general sewing and embroidery, though you might need to evaluate thread weight options for ideal results on certain fabrics.
Best For: DIY sewers and embroidery enthusiasts who want affordable, hassle-free prewound bobbins for compatible home machines.
- Not suitable for machines requiring L-size bobbins.
- Occasional thread breakage or bobbin thread showing on top.
- Some concerns about polyester authenticity and thread thickness on certain fabrics.
- Saves time with prewound, ready-to-use bobbins.
- Consistent tension and smooth performance across projects.
- Excellent value with a large 144-pack and wide machine compatibility.
4. Babylock Brother Blind Hem Presser Foot
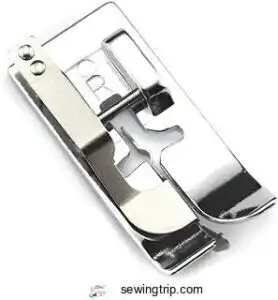
Professional crafting becomes effortless with this precision-engineered blind hem foot from DreamStitch.
You’ll achieve nearly invisible hems that rival store-bought garments on woven fabrics, stretch materials, and even heavy drapery.
Its adjustable guide guarantees perfectly spaced stitches while the metal construction guarantees durability.
Compatible with 25+ Babylock and Brother models, it installs quickly without tools.
For best results, maintain slow to medium speeds (300-700 stitches per minute) and test settings on fabric scraps first.
Best For: Home sewists using compatible Babylock or Brother machines who want professional-looking, invisible hems without hand-stitching.
- Not compatible with all sewing machine brands or models—check fit before buying.
- Some users report issues with bending or breakage if not handled carefully.
- Requires practice and slower speeds for optimal, invisible results.
- Easy snap-on installation with adjustable guide for consistent, precise hems.
- Works well on a variety of fabrics, including woven, stretch, and heavy curtains.
- Saves time and improves finish compared to hand hemming.
5. Office Chair Mat for Carpet
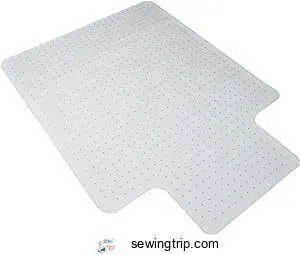
Your sewing room deserves the same comfort you’d expect from your favorite workspace.
This 36" x 48" polyurethane chair mat transforms carpet into a smooth rolling surface, protecting your floors from thread snips and fabric scraps.
The ultra-clear vinyl blends seamlessly with your carpet while preventing permanent indentations from your chair’s casters.
Though it requires patience to flatten after unboxing, the anti-skid surface and gripping cleats guarantee stability during those marathon quilting sessions.
Best For: Home sewers or crafters who work on low or standard-pile carpet and want smooth chair mobility with reliable carpet protection.
- Blends into carpet with ultra-clear, seamless look.
- Anti-skid surface and studded backing keep mat stable.
- Protects carpet from chair indentations and sewing debris.
- Difficult to flatten after unboxing, requires patience.
- Small size limits chair rolling range.
- Not suitable for hard floors or plush carpeting.
6. Prewound Bobbins Assorted Colors Sewing

Why struggle with constant bobbin winding when you could be creating? These prewound bobbins arrive ready-to-use with over 30 vibrant colors, holding three times more thread than home-wound versions.
You’ll save significant time while achieving consistent tension and superior stitch quality.
The clear storage box keeps everything organized, and the bobbins fit Brother, Singer, Janome, and Babylock machines perfectly.
Though some users report occasional thread breakage, the convenience and color variety make these essential for quick projects and seamless thread matching.
Best For: Anyone who sews regularly and wants fast, colorful thread changes without the hassle of winding bobbins.
- Occasional thread breakage may occur.
- Limited shade selection compared to custom-wound threads.
- Bobbins can crack if dropped or handled roughly.
- Saves time with ready-to-use, prewound bobbins.
- Wide range of vibrant colors for easy thread matching.
- Consistent tension and improved stitch quality.
7. Janome Blind Hem Foot Attachment
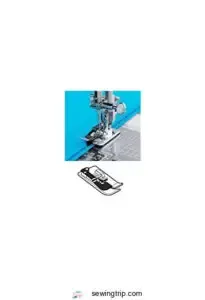
Janome’s blind hem foot transforms your hemming game with professional precision that’ll make store-bought garments jealous.
This metal attachment features three grooves and a central guide that keeps fabric perfectly aligned while you stitch.
You’ll create nearly invisible hems on pants, curtains, and skirts without tedious hand-sewing.
The foot works with most Janome models, though you’ll want to verify compatibility before purchasing.
Practice on scraps first—this tool rewards patience with flawless results.
Best For: Home sewists and professionals who want crisp, invisible hems on garments, curtains, and other fabric projects using compatible Janome machines.
- Delivers clean, professional-looking hems with minimal effort
- Metal guide ensures consistent stitch placement and reduces slipping
- Adjustable options fit a wide range of Janome models and project needs
- Not compatible with all Janome models; requires careful compatibility check
- Consistency depends on proper fabric folding and machine setup
- Mixed user reviews on performance with certain fabrics or machines
8. Brother SA133 Blind Stitch Foot Silverwhite
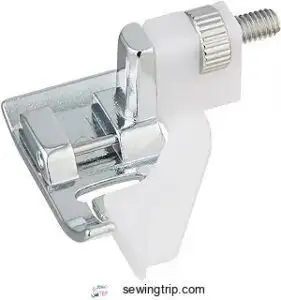
When you’re tackling blind hems, the Brother SA133 becomes your secret weapon for invisible stitching mastery.
This genuine silverwhite foot works seamlessly with Brother machines featuring 7mm feed dogs, including popular models like PE770 and XL2230.
Its adjustable blade gently folds fabric edges while the guide guarantees consistent stitch placement, allowing you to achieve professional-looking hems on pants, skirts, and delicate fabrics without visible topstitching.
The foot’s plastic construction proves durable for regular use, though some users recommend practicing on scraps first since the included manual lacks detailed guidance, which can affect the overall stitching experience.
Best For: Home sewists who want clean, invisible hems on a range of fabrics and have a compatible Brother sewing machine.
- Instruction manual lacks useful detail, making setup tricky for beginners
- Durability issues reported, with parts sometimes falling apart during use
- Requires practice and trial/error for best results, especially for newbies
- Delivers professional-looking, invisible hems without visible topstitching
- Adjustable guide and blade help ensure precise, consistent stitch placement
- Fits a wide selection of Brother models and snaps in easily
9. Low Shank Binder Sewing Foot
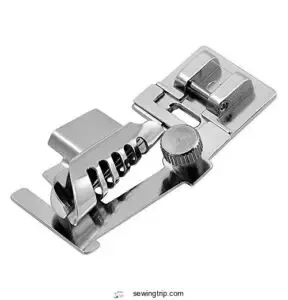
Streamlining bias binding application, this versatile foot transforms tedious hand-pinning into effortless machine work.
You’ll create professional 1/4" bindings using 1" fabric strips with its funnel guide system.
Compatible with most low-shank machines from Singer, Brother, and Janome, it accommodates binding widths from 5mm to 20mm through adjustable settings.
The key? Feed pre-folded binding and fabric simultaneously at moderate speeds.
Master the "sandwich method" for consistent results, and you’ll cut binding time in half while achieving that coveted professional finish with the help of this versatile foot.
Best For: Home sewists with low-shank machines who want quick, professional-looking bias binding without the hassle of hand-pinning.
- Not compatible with high-shank machines or very thick quilts
- No instructions included, requiring trial and error or online tutorials
- Some users find it tricky to feed fabric and binding smoothly without practice
- Cuts binding application time in half with a guided, hands-free system
- Adjustable for various binding widths and fits most major low-shank machine brands
- Produces neat, consistent results for both straight and curved edges
Sewing Machine Maintenance Tips
You’ll keep your sewing machine running like clockwork with just a few simple maintenance habits that take minutes but save you hours of frustration later.
Think of these quick checks as your machine’s daily vitamins—they prevent the headaches that come with poor stitching, thread breaks, and costly repairs down the road, which can be considered as daily habits.
Regular Lubrication and Cleaning
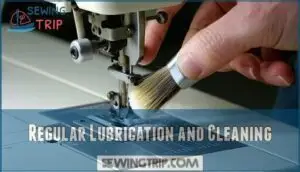
Your sewing machine craves regular attention like a faithful friend. Clean lint from the bobbin case weekly, focusing on Lint Removal from feed dogs and tension discs.
Apply one drop of sewing machine oil to designated Oiling Points monthly. Use appropriate Cleaning Solutions for stubborn residue.
Proper care requires using specialized machine lubricants. This simple Lubrication Frequency keeps your machine humming smoothly, preventing costly Professional Servicing down the road.
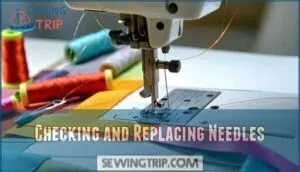
Checking and Replacing Needles
Every three needle changes keep your sewing machine running smoothly.
Check for bent needles, burrs, or dull points that damage fabric.
Match needle type to fabric—universal for cotton, ballpoint for knits, leather needles for heavy materials.
Replace when you notice skipped stitches or thread fraying.
Proper needle size prevents fabric puckering and guarantees clean punctures through your material layers.
Regular replacement is important, as dull needles cause problems, to maintain a sewing machine that runs smoothly with clean punctures and prevents skipped stitches.
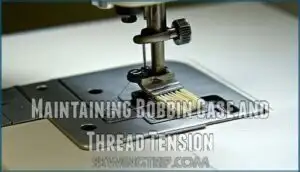
Maintaining Bobbin Case and Thread Tension
Clean your bobbin case weekly to remove lint buildup that disrupts thread tension balance.
A dirty tension disc adjustment mechanism causes bobbin winding issues and inconsistent stitch formation.
Use a small brush to clear debris from the bobbin tension spring. Consider using a specialized cleaning product for superior results.
Proper sewing machine bobbin maintenance guarantees smooth thread tension and prevents costly repairs down the road.
Benefits of Slow Sewing Speed
When you slow down your sewing speed, you’ll discover that precision becomes your best friend and those frustrating mistakes practically disappear.
You’ll also find that slower stitching gives you the control needed for intricate details while making the entire process more relaxing and enjoyable.
Increased Precision and Accuracy
Dialing back your sewing speed reveals remarkable Stitch Accuracy and Seam Precision. You’ll discover how speed control transforms challenging precision tasks into manageable achievements, especially when tackling intricate Pattern Complexity.
- Fabric Control improves dramatically when you’re not racing against the machine
- Consistent Length becomes achievable as you guide each stitch with intention
- Complex curves and corners respond better to deliberate, measured movements
- Your stitch quality remains uniform throughout demanding projects
Reduced Errors and Improved Stitch Quality
Slower speeds substantially improve your stitch quality by allowing better Fabric Handling and Tension Control.
You’ll notice Consistent Stitching patterns when your machine isn’t rushing through seams.
Reduced errors occur naturally because you can observe and adjust needle placement in real-time. Proper Needle Choice combined with ideal sewing speed prevents thread breakage and skipped stitches, ensuring professional results every time.
Enhanced Creativity and Enjoyment
When you slow down your sewing machine speed, you discover Creative Stitching possibilities that rushed work simply can’t achieve.
Free-Motion Mastery becomes accessible as you develop steady hands and confident control.
This measured approach transforms Fabric Embellishment from stressful tasks into enjoyable exploration.
Personalized Projects flourish when you’re not racing against time, allowing intricate details to emerge naturally.
Sewing Relaxation replaces frantic stitching, creating a meditative rhythm that enhances both creativity and your overall sewing experience.
Troubleshooting Sewing Speed Issues
When your sewing machine acts up with speed problems, you’ll need to check both mechanical issues and settings before assuming the worst.
Start by examining your presser foot settings and machine controls, as these simple adjustments often solve most speed-related headaches without requiring a repair shop visit.
Identifying and Resolving Mechanical Problems
Motor issues often signal deeper problems requiring immediate attention.
When your machine struggles with speed control, these mechanical culprits could be sabotaging your projects:
- Motor Wear – Worn brushes reduce power output, causing erratic speeds
- Belt Slippage – Loose belt tension creates inconsistent stitching rhythms
- Gear Damage – Stripped gears prevent smooth speed shifts
- Needle Misalignment – Bent needles strain the motor, affecting performance
Regular sewing machine maintenance prevents these underlying issues from escalating into costly sewing machine repair situations.
Adjusting Presser Foot and Machine Settings
Beyond mechanical fixes, adjusting your presser foot and machine settings often resolves speed issues.
Check presser foot height for proper fabric contact, then examine stitch length control and feed dog adjustment.
Fine-tune tension dial settings and verify needle plate selection matches your fabric.
These speed control adjustments work together, creating ideal speed settings that respond predictably to your speed adjustment guide preferences.
Proper sewing often requires presser foot expertise.
Frequently Asked Questions (FAQs)
What should my sewing machine settings be on?
You’ll want to adjust stitch length, thread tension, and speed based on your fabric type and project needs. Start with medium settings, then fine-tune for ideal results.
Does sewing speed matter?
Yes, sewing speed absolutely matters. You’ll get stronger seams, better stitch quality, and avoid fabric damage when you match your speed to the material and technique you’re using.
What is the standard stitch setting?
Standard stitch settings typically range from 0 to 0mm for stitch length and 5 to 0mm for zigzag width.
You’ll find straight stitches work best at 5mm length, while most fabrics handle these default settings perfectly for everyday sewing projects.
Whats the ideal speed for thick fabric materials?
For thick fabrics, you’ll want to slow down considerably—around 260 stitches per minute or less works best.
Lower speeds prevent needle breakage, guarantee proper thread penetration, and maintain stitch quality through dense materials.
How does thread type affect optimal sewing speeds?
Thread choice acts as your machine’s conductor, dictating the tempo of your stitching symphony.
Heavier threads like upholstery or denim thread require slower speeds to prevent breakage and tension issues.
While lightweight cotton or polyester threads handle faster speeds smoothly without compromising stitch quality.
What speed works best for decorative stitching patterns?
Decorative stitching patterns require slower speeds for precision and control.
You’ll want to reduce your machine’s speed to around 50-70% of maximum.
This prevents puckering, maintains even stitch formation, and lets you navigate curves smoothly, ensuring precision.
Should beginners use maximum or minimum speed settings?
Ironically, racing toward mastery means you’ll crawl first. Start with minimum speed settings—they’re your training wheels for building control, accuracy, and confidence before advancing to faster stitching speeds.
Conclusion
Mastering your sewing machine’s speed is like learning to dance – it’s all about finding the rhythm that works for you and your fabric.
Perfect ideal sewing speed settings transform your projects from rushed disasters to professional masterpieces.
You’ve discovered that controlled speeds prevent errors, improve stitch quality, and boost your confidence.
Whether you’re working with delicate silk or sturdy denim, the right speed makes all the difference.
Practice these techniques, trust your instincts, and watch your sewing skills soar to new heights.
- https://www.asg.org/sewing-machines-the-need-for-speed/
- https://www.fibre2fashion.com/industry-article/7044/sewing-machine-important-safety-rules-and-instructions
- https://www.reddit.com/r/sewing/comments/df4z5d/how_come_speed_control_is_not_a_standard_in/
- https://absolutedigitizing.com/how-to-adjust-embroidery-machine-speed-for-different-fabrics/
- https://weallsew.com/tips-for-sewing-heavy-fabrics/

