This site is supported by our readers. We may earn a commission, at no cost to you, if you purchase through links.

Whether you’re crafting a custom tote bag or outfitting your outdoor space, mastering the art of sewing canvas is crucial.
This guide will navigate you through common problems, from selecting the right needle and thread to troubleshooting tension issues, ensuring your canvas creations are both beautiful and built to last.
Embrace these techniques, tips, and troubleshooting advice to elevate your sewing skills and achieve flawless results with canvas.
Table Of Contents
Key Takeaways
- Use a size 90 to 100 Universal or Jeans needle for canvas to avoid needle breakage and to handle the heavy fabric.
- Select heavy-duty thread such as polyester, cotton-wrapped polyester, or marine thread for outdoor projects, and adjust the machine’s top tension to accommodate the thread thickness.
- To prevent issues with bobbin tension and thread tangling, ensure the bobbin is correctly threaded and not overfilled, and consider using a thinner thread in the bobbin if necessary.
- Finish canvas projects with strong seams and topstitching for durability, and use techniques like zigzag stitching or serging to prevent the fraying of canvas fabric.
Fabric Handling Techniques
When sewing canvas, adjusting your machine’s presser foot pressure is crucial to handle the fabric’s weight and thickness effectively.
If you’re working with heavy fabrics like canvas, set your presser foot pressure to a lower setting to allow the material to feed through the machine smoothly.
Additionally, using a walking foot can greatly enhance your straight stitching on heavy fabrics by evenly feeding the layers through the machine, preventing the fabric from shifting and ensuring consistent stitch quality.
Adjusting Presser Foot Pressure
When sewing heavy fabrics like canvas, you’ll need to adjust the presser foot pressure on your machine to ensure the fabric feeds through evenly without puckering. This adjustment helps in fabric handling, preventing the material from dragging or stretching.
For optimal results, pair this with a walking foot, fine-tuning stitch length and width, and adjusting tension to match the canvas fabric’s weight and texture.
Using a Walking Foot
Transitioning from the topic of adjusting presser foot pressure, the use of a walking foot emerges as a pivotal technique in managing fabric movement during sewing. You’ll find it indispensable for ensuring your heavy and challenging fabrics glide smoothly under the needle without shifting or puckering.
A walking foot, with its built-in feed dogs, works in tandem with your sewing machine‘s feed dogs. This synchronized movement allows both the top and bottom layers of fabric to be fed through the machine at the same rate, effectively preventing the layers from misaligning or the fabric from puckering during the sewing process.
Whether you’re working with canvas, heavy upholstery fabric, or multiple layers for quilting, a walking foot can significantly enhance your sewing experience. It’s particularly beneficial for projects that require precise alignment, such as matching stripes or plaids, and for sewing through thick or slippery materials that are prone to shifting.
If you encounter problems, such as the walking foot not feeding fabric evenly, it’s crucial to troubleshoot by ensuring compatibility with your sewing machine, checking installation, and adjusting sewing speed and stitch type as necessary.
Needle and Thread Selection
When sewing canvas, selecting the right needle size and thread type is crucial for achieving professional results and avoiding common issues like needle breakage or thread tangling.
For canvas, a heavy and durable fabric, using a size 90 to 100 Universal or Jeans needle is recommended to handle the fabric’s thickness effectively.
Thread choice is equally important, with heavy-duty thread made from polyester, cotton-wrapped polyester, or cotton being well-suited for canvas due to their strength and durability.
Additionally, adjusting tension settings appropriately can help prevent problems such as puckering or loose stitches, ensuring a smooth sewing experience.
Needle Size Importance
Selecting the right needle size is crucial for successfully sewing canvas, as it directly impacts the fabric’s integrity and the quality of your stitches. When you’re choosing needles, it’s essential to consider the fabric’s weight and density.
For canvas, a size 90 to 100 Universal or Jeans needle is typically recommended. Needle materials also play a role; ensure the needle is strong enough to handle the heavy fabric without breaking.
Needle brands like Schmetz are recognized for their quality and offer a wide range of needles compatible with various sewing machines.
Proper needle care, such as changing needles regularly, ensures the best stitch quality and prevents damage to your machine and fabric.
Thread Type Selection
In conjunction with selecting the appropriate needle size, you’ll also need to choose the right thread type for your canvas sewing project. The thread you select plays a crucial role in the durability and appearance of your finished project.
For canvas, a heavy-duty thread is essential to withstand the fabric’s weight and density. Options include polyester, cotton-wrapped polyester, or cotton threads, all of which offer the strength needed for canvas.
Thread weight and thickness are critical factors; a size 40 heavy-duty thread is often recommended for its compatibility with heavier-weight canvas.
When adjusting your canvas sewing machine, remember to fine-tune the top tension to accommodate the thread thickness.
For projects that demand even greater durability, such as outdoor gear, consider using upholstery thread or even marine thread, designed to resist environmental stressors like sun and water.
Always ensure the thread’s compatibility with your machine, particularly the bobbin mechanism, to prevent issues like tangling or uneven tension.
Adjusting Tension Settings
You’ll need to adjust your machine’s tension settings when you’re working with different thread types and fabric weights. Achieving balanced tension is crucial for precision stitching, especially with canvas, which can be unforgiving if the tension is off.
- Tension Mastery: Gradually tweak the tension until the stitches appear even on both sides of the fabric.
- Troubleshooting Techniques: If you notice puckering or looping, it’s a sign that tension adjustments are needed.
- Precision Stitching: Test your tension settings on a scrap piece of canvas to avoid problems sewing your main project.
Tension Troubleshooting
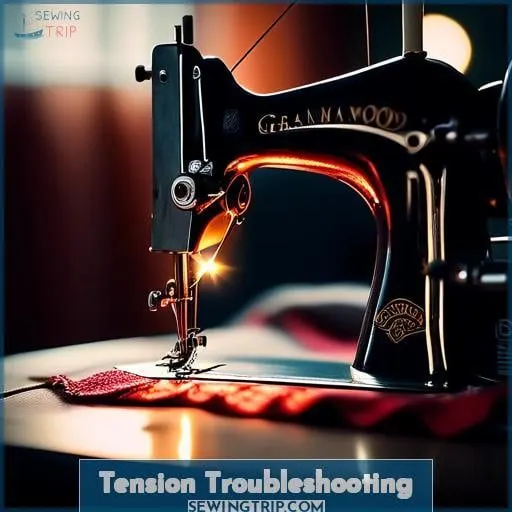
When you’re experiencing tension problems while sewing canvas, it’s crucial to diagnose the issue accurately.
If your stitches are puckering or you’re seeing loops on the underside of the fabric, it may indicate that your needle thread tension is too loose.
Conversely, if the loops appear on the topside, your bobbin tension might be too tight.
Adjusting these tensions is a delicate process, and it’s often helpful to test your settings on a scrap piece of canvas before proceeding with your project.
Diagnosing Tension Problems
While diagnosing tension problems, it’s essential you’re aware that incorrect tension can manifest as loops on the underside of your fabric or puckering on the top, indicating the need for adjustments.
Understanding causes is crucial; for canvas, which doesn’t stretch much, tension issues can lead to puckering seams.
Implementing solutions involves testing techniques such as adjusting the tension dial and ensuring the presser foot pressure is correct. Always test your stitches on scrap fabric to confirm the tension is set properly for smooth, even seams.
Solutions for Thread Locking
When transitioning from identifying to solving thread locking issues behind the tension dial, you’ll find that a common and effective first step is to replace your current needle with a new one.
Regular machine maintenance, including cleaning and oiling, can prevent many thread locking problems.
Tension adjustment is crucial; start with small increments to find the sweet spot for smooth seams.
Bobbin Challenges
When tackling bobbin challenges while sewing canvas, it’s crucial to prevent tangles and adjust bobbin tension appropriately.
Ensure your bobbin is wound smoothly and not overfilled, as this can cause snarls and disrupt the sewing process.
If you’re experiencing frequent tangles with heavy thread, consider using a thinner thread in the bobbin and making necessary tension adjustments.
Preventing Bobbin Tangles
To avoid getting caught up in bobbin tangles, make sure you’re threading your machine correctly and adjusting the bobbin tension as needed.
Proper bobbin maintenance is crucial for smooth sewing experiences, especially when working with canvas.
Ensuring your bobbin is wound correctly and the bobbin case is properly inserted can prevent many issues.
If you encounter thread tension problems, adjusting both the bobbin and top tensions might be necessary.
Regularly cleaning the bobbin holder and area can also help avoid tangles and ensure your stitches, seams, and overall sewing project come out looking professional.
These sewing tips are essential for troubleshooting common problems and achieving durable, high-quality finishes on your canvas projects.
Adjusting Bobbin Tension
Before you start sewing with canvas, it’s crucial to adjust your bobbin tension to prevent issues such as thread tangling or uneven stitches. Proper bobbin calibration is essential for achieving stitch consistency and ensuring your machine is compatible with the heavy-duty thread used for canvas.
Tension calibration plays a pivotal role in maintaining thread balance, which is vital for producing strong, durable seams.
To troubleshoot any bobbin-related challenges, consider adjusting the bobbin tension slightly and testing on scrap fabric until you find the perfect setting.
These sewing tips are fundamental for anyone looking to master canvas projects, ensuring each stitch contributes to a high-quality finish.
Finishing Canvas Projects
When finishing your canvas projects, it’s essential to topstitch all seams to enhance durability and give your work a professional appearance.
Be mindful to prevent the fabric from fraying by using techniques such as zigzag stitching or serging the edges.
These steps will ensure your canvas creations withstand regular use and maintain their structure over time.
Topstitching for Durability
How can you ensure your canvas projects last longer and look professionally finished? By focusing on topstitching for durability, you’re enhancing strength and adding decorative accents that elevate your work.
- Use a heavy-duty needle and thread for seam reinforcement.
- Employ edging techniques to prevent fraying.
- Select a wider stitch width for robust seams.
- Incorporate decorative stitches as seam finishing.
- Practice consistent stitching to maintain seam integrity.
Preventing Fabric Fray
Often, after topstitching for added durability, you’ll find that preventing fabric fray becomes your next frequent concern when finishing canvas projects.
Fray prevention involves careful seam reinforcement and meticulous edge finishing. Techniques like raw hemming and applying stitch sealant can safeguard your stitches.
These finishing touches, along with clear care instructions, ensure your canvas creations withstand time and use, embodying both beauty and resilience.
Frequently Asked Questions (FAQs)
How do I prevent my canvas fabric from fraying before I start sewing?
To prevent your canvas fabric from fraying before you start sewing, apply a thin layer of Mod Podge along the cut edges with a small brush. This simple technique seals the threads, allowing for smooth sewing without unraveling.
Can I sew waterproof or waxed canvas with a basic sewing machine, and if so, how?
Yes, you can sew waterproof or waxed canvas with a basic sewing machine by using the right tools and techniques.
Start by selecting a sharp denim needle (#16) and all-purpose polyester thread.
Pre-clean your machine, adjust the stitch length to 25mm for heavier fabrics, and test on scrap material.
Use fabric clips instead of pins to avoid leaving marks.
Consider using a hair dryer to smooth out any creases or lines after sewing.
What are the best practices for cleaning and maintaining my sewing machine after working with canvas?
After sewing with canvas, clean your machine by unplugging it, removing lint with a brush, and oiling as per the manual.
Unplug your sewing machine. Remove any accumulated lint using a brush. Refer to your machine’s manual for oiling instructions. Regular cleaning and maintenance can prevent operational problems and prolong the lifespan of your sewing machine.
How can I add waterproofing to my canvas projects after sewing?
Looking to keep your canvas creations dry and durable? Why not try waterproofing them at home? It’s simpler than you might think.
Apply a wax compound like Canvak to cotton canvas for a water-resistant finish.
Or use commercial waterproofing sprays for a quick solution.
What are some effective methods for sewing canvas without a walking foot if my machine doesn’t have one?
To sew canvas without a walking foot, use a larger needle like a 100/16 or 110/18, and heavy-duty thread.
Sew slowly, especially over bulky areas, and avoid stretching the fabric.
Adjust presser foot pressure and upper tension as needed.
Conclusion
Mastering the art of sewing canvas can feel like conquering Mount Everest. With these techniques and tips, you’re now equipped to tackle any challenge that comes your way.
As you finish your canvas masterpieces, topstitching and fray prevention will ensure longevity.
Embrace these solutions for common problems sewing canvas, and watch your projects thrive.


