This site is supported by our readers. We may earn a commission, at no cost to you, if you purchase through links.
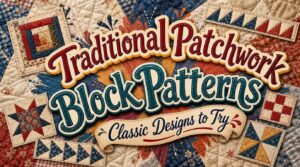
quilts made in the 1800s are still intact today—stitched together from worn-out shirts, feed sacks, and dress scraps that had no other use.
women who made them weren’t following trends.
They were working with what they had, using block patterns passed down through families and communities.
That’s the quiet power behind traditional patchwork block patterns: they were built to last, in more ways than one.
Log Cabin block or a set of Flying Geese carries the same structure now as it did 150 years ago.
Learning these patterns connects you to that long line of makers—and gives you a seriously solid foundation for any quilt you’ll ever want to build.
Table Of Contents
Key Takeaways
- Classic blocks like Log Cabin, Nine Patch, and Flying Geese have survived 150+ years because their structure is simple, adaptable, and built from whatever scraps you have on hand.
- Choosing the right block size shapes everything — six inches suit baby quilts, nine works for samplers, and twelve keeps seam counts manageable on bed quilts.
- Techniques like chain piecing, strip piecing, and paper piecing aren’t just time-savers — they’re the difference between wonky points and blocks that actually line up.
- You don’t need to start from scratch — every traditional block you learn connects you to a long line of makers who already solved the hard problems for you.
Classic Patchwork Blocks to Try
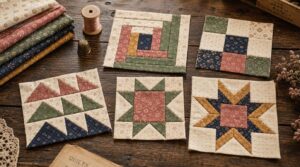
Some quilt blocks have been around for over a century — and for good reason. They’re simple enough to learn quickly but satisfying enough to keep making. Here are five classics worth adding to your repertoire.
If you’re just getting started, this roundup of beginner traditional quilt blocks walks you through the ones that have stood the test of time for a reason.
Log Cabin
The Log Cabin quilt block is one of the most recognized patchwork block patterns in American quilting history. Strips of fabric — called "logs" — wrap around a small center square, traditionally cut in red to symbolize the hearth:
- Light and dark logs alternate on opposite sides
- Block construction builds outward in a spiral
- Scrap fabrics work perfectly here
Four Patch
If the Log Cabin block is about building outward, the Four Patch quilt block is about keeping things beautifully simple. Four equal squares. Two light, two dark. Arranged in a 2×2 grid — and done.
A precise quarter‑inch seam guide ensures the block measures the correct finished size.
| Element | Detail |
|---|---|
| Block construction | 2×2 grid of equal squares |
| Finished size | 4.5 inches with seam allowances |
| Pressing technique | Toward the darker fabric |
| Color combinations | High contrast pairs work best |
| Scale variations | 2-inch or 3-inch finished patches |
It’s one of the oldest patchwork block patterns around, and it earns that reputation. Use scraps, fat quarters, even leftover strips — this block welcomes everything. Strip piecing speeds things up fast when you’re making a stack of them.
Nine Patch
The Nine Patch quilt block takes that same "keep it simple" spirit and adds one more row. You get a 3×3 grid of nine equal squares — and suddenly you have something that feels more complex than it is.
The center square naturally draws the eye. Surround it with contrasting fabrics and the whole block comes alive.
Here’s what makes it work:
- High contrast placement — light and dark squares create instant visual rhythm
- Scrap-friendly construction — almost any leftover fabric fits
- Reversed Nine Patch — flip the center color for a completely different look
- Mini Nine Patch — shrink the units for a delicate, intricate effect
This 9 patch quilt block unit also plays well with others. Combine it with plain blocks, alternate the layout, and secondary patchwork designs start appearing across your quilt top — almost like magic.
Half-Square Triangles
If the Nine Patch taught you that simple grids hold real power, the Half Square Triangle quilt block takes things up a notch — same idea, different geometry.
An HST is just two right-angle triangles sewn along their diagonal edge. That one seam creates a crisp line that becomes the backbone of dozens of patchwork designs.
Template-free HST cutting is the most popular approach. You start with two squares cut slightly larger than your finished size, draw a diagonal line, stitch on both sides, then cut and press open. Two HSTs from one pair of squares — clean and efficient.
For sharper results and fewer wonky points, advanced quilting tips for cutting and pressing HSTs can make a real difference in how your blocks line up.
Here are the top five keywords quilters search when learning this block: Half Square Triangle Quilt Block, quilt block patterns, patchwork designs, sewing tutorials, and fabric cutting guides. All five point back to the same workhorse unit.
| HST Construction Method | Speed | Best For |
|---|---|---|
| Two at a time | Moderate | Beginners and small projects |
| Four at a time | Fast | Consistent scrappy layouts |
| Eight at a time | Fastest | Large bed quilts |
Color value placement is where HSTs really shine. High contrast pairings — think black and white or deep navy against cream — create strong visual diagonals. Subtle gradations from light to dark add movement without shouting.
For pressing techniques, always press seams toward the darker fabric. A little starch keeps bias edges flat. Rushing this step is how points go wonky.
Scaling HST projects is straightforward. The same finished size across all your units keeps layout planning simple, whether you’re making a wall hanging or a king-sized quilt.
Flying Geese
Flying Geese might be the most satisfying block in classic patchwork — one goose triangle flanked by two sky triangles, forming a clean V that points forward like it means it.
Flying Geese: one bold triangle flanked by two sky pieces, pointing forward like it means it
Color contrast does the heavy lifting here. A dark goose against a light sky reads instantly. Flip those values and you get a totally different mood.
Star and Triangle Block Patterns
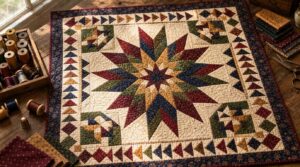
Stars and triangles have been quilt favorites for centuries — and it’s easy to see why. These blocks bring real visual punch without needing a complicated pattern. Here are five classic designs worth adding to your rotation.
Eight-Pointed Star
The Eight-Pointed Star is one of quilting’s oldest showstoppers — a geometric octagram built from two overlapping squares, rotated 45 degrees apart. Its eight symmetry points create a design that feels both bold and balanced.
First documented in Ohio Farmer Magazine in 1894, this block has anchored medallion quilts and scrap projects alike.
Pick a high-contrast fabric pair to make every point sing.
Ohio Star
The Ohio Star quilt block earns its place in every quilter’s repertoire. It’s a classic 3×3 grid — center square, corner squares, and four quarter-square triangle star points — that finishes cleanly at 6, 9, or 12 inches.
Strong color contrast is the real secret here. Dark points against a light center make the star pop.
Try chain piecing multiples for a repeating star-field layout.
Lone Star
The Lone Star is patchwork quilting at its most dramatic. Eight diamond-shaped rays radiate from the center, forming one bold, oversized star that fills nearly the entire quilt top. Unlike the Ohio Star’s tidy grid, this one commands the room.
Construction takes patience. Paper piecing or template-cut diamonds keep those sharp points accurate. Red, white, and blue or warm earth tones both work beautifully.
Pinwheel Blocks
Few blocks move the eye quite like a pinwheel. This pinwheel quilt block uses four half-square triangles arranged in a 2×2 grid, spinning from the center.
High-contrast color pairings — two light, two dark — give it that satisfying whirl.
Try scrappy arrangements for playful energy, or flip rotation in adjacent rows to create unexpected secondary patterns across your patchwork.
Broken Dishes
Broken Dishes looks chaotic at first glance — two half-square triangles flipped and paired, creating a scattered, energetic effect. It’s a close cousin to Pinwheel, but feels more restless.
Keep your color schemes high-contrast for maximum punch, or go scrappy for a cozy, collected look. A simple block, but endlessly interesting once it’s repeated across a full quilt.
Themed Traditional Quilt Blocks
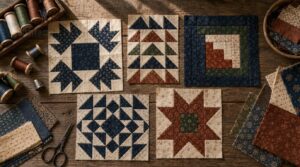
Some quilt blocks tell a story the moment you look at them. Makers throughout history pulled inspiration from the world around them — animals, landscapes, and even the roads they traveled. Here are a few themed traditional blocks worth adding to your repertoire.
Bear’s Paw
The Bear’s Paw block pulls straight from early American wilderness life — think frontier cabins, pine forests, and rough-cut quilts pieced from whatever scraps were on hand.
- High contrast fabrics make the paw shape pop cleanly
- Precise central square alignment keeps the silhouette readable
- A split-fabric paw adds a modern, beveled visual effect
Small-scale prints work best inside the paws.
Bird’s Nest
From paws to feathers — the Bird’s Nest quilt block captures something quieter than the Bear’s Paw, but just as grounded in nature. It mirrors how real nests work: layered materials, a secure structure, and a soft center.
Warm, earthy tones echo that cozy, cup-shaped interior perfectly. Try pairing coarse outer fabrics with softer inner prints to bring the design to life.
Honey Bee
The Honey Bee block buzzes with life — and it earns its name. Inspired by hive structure and roles, the design mirrors how worker bees organize their world: busy, geometric, and purposeful.
- Pick golden and amber fabrics
- Center a small patchwork square
- Surround it with angled units
- Press seams toward the darker pieces
Road to California
From hive to horizon. The Road to California block tells a different kind of story — one of wagon wheels and wide-open land.
Rooted in 19th-century westward migration, it captures that restless pioneer spirit in patchwork form. Use your downloadable quilt block cheat sheet to cut accurate pieces and keep your points crisp.
City Streets
Step off the grid and into the city. The City Streets block turns urban geometry — think brickwork rows, pedestrian crossings, and checkerboard intersections — into sharp, satisfying patchwork.
It’s one of those antique quilt designs that feels surprisingly modern. Pair it with high-contrast fabrics to make those street-grid lines pop.
Choosing The Right Block Size
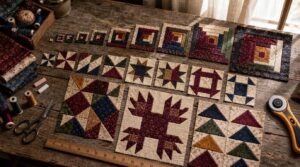
Block size shapes everything — how a quilt looks, how long it takes, and how much fabric you’ll need. The good news is there’s no single right answer, just what works best for your project. Here are a few things to think about before you cut your first piece.
Finished Size Options
Block size shapes everything — how much fabric you need, how long it takes, and how the finished quilt feels.
Standard block sizes run 6, 9, and 12 inches. Six-inch blocks suit baby quilts. Nine-inch blocks work well for samplers. Twelve-inch finished blocks keep seam counts low on bed quilts. Adding borders bumps your overall quilt dimensions by 2 to 4 inches per round.
Beginner-Friendly Blocks
Some blocks just make sense for beginners. Four Patch and Nine Patch are the best starting points — large squares, straight seams, no curves.
High contrast fabric pairings make matching seams easier and keep the design crisp. Both blocks use simple construction and assemble quickly.
You can find free quilt block patterns online with clear instructions that walk you through every cut.
Scrap Quilt Planning
Scrap quilts reward planning. Before you cut anything, sort your fabric scraps into light, medium, and dark values. This simple step shapes every block decision you make.
A quick fabric inventory by size and color saves time later and helps you choose blocks that actually fit what you have — no awkward leftovers, no wasted cuts.
Border Block Ideas
Borders pull a quilt together — think of them as the final frame on a painting. Finished border widths usually run 2 to 6 inches, and that range matters more than you’d think.
Narrow borders let your center blocks breathe. Wider ones add drama.
Flying Geese borders bring movement along the edge, while Nine Patch borders echo interior blocks for a cohesive feel.
Mitered corners keep joins crisp and clean.
Whole-Quilt Layouts
Think of your whole quilt as a map.
Grid layout planning gives you straight rows and columns — clean, classic, easy to align.
On-point arrangements rotate blocks 45 degrees, adding diagonal energy and requiring diagonal setting triangles at the edges.
Sashing and borders define flow.
Match your block size considerations to standard bedding dimensions so nothing feels off-balance.
Cutting, Piecing, and Templates
Once you’ve settled on your block size, the real fun begins — actually cutting and sewing the pieces together. A few foundational techniques make the whole process smoother and more accurate. Here’s what every patchwork quilter should know before the first snip.
-Inch Seam Allowance
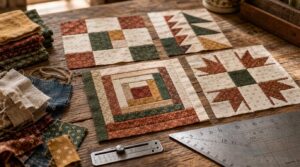
Most quilters work with a ¼-inch seam allowance, but knowing when to go wider makes a real difference. For bulky batting, heavy fabrics like denim, or quilts that’ll be washed often, a one-inch seam adds durability where you need it most.
- Reduces fraying on linen and canvas
- Allows seam-finishing techniques like binding or serging
- Allows for future alterations
- Keeps heirloom blocks precisely aligned
Chain Piecing Tips
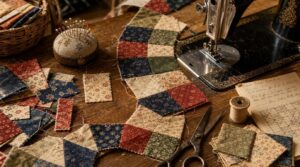
Once your seam allowance is dialed in, chain piecing helps you move fast without losing accuracy. Instead of sewing one block, stopping, and starting again, you feed pieces through the machine back to back. Leader and ender scraps go under the needle first to protect your thread and reduce fraying at the start of each run.
Clip your chain every six to eight units to prevent tangling. Keep your stitch length between 2.0 and 2.5 mm throughout. After clipping, press seams in alternating directions across rows so they nest cleanly when joined.
| Tip | Why It Helps | When to Use It |
|---|---|---|
| Leader/ender scraps | Protects thread starts | Every chain session |
| Clip every 6–8 units | Prevents tangles and bulk | Mid-chain, consistently |
| Alternate seam pressing | Helps seams nest and lock | Before joining rows |
Strip Piecing Basics
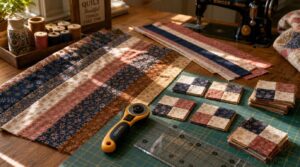
Strip piecing picks up right where chain piecing leaves off. Instead of cutting individual squares and sewing them one by one, you sew long strips together first, then sub‑cut them into ready‑made units.
It’s faster, more consistent, and cuts down on handling. Simple blocks like Four Patch practically build themselves this way.
Paper Piecing Templates
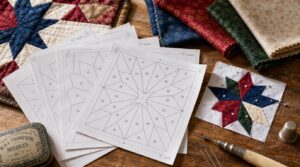
Paper piecing takes precision to a different level. You sew fabric directly onto a printed foundation — following numbered sections in order — so your points line up every time.
Use foundation paper between 80 and 100 GSM. It’s sturdy enough to sew through but tears away cleanly afterward. Many patterns also include mirror image options for symmetrical blocks, which saves real guesswork.
Printable Cutting Charts
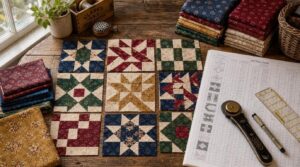
A good cutting chart is like having a seasoned quilter whisper exactly how much fabric to cut — before you make a single snip.
Most printable quilt charts download straight from the tutorial page as PDFs. Open them in Adobe Reader for the cleanest print.
Always check your print settings — print at 100%, never "fit to page," or your measurements will be off.
Frequently Asked Questions (FAQs)
How do I press seams for accurate block alignment?
Hot iron, flat seam, accurate block — it’s that simple. Press each seam to the side toward the darker fabric first. Where seams meet, press open to cut down bulk and keep your points sharp.
Which fabrics work best for geometric patchwork blocks?
100% cotton is your best bet. It’s stable, easy to sew, and holds crisp points. Prewash before cutting to prevent shrinkage. Batiks offer gorgeous edge precision for geometric shapes.
Can traditional blocks be resized without distorting patterns?
Yes — and it’s simpler than you’d think. Keep scaling proportions uniform, maintain a consistent ¼-inch seam, and multiply every unit by the same factor. Your pattern stays crisp, your grid stays aligned.
Conclusion
The proof is in the pudding—and with traditional patchwork block patterns, the pudding has held up for over a century.
Every block you learn carries the muscle memory of makers who figured it out before you, often with far less. You’re not starting from scratch. You’re picking up a thread that never really stopped.
Start with one block. Get comfortable. Then let the pattern lead you somewhere worth going.