This site is supported by our readers. We may earn a commission, at no cost to you, if you purchase through links.
Your first quilt block doesn’t need to be complicated. The oldest patterns in American quilting—the Nine-Patch, Log Cabin, Pinwheel—have survived two centuries because they work, and because beginners can actually finish them.
Fabric strips, a few squares, a consistent quarter-inch seam: that’s the whole secret. Easy traditional block patterns aren’t a shortcut or a consolation prize.
They’re where every skilled quilter started, and they teach the core skills that make every project after this one easier. Pick your block, grab your rotary cutter, and let’s get your first one done.
Table Of Contents
Key Takeaways
- Classic blocks like the Nine-Patch, Log Cabin, and Pinwheel have stood the test of time because they teach real skills — accurate cutting, consistent seams, and color contrast — that carry into every project you make after.
- A true quarter-inch seam is the one habit that holds everything together; even a thread’s worth of drift compounds across a whole quilt top.
- How you arrange your finished blocks changes everything — from a simple straight-set grid to a dramatic Barn Raising layout, the same blocks can tell completely different stories.
- Pressing seams as you go and trimming each block square before assembly are the two quiet steps that separate blocks that match up from blocks that fight you.
Choose Beginner Traditional Quilt Blocks
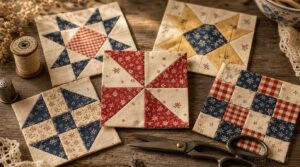
The best place to start is with blocks that teach you real skills without overwhelming you. Each of the five blocks below builds a different foundation — from simple grids to rotating shapes — so you’ll grow as you go. Here are the beginner-friendly traditional blocks worth learning first.
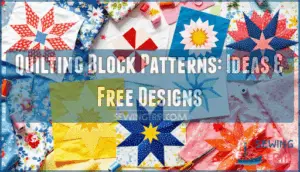
For a deeper look at what’s out there, this collection of quilting block patterns and ideas shows just how much variety you can explore once you’ve got the basics down.
Nine-Patch Block
The Nine-Patch Block is where most quilters begin — and for good reason. It’s just nine equal squares sewn into a 3×3 grid. Simple as that.
You alternate light and dark fabrics to create contrast, and the pattern almost builds itself. It’s the perfect first block to practice your quarter-inch seams and build real confidence.
Log Cabin Block
The Log Cabin Block is your next natural step. Instead of squares, you build outward from a small center square, wrapping fabric strips around it — one at a time — in a log sequence.
Light strips go on two sides, dark on the other two. That color contrast is what gives this classic block its striking, graphic look.
Uniform strip widths help keep the block square, as explained in the strip widths determine size.
Courthouse Steps Block
The Courthouse Steps block is a close cousin to the Log Cabin. Instead of wrapping strips all the way around, you add fabric to opposite sides — top and bottom first, then left and right.
That back-and-forth rhythm creates a staircase effect. Keep your light and dark fabrics balanced, and the stepped pattern practically builds itself.
Pinwheel Block
The Pinwheel block is where quilting starts to feel like magic. Four half-square triangle units come together to form a spinning motif that looks far more impressive than the effort required.
Use high-contrast light and dark fabrics to make the blades pop. Keep your center point aligned, and that wheel will spin beautifully every time.
Plus Sign Block
The Plus Sign block might be the simplest block in this step-by-step tutorial — just five squares arranged in a cross on a 3×3 grid. Here’s what makes it work:
- Use high-contrast fabrics to define the arms clearly.
- Press seams toward the center to reduce bulk.
- Trim the finished block square before moving on.
Gather Fabric, Tools, and Templates
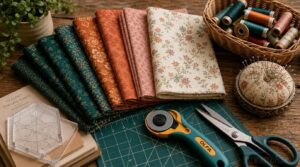
Before you sew a single stitch, you need the right supplies within arm’s reach. Getting set up doesn’t have to be complicated — just a few key items make all the difference. Here’s what to gather before you start.
If you’re making a card project, printing your template from a beginner pop-up card tutorial at full scale ensures your cuts and folds line up perfectly from the start.
Beginner-Friendly Cotton Fabrics
The fabric you choose can make or break your first quilt. For beginners, 100 percent cotton is the clear winner. It’s easy to cut, holds its shape, and doesn’t shift around while you sew. Look for quilting-weight cotton — around 4.5 to 5.5 ounces per yard — with a smooth, crisp hand. Weaves like percale or broadcloth work especially well.
Prewash your fabric before cutting anything. This removes excess dye and shrinks the cloth so your finished quilt won’t pucker later. Most quilting cottons are machine washable, making care simple. Pick fabrics with strong color contrast — light against dark — so your seam lines stay easy to see as you piece your blocks together.
Rotary Cutter and Ruler
Getting clean cuts starts with the right tools.
A 45 mm rotary cutter covers most quilting tasks well — it slices through multiple fabric layers smoothly and pairs with a clear acrylic ruler for straight, accurate lines.
Keep a spare blade handy, and replace dull blades before they drag.
Always cut away from your body, and store your cutter with the blade guard closed.
Accurate Cutting Mat Setup
Your cutting mat is the foundation of every accurate cut you’ll make.
Lay it flat on a stable surface — any curl or wobble causes blade drift. Choose a self-healing mat with a non-slip underside to protect your table and keep things steady. Align the mat’s grid lines with your table edge, then place your ruler along those same lines before every cut. Clean the mat regularly to remove loose fibers.
Printable Block Templates
Printable block templates take the guesswork out of cutting. Download a PDF cutting chart at 100 percent scale — no "fit to page" — so your pieces finish at the right size.
Many packs include multiple block patterns like Nine-Patch and Log Cabin in one file. Print on cardstock for a reusable template that holds its shape cut after cut.
Light and Dark Fabric
Light and dark fabric is the secret engine behind every traditional quilt block. High contrast pairings — think navy against cream or charcoal beside white — make shapes like Nine-Patch and Log Cabin pop from across the room.
Choose 100% quilting cotton in true lights and darks, skipping midtones. Always prewash both to prevent color bleed.
Cut Pieces for Easy Blocks
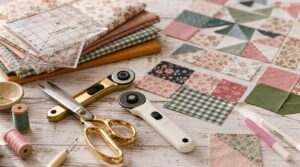
Good cutting makes everything else easier. Once your fabric is prepped, it’s time to break it down into the exact pieces each block needs. Here’s how to cut for five of the most beginner-friendly traditional blocks.
Squares for Nine-Patch
Nine squares — that’s all it takes. For a Nine-Patch block, cut all nine squares to the exact same size. A 3-inch cut square gives you a 2.5-inch finished square, which builds a standard 6-inch block.
Use a rotary cutter and ruler for clean edges. High contrast fabric choices — think dark against light — make your grid pop.
Strips for Log Cabin
Where squares give you a grid, strips give you rhythm. The Log Cabin block is built by sewing fabric strips around a center square in a stair step arrangement — working outward, round by round.
Start with strips cut 1½ to 2½ inches wide.
Keep your light strips on one side, dark on the other. That contrast is what makes the pattern sing.
Half-Square Triangle Units
From strips, we move to triangles — and this is where quilting gets fun.
Half-square triangle units (HSTs) are made by sewing two squares together along the diagonal. One cut. Two triangles. Done.
Use the 7/8-inch rule for sizing:
- For a 2-inch finished HST, cut squares at 2⅞ inches.
- For 3 inches finished, cut at 3⅞ inches.
- Always trim square after sewing.
Matching Block Sizes
Once your HSTs are trimmed, matching block sizes across your whole project becomes the real advantage. Consistent block sizes mean your rows line up cleanly and you won’t spend extra time forcing mismatched edges together.
A standard starting point: Nine-Patch blocks finish at 6, 9, or 12 inches, while Flying Geese and Log Cabin blocks have their own common finished dimensions.
Pre-Cutting Time Savers
Before you touch your rotary cutter, a little prep work saves you real time later.
- Sort by color group — keep lights and darks separate from the start.
- Layer-cut two to four fabric pieces at once to double your output.
- Store templates flat in a labeled folder for your next project.
- Pre-wash fabrics to prevent shrinking after you’ve already sewn.
Sew Traditional Blocks Step-By-Step
Now comes the part where everything starts to look like a real quilt block. A few good habits here will make the difference between pieces that match up and pieces that fight you. Here’s what to focus on as you sew.
Maintain Quarter-Inch Seams
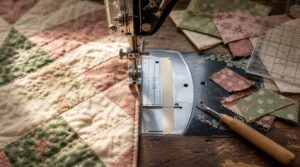
One small habit makes or breaks your blocks: a true quarter-inch seam. Even a thread’s difference throws off alignment across an entire quilt top.
A true quarter-inch seam is the single habit that holds your entire quilt together
Use a dedicated quarter-inch presser foot or a seam guide taped to your machine. Before sewing your actual blocks, test on a scrap first. Measure the result. Adjust until it’s right, then don’t change a thing.
Chain Piece Repeated Units
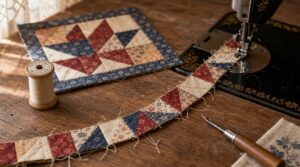
Chain piecing is your best friend when you’re making multiple identical blocks. Instead of stopping and starting between each unit, you feed one right after another through your machine — no cutting thread in between.
Sew each unit in continuous sequence, keeping pieces organized by position. This saves time, reduces thread waste, and keeps your repeated units consistent across the whole quilt.
Press Seams as You Go
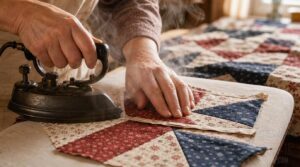
Every seam you press is setting up the next one for success.
Press each seam immediately after sewing — don’t let pieces pile up. Use a dry iron with steady, even pressure, and press from the seam allowances rather than the fabric surface.
- Press seams immediately after stitching to flatten the stitch line
- Choose open seam pressing for bulky fabrics to reduce bulk at center points
- Apply steam control tips — use the lowest effective steam to avoid distorting prints
- Check seam alignment so intersections lie flat and corners stay square
- Keep an ironing surface clean and dry to prevent residue transfer onto your fabric
Trim Blocks Square
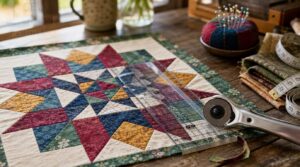
After pressing, trimming is what turns a good block into a great one.
Use a clear acrylic ruler and rotary cutter to trim each block square. Align the ruler’s grid lines with your seam lines, then cut. Always trim after pressing — fabric shifts when warm.
| Step | Tool | Goal |
|---|---|---|
| Align edges | Clear ruler | True 90° corners |
| Trim sides | Rotary cutter | Consistent block size |
| Verify size | Measuring tape | Match pattern dimensions |
Check Point Alignment
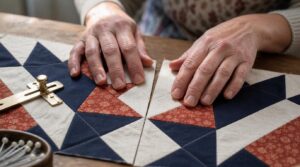
Think of this as a final quality check before your blocks meet each other. Place pieces together and look for corner alignment — every point should meet cleanly, with no gaps or overlaps. Check that your seam allowances stay a consistent ¼ inch across all joined edges.
Good alignment means your quilt lies flat and looks sharp.
Arrange Blocks Into Quilt Layouts
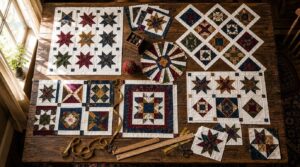
Once your blocks are sewn, it’s time for the fun part — deciding how they’ll come together. The layout you choose shapes the entire look and feel of your quilt, so it’s worth taking a moment to explore your options. Here are five simple arrangements to explore.
Straight Set Layout
The straight set layout is the most beginner-friendly way to arrange your traditional quilt blocks. You simply place blocks in even rows and columns — no rotation, no fuss. Think of it like a clean grid on graph paper.
Before sewing, lay your blocks on a design wall to check color rhythm and block spacing. Adjust until it feels balanced.
On-Point Block Layout
Once you’ve mastered the straight set, try rotating your blocks 45 degrees into an on-point layout. Each block rests on its corner, forming a diamond shape. This instantly gives your quilt more energy and movement.
You’ll need setting triangles along the edges and corner triangles at the quilt’s four corners to fill the gaps.
Alternating Plain Squares
Another simple layout is alternating plain squares. You place your pieced blocks next to plain solid squares in a checkerboard pattern. This creates strong contrast and gives each block room to breathe.
Pick fabrics based on light and dark values, not just color. Cut your plain squares to match your block size exactly — a consistent quarter-inch seam keeps everything aligned.
Barn Raising Arrangement
The Barn Raising arrangement is one of the most striking Log Cabin quilt patterns you can try. You rotate each Log Cabin block to create a secondary pattern — concentric diamonds of light and dark radiating from the center.
Lay your blocks on the floor first. Shift them around until the color sequence clicks into place before you sew a single seam.
Simple Color Placement
Color is where your quilt comes alive. A few simple choices make all the difference.
- Place high-contrast pairs at block centers so they catch the eye first
- Keep lighter fabrics toward the middle to open up the space
- Use dark tones at edges to frame and ground each block
- Scatter neutral accents evenly to create rhythm without noise
- Let color flow diagonally to guide the eye across the whole quilt
Frequently Asked Questions (FAQs)
How do I fix puckered seams after sewing?
Puckered seams are quilting’s little joke — they show up right after you think everything went perfectly. Adjust stitch length to 5–0mm, check seam tension, and press flat with steam to smooth things out.
What batting works best for traditional quilts?
For traditional quilts, cotton batting is the go-to choice. It breathes well, drapes flat, and gives that classic crinkled look after washing. Wool adds loft and warmth. For durability, try an 80/20 cotton-polyester blend.
How do I calculate total yardage needed?
Multiply your block count by the fabric needed per block, then add yardage for borders, binding, and backing. A fabric yardage calculation for a lap quilt usually needs 4–6 yards total.
Can I mix quilt block sizes in one project?
Yes, you can! Mixing block sizes works well when you plan ahead. Use sashing or borders to align different sizes, keep a consistent seam allowance, and choose cohesive fabrics to unify the whole design.
How do I bind and finish a quilt edge?
Cut your binding strips at 5 inches wide, fold them lengthwise, and sew to the front with a quarter-inch seam. Wrap to the back, then hand stitch for a clean finish.
Conclusion
What if the block you finish today becomes the one you show someone else how to make ten years from now? That’s how easy traditional block patterns have always traveled—hand to hand, generation to generation.
You’ve learned the cuts, the seams, the pressing, the layout. None of it was beyond you.
Keep your scraps. Start another block.
The skills you’ve built here don’t reset between projects—they stack.
- https://www.diaryofaquilter.com/nine-patch-quilt-blocks-quilt-tutorials
- https://www.farmandfolk.com/blog/2019/7/20/a-9-patch-quilt-tutorial
- https://bryanhousequilts.com/2025/08/log-cabin-quilt-for-beginners
- https://fabric406.com/blogs/fabric406-blog/beginner-friendly-nine-patch-variation-quilt-block-tutorial
- https://apps.apple.com/us/app/quiltler-3-quilt-design/id6755831082