This site is supported by our readers. We may earn a commission, at no cost to you, if you purchase through links.
That generic store-bought cover sitting on your sewing machine? It probably fits like a paper bag. Too wide, too short, slides off the bobbin spindle every time you lift it.
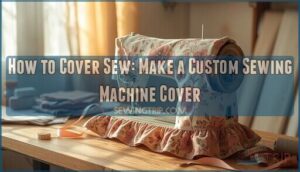
The good news: you can sew your own sewing machine cover in an afternoon—and it’ll fit like it was made for your machine. It was.
With straight-line sewing skills, a few basic supplies, and about two hours, you’ll have a custom cover that actually protects your machine from dust and lint while looking exactly the way you want it to.
Table Of Contents
Key Takeaways
- You can sew a custom-fitted sewing machine cover in one afternoon using only straight-line stitching, basic tools, and accurate measurements of your machine’s width, height, and depth.
- Measuring at three heights, including the bobbin spindle, and adding ½‑inch seam allowance to every dimension is what separates a cover that fits from one that doesn’t.
- Your fabric choice drives both protection and structure—quilted cotton works for beginners, while canvas or waxed canvas adds durability, and fusible fleece gives any cover a clean, padded shape.
- Small finishing details like a slip‑stitched closing gap, and reinforced handles are what make a handmade cover look and function like something store‑bought.
Can You Sew Your Own Sewing Machine Cover?
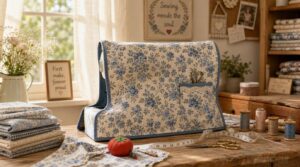
Yes, you can absolutely sew your own sewing machine cover — and you don’t need much experience to pull it off. Most beginners finish one in an hour or two, and the result fits your machine way better than anything off a store shelf. Here’s what makes this project worth your time.
If you’re working with limited space, these sewing machine cover patterns for small spaces show how to keep things compact without sacrificing style or protection.
Yes, Beginner Sewists Can
Anyone who can sew a straight line can make a DIY sewing machine cover. No specialized skills are needed. A simple free sewing pattern and basic tools are all it takes.
- Cut and sew with confidence from day one.
- Follow clear step-by-step instructions at your own pace.
- Customize your pattern to fit your exact machine.
- Build real skills on a project you’ll actually use.
Simple 1–2 Hour Project
This whole project fits into a single afternoon. From start to finish, most beginners wrap it up in 60 to 120 minutes.
Pre-cut your pieces ahead of time and you’ll move even faster.
Cutting and sewing combined take around 40 minutes. Pressing and topstitching add maybe 15 more.
That’s it — one focused session and you’re done.
Protects From Dust and Lint
A well-made dust barrier design does real work. A tightly woven cotton cover traps lint on its outer surface instead of letting it settle into your bobbin area.
A tightly woven cotton cover traps lint on its surface before it ever reaches your bobbin
Finished edges and topstitched seams close off tiny gaps where dust sneaks through.
Shake or wash your cover regularly so buildup doesn’t transfer back onto the machine.
Custom Fit and Style
Generic vinyl covers sag and slip. A custom-made cover fits your exact machine like it was made for it — because it was.
With pattern drafting and the fabric of your choice, you control everything:
- Fit adjustments for spindles and cords
- Pocket integration for tools and feet
- Decorative piping for a polished edge
That’s your unique touch, built in from the start.
Measure Your Sewing Machine First
Before you cut a single piece of fabric, grab a measuring tape and spend five minutes with your machine. Getting the numbers right upfront saves you from a cover that’s too tight, too loose, or just plain awkward. Here’s what to measure.
Measure Widest Machine Width
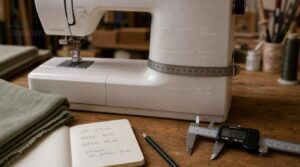
Start with the widest point of your machine — measured front edge to outer edge. Measure at three heights (top, middle, bottom) and use the largest number.
A steel tape works fine, but a digital caliper gives you cleaner accuracy. Record everything in millimeters, then add 5–10mm clearance so your cover slips on without binding.
Reading the measurement at eye level helps you avoid parallax error.
Measure Height With Spindle
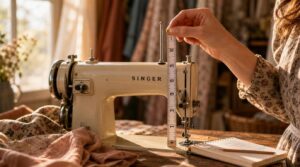
Don’t forget the bobbin spindle when you measure height. That little pin at the top is the tallest point on your machine — skip it and your cover won’t fit. Measure from your flat work surface straight up to the spindle tip. Write that number down, then add ½ inch for seam allowance.
Measure Front-to-back Depth
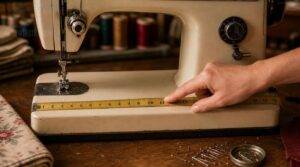
Depth is the measurement you take from the front edge of your machine to the back. Most home machines run 14 to 18 inches deep, depending on the model.
Use a soft, flexible tape measure — a rigid ruler won’t hug the curves.
Check the back for any protruding spools or handgrips, since those add extra depth you can’t ignore.
Add Seam Allowance
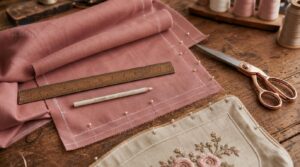
Once you have all three measurements, add ½ inch seam allowance to each dimension. This gives your outer fabric and lining enough room to meet cleanly at the seams. A consistent seam allowance keeps corners sharp and prevents puckering.
Mark seam lines with chalk before cutting — it takes 30 seconds and saves a lot of frustration.
Check Standard Cover Sizing
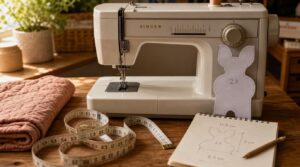
Most standard home sewing machines fit a cover sized around 16.5 in wide, 16 in tall, and 7.5 in deep. Compare your measurements to that baseline.
If your machine runs larger — say, 14 in tall — bump up to a larger template. A quick dimension verification process now means no awkward gaps or tight spots later.
Choose Fabric and Cover Style
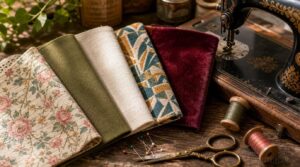
The fabric you pick shapes the whole look and feel of your cover. Some options are decorative, some are heavy-duty, and some do both at once. Here are five styles worth considering.
Quilting Cotton Cover
Quilting cotton is the go-to choice for most beginner sewists — and for good reason. It’s lightweight at 4–5 oz per square yard, easy to cut straight, and comes in hundreds of prints.
You can tailor it to your exact machine dimensions using a simple measurement guide, fuse it with fusible fleece for padding, then finish with clean topstitching for a polished, custom look.
Cotton Canvas Cover
Cotton canvas is the step up from quilting cotton when you want something tougher. It’s a breathable, natural fiber that resists abrasion and holds its shape well — perfect for a sewing machine cover that actually stands upright.
You can even treat it with wax for light water repellency, keeping dust and moisture out without sacrificing airflow.
Waxed Canvas Dust Cover
Waxed canvas takes durability one step further. It has a water repellent coating that beads moisture right off the surface — so dust, splashes, and pet hair wipe away fast.
Over time, it develops an aging patina look that gets better with use.
It’s stiffer than plain canvas, too, giving your sewing machine cover natural stiff structure support without any interfacing.
Padded Lined Cover
A padded lined cover takes protection up a notch. It sandwiches soft batting between outer fabric and lining — cushioning your machine from bumps while blocking dust. The smooth lining helps it glide on and off without snagging.
Use fusible fleece to bond the layers cleanly.
Spot clean as needed and always air dry.
Structured Cover With Interfacing
Want your cover to actually hold its shape? That’s where fabric interfacing comes in.
Fuse Pellon Peltex 71F or 72F to your side panels, and the cover stands upright instead of drooping. It keeps edges crisp, corners clean, and the whole thing looking neat wash after wash — like it came off a store shelf.
Top 5 Sewing Cover Supplies
Before you start cutting fabric, make sure you’ve got the right tools in your corner. A few key supplies will make this project go a whole lot smoother. Here’s what you’ll want to have on hand.
1. Pellon Fusible Fleece
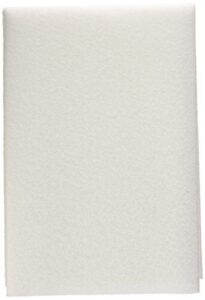
Think of Pellon Fusible Fleece as your cover’s secret backbone. It’s a 100% polyester fusible fleece that bonds directly to your fabric with a hot iron — no pins, no sewing required. It adds just enough padding to give your cover soft structure without making it stiff or bulky.
Cut it to match your outer panels, fuse it to the wrong side, and you’re ready to sew. It’s machine washable and won’t gum up your needle.
| Best For | Crafters and sewists working on small projects like totes, placemats, quilts, and accessories who want easy, iron-on structure without bulk. |
|---|---|
| Material | 100% Polyester |
| Color | White |
| Handedness | Universal |
| Primary Use | Quilting/Crafts |
| Package Count | 1 Sheet |
| Skill Level | Beginner–Advanced |
| Additional Features |
|
- Bonds fast with steam — no pinning or hand-sewing needed
- Adds soft, cushiony structure without stiffness or extra bulk
- Needle-friendly, so quilting and embroidery go smoothly
- Adhesion can be hit or miss — some fabrics need longer ironing time
- Only comes in one size (22×36 in), so bigger projects are out
- White only, which can be a problem if color bleed-through matters
2. Gutermann Sew All Thread
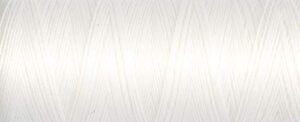
Good thread is the difference between seams that hold and seams that fail. Gütermann Sew All is a solid go-to for this project. It’s 100% polyester, so it’s strong, colorfast, and withstands machine washing without fraying or losing tension.
Each spool gives you 1,000 meters — plenty for a full cover with room to spare. It feeds smoothly through your machine with minimal lint, so you won’t be fighting skipped stitches or jams as you go.
| Best For | Home sewers and high-volume operations who want a reliable, all-purpose thread that works across garments, alterations, and quilting without fuss. |
|---|---|
| Material | 100% Polyester |
| Color | White |
| Handedness | Universal |
| Primary Use | Sewing/Quilting |
| Package Count | 1 Spool |
| Skill Level | Beginner–Advanced |
| Additional Features |
|
- 1,000 meters per spool means you’ve got plenty of thread for big projects without constant restocking.
- Low lint and smooth feed keep your machine running clean — fewer jams, fewer headaches.
- That silky finish gives visible seams a polished, professional look.
- Only comes in white, so you’ll need separate spools for every other color you’re working with.
- Not the best pick for fabrics that need a matte finish or heat-setting.
- Larger projects may eat through spools fast, and buying multiples adds up quickly.
3. Olfa 45mm Tungsten Steel Ergonomic Rotary Cutter
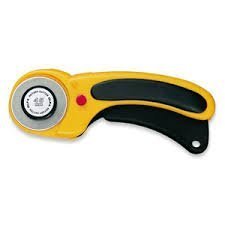
A sharp blade changes everything. The Olfa 45mm Tungsten Steel Rotary Cutter glides through quilting cotton and canvas without dragging or fraying edges.
The tungsten steel blade stays sharp through multiple projects, and the ergonomic comfort-grip handle reduces hand fatigue — a real win when you’re cutting long, straight lines.
It’s also ambidextrous, so lefties aren’t left out.
The self-retracting blade locks away safely when you’re done, which matters if kids are nearby.
| Best For | Quilters, sewists, and crafters — especially those with arthritis or limited grip strength — who need clean, precise cuts through multiple fabric layers. |
|---|---|
| Material | Alloy Steel |
| Color | Yellow |
| Handedness | Ambidextrous |
| Primary Use | Fabric Cutting |
| Package Count | 2 Blades |
| Skill Level | Beginner–Advanced |
| Additional Features |
|
- Tungsten steel blade holds its edge well and slices cleanly through up to six layers of fabric
- Ambidextrous design works for both right- and left-handed users without any awkward adjustments
- Self-retracting blade with a lock mechanism keeps things safe, especially around kids
- The instruction manual is only in Japanese, so figuring out blade changes may take a quick Google
- Blade sharpness out of the box can be hit or miss — you might need to swap to the spare right away
- Locked into 45mm blades only, so it won’t work if your projects call for a different size
4. Omnigrip Non Slip Quilting Ruler

Measuring fabric without a ruler that holds its ground is a frustrating way to waste good material. The Omnigrip 6×24 Non-Slip Ruler solves that instantly — its grippy backing keeps it planted while your rotary cutter glides along the edge.
The neon green markings show up clearly on light and dark fabrics, and dual-direction numbering works for both righties and lefties. Hatch marks at every ⅛-inch interval make hitting your seam allowances dead-on easy.
| Best For | Quilters and sewists who cut large fabric strips often and want a ruler that actually stays put. |
|---|---|
| Material | Rigid Plastic |
| Color | Neon Green |
| Handedness | Ambidextrous |
| Primary Use | Fabric Measuring |
| Package Count | 1 Ruler |
| Skill Level | Beginner–Advanced |
| Additional Features |
|
- Neon green lines pop on any fabric color, so you’re not squinting to find your mark
- Works for both left- and right-handed users thanks to dual-direction numbering
- The non-slip backing seriously cuts down on ruler drift during repeated cuts
- Inches only — no metric markings, so it’s a tough sell outside the US
- Some buyers have received units with damaged corners right out of the box
- Can warp if left in a hot car or sunny spot for too long
5. Olfa Double Sided Self Healing Rotary Mat
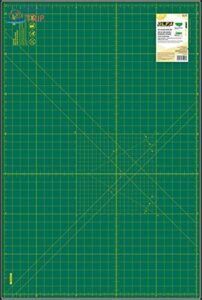
Every rotary cutter needs a surface that can take the hits. The Olfa Double-Sided Self-Healing Mat (24×36 in) is exactly that.
Its self-healing surface closes up after each pass, keeping your cuts clean and your blade sharper for longer. One side has yellow grid lines for precise alignment — perfect for squaring up your cover panels. Flip it over for bulk cutting on the solid green side.
Store it flat and out of direct sunlight to keep it warp-free.
| Best For | Quilters, sewists, and crafters who use rotary cutters regularly and need a large, durable cutting surface with precise measurement guides. |
|---|---|
| Material | Synthetic/Steel Core |
| Color | Green |
| Handedness | Universal |
| Primary Use | Fabric Cutting |
| Package Count | 1 Mat |
| Skill Level | Beginner–Advanced |
| Additional Features |
|
- Self-healing surface keeps cuts clean and extends your rotary blade life over time.
- Double-sided design gives you a grid-lined side for precise cuts and a clean green side for bulk cutting.
- Large 24×36 in work area handles multiple fabric layers at once — great for quilting blocks and bias strips.
- Thin at 1.5 mm, so visible cut lines may show up sooner than with thicker mats.
- Fresh out of the box, it can have a noticeable chemical odor that takes a few days to fade.
- Needs to be stored completely flat — rolling it risks warping that’s a hassle to fix.
Cut Your Cover Pieces
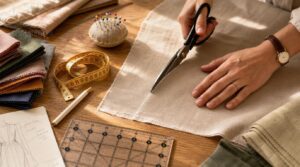
Now comes the satisfying part — actually cutting your fabric. You’ve got your measurements ready, so this step is just about turning those numbers into real pieces you can sew. Here’s what to cut.
Cut Main Body Panels
Start with your two body panels — each cut to 16.5 in × 16 in. Lay your outer fabric flat, align it with the fabric grain, and use your rotary cutter and clear ruler for clean, straight edges.
Trace any curved top edges with chalk before cutting. Mark your ½ in seam allowance around every edge so your panels are ready to sew.
Cut Matching Lining Pieces
Now cut your lining pieces to the exact same dimensions — 16.5 in × 16 in for each body panel. Match the fabric grain direction to your outer pieces. Prewash your lining fabric first to prevent shrinkage later.
- Mark a ⅝ in seam allowance on all edges
- Use pattern weights to keep fabric flat while cutting
- Cut on a single layer for clean, precise edges
Cut Two Side Panels
Your body panels are cut — now the side panels complete the puzzle. Each side panel measures 7.5 in × 12 in.
Use your rotary cutter and clear ruler on a cutting mat for clean, straight edges.
Cut two pieces from your outer fabric, then two matching pieces from your lining. Keep grain lines consistent across all four pieces.
Fuse Fleece to Fabric
Now that your panels are cut, it’s time to give them structure. Fuse fleece to fabric on the wrong side of each outer piece before sewing anything together.
- Prewash and press your fabric first
- Cut fleece slightly oversize
- Place fleece adhesive-side down
- Press at 275–350°F for 8–12 seconds
- Let it cool completely before moving
Mark Rounded Edges
With your fleece fused, sharp corners are next. Mark rounded edges on each panel using a plate or rounded template — trace a smooth curve at every corner with a marking pencil.
| Tool | Purpose |
|---|---|
| Sewing gauge | Measures consistent radius |
| Edge template | Guides curved corners |
Pin the edges before cutting so nothing shifts.
Sew The Machine Cover
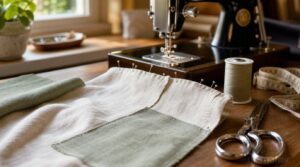
Now it’s time to put all those cut pieces together. The steps move pretty quickly once you get going, so it helps to know what’s coming. Here’s the order that makes the whole thing come together cleanly.
Attach Optional Pocket
A pocket turns your cover into a real workstation. Stitch one to the front or side panel before you join anything together — it’s much easier now than later.
Cut your pocket piece around 6 to 8 inches wide and 4 to 6 inches tall, line it for structure, then topstitch it on with a reinforced edge.
Add a snap or velcro closure to keep your seam ripper from escaping.
Join Side Panels
Once your pocket is secured, it’s time to bring the cover together. Sewing the side panels to the main body is where your cover starts looking like an actual cover.
- Pin each side panel carefully, matching top and bottom edges
- Use a straight stitch or elastic stitch choice to prevent fraying
- Backstitch at every corner for corner reinforcement
- Add seam allowance for a snug, easy fit
Press the seam flat with your iron once done.
Sew Outer Cover
With your side panels joined, you’re ready to sew the full outer cover together. Use a ⅜-inch seam allowance throughout and backstitch at every start and stop.
Work around the rounded edges slowly — small stitches here keep everything smooth.
Trim any excess fabric and clip the curves so your cover lies flat when turned.
Assemble Lining Separately
Think of the lining as its own little project. Lining first assembly keeps things cleaner and reduces bulk later.
- Independent lining sew builds cleaner inside seams
- Apply lining understitching technique before joining the shell
- Lining seam finish prevents fraying on hidden edges
- Lining fitting precision ensures a snug fit around the spindle
Leave Turning Gap
Before you sew the lining shut, leave a turning gap — about 3 to 4 inches — along one side seam. This is how you’ll flip the whole cover right-side-out later.
Place it away from pockets or decorative details. Backstitch at both gap ends to hold the seam securely, then press your fabric flat so the gap stays neat and ready to close.
Finish and Customize Your Cover
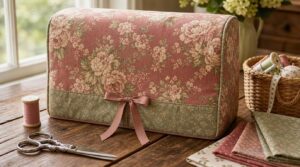
The hard part is behind you — now comes the satisfying bit. A few final steps will transform your cover from a shell into something that looks and feels professionally made. Here’s how to wrap it up and make it your own.
Turn Cover Right-side-out
Reach inside and reveal outer fabric by pulling the cover through the turning gap. Push each corner out with a blunt tool to remove corner bulk cleanly.
- Turning gap alignment keeps the gap flush with the side seam
- Coax fabric corners into crisp points, not rounded lumps
- Trim loose threads so nothing snags later
Press Seams Flat
Now that your cover is right-side-out, grab your iron. Press seams flat before anything else.
Set it to the cotton temperature setting and use light steam. Lay a pressing cloth over the fabric to protect it. Work in small sections, lifting and pressing — don’t drag.
This reduces seam bulk and gives every edge a clean, professional look.
Top-stitch Outer Edges
With your seams pressed flat, you’re ready to topstitch. Set your stitch length to 3.0–4.0 mm and use a size 90/14 or 100/16 needle. Place your stitching line ¼ inch from the edge for standard cotton or ⅜ inch for canvas. Use a walking foot to keep all those fleece layers moving evenly through the machine.
Add Handles or Piping
Now for the fun part. Adding hand grips gives your cover a grip-friendly lift when you move your machine.
Cut your handle pieces about 6¾ inches wide by 6 inches tall. Position each one roughly 2.5 inches below the top edge. Use a reinforcement stitch — an X-stitch or bar tack — at every handle attachment point.
For a polished look, finish handle ends with bias tape or tuck in coordinating piping.
Slip-stitch Turning Gap
One small stitch closes it all.
Thread a hand needle with matching thread and fold the gap edges inward. Take small, even bites — just a few fabric threads each time — and pull gently as you go. Bury your knot inside the seam when done. Press that spot flat, and your sewing machine cover looks completely store-bought.
Frequently Asked Questions (FAQs)
How do you wash a homemade sewing machine cover?
Wash your homemade cover in cold water with mild detergent. Turn it inside out first. Air dry or tumble dry low. For most home sewists, washing twice a year is plenty.
Can you use a serger to finish the seams?
Yes — a serger works great here. It delivers a clean serger edge finish in one pass, accommodates fabric weight suitability well, and keeps serged seam allowances tight for a snug, professional fit.
What thread weight works best for quilting cotton?
For quilting cotton, stick with 50-weight cotton thread for piecing. It’s strong, clean, and won’t overpower the fabric. Switch to 40-weight if you want your quilting stitches to show up more.
How do you adjust the pattern for embroidery machines?
Embroidery machines are wider and deeper than standard ones. Scale the pattern to match your machine’s height and width. Adjust density settings and hoop alignment before cutting. Choose the right stabilizer and check thread tension first.
Can you add a zipper instead of an open bottom?
Absolutely — you can add a zipper instead of an open bottom. A standard coil nylon zipper along the front creates a secure, dust-tight seal and makes removing the cover for maintenance simple.
Conclusion
Like a tailor fitting a suit to one person alone, sewing your own sewing machine cover means nothing gets left to chance. The fit is exact. The style is yours. And the protection actually works.
Now you know you can sew your own sewing machine cover without special skills or expensive tools—just an afternoon and the right steps. Enjoy the view. Your machine deserves that kind of care.
- https://www.stacey-lee.com/how-to-make-a-sewing-machine-cover
- https://www.loulouandbetty.com/blog/make-a-sewing-machine-cover
- https://www.sailrite.com/diy-sewing-machine-dust-cover
- https://www.threadsmagazine.com/2016/02/11/make-a-sewing-machine-cover
- https://sewcanshe.com/how-to-make-a-diy-sewing-machine-cover-free-pattern