This site is supported by our readers. We may earn a commission, at no cost to you, if you purchase through links.
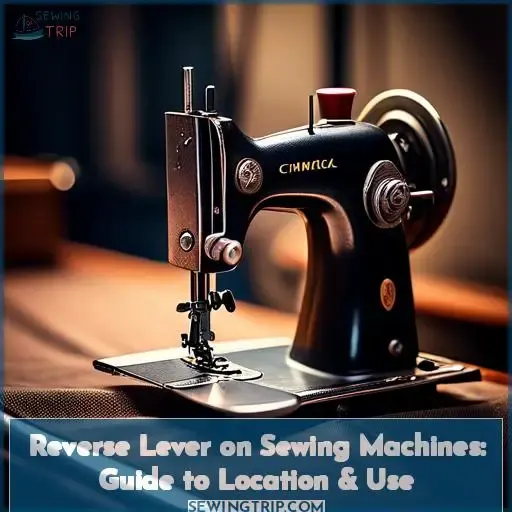
Whether you’re pressing or holding down the lever, understanding its function and troubleshooting common issues can enhance the durability of your projects. Dive into our guide to master the use of your sewing machine’s reverse lever and ensure your seams are finished with professional strength.
Table Of Contents
Key Takeaways
- The reverse lever is crucial for engaging reverse stitching at the start and end of seams, securing stitches to prevent unraveling and ensure seam strength.
- It is typically located on the front or side of the sewing machine, marked with an arrow or symbol for easy identification.
- Regular maintenance of the reverse lever, including timing adjustments, is essential for preventing issues and ensuring optimal performance.
- The reverse lever’s ergonomic design and accessible location facilitate easy use, allowing sewers to efficiently lock stitches in place for seam durability.
Understanding the Reverse Lever
The reverse lever on a sewing machine is a crucial component for securing stitches at the beginning and end of seams by activating reverse stitching. It’s typically located on the front or side of the machine, often marked with an arrow or symbol to indicate its function.
To use it, you simply press or hold down the lever, which allows you to lock stitches or perform backstitching for reinforcement.
Regular maintenance, including cleaning and lubrication, can help prevent issues with the reverse lever not engaging properly.
Definition and Function
The reverse lever on your sewing machine is like the unsung hero of your stitching saga. It’s the trusty sidekick that lets you back up and lock in those stitches, ensuring your seams are as secure as a bank vault.
But when it starts ticking like a time bomb, you know it’s time to dive in and play detective.
Here’s a quick rundown to get you in the know:
- Lever mechanism: This is your go-to gadget for reverse stitching, making sure your seams won’t unravel like a poorly kept secret.
- Stitch length: Adjusting this can feel like tuning a vintage radio—get it just right, and you’re in stitch heaven.
- Timing issues: If your lever’s ticking like a metronome at a piano recital, it’s a sign that timing might be off-kilter.
- Lever adjustment: It’s a delicate dance between too tight and too loose—like adjusting a bow tie for that perfect look.
- Reverse stitching: It’s the backtracking step in your sewing dance, ensuring every stitch is anchored down like a tent in a storm.
Activates Reverse Stitching
As you’ve discovered, the reverse lever on your sewing machine is a nifty little gadget that’s essential for locking in stitches at the start and end of your seams. But when it starts sticking or ticking, especially at the max stitch length, it’s like a hiccup in your sewing rhythm.
| Area to Inspect | Potential Issue | Maintenance Action |
|---|---|---|
| Needle Bar Area | Misalignment | Adjust and lubricate |
| Stitch Plate | Debris buildup | Clean thoroughly |
| Bobbin Area | Lint or damage | Remove lint, inspect for damage |
| Reverse Lever | Sticking | Lubrication or adjustment |
Secures Stitches at the Beginning and End of Seams
Continuing from the importance of reverse stitching, let’s delve into how the reverse lever ensures your seams start and end with a bang, not a whimper.
You see, by engaging the reverse stitch, you’re essentially telling your fabric, Hey, we’re not going anywhere! It’s like a security guard for your stitches, making sure they’re locked down tight.
For beginner sewers, this is like having training wheels that ensure your needle thread doesn’t go rogue, causing those pesky timing issues.
Just imagine your presser foot as a bouncer, the stitch dial as the VIP list, and the sliding reverse mechanism as the velvet rope. When you rock that rocker shaft lever, you’re not just going back and forth; you’re reinforcing your fabric’s VIP status, making sure the top feeds and stitch width are all part of the exclusive seam club.
Location and Identification
To pinpoint the reverse lever on your sewing machine, look towards the front or side.
This lever, often highlighted with an arrow or symbol, is key for engaging reverse stitching.
Common Placement
Given the intricate nature of sewing machines, pinpointing the exact location of the reverse lever can feel like a treasure hunt. Yet, it’s typically stationed on the front or side, often marked with an arrow or symbol to guide your quest.
This lever, crucial for securing stitches at both the start and end of your sewing journey, demands a keen eye for detail. Whether you’re adjusting the needle position, wrestling with thread tension, or considering the fabric weight and stitch type, a drop of machine oil on the moving parts, including the elusive flywheel, might just be the magic potion you need.
Typically Found on the Front or Side of the Machine
You’ll typically find the reverse lever on the front or side of your sewing machine, easily spotted by visual indicators like arrows. This handy lever is your go-to for locking in those stitches at the start and end of your seams.
It’s not just a button to press; it’s your secret weapon for sturdy, unravelling-resistant seams. Remember, a well-oiled machine is a happy one, so don’t skimp on those maintenance tips.
For those machines with specialized buttons for continuous reverse stitching, you’ve got the power of backstitching at your fingertips. Keep that lever in tip-top shape, and you’ll be stitching backwards like a pro in no time.
Visual Indicators
To seamlessly transition from the placement of the reverse lever, let’s talk visual cues. Your sewing machine’s reverse lever is often highlighted with ergonomic design features for easy identification and use.
Look for color coding or symbols that indicate its function, and expect tactile feedback when engaging the lever to ensure accessibility. These design elements aren’t just for show; they’re there to guide you like a beacon, making the reverse function as intuitive as a handshake.
No need to play hide and seek—these visual and tactile signals are your allies in the quest for seamless sewing.
Often Marked With an Arrow or Symbol
To seamlessly transition from the previous discussion on visual indicators, let’s delve into the design of the reverse lever on your sewing machine.
- Lever Design: The lever’s shape is engineered for easy grip and use, ensuring you can engage reverse stitching without a hitch.
- Shape Variations: Depending on the machine model, the lever may have different contours—some are round, others more angular.
- Color Coding: A splash of color can sometimes highlight the lever, making it stand out for quick identification.
- User Ergonomics: The placement is no accident; it’s positioned for lever accessibility, allowing you to flick it back and forth with a simple thumb movement.
Operating the Reverse Lever
To effectively operate the reverse lever on your sewing machine, you’ll need to press or hold down the lever, depending on your machine’s design.
This action activates the reverse stitching mechanism, allowing you to lock stitches at the beginning and end of seams or perform backstitching for added seam strength.
Activation Process
To engage the reverse lever on your sewing machine, you’ll need to press or hold it down. This action activates the mechanism for reverse stitching, which is essential for locking stitches at the beginning and end of seams.
If you’re facing issues with the reverse lever, such as a ticking sound when adjusting stitch length, it could be due to a mechanical bind or misalignment. Troubleshooting these issues often involves a physical inspection and may require cleaning, lubrication, or adjustment of the components involved.
When you’re troubleshooting, remember to unplug the machine for safety and carefully inspect the linkage for any signs of damage or excessive wear. If the reverse lever isn’t engaging properly, it might be due to old grease or a misaligned part.
Sometimes, specialized buttons or levers can become stuck or disengaged, which can also cause problems with reverse stitching.
If you’re hesitant to adjust the machine due to its correct timing, consider that removing the lever to investigate the ticking could indeed affect the timing. However, if multiple users have reported a similar issue, it might be a known problem that requires a specific fix.
In such cases, applying machine oil to the moving parts could be a simple and cost-effective solution. If the problem persists, seeking assistance from a professional with experience in sewing machine repairs might be the best course of action.
They can provide guidance on whether the machine can be repaired or if it’s time to consider an alternative. Remember, a stitch in time saves nine, so addressing the issue promptly can prevent further complications.
Pressing or Holding Down the Lever
To seamlessly transition from forward to reverse stitching, you’ll need to get familiar with your machine’s reverse lever or button.
- Locate the reverse lever, often marked with an arrow or symbol for easy identification.
- For a quick backstitch, simply press or hold down the lever.
- Some machines offer a continuous reverse feature, allowing for extended reverse stitching without holding the lever.
- If your machine has a permanent reverse option, activating it will keep the machine stitching backward until you choose to disengage it.
- Regular troubleshooting should include checking the reverse mechanism for smooth operation and applying lubrication if necessary.
Practical Usage
To master your sewing machine’s reverse lever, think of it as your fabric’s time machine. By engaging reverse stitching, you’re locking stitches in place, ensuring your seams won’t unravel as if by magic.
It’s like hitting the rewind button to reinforce your work with backstitching, adding an extra layer of durability to your creations. Regular maintenance, like a well-oiled machine, keeps this feature running smoothly, preventing hiccups in your sewing journey.
For those with machines boasting advanced features, continuous reverse stitching becomes a game-changer, allowing for seamless transitions between forward and backward sewing. Keep these tips in your toolkit, and you’ll be stitching in reverse like a pro, with every seam as strong as the last.
Locking Stitches
To lock your stitches with panache, engage the reverse lever for backstitching strength.
This stitch reinforcement is your seam’s knight in shining armor, securing stitches against the daily duels of wear and tear.
Embrace your machine’s advanced features and revel in the durability of your seams.
Backstitching for Reinforcement
To address the ticking issue with the Juki 341 sewing machine when adjusting the stitch dial to lengthen stitches, it’s important to consider the possible causes and potential solutions. The ticking sound, which is most prominent at maximum stitch length and stops when stitches are shorter, could be due to the dial adjustment causing the reverse lever to push beyond its designed range or a bind between the rocker shaft lever and reverse slider bar.
Given that the feed dog and needle have been removed for diagnosis, and the machine is timed and sewing correctly, there’s a hesitation to adjust the machine due to the correct timing. However, to potentially resolve the issue, it’s suggested to remove the lever to identify the cause of the tick, with the understanding that lever removal may affect the machine’s timing, which is crucial for operation.
The issue has been reported by multiple users, indicating that the tick may be caused by different factors, and further investigation is needed to determine the exact cause. The potential solution includes trying machine oil, which costs around $3, and applying it to moving parts.
Testing reverse stitching by selecting stitches L, M, N, and checking if the machine stitches backward is also recommended.
For maintenance, it’s advised to remove the stitch plate and bobbin, remove the left cover screw, and wiggle parts back and forth. The potential outcome could be that the machine starts working properly, or reverse stitching may not be available.
It’s important to consider that the machine isn’t ideal and alternative machines may be better.
Troubleshooting techniques include checking buttonhole lever engagement, rotating stitch knobs and pulling the buttonhole lever, setting the machine to straight stitch with the longest stitch length, and raising and lowering feed dogs.
Seeking help from an experienced machine user, avoiding unnecessary machine shipments, and considering repair costs and feasibility are also part of external assistance.
For physical inspection, it’s recommended to remove covers, lay the machine on its back, press the reverse lever multiple times, inspect linkage for damage, and lubricate moving parts. Electrical considerations include unplugging the machine before inspection and ensuring the flywheel always turns towards the user.
Safety precautions involve turning the flywheel by hand in the wrong direction being harmless when unthreaded, but a threaded machine may result in tangled thread and sewing difficulties.
In summary, the ticking issue with the Juki 341 sewing machine when adjusting the stitch length could be due to mechanical binds or misalignment, and careful inspection and lubrication may resolve the problem.
Troubleshooting Common Issues
When troubleshooting common issues with the reverse lever on a sewing machine, it’s crucial to first identify if the lever isn’t engaging properly.
This could stem from a variety of causes, such as mechanical obstruction or lack of lubrication.
Regular maintenance, including cleaning and lubricating the moving parts, can often resolve these issues and ensure smooth operation.
Reverse Lever Not Engaging
When your reverse lever’s playing hard to get, it’s like your sewing machine’s giving you the silent treatment.
First off, if your reverse lever’s sticking or just not engaging, think of it as a cry for attention. It’s time for some reverse lever TLC. Start with a bit of reverse lever lubrication to smooth things over.
Sometimes, it’s all about alignment; a slight adjustment can rekindle that seamless operation.
But if things have gone too far, consider a reverse lever replacement. It’s like setting up a second date hoping for a better outcome. Remember, a well-adjusted reverse lever can make your sewing machine sing in reverse again.
So, grab your tools, and let’s turn that tick into a triumph!
Potential Causes and Fixes
When your reverse lever ticks, it’s like a tiny alarm bell ringing in your sewing sanctuary.
- Check for a mischievous bind in the linkage; it’s a common gremlin.
- A stitch in time: oil those moving parts to silence the tick.
- Lever removal might ruffle the machine’s timing feathers—tread lightly.
- Reverse lever adjustment: a delicate dance with precision.
- Timing concerns: the heartbeat of your machine, don’t skip a beat.
Maintenance Tips
To keep your sewing machine in tip-top shape, you’ll want to embrace a maintenance schedule that includes regular cleaning and lubrication. Start by giving your machine a good clean-up to banish lint and thread remnants from all nooks and crannies, especially around the feed dogs and bobbin area.
Next, let’s talk lubrication tips. A drop of sewing machine oil on the moving parts can prevent that dreaded tick you’re experiencing with the reverse lever. Just remember, after oiling, run a few stitches on scrap fabric to ensure any excess oil doesn’t stain your next masterpiece.
Don’t forget about storage considerations. Keep your machine covered when not in use to prevent dust accumulation. And if you’re not confident in your repair skills, it’s worth exploring repair options with a professional who can ensure the timing remains unaffected.
Regular Cleaning and Lubrication
To keep your sewing machine humming like a well-oiled melody, stick to a regular maintenance schedule. You’ll want to clean and lubricate the moving parts frequently to prevent the tick-tock of mechanical hiccups.
Grab your cleaning tools—brushes, tweezers, and perhaps a can of compressed air—to banish lint and dust from the nooks and crannies. When it comes to oil type, don’t play kitchen chemist; use only sewing machine oil to ensure smooth operations.
Keep those gears gleaming, and you’ll stitch up a storm without a single tick.
Advanced Features and Variations
When exploring the advanced features and variations of sewing machines, it’s essential to understand how innovations like permanent reverse and specialized buttons for continuous reverse stitching can significantly impact your sewing projects.
These features not only enhance the durability of seams but also offer a level of convenience and precision that traditional reverse levers can’t match, making them invaluable for both novice and experienced sewers alike.
Machines With Permanent Reverse
Some sewing machines come with a nifty feature that’s like having cruise control for your stitching: the permanent reverse.
No more awkward hand gymnastics trying to find the optimal lever placement while you’re in the middle of a seam. And for those of you who’ve faced lever compatibility issues, this feature is a game-changer, ensuring your seams are as strong going backward as they’re going forward.
So, if you’re looking to upgrade your sewing experience, keep an eye out for reverse lever designs that include this hands-free backstitching bliss.
Specialized Buttons for Continuous Reverse Stitching
Given the issue with the Juki 341 sewing machine where the reverse lever ticks slightly when adjusting the stitch dial to lengthen stitches, especially at maximum stitch length, it’s clear that this is a mechanical concern that requires careful attention.
The ticking noise, which stops when stitches are shorter, suggests a possible mechanical interference or misalignment within the machine’s internal components.
The diagnosis steps taken, including the removal of the feed dog and needle for a closer inspection, indicate that the machine’s timing and overall sewing.
Impact on Sewing Projects
Continuing from the discussion on specialized buttons for continuous reverse stitching, let’s delve into how this impacts your sewing projects.
The placement of your reverse lever, whether it’s a classic pull-down or a modern push-button, plays a pivotal role in the flow of your work. Different types of reverse levers offer varying levels of control and can affect the durability of your seams.
Regular maintenance, including cleaning and lubrication, ensures your reverse lever remains responsive and extends its lifespan. Remember, a well-maintained reverse lever is like a trusty co-pilot on your sewing journey, ready to back you up (literally) when you need to reinforce a seam or fix a mishap.
Keep that lever in tip-top shape, and it’ll help you stitch your way to perfection!
Enhancing Durability of Seams
When you’re aiming to boost seam strength and fabric lifespan, your sewing machine’s reverse lever is your trusty sidekick.
- Enhancing Durability: By backstitching at the start and end of seams, you’re reinforcing them, which prevents unravelling and extends the life of your garment.
- Seam Strength: A few reverse stitches act like a knot, giving your seams the muscle to withstand stress and strain.
- Stitch Reinforcement: This simple action can significantly increase the durability of your stitches, ensuring they hold up through wear and tear.
Frequently Asked Questions (FAQs)
How to clean the reverse lever area?
To clean the reverse lever area, tilt your machine back, then use a brush to remove lint and grime.
Apply sewing machine oil to all moving parts associated with the lever.
Can reverse lever cause thread tension issues?
The reverse lever on your sewing machine isn’t typically linked to thread tension issues; it’s more about stitch direction.
However, if there’s a mechanical hitch or misalignment when engaging reverse, it could indirectly affect tension by disrupting the smooth flow of thread.
Does reverse lever position affect speed?
The reverse lever on your sewing machine is like a secret speed dial, not for cranking up the tempo, but for locking in those stitches with a back-and-forth dance that ensures your creations won’t unravel at the seams.
While it might seem like a magical lever that could potentially give your machine a burst of speed, in reality, its position doesn’t directly influence how fast your machine sews. Instead, it’s all about securing your stitch in place, making sure that your fabric masterpiece stays intact through thick and thin.
So, while it won’t make your sewing machine sprint like a racehorse, it plays a crucial role in the art of stitch security, ensuring your projects are built to last.
Are reverse levers replaceable?
Yes, reverse levers are replaceable. You’ll find them for various models, like Singer and Kenmore, proving you’re not stuck with a one-trick pony.
Dive in with some basic tools; it’s a fix within reach.
Can lubrication fix a sticky reverse lever?
Traffic on Ask-a-doc rose 14 percent, showing we’re all a bit stuck sometimes, not unlike a sticky reverse lever on a sewing machine.
Lubrication, when applied correctly, can indeed unstick that pesky lever, making your sewing smooth sailing once again.
Conclusion
Just as a seasoned navigator relies on a compass, you’ve learned to depend on the reverse lever for precise seam finishing.
By mastering its use and keeping up with maintenance, you’ll ensure each project is as durable as it’s beautiful.
Embrace the reverse lever’s role in your sewing endeavors for professional-grade results every time.

