This site is supported by our readers. We may earn a commission, at no cost to you, if you purchase through links.
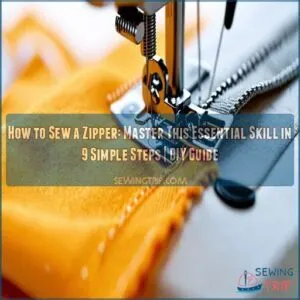
Start by pinning one side of the zipper face-down along your fabric’s edge.
A regular zipper foot is commonly included with sewing machines and can be used to stitch close to the teeth, but if you’re having trouble you can also try using a narrow foot alternative. Using a zipper foot on your sewing machine, stitch close to the teeth.
Repeat for the other side, attaching it to the second fabric piece.
Finally, topstitch for a polished look.
Remember, practice makes perfect – your first attempt might not be runway-ready, but you’ll be zipping through projects in no time.
Don’t let a little teeth-gnashing frustration get you down; mastering this skill opens up a world of sewing possibilities.
Stay tuned for pro tips on choosing the right zipper for your project!
Table Of Contents
- Key Takeaways
- Choosing The Right Zipper
- Essential Tools and Materials for Sewing Zippers
- Preparing The Fabric for Zipper Installation
- Positioning and Pinning The Zipper in Place
- Step-by-Step Guide to Sewing a Zipper
- Techniques for Different Zipper Types
- Common Mistakes to Avoid When Sewing Zippers
- Troubleshooting and Fixing Zipper Issues
- Finishing Touches and Final Inspection
- Frequently Asked Questions (FAQs)
- Conclusion
Key Takeaways
- You’ll need the right tools: a sewing machine with a zipper foot guide, which allows for close stitching to zipper coils, fabric marking tools, straight pins, and thread that matches your fabric.
- Proper preparation is crucial: finish your fabric edges, leave the correct seam allowance, and baste the area where your zipper will go.
- Alignment is key: position your zipper carefully, secure it with pins or tape, and double-check for proper placement before sewing.
- Practice different techniques: master invisible zippers for a sleek look, lapped zippers for a classic touch, and exposed zippers for a bold statement.
Choosing The Right Zipper
You’ll need to pick between sturdy metal zippers with limited colors or plastic ones that offer more variety but less durability for your sewing project.
Whether you’re fixing a broken zipper on your favorite jacket or adding one to a homemade skirt, you’ll want to match the zipper size to your project’s needs.
You’ll also want to consider if you need a separating zipper that opens at both ends.
Metal Zippers Vs. Plastic Zippers
When choosing between metal and plastic zippers, consider how they’ll be used.
Metal zippers offer unmatched durability and a classic look, but they’re heavier and come in limited colors.
Plastic zippers are lightweight, budget-friendly, and available in countless colors, but they’re less durable. They’re perfect for dresses and light garments, while metal zippers excel in heavy-duty applications like jeans and bags.
Coil Zippers Vs. Tooth Zippers
Beyond material choices, you’ll find two main zipper styles: coil and tooth.
Coil zippers feature a continuous spiral of nylon or polyester, making them flexible and smooth-running.
They’re perfect for curved seams and lighter fabrics.
Tooth zippers have individual plastic or metal pieces that interlock.
While they’re more rigid, they offer superior durability and work great for heavy-duty projects like jackets and bags.
Invisible Zippers for Seamless Look
Invisible zippers make your garments look polished, like they were crafted by a pro.
After working with coil and tooth options, you’ll love how these zippers virtually disappear into the seam.
They’re perfect for dresses, skirts, and formal wear where you want clean lines.
- Choose a zipper length slightly longer than needed – you can always shorten it
- Look for nylon coils that match your fabric color exactly
- Get a specialized invisible zipper foot for best results
- Practice on scrap fabric first to perfect your technique
Open-Ended Zippers for Jackets
Open-ended zippers are your go-to choice for jackets, letting you unzip completely from top to bottom.
Open-ended zippers are perfect for jackets, allowing you to unzip them completely from top to bottom.
Match heavier-weight zippers (size 5 or 7) with sturdy outerwear fabrics, and consider metal teeth for durability.
You’ll want the zipper tape color to complement your fabric, and don’t forget to test the slider style—it’s what you’ll grab daily.
For kids’ jackets, opt for larger pulls they can easily handle.
Essential Tools and Materials for Sewing Zippers
You’ll need a few key tools to make your zipper installation a breeze, including a sewing machine with a zipper foot, marking tools, straight pins, and thread that matches your fabric.
Just like a chef needs the right knives for perfect cuts, these essential items will help you create professional-looking results every time you sew a zipper.
Sewing Machine and Zipper Foot
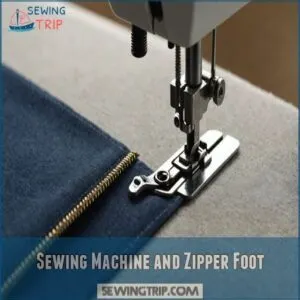
While your sewing machine is essential, the right zipper foot makes all the difference between a professional finish and a DIY disaster.
Here’s what you need to know about zipper feet:
- When sewing pants, proper zipper placement and orientation are crucial for a professional finish, as shown in the sewing pants guide. Regular zipper foot: Perfect for basic zipper installation
- Adjustable zipper foot: Lets you sew close to either side of zipper teeth
- Invisible zipper foot: Has special grooves for hidden zippers
- Magnetic zipper foot: Holds metal zippers in place while sewing
Fabric Marking Tools
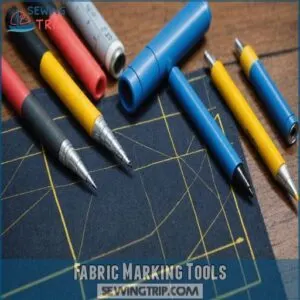
Three essential marking tools make zipper installation a breeze.
You’ll need these to mark stitching lines and guarantee perfect placement.
Here’s your quick guide to the most useful options:
| Tool Type | Best For | Durability |
|---|---|---|
| Tailor’s Chalk | Dark Fabrics | Temporary |
| Fabric Pencils | Light Fabrics | Semi-Permanent |
| Marking Wheel | Pattern Transfer | Long-lasting |
| Washable Markers | Quick Marks | Temporary |
| Sewing Gauge | Measuring Seams | Permanent |
Pins, Tape, and Thread
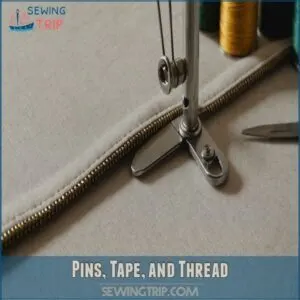
For successful zipper installation, you’ll need straight pins or wonder clips to secure fabric layers, double-sided tape as a pinning alternative, and quality thread that matches your fabric.
Keep pins perpendicular to the zipper tape’s edge for easy removal while sewing.
Thread tension matters – test it on scrap fabric first.
Wonder tape’s temporary hold makes positioning easier than traditional pins.
Preparing The Fabric for Zipper Installation
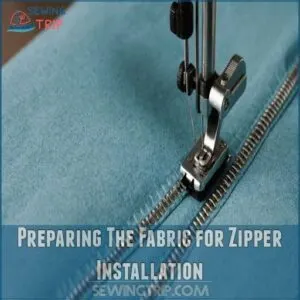
You’ll need to prep your fabric before your zipper can find its forever home, just like setting the table before serving dinner.
First, you’ll finish the fabric edges and create the right amount of space for your zipper by sewing the seam with the correct allowance and basting the area where your zipper will go.
Finishing Fabric Edges
Before touching those zipper teeth, let’s get your fabric edges looking sharp.
Think of it as giving your project a clean haircut – no frayed ends allowed!
Start by serging or using a zigzag stitch along the raw edges where your zipper will sit.
If you’re working with lightweight fabrics, pinking shears work great too.
This prevents fraying and gives you a professional foundation.
Leaving Seam Allowance
Precision is key when it comes to leaving seam allowance. You’ll want to make sure you’ve got enough fabric to work with, typically ½ to ⅝ inch.
This extra space is important for:
- Securing the zipper without puckering
- Allowing room for adjustments
- Ensuring a smooth, professional finish
- Accommodating different fabric thicknesses
- Preventing the zipper from pulling at the seam
Remember, a little extra fabric now can save you headaches later. It’s like giving yourself a safety net while you’re mastering this skill.
Basting Remaining Seam
Now that you’ve left the proper seam allowance, it’s time to baste the remaining seam.
To ensure smooth zipper installation, consider using a regular zipper foot for smooth zipper installation. Grab your sewing machine and set to the longest stitch length.
This temporary stitch will hold your fabric in place while you work your zipper magic.
Remember, basting is like a dress rehearsal for your final performance – it’s not meant to last forever, so don’t sweat it if it’s not perfect!
Positioning and Pinning The Zipper in Place
You’re about to tackle the trickiest part of zipper installation: positioning and pinning.
Get ready to align your zipper with laser-like precision, as if you’re lining up the perfect sandwich – it’s all about that satisfying snap when everything falls into place.
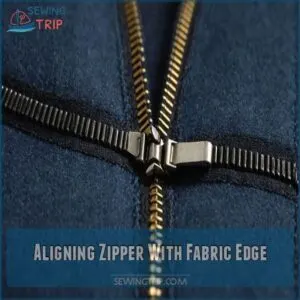
Aligning Zipper With Fabric Edge
Proper alignment is the essential skill to a flawlessly sewn zipper.
Here’s how to nail it:
- Place your zipper face-down along the fabric edge.
- Line up the top stop with the edge of your garment.
- Make sure the zipper teeth sit exactly on the seam line.
With the right tools, such as finding the perfect zipper, you can get started at sew zipper products.
Remember, a well-aligned zipper is like a perfectly fitted suit – it just feels right.
Take your time here; it’ll save you headaches later.
Trust me, your future self will thank you!
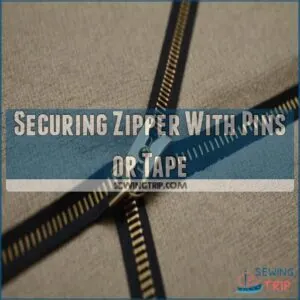
Securing Zipper With Pins or Tape
Once you’ve got your zipper in the right spot, it’s time to lock it down.
You’ve got two trusty sidekicks for this job: pins or tape.
Let’s break it down:
| Method | Pros | Cons |
|---|---|---|
| Pins | Precise positioning | Can leave marks |
| Easy to adjust | Risk of pricking | |
| Tape | No fabric damage | Less flexibility |
| Faster application | Residue possible | |
| Keeps fabric flat | Can be tricky to remove |
Choose your weapon wisely, and let’s secure that zipper like a pro!
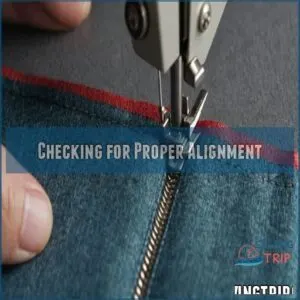
Checking for Proper Alignment
After pinning or taping your zipper, it’s time to double-check its alignment.
This step’s a game-changer for a polished look.
Here’s what to watch for:
- Zipper tape runs parallel to the fabric edge
- Teeth align perfectly with the seam allowance
- No twists or kinks along the zipper’s length
- Equal distance from the edge on both sides
Run your fingers along the zipper, feeling for any bumps or irregularities.
Trust your touch – it’s often more reliable than your eyes!
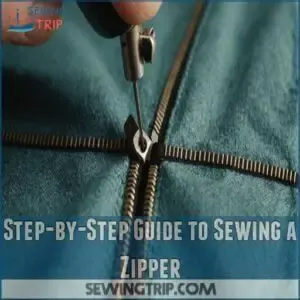
Step-by-Step Guide to Sewing a Zipper
Ready to transform your sewing game? Let’s walk through the step-by-step process of sewing a zipper, turning this tricky task into a breeze you’ll master in no time.
Attaching Zipper Foot
Let’s get that zipper foot on your machine!
It’s your secret weapon for smooth, clean zipper installation.
First, locate the zipper foot in your sewing kit – it looks like a one-sided presser foot.
Snap it onto your machine, making sure it clicks into place.
If you’re unsure, consult your machine’s manual.
Remember, the right foot makes all the difference in achieving pro-level results.
Starting Stitching Process
With your zipper foot in place, you’re ready to start stitching.
Set your machine to a medium stitch length – about 2.5mm is perfect.
If you’re looking for a reliable sewing machine for beginners, make sure to explore the various options available.
Lower the needle into the fabric about 1/4 inch from the top edge.
Take a deep breath, and begin sewing slowly.
Remember to backstitch at the start to secure your stitches.
Keep your hands and guide the fabric gently.
You’ve got this!
Sewing Along Zipper Teeth
Now that you’re set up, it’s time to sew along those zipper teeth.
Keep your stitches straight and even as you guide the fabric through your machine.
Here are some key points to remember:
- Maintain a consistent distance from the zipper teeth
- Use your zipper foot to get nice and close without catching
- Keep an eye on your fabric to prevent puckering
Take it slow and steady – you’ve got this!
Finishing Touches and Backstitching
The final stretch of your zipper journey is here!
Backstitch at both ends to secure your work.
Adjust your stitch length to normal and sew a few stitches forward, then backward. This locks the zipper in place, preventing any unwanted unraveling.
Don’t forget to check your zipper pull’s movement – it should glide smoothly along the tape.
You’re almost at the finish line!
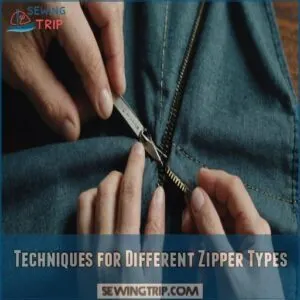
Techniques for Different Zipper Types
You’ll find that mastering different zipper types opens up a world of sewing possibilities.
Whether you’re tackling invisible zippers for a sleek look,
lapped zippers for a classic touch, or exposed zippers for a bold statement,
each technique will add a unique flair to your projects.
Sewing Invisible Zippers
Invisible zippers are your secret weapon for a polished, seamless look.
Here’s how to master them:
- Unzip and press the coils flat.
- Pin the zipper face-down along the seam allowance.
- Use an invisible zipper foot to stitch close to the teeth.
Remember, practice makes perfect! Don’t get discouraged if your first attempt isn’t flawless. With each try, you’ll get closer to that pro-level finish that’ll make your friends ask, "Where’s the zipper?
Installing Lapped Zippers
Installing lapped zippers adds a polished look to your garment.
Start by sewing one side of the zipper tape to the seam allowance.
When choosing a zipper, consider factors like nylon, metal, or separating zippers based on your project needs Hand Sewn Zipper Installation Guide.
Then, fold the other side over, creating a "lap" that conceals the zipper.
Use your zipper foot to stitch close to the folded edge.
Remember to adjust fabric tension as you go.
This technique’s a game-changer for skirts and dresses!
Attaching Exposed Zippers
Exposed zippers add a bold, edgy touch to your projects.
Unlike their hidden counterparts, these zippers are meant to be seen and admired.
To achieve a professional finish, consider using a high-quality zipper tape from a reliable supplier like Zipper tape products.
Here’s how to attach them like a pro:
- Pin the zipper face-up on the right side of your fabric
- Align the zipper teeth with the fabric edge
- Use a zipper foot for precise stitching
- Top stitch close to the zipper teeth
- Press the fabric away from the zipper for a clean finish
These steps will help you rock that exposed zipper look!
Common Mistakes to Avoid When Sewing Zippers
You’re about to become a zipper-sewing pro, but watch out for these common pitfalls that can turn your project into a fashion faux pas.
From uneven stitching to misaligned zippers and pesky fabric puckers, we’ll show you how to sidestep these blunders and create a smooth, professional finish.
Uneven Stitching Lines
Uneven stitching lines can turn your zipper project into a zigzag nightmare.
Let’s tackle this common hiccup head-on.
Here’s a quick guide to keep your stitches straight as an arrow:
| Issue | Cause | Solution |
|---|---|---|
| Wavy lines | Incorrect tension | Adjust zipper foot |
| Skipped stitches | Wrong needle size | Match to fabric |
| Puckering | Fabric slippage | Use stabilizer |
| Uneven spacing | Inconsistent speed | Practice steady pace |
| Loose stitches | Incorrect stitch length | Adjust for thickness |
Zipper Misalignment
Zipper misalignment can turn your project into a wonky mess.
It’s like trying to zip up a jacket with one arm through the wrong sleeve.
To avoid this headache, double-check your zipper’s position before stitching.
Line it up with the fabric edge, pin it in place, and give it a test run.
Remember, a little extra time aligning now saves a lot of unpicking later.
Fabric Puckering Around Zipper
After tackling misalignment, let’s address another pesky problem: fabric puckering.
Ever sewn a zipper only to find the fabric resembling a crinkled paper bag? Yikes!
This often happens when you’re pulling the fabric too tightly or using the wrong stitch length.
To avoid this fashion faux pas, keep in mind that mismatched thread and fabric types can result in puckering, as explained in preventing fabric puckering techniques.
To avoid this fashion faux pas, keep your fabric relaxed, adjust your zipper foot pressure, and use a longer stitch length.
Your zipper will thank you!
Troubleshooting and Fixing Zipper Issues
You’ve mastered sewing zippers by learning how to adjust your sewing machine’s stitch length for a smooth zipper stop, and now you’re facing a sticky situation, check out this guide on sewing in a zipper for more help.
Don’t worry, we’ll show you how to unstick a stubborn zipper, fix broken teeth, and even replace a faulty pull, so you can keep your projects zipping along smoothly.
Dealing With Stuck Zippers
Your zipper’s stuck, and you’re in a pinch.
Don’t panic!
Here’s how to unstick that stubborn slide:
- Grab a pencil and rub the lead along the teeth
- Dab a tiny bit of soap on the zipper pull
- Gently work the pull back and forth
If these tricks don’t do the trick, try cleaning the teeth with an old toothbrush.
Remember, patience is key – forcing it might make things worse.
Repairing Broken Zipper Teeth
Broken zipper teeth can be a real pain, but with a simple fix like replacing missing teeth, you can get your garment back in working order, but don’t toss that garment just yet!
You can often fix this issue with a bit of DIY magic.
Start by carefully examining the damaged area.
If only a few teeth are bent, use pliers to gently realign them.
For missing teeth, try a zipper rescue kit or replace the entire zipper if the damage is extensive.
Remember, patience is key when tackling these delicate repairs.
Replacing Faulty Zipper Pull
Zipper-pull woes got you down? Don’t fret.
To fix a broken zipper pull, start by checking the damage to determine the best solution.
First, remove the old pull using pliers or a zipper repair kit.
Then, slide on a new pull that matches your zipper type.
Make sure it’s secure and moves smoothly.
If you’re feeling crafty, try a DIY option like a key ring or decorative charm for a unique touch.
Finishing Touches and Final Inspection
You’re in the home stretch of your zipper-sewing journey!
Now it’s time to put on those final touches and give your work a thorough once-over, ensuring your newly installed zipper is aligned perfectly and ready to zip with ease.
Ripping Out Basting Stitches
Now that your zipper’s in place, it’s time to tidy up those basting stitches.
Here’s how to remove them like a pro:
- Grab a seam ripper or small scissors
- Gently slide the tool under the long basting stitches
- Cut every few stitches, being careful not to snag the fabric
- Pull out the loose threads with tweezers
Remember, basting stitches are temporary allies.
Removing them reveals your handiwork and gives your project a polished look.
Inspecting Zipper for Proper Alignment
The devil’s in the details regarding zipper alignment.
Take a step back and examine your handiwork.
Run your fingers along the zipper teeth, feeling for any bumps or misalignments, and check if the teeth are properly secured and tight, a common issue that can be fixed by learning how to fix a misaligned zipper.
Check that both sides of the fabric line up perfectly when the zipper’s closed.
Don’t forget to test the zipper’s action – it should glide smoothly without catching.
Your keen eye now will save headaches later!
Making Final Adjustments
With your zipper sewn in place, it’s time for the finishing touches.
Step back and examine your handiwork.
Check the zipper length, ensuring it matches your project perfectly.
Adjust the tension if needed – you want smooth sailing, not a tug-of-war!
Double-check your zipper foot placement and seam finish.
Finally, give that zipper pull a test run.
Smooth operation? You’ve nailed it!
Frequently Asked Questions (FAQs)
How to sew a zipper?
You’d think sewing a zipper would be a breeze, right?
Well, it’s not rocket science, but it does require some finesse.
Choose your zipper, prep the fabric, align carefully, and stitch with a zipper foot.
Voilà!
Can you sew a zipper with a foot?
Sewing a zipper with a foot is possible and recommended.
You’ll want to use a zipper foot, which allows you to stitch close to the zipper teeth without snagging.
It’s a game-changer for neat, professional-looking results.
How do you measure a zipper on a sewing machine?
Like threading a needle, measuring a zipper on your sewing machine’s a breeze.
Lay the zipper flat, align it with your machine’s measurements, and note the length from top to bottom.
Don’t forget to account for the zipper pull!
Can you sew a lapped zipper?
Yes, you can sew a lapped zipper.
It’s a stylish technique where one side of the fabric overlaps the zipper.
You’ll need precision and patience, but it’s worth it for that sleek, professional look on skirts and dresses.
How to sew a zip step by step?
Start by pinning your zipper in place.
Baste it, then switch to a zipper foot.
Sew close to the teeth, backstitching at ends.
Repeat on the other side.
Is it difficult to sew a zipper?
Sewing a zipper isn’t as intimidating as it might seem.
With practice, you’ll find it’s quite manageable.
Start with a basic closed-bottom zipper on a simple project.
Take it step by step, and you’ll be zipping along in no time!
What is the best stitch for a zipper?
Did you know 90% of professional tailors swear by the straight stitch for zippers?
It’s your go-to choice.
Use a medium-length straight stitch, about 5-3mm long.
This gives you strength and flexibility without puckering the fabric.
How do you sew the end of a zipper?
To finish a zipper neatly, backstitch at the end for reinforcement.
Trim excess tape, leaving a small margin.
Fold the tape under and secure with a few hand stitches.
This creates a clean, durable finish.
How do I sew a zipper without a zipper foot?
You’re in luck!
While a zipper foot‘s ideal, you can still sew a zipper using your regular presser foot.
Just adjust your needle position to the far left or right, allowing you to stitch close to the zipper teeth.
Can I hand-sew a zipper instead of machine-sewing?
Hand-sewing a zipper is possible, but it’s trickier than machine-sewing.
You’ll need patience and precision.
Use a backstitch for strength, working close to the zipper teeth.
It’s time-consuming but gives you more control over tricky fabrics.
How to replace a broken zipper in clothing?
Replacing a broken zipper isn’t as challenging as it seems.
First, remove the old zipper carefully.
Then, pin the new one in place, ensuring it’s centered.
Sew along both sides, backstitching at the ends for security.
Whats the best way to sew an invisible zipper?
Like threading a needle through the fabric of time, mastering the invisible zipper is an art.
Align the zipper face down along the seam, pin carefully, and use a zipper foot to stitch close to the teeth for a seamless finish.
How to shorten a metal zipper without special tools?
To shorten a metal zipper, remove the bottom stop with pliers.
Mark the new length, snip excess teeth, and file rough edges.
Reattach the stop by squeezing it with pliers.
Voila! You’ve got a custom-fit zipper without fancy tools.
Conclusion
Like threading a needle, mastering how to sew a zipper takes patience and practice.
But once you’ve nailed it, you’ll zip through projects with ease.
Remember, even seasoned sewers started somewhere.
So don’t get caught up if your first attempt isn’t perfect – each stitch brings you closer to expertise.
With these nine steps in your sewing kit, you’re well-equipped to tackle zippers of all types.
So go ahead, jump right in, and let your creativity soar.
You’ve got this in the bag!


