This site is supported by our readers. We may earn a commission, at no cost to you, if you purchase through links.
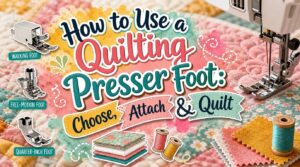
The wrong presser foot can turn a beautiful quilt sandwich into a puckered, shifting mess—no matter how precise your piecing was. Most quilters discover this the hard way, usually mid-project, when their fabric layers start moving in opposite directions. The foot doing the stitching matters as much as the needle or thread.
Quilting presser feet aren’t interchangeable. A walking foot feeds all three layers evenly; a free-motion foot lets you draw with thread; a quarter-inch foot keeps your seam allowances honest. Each type serves a distinct purpose, ensuring stability, creativity, or precision during quilting.
Knowing which foot to reach for—and how to use it correctly—separates frustrating results from work you’ll actually want to show off. Mastering these tools transforms quilting from a struggle into an art form.
Table Of Contents
- Key Takeaways
- Choose The Right Quilting Foot
- Walking Foot for Straight-line Quilting and Layered Quilt Sandwiches
- Open-toe Foot for Applique, Visibility, and Decorative Quilting
- Free-motion Foot for Curves, Stippling, and Custom Quilting Designs
- Quarter-inch Foot for Accurate Quilt Piecing Before Quilting
- Guide Foot for Parallel Rows Without Marking Fabric
- When to Use a Quilting Presser Foot Instead of a Standard Foot
- Check Machine Compatibility First
- Identify Whether Your Machine is Low-shank, High-shank, or Slant-shank
- Match Snap-on and Screw-on Quilting Feet to Your Machine Type
- Check Brand-specific Systems Like Pfaff, Bernina, Janome, and Husqvarna Viking
- Know When an Adapter is Needed for Quilting Presser Feet
- Confirm Needle Opening, Stitch Width, and Feed Dog Alignment
- Avoid Incompatible Feet That Can Break Needles or Damage Fabric
- Attach The Quilting Presser Foot
- Turn Off The Machine Before Changing The Presser Foot
- Raise The Needle to Its Highest Position
- Remove The Current Presser Foot Safely
- Attach a Snap-on Quilting Foot Correctly
- Install a Screw-on Walking Foot Securely
- Hook The Walking Foot Lever Over The Needle-bar Screw
- Lower The Presser Foot and Test The Attachment
- Check That The Needle Clears The Foot Opening
- Quilt With Smooth, Even Stitches
- Prepare The Quilt Sandwich Before Sewing
- Set Stitch Length for Straight-line Quilting
- Adjust Presser Foot Pressure for Fabric Thickness
- Use a Walking Foot to Prevent Fabric Shifting
- Use The Guide Bar for Evenly Spaced Parallel Lines
- Stitch in The Ditch Along Seam Lines
- Create Grid Quilting With Consistent Spacing
- Pivot Carefully for Corners and 90-degree Turns
- Use an Open-toe Foot for Better Needle Visibility
- Troubleshoot Skipped Stitches, Puckering, and Uneven Feeding
- Top 9 Quilting Presser Foot Options
- 1. DreamStitch High Shank Open Toe Presser Foot
- 2. YEQIN Clear Open Toe Presser Foot
- 3. Distinctive Clear Open Toe Presser Foot
- 4. DreamStitch Snap On Open Toe Applique Foot
- 5. Sew Perfect Low Shank Open Toe Foot
- 6. TISEKER Metal Open Toe Free Motion Presser Foot
- 7. DreamStitch Pfaff Open Toe Presser Foot
- 8. Madam Sew Open Toe Walking Foot
- 9. Janome AcuFeed Open Toe Satin Foot 9mm
- Frequently Asked Questions (FAQs)
- Conclusion
Key Takeaways
- Matching your presser foot to the task—walking foot for straight lines, free-motion foot for curves, quarter-inch foot for piecing—is what keeps your quilt layers from shifting during stitching.
- Before buying any specialty presser foot, measure your machine’s shank height and confirm the attachment style, because a mismatch can crack needles and ruin fabric.
- Attaching your foot correctly matters just as much as choosing the right one—power off first, raise the needle, and always hand-turn the wheel to confirm clearance before you sew a single stitch.
- Most quilting problems like puckering, skipped stitches, and uneven feeding can be traced back to pressure settings or foot choice, so test every new setup on scrap fabric before touching your actual quilt.
Choose The Right Quilting Foot
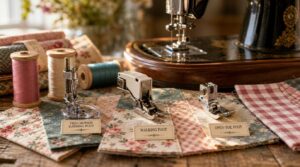
Not all quilting feet are created equal, and picking the wrong one can turn a fun project into a frustrating mess. The good news is that once you know what each foot does, matching it to your project becomes second nature.
A quick look at a guide to the best sewing machine feet for quilting can speed up that learning curve considerably.
Here’s a breakdown of the main quilting feet and when to reach for each one.
Walking Foot for Straight-line Quilting and Layered Quilt Sandwiches
Tackling a layered quilt sandwich is where the walking foot truly earns its place. Its double-layer feeding system grips both the top and bottom simultaneously, making layer slip prevention almost automatic.
Dial in your spring pressure tuning and bobbin tension matching, run a quick feeding consistency test on a scrap sandwich, and use the guide bar for perfectly spaced parallel lines — no marking needed.
Understanding the dual feed mechanism helps you achieve consistent stitch length across thick layers.
Open-toe Foot for Applique, Visibility, and Decorative Quilting
The walking foot keeps stitching straight, while the open-toe foot offers precision for intricate work. Its wide-open front provides a clear needle sightline, enhancing accuracy for appliqué edges and curved stitching. Decorative stitches land exactly where intended, thanks to this design.
For scratch prevention and transparent care, store the foot in a protective case. Visibility is its superpower—safeguard it to maintain performance.
Free-motion Foot for Curves, Stippling, and Custom Quilting Designs
If straight lines are your comfort zone, the FreeMotion Quilting Foot opens up a whole new world. Drop your feed dogs, engage needle-down mode, and you’re in control — guiding fabric like a pencil on paper.
Arc stitching control comes from variable curve speed: move faster for wider sweeps, slower for tight turns.
Adjust needle pressure modulation for stipple texture density.
Use template tracing methods for custom motifs.
Quarter-inch Foot for Accurate Quilt Piecing Before Quilting
Before you can quilt, your blocks need to actually line up — and that’s where the quarter-inch quilting foot earns its keep. Its built-in edge flush technique ensures consistent fabric guidance without extra tools. Run a test stitch calibration on scrap fabric first to verify accuracy.
Some feet include an eighth-inch marking and multiple marks for seam line consistency, enhancing precision. These features help maintain uniform stitching across projects.
Quarter-inch troubleshooting is simple: check needle alignment, then sew. Addressing this common issue ensures flawless results with minimal effort.
Guide Foot for Parallel Rows Without Marking Fabric
If you’ve ever tried to draw parallel quilting lines freehand, you know how fast that goes sideways. The adjustable guide foot solves that entirely.
Using guide bars for parallel stitching, your guideline alignment stays locked in without a single marking pen. Edge guidance keeps rows consistent.
With basic spacing calibration tips and a regular foot cleaning routine, your straight stitching technique stays sharp from first row to last.
When to Use a Quilting Presser Foot Instead of a Standard Foot
Your standard foot works fine for single-layer projects, but once you’re dealing with high-bulk quilting or a fabric sandwich, everything changes. Switch to a specialty foot when you need:
- Even multi-layer feed and fabric sandwich stability
- Precise edge stitching during complex applique alignment
- Walking foot advantages for quilting thick, shifty layers
The right foot makes the difference between smooth results and a frustrated seam-ripper situation.
Check Machine Compatibility First
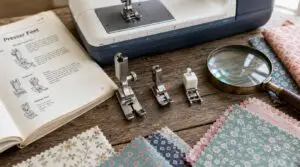
Before you buy any quilting foot, you need to make sure it will actually work with your machine. Not every foot fits every model, and using the wrong one can damage your needle or fabric.
Here’s what to check before you commit.
Identify Whether Your Machine is Low-shank, High-shank, or Slant-shank
Think of your machine’s shank as its shoe size — get it wrong, and nothing fits right. To identify yours, use the Ruler Test Technique: measure from the needle plate to the screw hole.
Your machine’s shank is like a shoe size — get it wrong, and nothing fits right
Under ½ inch indicates a low shank, while over 1 inch signals a high shank. A noticeable forward tilt confirms a slant shank.
Additionally, check for the Manufacturer Label Lookup near the needle plate as another verification method.
Match Snap-on and Screw-on Quilting Feet to Your Machine Type
Once you’ve nailed your shank type, matching the right foot attachment style gets much easier.
Here’s a quick Shank Height Comparison to guide your Snap vs Screw decision:
- Low shank machines take universal snap-on feet — no fuss.
- High shank machines need feet specifically labeled for high shank, even snap-on styles.
- Slant shank machines require screw-in versions or a compatible adapter.
Check your Adapter Compatibility Guide before buying anything.
Check Brand-specific Systems Like Pfaff, Bernina, Janome, and Husqvarna Viking
Some machines have their own built-in feeding systems that change everything. Pfaff IDT Integration syncs top and bottom fabric feed automatically, eliminating the need for a separate walking foot.
Bernina Automatic Tension manages thread balance across layers, while Janome AcuFeed Sync coordinates fabric movement with precision.
Viking Sensor Feed monitors and adjusts as you sew. These Brand-Specific Presser Foot Systems mean standard feet often work beautifully — no extras required.
Know When an Adapter is Needed for Quilting Presser Feet
Not every foot click straight onto your machine—that’s where shank conversion comes in. Universal adapters can bridge the gap, letting you use snap-on feet designed for low-shank systems.
Just watch third-party risks: incompatible adapters can compromise needle clearance and alignment. Always verify presser foot compatibility and shank types before buying.
Confirm Needle Opening, Stitch Width, and Feed Dog Alignment
Needle clearance should be at least 0.5 mm at the foot’s lowest point. Set stitch width to zero for straight-line quilting. Confirm your feed dogs are synchronizing properly with the foot.
Run an alignment test routine on scrap fabric — the feeding of layered fabric should appear smooth and even.
Avoid Incompatible Feet That Can Break Needles or Damage Fabric
Once your alignment looks good, don’t skip one final check — compatibility itself.
A shank height mismatch is one of the fastest ways to crack a needle. Other common trouble spots include:
- Needle Path Obstruction from foot plate width that’s too wide for your needle plate opening
- Shank Height Mismatch stressing snap-on vs. screw-in presser foot attachments
- Improper Pressure Settings pushing layers sideways and causing thread-catching risk
- Needle Placement Shifts when using brand-specific feet without proper adapters
- Foot Plate Width interfering with feed dog alignment and fabric handling
Always confirm clearance before you sew.
Attach The Quilting Presser Foot
Attaching a quilting presser foot takes less than a minute once you know the steps. Getting it wrong, though, can mean skipped stitches, broken needles, or a foot that just won’t feed your fabric evenly.
Here’s exactly what to do, from powering down your machine to confirming the needle clears the foot’s opening.
Turn Off The Machine Before Changing The Presser Foot
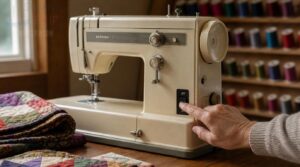
Powering down is your non-negotiable first step before touching any presser foot. This action activates the safety lock activation on most models, which prevents accidental pedal engagement while your hands are near the needle.
It also provides a moment to verify foot release without rushing. Think of it as a built-in pause that ensures your presser foot installation remains safe from the start.
Raise The Needle to Its Highest Position
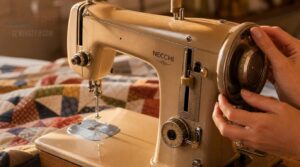
With the machine off, rotate the handwheel toward you until the needle reaches its highest point. This needle clearance verification is your safety foot change checkpoint — it prevents needle damage and gives you room to work without interference.
- Confirms needle drop height clears the foot opening
- Aligns the eye for smooth threader preparation step
- Allows a quick alignment check before presser foot selection for quilting
Remove The Current Presser Foot Safely
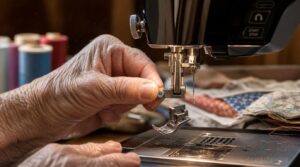
Lift the presser foot lever fully, then press the release button to drop the foot free.
Before you do anything else, confirm you’ve already followed the Power Off Machine and Raise Needle Position steps — skipping either creates real risk.
| Step | What to Do |
|---|---|
| Engage Release Lever | Press the release button firmly |
| Clear Foot Obstructions | Remove lint, thread, and fabric scraps |
| Inspect Screw Thread | Check for damage on screw-on parts |
| Check Handwheel | Rotate gently if the foot feels stuck |
Attach a Snap-on Quilting Foot Correctly
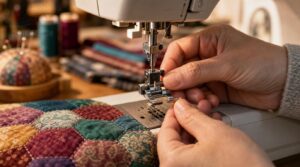
Snap-on presser feet are refreshingly simple — position the foot under the ankle, then lower the presser foot lever until you hear that satisfying lever click confirmation. That click is your green light.
Before stitching, perform a quick foot alignment check to verify the foot sits centered. Then, conduct a needle clearance verification by hand-turning the wheel slowly.
A gentle snap tension test confirms the snap-on system is locked securely.
Install a Screw-on Walking Foot Securely
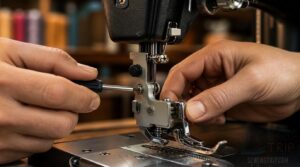
A screw-on walking foot demands a little more patience than its snap-on cousin — but the payoff is rock-solid stability.
Align the foot’s mounting hole with your machine’s threaded hole, then hand-tighten the mounting screw before using a screwdriver for final tightening. Don’t overtighten; firm is enough.
- Check alignment markers so the foot sits centered over the feed dogs
- Complete a foot leveling check by slowly turning the handwheel
- Verify presser foot compatibility with your shank type before installing
Hook The Walking Foot Lever Over The Needle-bar Screw
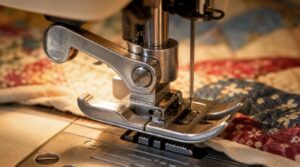
Hook the lever arm over the needle-bar screw — not beside it, over it. Lever positioning matters because the screw acts as your foot’s heartbeat, driving the upper feed dogs with every needle cycle.
Ensure the screw is tight, then do a clearance check by turning the handwheel slowly. Any lever wobble signals misalignment. Alignment verification takes seconds and saves your whole quilt.
Lower The Presser Foot and Test The Attachment
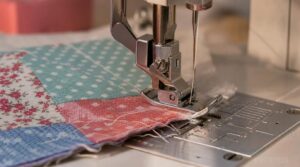
Lower the presser foot lever until the foot lightly touches your scrap fabric — no compression marks, just contact. That’s your pressure calibration sweet spot.
Run a quick stitch test and watch the fabric feed observations carefully: even movement means your presser foot installation is solid. Any puckering? Dial back pressure slightly.
Alignment verification takes seconds but protects every seam ahead.
Check That The Needle Clears The Foot Opening
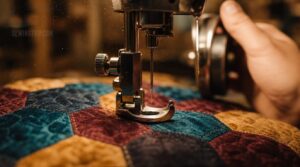
One tiny misalignment here can snap a needle mid-quilt. Before sewing, perform a quick needle clearance test to prevent damage:
- Raise the needle to its highest position and lower the presser foot.
- Confirm visual clearance — ensure a small gap exists between the needle and the foot’s opening edge.
- Check needle bar alignment; even minor bending will compromise this immediately.
- Slowly turn the handwheel, observing needle placement throughout the full stitching stroke.
- Adjust needle position if any contact occurs during the test.
Quilt With Smooth, Even Stitches
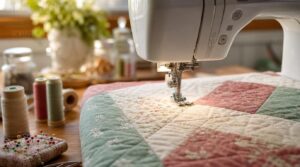
Now that your foot is attached, it’s time to actually quilt — and a few simple adjustments make all the difference between frustrating puckers and smooth, satisfying stitches. The setup steps below cover everything from stitch length to troubleshooting, so you can work through your quilt sandwich with confidence.
Here’s what to do at each stage.
Prepare The Quilt Sandwich Before Sewing
Cut your quilt layers — top, batting, and backing — with at least 2 inches extra on all sides for edge alignment. Batting selection matters: low-loft is easiest to manage.
Smooth from the center outward during fabric smoothing, ensuring no wrinkles or folds.
Secure everything with your preferred basting techniques to prevent shifting during multilayer sewing.
Set Stitch Length for Straight-line Quilting
With your quilt sandwich basted and ready, stitch length is your next call. For straight-line quilting with a walking foot, the ideal stitch length sits between 2.5–3.0 mm.
- Start at 2.5 mm for standard cotton layers
- Test on scrap fabric first — always
- Increase slightly for thicker batting
- Use the guide bar for consistent spacing
Adjust Presser Foot Pressure for Fabric Thickness
Stitch length sorted? Now let’s talk pressure. Too much pressure squashes thin layers and causes puckering; too little pressure lets thick fabric wander.
For layered sandwiches, start mid-range, adjust incrementally — denim requires around 4–6 on most pressure scales, while chiffon sits near the lowest setting.
Always test pressure on scraps first.
Use a Walking Foot to Prevent Fabric Shifting
With pressure dialed in, it’s time to let your walking foot do the heavy lifting. Its built-in feed dogs grip top and bottom layers simultaneously, making fabric slippage prevention almost automatic.
Pre-basting your quilt sandwich helps, but the walking foot is your real insurance.
Mind your speed consistency — steady wins here.
Do a test swatch trial first, and keep the foot clean for even feeding.
Use The Guide Bar for Evenly Spaced Parallel Lines
Once your walking foot is humming along, snap into the guide bar for Precision Grid Planning without ever touching a marking pen. Slide it into the designated hole — that’s your Bar Attachment Security sorted.
Set your Bar Spacing Calibration, then let Guide Bar Edge Alignment do the work.
Using guide bars for parallel stitching maintains consistent line tracking across every pass.
Stitch in The Ditch Along Seam Lines
Along a pressed seam, your needle has one job: sit right in the ditch. Ditch seam prep starts before you even sew — press seam allowances to one side so that the lower fold is clear and defined.
Then focus on needle placement, centering it exactly in the crease. Use a guide presser foot for straight stitching, match your thread, and let steady fabric feeding do the rest. The result? A clean, invisible seam finish.
Create Grid Quilting With Consistent Spacing
Grid quilting rewards patience — and the right setup. Before your first pass, use a water-soluble pen for Marking Techniques: light, erasable lines guarantee your Grid Spacing Verification stays honest from edge to edge.
- Set your guide bar to 1-inch intervals for Fabric Layer Stability
- Maintain Thread Tension Balance at mid-range settings
- Control Edge Margin Control by measuring from the quilt’s border first
- Keep parallel lines consistent using guide bars for straight quilting lines
- A quarter-inch quilting foot manages precision stitching without extra marking
Pivot Carefully for Corners and 90-degree Turns
Corners are where precision stitching either holds or falls apart. Before turning, shorten your Stitch Length Adjustment slightly, then stop with the needle down — that’s your anchor.
Lift the presser foot, use gentle Hand Guidance and slight Body Rotation to reposition, then lower and continue.
Proper Needle Alignment and Pressure Tuning keep your walking foot’s fabric feeding mechanism steady through every clean 90-degree pivot.
Use an Open-toe Foot for Better Needle Visibility
Switching to an open-toe foot transforms your Needle Sight Line almost instantly. That wide-open front lets you watch the Thread Path and catch any Fabric Shift before it becomes a problem.
For applique, topstitching, or Free Motion Quilting with an Open Toe Foot, Edge Alignment stays clean because you can actually see what you’re stitching.
Improving Fabric Visibility for Precise Stitching really does change everything about your Stitch Precision.
Troubleshoot Skipped Stitches, Puckering, and Uneven Feeding
Skipped stitches usually point to one thing: the wrong foot for the job. Check your needle timing and thread tension first — small adjustments fix most problems fast.
Puckering often means presser pressure is too high for your fabric thickness.
For uneven feeding in double-layer feeding situations, confirm your feed dog sync and bobbin alignment are spot-on. Dial those in, and your seams will thank you.
Top 9 Quilting Presser Foot Options
Not all presser feet are created equal, and the right one can make a real difference in your quilting results. Whether you need better visibility, cleaner edges, or smoother feeding, there’s a foot designed for exactly that. Here are nine solid options worth knowing about.
1. DreamStitch High Shank Open Toe Presser Foot
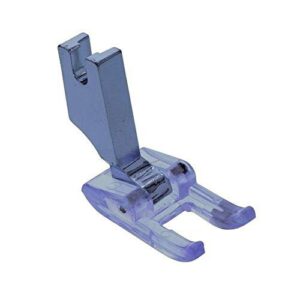
The DreamStitch High Shank Open Toe Presser Foot (P60792) is a smart pick if your machine is a Janome MC6600P, Kenmore 148.200, Singer 331K1, or Viking Mega Quilter 1200.
At just $9.90, it punches well above its price.
The open-toe design gives you a clear sightline to your needle — ideal for appliqué placement and detailed quilting.
Keep in mind it’s plastic, not metal, so it’s best for moderate use rather than heavy daily quilting sessions.
| Best For | Quilters and sewists with a Janome MC6600P, Kenmore 148.200, Singer 331K1, or Viking Mega Quilter 1200 who want better visibility for appliqué and detailed stitching work. |
|---|---|
| Design Type | Open-toe |
| Material | Plastic |
| Shank Type | High-shank |
| Price (USD) | $9.90 |
| Stitch Visibility | Yes |
| Brand Compatibility | Janome, Kenmore, Singer, Viking |
| Additional Features |
|
- Clear plastic body gives you a direct view of your stitch line — no guessing, no magnifying lens needed
- Open-toe design handles bulky stuff like rope bowls and cords without getting in the way
- At $9.90, it’s an easy buy if you need a reliable foot for decorative projects
- Plastic construction means it won’t hold up as well as metal under heavy, daily use
- Only fits four specific machine models, so double-check compatibility before ordering
- Worth keeping a backup on hand — plastic feet can wear down or snap over time
2. YEQIN Clear Open Toe Presser Foot
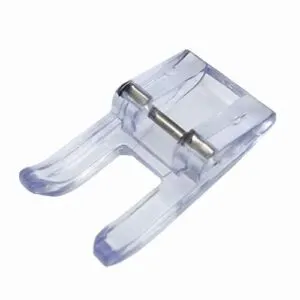
YEQIN Clear Open Toe Presser Foot is an affordable solution for low-shank sewing machines, priced at just $6.99. Designed to enhance stitch visibility, its fully transparent body eliminates the need to squint past bulky feet, allowing precise needle placement—ideal for appliqué edges and satin stitch outlines.
The foot easily snaps onto popular brands like Singer, Brother, and Janome. However, compatibility is limited to low-shank systems; it won’t suit high-shank or slant-shank machines. Always confirm your model before ordering to ensure a proper fit.
| Best For | Sewists who do a lot of decorative or appliqué work and need to see exactly where their needle is landing. |
|---|---|
| Design Type | Open-toe |
| Material | Plastic |
| Shank Type | Low-shank |
| Price (USD) | $6.99 |
| Stitch Visibility | Yes |
| Brand Compatibility | Singer, Brother, Babylock, Janome, Juki, Elna |
| Additional Features |
|
- Crystal-clear body gives you a full view of your stitches as you sew — no more guessing
- Snaps onto most low-shank machines (Singer, Brother, Janome, and more) without any fuss
- At $6.99, it’s an easy, low-risk buy for anyone wanting better stitch control
- Plastic build means it won’t hold up as long as a metal foot under heavy, frequent use
- Doesn’t play nice with Bernina-style attachments and some Kenmore models — check compatibility first
- The open-toe depth is a bit shallow, so Bernina users may need to do some filing to get a proper fit
3. Distinctive Clear Open Toe Presser Foot
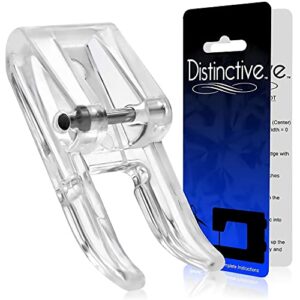
The Distinctive Clear Open Toe Presser Foot (model DOPENTSF) is the YEQIN’s close cousin, priced at just $7.99—only a dollar more. Its clear polycarbonate body provides an unobstructed view of the needle’s path, significantly aiding precision when guiding satin stitching around tight appliqué curves.
This foot snaps onto most low-shank machines, including Singer, Brother, and Janome, though some models may require a low-shank adapter. The design ensures solid quality for the price, balancing affordability with functionality.
The transparency of the foot allows users to see exactly where the needle lands, enhancing control during intricate work. While compatible with many machines, verify your model’s requirements to ensure a perfect fit.
| Best For | Hobbyists and professionals who do detailed embroidery, appliqué, or decorative stitching and want a clear view of exactly where their needle is hitting. |
|---|---|
| Design Type | Open-toe |
| Material | Plastic |
| Shank Type | Low-shank |
| Price (USD) | $7.99 |
| Stitch Visibility | Yes |
| Brand Compatibility | Singer, Brother, Babylock, Janome, Juki, Elna |
| Additional Features |
|
- The clear plastic body gives you a true unobstructed view of the needle, which makes precision work a lot easier.
- Snaps right onto most low-shank machines—Singer, Brother, Janome, and more—so setup is quick.
- At $7.99, it’s an easy add to your toolkit without much risk.
- Fit can be iffy on certain models like the Janome CoverPro 900 CPX, with some lateral wobble reported.
- The back of the foot can stick out on some units and get dangerously close to the needle—might need a little sanding to fix.
- Not a universal fit—machines without a low shank will need an adapter, which adds a step.
4. DreamStitch Snap On Open Toe Applique Foot
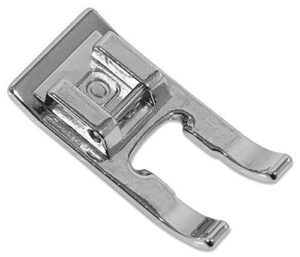
The DreamStitch Snap On Open Toe Applique Foot ensures you can see exactly where your needle lands during appliqué work, eliminating guesswork. Its clear 7 mm opening allows precise guidance of satin and blanket stitches along fabric edges, enhancing accuracy for intricate designs.
This foot snaps on without tools, offering seamless compatibility with most low-shank machines like Brother, Singer, and Babylock. Its wide underside channel glides effortlessly over dense stitching, preventing bunching—a critical advantage when navigating intricate curves.
| Best For | Sewers who do appliqué, embroidery, or detailed decorative work and need a clear view of their needle at all times. |
|---|---|
| Design Type | Open-toe |
| Material | Metal |
| Shank Type | Low-shank |
| Price (USD) | $7.90 |
| Stitch Visibility | Yes |
| Brand Compatibility | Brother, Babylock, Singer, Janome, Juki |
| Additional Features |
|
- Open-toe design gives you a clean sightline to the needle, so precise stitching on curves and edges is way easier.
- The wide underside channel glides over dense or layered stitches without bunching — a real time-saver on complex projects.
- Snaps on and off without tools, and works with most major brands like Brother, Singer, and Babylock.
- Not compatible with all machines — older or non-standard models may not accept the snap-on fit.
- The metal build can transmit more vibration, which means you might need to tweak your machine’s pressure settings.
- The open-toe design can struggle with very thick or heavily padded appliqués without some extra adjustments.
5. Sew Perfect Low Shank Open Toe Foot
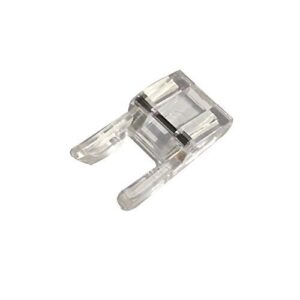
The HONEYSEW Sew Perfect Low Shank Open Toe Foot delivers unobstructed visibility for appliqué and decorative stitching at just $7.80. Its open-toe design eliminates needle obstruction, enabling precise stitch placement along marked lines.
It snaps on tool-free and fits most low-shank machines, including Singer, Brother, Janome, and Babylock.
Note: This foot is incompatible with high-shank or slant-shank models.
| Best For | Sewists who do appliqué, decorative stitching, or detailed lettering and want a clear view of exactly where their needle is hitting. |
|---|---|
| Design Type | Open-toe |
| Material | Plastic |
| Shank Type | Low-shank |
| Price (USD) | $7.80 |
| Stitch Visibility | Yes |
| Brand Compatibility | Singer, Brother, Viking, Janome, Bernina |
| Additional Features |
|
- Open-toe design gives you a great sightline — no more guessing where your stitch is landing
- Snaps on easily and works with a ton of popular brands like Singer, Brother, Janome, and Babylock
- At $7.80, it’s a cheap upgrade that genuinely improves your accuracy
- No alignment markings on the foot, so you’re eyeballing stitch placement yourself
- Won’t fit high-shank or slant-shank machines — low-shank only
- Older or non-standard low-shank models (like the Singer Stylist 518) may not be compatible
6. TISEKER Metal Open Toe Free Motion Presser Foot
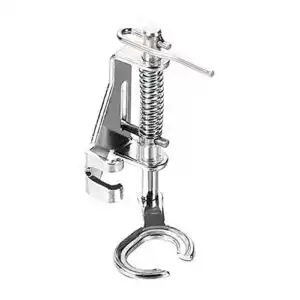
For free-motion quilting on thicker materials, the TISEKER Metal Open Toe Free Motion Presser Foot justifies its $6.99 price tag. Its spring-loaded design moves with the needle, reducing skipped stitches when working through batting and backing.
Key features include a 12mm opening accommodating embroidery threads and a polished metal finish that ensures smooth, snag-free gliding. The foot is compatible with most low-shank machines, including Brother, Singer, Janome, and Juki, requiring no adapter.
However, the top pin can be fragile under aggressive stitching pressure, so handle with care during intense use.
| Best For | Quilters and crafters who do free-motion work on thick fabrics or leather and need a budget-friendly foot that fits most low-shank machines. |
|---|---|
| Design Type | Open-toe |
| Material | Metal |
| Shank Type | Low-shank |
| Price (USD) | $6.99 |
| Stitch Visibility | Yes |
| Brand Compatibility | Brother, Singer, Janome, Juki |
| Additional Features |
|
- At $6.99, it’s an easy buy — works with Brother, Singer, Janome, Juki, and more without any extra adapters
- The open-toe design keeps your stitching area fully visible, so placing those free-motion patterns is a lot easier
- The spring-loaded action moves with the needle, which cuts down on skipped stitches when you’re working through thick batting or leather
- The top pin can snap under heavy pressure, so you’ll want to ease up during more aggressive stitching sessions
- Some units arrive slightly bent with no installation guide included, meaning you might have to do a bit of fiddling before it’s ready to go
- It only fits low-shank machines, so if you have a high-shank setup, this one won’t work for you
7. DreamStitch Pfaff Open Toe Presser Foot
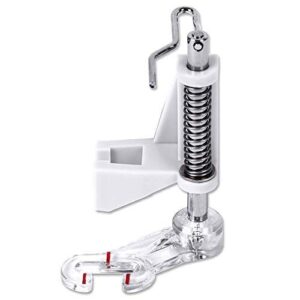
DreamStitch Open Toe Presser Foot is worth a close look for Pfaff machine owners. At just $12.05, it fits a surprisingly long list of Pfaff models—from older workhorses like the 74 and 75 all the way up to the 1469.
The open-toe design ensures your needle line remains fully visible, simplifying appliqué placement and decorative stitching. This visibility significantly reduces stress during precision work.
Its spring-action mechanism also helps prevent thread breakage when using specialty threads, enhancing reliability during intricate projects.
Always confirm your specific model is on the compatibility list before ordering to ensure a proper fit.
| Best For | Pfaff machine owners who do a lot of free-motion quilting, embroidery, or decorative stitching and want an affordable alternative to OEM presser feet. |
|---|---|
| Design Type | Open-toe |
| Material | Fabric/Metal |
| Shank Type | Low-shank |
| Price (USD) | $12.05 |
| Stitch Visibility | Yes |
| Brand Compatibility | Pfaff only |
| Additional Features |
|
- Open-toe design keeps your needle line clear, so precision work like appliqué and decorative stitching is way easier to manage.
- The spring-action mechanism cuts down on thread breakage, which is a lifesaver when you’re working with thicker or specialty threads.
- At $12.05, it’s a budget-friendly option that fits a huge range of Pfaff models without sacrificing function.
- Compatibility is limited to the models on the list—some machines like the Creative 710 won’t work with it, so double-check before ordering.
- The foot body material may not hold up as well as a metal foot under heavy, continuous use over time.
- You’ll need to pair it with the right needle for your thread type, or you’ll still run into stitching issues.
8. Madam Sew Open Toe Walking Foot
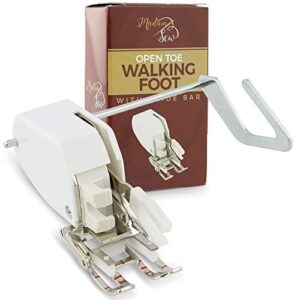
The Madam Sew Open Toe Walking Foot feeds multiple layers evenly while keeping your needle line fully visible. At $24.99, it fits most low-shank machines, including Brother, Singer, and Janome.
The integrated moving feed system prevents shifting and puckering through thick quilt sandwiches, while the open-toe design simplifies lining up seams or marked quilting lines.
Note: A few vintage Kenmore models may experience tension issues, so test on scrap fabric first.
| Best For | Quilters and sewists who work with thick, slippery, or multi-layer fabrics and need precise stitch placement without fabric shifting. |
|---|---|
| Design Type | Open-toe |
| Material | Stainless Steel |
| Shank Type | Low-shank |
| Price (USD) | $24.99 |
| Stitch Visibility | Yes |
| Brand Compatibility | Brother, Singer, Janome, Babylock, Viking |
| Additional Features |
|
- Open-toe design gives you a clear view of your stitching line, making topstitching and stitch-in-the-ditch work much easier.
- The moving feed system keeps multiple layers in sync, so no more bunching or puckering through quilt sandwiches or tricky fabrics.
- Fits most low-shank machines right out of the box — no adapter plates needed.
- Some vintage Kenmore models can run into thread tension problems or bottom-thread breakage.
- The plastic arms may shed black shavings on certain machines like Husqvarna Viking, which can get on your fabric.
- On a handful of machine models, the rear bar can clash with the needle on its way down, which stops sewing altogether.
9. Janome AcuFeed Open Toe Satin Foot 9mm
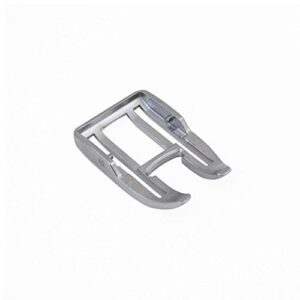
If you own a Janome machine with a 9mm AcuFeed system, this foot was practically made for you. The open-toe design gives you a clear sightline right to the needle, which makes appliqué placement and decorative stitching noticeably easier. Its smooth satin profile glides over delicate fabrics without snagging, and the dual-feed synchronization keeps your quilt layers moving together evenly.
Just confirm your machine uses the 9mm AcuFeed system — it won’t fit standard 6mm setups or other brands.
| Best For | Janome machine owners with a 9mm AcuFeed system who do a lot of appliqué, quilting, or decorative satin stitching and want better visibility and control. |
|---|---|
| Design Type | Open-toe |
| Material | Clear Plastic |
| Shank Type | AcuFeed 9mm |
| Price (USD) | Not listed |
| Stitch Visibility | Yes |
| Brand Compatibility | Janome only |
| Additional Features |
|
- The open-toe design lets you see exactly where your needle lands — huge help for precise appliqué and decorative work.
- Clear construction means you’re never guessing; you can watch the fabric and stitching in real time.
- Works great with dual-feed setups, keeping multiple quilt layers feeding evenly without shifting.
- Only fits Janome 9mm AcuFeed machines — if you have a 6mm setup or a different brand, this won’t work for you.
- Some buyers have reported receiving the wrong foot, so double-check what’s in the box before you start sewing.
- You’ll need to make sure your feed dogs are properly engaged, which takes a little extra setup time.
Frequently Asked Questions (FAQs)
Can I quilt without basting the layers first?
Yes, but think of basting as your safety net. Spray baste or fusible batting bonds layers securely, and a walking foot keeps everything feeding evenly without pins or traditional basting.
How do I store and organize presser feet?
Store your presser feet in a clear, labeled compartment box — grouped by function, with frequently used feet up front.
Keep screws and adapters in small labeled bags so nothing goes missing mid-project.
What thread types work best for quilting?
Your thread matters as much as your foot. For most quilting, 50-weight cotton is your go-to — strong, clean, and nearly invisible. Need bold texture? Step up to 40-weight.
Can quilting feet work on thick batting?
Absolutely — the right foot makes all the difference. A walking foot grips both layers evenly, preventing shifting through thick batting. Pair it with adjusted presser pressure, and you’re in control.
How do I fix puckering on finished quilt tops?
Puckering usually points to tension trouble or uneven basting. Check your top and bobbin thread tension first, smooth the quilt sandwich from center out, and slow down your stitching speed.
Conclusion
The smallest tool on your machine carries the biggest responsibility—that’s the quiet truth every quilter learns eventually. Knowing how to use a quilting presser foot correctly means your layers move together instead of fighting each other, your seams stay honest, and your designs land exactly where you intend them. The right foot doesn’t just improve your stitching; it hands control back to you. Choose deliberately, attach carefully, and let the foot do its job.
- https://www.bernina.com/en-US/Accessories-US/Presser-Feet/Quilting
- https://www.stringandstory.com/blog/fmqfeet
- https://quiltsocial.com/straight-stitching-with-a-perfect-seam-allowance-how-needle-position-helps/
- https://prettysimplesara.com/presser-feet-for-quilting/
- https://www.thesewingdirectory.co.uk/free-motion-foot/