This site is supported by our readers. We may earn a commission, at no cost to you, if you purchase through links.
Some quilt blocks age gracefully. log cabin block has been a fixture in American quilting since the mid-1800s, and it still shows up in beginner kits, heirloom projects, and modern fabric shops alike—not because it’s trendy, but because it works.
It features a small center square, strips of fabric sewn in rounds, light values on one side and darks on the other. Simple concept, endlessly satisfying results.
Once you understand how the pieces fit together, you’ll see why quilters keep returning to it across generations. Everything from measurements and color placement to fabric selection and block variations makes a lot more sense than it first appears.
Table Of Contents
Key Takeaways
- The log cabin block is built on one simple idea — a center square surrounded by strips of light and dark fabric — and that structure alone creates endless variety depending on how you rotate and arrange the finished blocks.
- Getting your measurements right from the start (2.5-inch strips, a 12-inch finished block) keeps everything consistent, so your rounds line up cleanly without a lot of guesswork or recutting.
- Pressing seams outward and squaring up after every round aren’t optional extras — they’re the habits that keep your block flat, your corners sharp, and your whole quilt from going wonky.
- Once you’re comfortable with the classic version, variations like Courthouse Steps, wonky logs, and quarter log cabin blocks let you take the same basic skills somewhere totally new.
What is a Traditional Log Cabin Block?
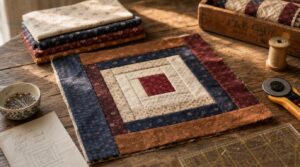
The log cabin block is one of quilting’s most iconic designs, and once you understand its basic structure, everything clicks into place. It’s built around a few key ideas that work together to give the block its signature look. Here’s what makes a traditional log cabin block what it is.
If you want to explore more patterns like this one, free quilting block tutorials are a great place to see these ideas in action.
Center Square Meaning
Think of the center square as the heart of your block — it’s where everything begins. In a traditional log cabin block, this small piece carries real symbolism: it represents the hearth, the warmth at the core of a pioneer home.
Here’s why it matters more than you might expect:
- Color sets the mood — a red or yellow center feels warm and inviting
- It acts as a visual anchor, pulling your eye straight to the middle
- High contrast centers make the whole block feel deeper and more dimensional
- Earlier quilts favored bold solid colors; later ones welcomed cheerful prints
- Some quilters use it to tell a personal story through a meaningful fabric choice
Logs Around The Center
Once your center square is set, the logs come next — strips of fabric added one at a time, wrapping outward in a clockwise placement sequence. Each strip aligns with the outer edge of the previous one, keeping everything square as you go. Press each seam outward toward the newer log, and your block stays flat without bunching.
The arrangement follows the historic alternating light dark logs pattern typical of traditional Log Cabin blocks.
Square-within-square Layout
All those logs wrapping outward create something special — a square-within-square layout where each round of logs forms its own concentric log frame around the center. It’s like nesting dolls, but flat and stitched.
- The center square anchors the whole block
- Each log round builds a bigger square
- The nested square motif grows with every strip
- All four sides stay equal width
- Square up your block after each round
That rhythm is what makes a log cabin block so satisfying to build.
Light and Dark Halves
Now here’s where the magic really happens. Each log cabin block is split diagonally — light half construction on one side, dark half framing on the other.
Light fabrics build inward toward the center; darker strips wrap the outer edges. That diagonal color split creates a sharp contrast seam line right through the middle, giving your finished block a striking sense of depth.
Classic Quilt Symbolism
Every log cabin quilt tells a story before it ever covers a bed. The red center square has long symbolized the hearth — warmth, home, and welcome.
Surrounding logs represent sheltering walls built by family hands. Light and dark fabrics echo dawn and dusk inside a pioneer household, quietly honoring the resourcefulness and resilience that defined early American life.
Getting the block size right from the start shapes everything else, much like how mastering string piecing quilt techniques turns humble fabric scraps into intentional, story-rich design.
Pioneer hands built log cabin quilts as silent tributes to resilience, stitching dawn and dusk into every light and dark seam
Traditional Log Cabin Block Measurements
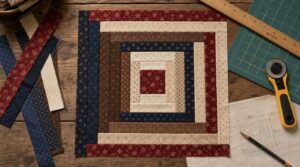
Getting your measurements right from the start makes everything else so much easier. A few key numbers come up again and again in log cabin quilting, and once you know them, they’ll feel like second nature. Here’s what you need to know before you cut a single strip.
Standard Strip Widths
The sweet spot for a traditional log cabin block is simple: 2.5 inches wide for every strip. That single measurement keeps your block consistent and your math easy.
Jelly roll packs are already cut to this width, so they’re a perfect shortcut. Stick to that uniform fabric width consistency, and your logs will line up beautifully every time.
Common Log Lengths
Seven strip lengths keep your log cabin block running smoothly: 2.5", 4.5", 6.5", 8.5", 10.5", 12.5", and 14.5". Each length builds on the last, so your block grows evenly outward.
Cut your fabric strips ahead of time and sort them by length — it makes the whole piecing process faster and keeps you from grabbing the wrong piece mid‑sew.
Center Square Sizing
The center square is the heartbeat of your log cabin block, so sizing it right matters more than you’d think. Cut it at 2.5 inches to match standard strip widths — that keeps your proportions balanced and your rounds even.
Always add a ¼-inch seam allowance, and cut it slightly oversized to account for pressing and fabric shrinkage as you build outward.
Finished Block Dimensions
Once all your rounds are sewn, your Log Cabin block finished size usually lands at 12 inches square — that’s the sweet spot for most traditional patterns. This quilt block finished size accounts for every seam allowance already eaten up during piecing.
Getting this right keeps your block layout planning smooth and makes border math a whole lot easier.
Squaring After Each Round
Squaring up your log cabin block after every round is one of those habits that separates a tidy quilt from a wonky one. Use a trim ruler to trim after each round, checking all four sides stay true.
Cutting back oversized logs keeps your block sizing methods consistent and your corners clean throughout.
How to Piece Log Cabin Blocks
Piecing a Log Cabin block is more straightforward than it looks, and once you get the rhythm, it honestly feels like you could do it in your sleep. Every step builds on the last, so following the right order makes a real difference in how your block turns out.
Here’s exactly how to work through each stage, from that very first centre square to the final trim.
Start From The Center
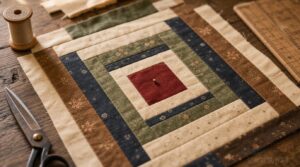
Every log cabin block tutorial begins the same way — with the centre square. This small piece is your central anchor role in the whole design. It sets the color story and guides every strip that follows. Think of it as home base.
- Place your centre square face-up
- Add the first round of strips around it
- Work outward in a consistent starting round sequence
Sew Logs Clockwise
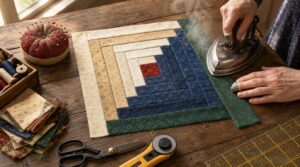
Once your center square is in place, the real rhythm begins. Sewing log strips clockwise keeps your Log Cabin Quilt Block tidy and your color placement predictable — no second-guessing which strip comes next.
| Step | Clockwise Action |
|---|---|
| 1 | Attach first log to the top edge |
| 2 | Rotate block, add second log to the right |
| 3 | Rotate again, sew third log to the bottom |
| 4 | Final rotation, attach fourth log to the left |
| 5 | Press each seam outward before the next log |
This Log Orientation Sequence is what makes the block grow so cleanly. Stitch Order Consistency means your corners turn neatly every time.
Use Quarter-inch Seams
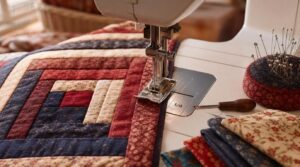
Getting your clockwise rhythm down is great — but it only pays off if your seams are spot-on. A quarter-inch seam allowance is the standard for log cabin blocks, and small drifts add up fast.
Use a dedicated seam guide on your machine, and always test on scrap fabric first. Seam consistency is what keeps every log fitting perfectly.
Press Seams Outward
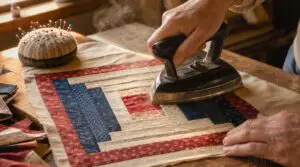
Once your seams are consistent, pressing them correctly keeps everything flat and square. Press seams outward — away from the center — after each round.
This bulk reduction method guides the seam allowances toward the outer strips, so your block stays smooth and your corners stay crisp. Skipping this step leaves lumpy layers that are hard to fix later.
Trim for Accuracy
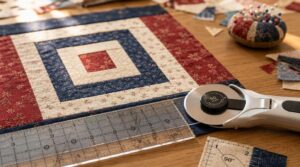
After pressing, trim for accuracy before adding the next round. Use a rotary cutter and clear ruler — aligned flush to the fabric edge — to square each side evenly.
Check all four corners with a quilting square. This final trim keeps your log cabin block true and prevents small errors from snowballing into a lopsided finished quilt.
Choosing Fabrics and Colors
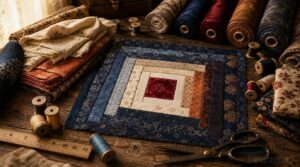
Fabric choices can make or break a Log Cabin block, and a few simple decisions go a long way. Getting the colors right is honestly more approachable than it sounds. Here’s what to keep in mind as you start pulling fabric.
Red or Yellow Center
The center square is the heart of your Log Cabin Quilt Block — and its color sets the whole mood. Traditionally, quilters chose red or yellow, each carrying its own quiet meaning:
- Red represents warmth and hearth
- Yellow mimics sunlight and optimism
- Both anchor the design visually
- Historical red centers date back to 19th-century quilts
Choose what feels true to your quilt’s story.
Light Fabric Placement
Once you’ve chosen your center color, the next big decision is where your light fabrics go. In a traditional Log Cabin Quilt Block, light strips belong on one diagonal half of the block — usually the top-right half.
That placement isn’t random. It’s what creates the contrast that makes classic quilt arrangements like Barn Raising come alive across a full quilt top.
Dark Fabric Placement
Dark fabrics live on the opposite diagonal half from your lights — the bottom-left half in a traditional block. That’s not just a style choice; it’s the backbone of outer log contrast that makes secondary patterns pop across a full quilt.
Here’s what to keep in mind when placing your darks:
- Use dark value uniformity across all outer rounds so the block reads clearly from a distance
- Stick to shade consistency — one dark tone per round prevents muddy, hard-to-read transitions
- Build placement rhythm by keeping your darkest fabric on the same side of every round
- Solid darks outperform busy prints for color blocking in quilting because they anchor the design without competing
- Press seams toward the dark side to maintain sharp contrast direction and clean 90-degree angles
Think of your darks as the frame on a painting — steady, purposeful, and quietly in charge.
Value Contrast Tips
Value contrast is what separates a flat block from one that stops you mid-scroll.
Start with a bright center choice — red or yellow pulls the eye straight to the heart of the block. Then let outer edge light fabrics open it up.
Before cutting your whole quilt, build a small mockup to test whether your contrast actually reads at a distance.
Jelly Roll Strip Options
Jelly rolls might just be the best shortcut in quilting. Each bundle gives you 40 pre-cut strips, all 2.5 inches wide, ready to go from the first round of strips through the second round of strips and into the final round without measuring once.
- Strips cover light-to-dark values for easy contrast
- Coordinating prints guarantee color palette variety
- 100% cotton ensures strip width consistency
- Solids and small-scale prints mix beautifully
- Pre-cut benefits save serious cutting time
Traditional Log Cabin Block Variations
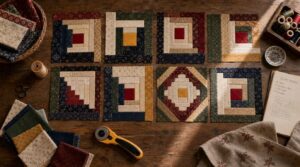
Once you get comfortable with the classic block, it’s fun to see how far quilters have taken this simple idea. There’s no single "right" way to build a log cabin — just different directions you can take it. Here are some of the most popular variations worth knowing about.
Courthouse Steps Blocks
The Courthouse Steps variation flips the traditional log cabin technique slightly — instead of wrapping logs all the way around, you add opposite strips in pairs. Two strips on top and bottom, then two on the sides, round after round.
That staircase layout gives the finished block a stepped, architectural feel that’s genuinely satisfying to assemble.
Quarter Log Cabin Blocks
If the Courthouse Steps felt like architecture, the quarter log cabin block is more like a pinwheel in progress. You only add logs to two sides of the center square, building a stepped corner shape instead of a full frame.
- Bento Box Layout arranges four blocks together
- Scrappy strips work beautifully here
- Precut strips simplify cutting dramatically
Rotate four blocks and watch a secondary pattern appear. ✨
Wonky Log Cabin Blocks
If the quarter log cabin plays it tidy, the wonky log cabin throws the rulebook out with a grin. Same center, same rounds — but every log goes on at a slight angle, so the whole block ends up charmingly crooked.
Scrappy fabric works beautifully here, and trimming after each round keeps things from getting too wild.
Modern Fabric Layouts
Modern layouts take the log cabin somewhere fresh.
Digital layout planning and CAD tools let you audition color palettes and directional print alignment before cutting a single strip.
Pair that with nesting techniques to fit pieces tightly within your fabric width — less waste, more blocks.
Always check your grain line so finished seams stay stable and flat.
Classic Quilt Arrangements
Once you’ve mastered your individual blocks, the real magic happens in how you arrange them.
Block placement patterns like Barn Raising, Sunshine and Shadows, and Streak of Lightning all use the same block — just rotated. That diagonal flow arrangement of light and dark halves creates movement across the whole quilt top.
A simple border framing technique ties everything together beautifully.
Frequently Asked Questions (FAQs)
How do you store finished Log Cabin blocks?
Store your finished blocks flat in a cool, dry spot — humidity between 40–60% works best. Stack no more than 6–8 high, and tuck cotton batting between layers to prevent color transfer.
Can Log Cabin quilts be machine-washed safely?
Yes, most Log Cabin quilts can be machine-washed safely. Use a gentle cycle with cold water and a mild detergent. This protects your seams, fabrics, and colors beautifully over time.
What batting works best for Log Cabin quilts?
Cotton batting is a top pick for log cabin quilts — soft drape, crisp lines. For more warmth, try wool. Polyester adds loft. Bamboo drapes beautifully. Wash cotton gently to preserve it.
How long does one Log Cabin block take?
Most quilters finish one block in 30 to 60 minutes, depending on experience. Neat fabric cutting techniques and consistent quarter-inch seams speed things up fast.
Are Log Cabin blocks suitable for beginner quilters?
Absolutely — log cabin blocks are beginner-friendly by design. You build outward from a center square, adding one strip at a time. Simple seams, easy pressing, and no curves make this a great first project.
Conclusion
Every strip you sew onto a traditional log cabin block is like adding another ring to a tree—quiet proof of time, patience, and something built to last. The center holds, the lights and darks find their balance, and suddenly you’re not just making a quilt; you’re joining a long line of makers who figured out the same thing you just did.
Cut your strips, trust your quarter-inch seam, and let the block do the rest.
- https://sherriquiltsalot.com/2020/10/14/log-cabins
- https://www.stitchedincolor.com/blog/2024/8/7/favorite-8-types-patchwork-log-cabin-blocks
- https://www.huntington.org/digital-classroom-resources/object-story-log-cabin-light-and-dark-quilt
- https://www.nps.gov/jeff/blogs/late-19th-century-log-cabin-style-quilt.htm
- https://www.generations-quilt-patterns.com/log-cabin-quilt-block-need-cutting-instructions-for-a-9-finished-block.html