This site is supported by our readers. We may earn a commission, at no cost to you, if you purchase through links.
cover that fits wrong isn’t just an eyesore—it snags on the handwheel, bunches around the knobs, and eventually gets tossed in a drawer, unused. Most sewists skip the measuring step or rush through it, then wonder why their finished cover sits crooked or won’t slide off cleanly.
Getting the dimensions right before you cut a single piece of fabric is what separates a cover that protects your machine from one that fights it.
These steps will walk you through exactly how to measure your sewing machine for a cover, handle the math, and avoid the mistakes that cost you time and fabric.
Table Of Contents
Key Takeaways
- Measure height, width, and depth at multiple points and always use the largest reading, because one‑off measurement throws off every panel you cut.
- Add at least ½ inch of ease to width and depth, plus 2.5 inches of top roll‑over space, so the cover slides on and off without snagging knobs or the handwheel.
- Always do a paper mockup before cutting real fabric — five minutes of test‑fitting can save you from wasting an entire yard on a cover that doesn’t fit.
- Calculate your main panel using the formula (height × 2) + depth + 1 inch, and size your lining pieces 1–2 cm larger than your outer panels, to keep seams smooth during assembly.
Measure Your Sewing Machine Correctly
Getting the measurements right is the whole game — everything else depends on it. Before you cut a single piece of fabric, you’ll need five specific numbers from your machine. Here’s how to get each one accurately.
If you’re new to this kind of project, walking through a DIY lunch bag sewing tutorial first gives you solid practice reading measurements before tackling more complex cuts.
Measure Overall Machine Height
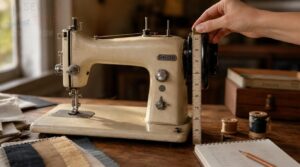
Start at the base — the flat bottom of the machine sitting on your work surface — and measure straight up to the tallest fixed point. That often means the top of the handwheel or any knob that rises above the shell.
Take three separate readings and average them for accuracy. This single step anchors every sewing machine dimension that follows.
Measure Full Machine Width
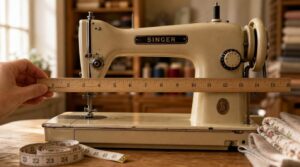
With height recorded, turn the machine to face you and measure full machine width from the leftmost to the rightmost exterior point. Use a rigid ruler — not a flexible tape — to avoid sag.
Take readings at the top, middle, and bottom, then use the largest number. If the handwheel or any accessory rail overhangs, measure to that farthest point.
For the most accurate result, always calibrate your measuring tool before taking measurements.
Measure Front-to-back Depth
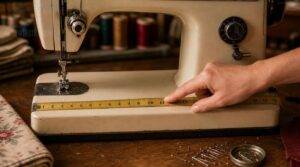
Now that you’ve captured the width, rotate your focus to the third dimension: front-to-back depth.
Place your tape flat along the machine base, measuring from the front edge of the presser foot to the back of the body. Take readings at the center, left edge, and right edge, then record the largest value.
Note Protruding Parts
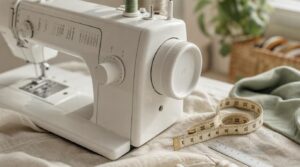
With depth noted, don’t stop there — your machine has parts that stick out beyond its main body, and ignoring them is how covers end up snagging or sitting crooked.
Here are the four protruding parts to measure your machine for:
- Button protrusion measurement — measure each knob from the housing surface to its tip; most extend 6–12 mm.
- Handwheel protrusion — note the furthest point it reaches outward; allow at least 1.5–2 cm of clearance.
- Spool pin reach — measure the maximum horizontal distance each spool pin extends beyond the body.
- Port cover depth — check USB and power ports for outward-facing covers that affect panel fit.
Record Every Measurement Clearly

Once you’ve measured every part of your machine, write it all down before you forget — because a number in your head isn’t a measurement, it’s a guess.
A measurement in your head isn’t a measurement — it’s a guess
Label data fields clearly: Height, Width, Depth, and any protrusions.
Document units consistently — stick with millimeters or inches throughout.
Cross-check measurements twice, then log measurements with a timestamp so your sewing machine dimensions stay accurate for every future cover project.
Add Ease and Seam Allowances
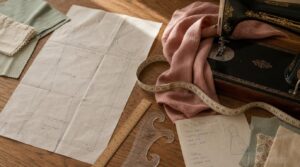
Raw measurements alone won’t get you a cover that fits well. You need to add ease and seam allowances so the fabric has room to move and the seams hold without pulling. Here’s exactly how to build those numbers in.
Add Width for Easy Fit
Width is where a lot of covers go wrong. Add 1½ to 2 inches of extra width to your machine’s measurement for a snug but easy fit. Here’s what to keep in mind:
- Distribute width evenly on both sides to prevent skewing
- Front-back balance matters — increase both sides equally
- Account for protrusion clearance around knobs and spool holders
- Wider machines may need up to 3 inches of added width
- For stretch fabric adjustment, add an extra ½ inch to compensate for bias pull
Keep the added width consistent from top to bottom for clean, even coverage.
Add Depth for Clearance
Depth is easy to underestimate, but getting it right keeps your custom cover from pressing against knobs, cords, and rear protrusions.
Measure front to back from the machine face to the furthest point behind it. Then add 1 to 3 inches of clearance, depending on your machine’s size and any attachments.
This extra room also allows airflow, protecting against heat buildup.
Include Seam Allowance
Seam allowance is the fabric buffer between your cut edge and the stitch line — and skipping it is one of the fastest ways to end up with a cover that won’t slide on.
Add ½ inch to each side of every panel. That’s 1 inch total per dimension, built into your sewing machine measurements before you ever touch your template or cut your measured panel cover.
Allow Top Roll-over Space
A cover that snags on your handwheel the moment you slide it on is a cover that fails its one job. That’s why top roll-over space isn’t optional — it’s built-in insurance.
Adding 2.5 inches to your front and back height in your sewing machine measurements gives you three things:
- Roll Space Clearance — room for the fabric to fold cleanly over the top edge without catching on knobs or thread guides
- Ventilation Gap Design — unobstructed airflow so cooling vents stay clear even when the cover sits fully on
- Access Clearance — a minimum 1.5 cm gap that keeps the handwheel turning freely without rubbing the cover material
Factor this Top Height Allowance into your measured panel cover before finalizing your front panel dimension or locking in pattern sizes.
Test Fit Before Cutting
Before you cut a single piece of fabric, do a Paper Mockup Test first. Cut newspaper or kraft paper to your calculated dimensions, tape it together, and drape it over the machine.
This Trial Placement takes five minutes and instantly reveals tight spots, gaps, or clearance issues around the handwheel — saving you from wasting good fabric on a cover that doesn’t fit.
Choose The Best Measuring Method
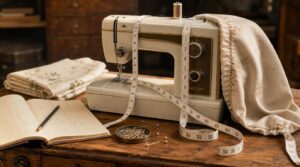
Not every sewing machine has the same shape, so the measuring method you use actually matters. Some machines are boxy and straightforward, while others have curves and protrusions that need a little more attention. Here are five methods to help you find the best fit for your machine.
Simple Rectangle Method
If you want a quick, no-fuss starting point, the simple rectangle method works well. Treat your machine’s side profile as a series of flat rectangles, measure the tallest height and full width, then use those numbers as your single bounding box.
It’s not perfectly contoured, but it gives you a reliable, roomy fit with minimal effort.
Cardboard Template Method
The cardboard template method takes things a step further than a basic rectangle. Trace your machine’s actual side profile onto sturdy cardboard, mark every protrusion — knobs, levers, the handwheel — then cut it out.
This becomes your reusable sewing template. Test the fit against your machine, adjust, and transfer cleanly to fabric. Label it for future custom cover projects.
Contoured Side Profile
The contoured side profile builds directly on what the cardboard template gives you — a traced outline — but refines it into a smooth, curved silhouette that follows your machine’s actual shape. Instead of straight edges, you’re drawing gradual curves that mirror each slope and bump.
Pay close attention to protrusions like the handwheel, stepping your contour line outward slightly so the fabric drapes cleanly without binding.
Paper Mockup Fitting
A paper mockup fitting takes your contoured outline one step further — you’re actually building a rough 3D version of the cover before touching your real fabric.
Cut lightweight craft paper or muslin into flat panels, tape the seams together, and slip it over your machine. It takes maybe ten minutes, but it’ll save you from costly cutting mistakes.
Clearance Around Handwheel
The handwheel is one of the trickiest spots to account for. Aim for at least 3 inches of clearance on all sides so it can rotate freely without your cover pulling tight. Wrap a tape measure loosely around it, note that measurement, and add it to your template before cutting your fabric.
Calculate Cover Pattern Pieces

Once you have your measurements locked in, it’s time to turn those numbers into actual pattern pieces. Each part of the cover — the main panel, side panels, lining, and stabilizer — has its own formula, and getting them right means the difference between a cover that fits and one that doesn’t. Here’s how to calculate each piece.
Main Panel Length Formula
Think of the main panel as a long sleeve that wraps over the top of your machine. The core formula is: (height × 2) + depth + 1 inch. Double the height to cover both sides, add the depth for the top span, then include that extra inch for seam allowances.
- Measure height from the base to the tallest point
- Add full depth so the panel bridges the top cleanly
- Include the 1-inch allowance for stitching on both ends
Main Panel Width Formula
Width is simpler than length, but it still needs your full attention. Your main panel width equals your machine’s widest point plus 1 inch for ease plus seam allowances on both sides.
If your handwheel juts out farther than the body, measure that — it’s your true width.
Always use the wider side on asymmetrical machines.
Side Panel Measurements
Side panels are the unsung heroes of a well-fitted cover. Each side panel needs three exact measurements: height from table to the machine’s highest point, width from the outermost edge, and depth front to back.
- Add ½ in ease to height for clearance
- Apply Width Allowance Calculation: machine width plus 1–2 in
- Follow Depth Fit Guidelines: include any rear protrusions
- Run a Protrusion Clearance Check on knobs and levers
Use a cardboard template to trace the true side profile, especially useful for pattern scaling for larger machines. Cut your side panel fabric to match, adding seam allowances after confirming the template sits flush.
Lining Piece Dimensions
Lining pieces run slightly larger than your outer panels — 1 to 2 cm extra on each edge accommodates seam allowances and keeps assembly smooth. Cut your lining length to match the finished cover length, adding 2 to 4 cm for hem and turn allowances.
Always align cuts to the fabric grain direction to prevent twisting.
Stabilizer Cutting Size
Your stabilizer cutting size should match each outer panel’s dimensions exactly — same length and width, no extras. For a foam stabilizer or quilted stabilizer layer, trim it flush to the cut edge before assembly.
Seam allowances in the fabric already account for the overlap, so adding more to the stabilizer only creates bulk at seams.
Top 5 Helpful Sewing Tools
Having the right tools on hand makes the whole process smoother and a lot less frustrating. A few key items can help you measure, stitch, and finish your cover with more accuracy and confidence. Here are five tools worth keeping close by.
1. Fiveizero Sewing Seam Ripper Kit
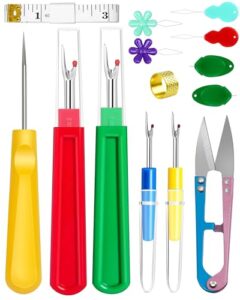
When a seam goes wrong mid-project, you don’t want to dig through a drawer hunting for the right tool. The Fiveizero Sewing Seam Ripper Kit puts everything in one place.
You get two large 5.5-inch rippers for heavy seams and two small 3.4-inch rippers for delicate fabrics, plus six needle threaders, a thimble, scissors, and a tape measure — all for $6.99. The included storage case keeps everything organized and ready to grab.
| Best For | Home sewers, crafters, and students who want a reliable, all-in-one sewing toolkit without spending a lot. |
|---|---|
| Price | $6.99 |
| Material | Metal & plastic |
| Primary Use | General sewing aid |
| Skill Level | Beginner to advanced |
| Portability | High – includes case |
| Durability | Moderate |
| Additional Features |
|
- Two ripper sizes mean you’re covered for both delicate fabrics and heavier seams — no guessing which one to grab.
- At $6.99 for the whole kit, it’s hard to beat the value, especially for beginners stocking up their first sewing kit.
- The storage case keeps everything together, so it’s easy to toss in a bag for class, travel, or on-the-go repairs.
- The plastic needle threaders can snap under pressure, so handle them gently or keep a spare on hand.
- The thimble runs a bit loose on smaller fingers, which makes it less useful if you have petite hands.
- Not built for heavy-duty work — if you’re sewing leather or thick canvas, these tools will likely struggle.
2. CKPSMS Seam Guide Gauge NG2000R
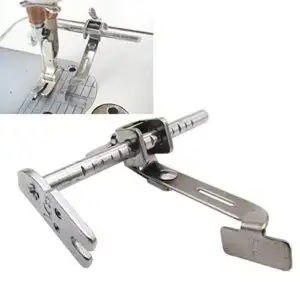
Once your seams are neat, keeping them that way means sewing straight in the first place. That’s where the CKPSMS NG-2000R Seam Guide Gauge earns its spot. It clips onto your presser-foot bar with a single bracket screw — no tools, no wiring. You just set your left-right guide distance, and it gives you a steady reference line for every pass.
At $6.99 and 1.13 oz, it’s a small investment that quietly removes a lot of guesswork.
| Best For | Quilters, garment sewists, and hobbyists who want consistent seam placement without spending much money. |
|---|---|
| Price | $6.99 |
| Material | Plastic & metal |
| Primary Use | Seam alignment |
| Skill Level | Hobbyist to professional |
| Portability | Low – machine-mounted |
| Durability | Moderate |
| Additional Features |
|
- Attaches with one screw — no tools or wiring needed
- Adjustable guide distance works for a wide range of seam widths
- Compatible with most major brands, including Singer, Brother, Juki, and Pfaff
- Screw size mismatches and missing instructions can make setup frustrating
- Sits low on some machines and may shift with presser foot movement
- Build quality is decent but not built to last like pricier alternatives
3. Willbond Universal Sewing Machine Needles
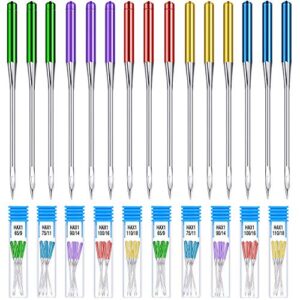
Good seams mean nothing if a dull needle is punching holes instead of piercing cleanly. The Willbond Universal Needles pack 30 needles across five sizes — 65/9 through 110/18 — so you’re covered from thin silk to heavy denim.
Each needle has a titanium-plated iron core for durability and rust resistance. Color-coded packaging makes size selection instant.
At $8.99 for 30 needles, it’s a practical, no-fuss addition to any sewing kit.
| Best For | Home sewers and beginners who work with a variety of fabrics and want a reliable, versatile needle set that covers everyday projects without breaking the bank. |
|---|---|
| Price | $8.99 |
| Material | Iron & titanium |
| Primary Use | Fabric stitching |
| Skill Level | Beginner to advanced |
| Portability | Medium – compact pack |
| Durability | High |
| Additional Features |
|
- 30 needles across five sizes means you’re ready for anything from silk to denim without making a separate trip to the store.
- Color-coded packaging takes the guesswork out of grabbing the right size — no squinting at tiny numbers.
- Titanium-plated construction holds up well with regular use, so you’re not replacing needles every other project.
- These are regular-point only, so if you do a lot of embroidery or quilting, you’ll still need specialty needles on hand.
- The titanium coating resists rust, but it’s not immune — store them somewhere dry or they can corrode over time.
- Finding the right size for unusual fabrics can take some trial and error since the size guidelines are fairly general.
4. TOOVREN Needle Threader for Hand Sewing
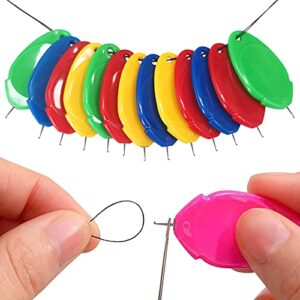
Threading a needle sounds simple until you’re squinting at a tiny eye for the third time. The TOOVREN Needle Threader fixes that fast.
Each threader has a slim steel wire hook and an ergonomic leaf‑shaped handle, making it easy to grip even with stiff fingers.
You get 12 in a clear storage box, so losing one isn’t a crisis. At roughly 1.57 inches long, it fits any sewing kit without taking up space.
| Best For | Anyone who struggles with threading needles — especially older adults, people with low vision, or anyone doing detailed work like embroidery or cross-stitch. |
|---|---|
| Price | Not specified |
| Material | Steel & plastic |
| Primary Use | Needle threading |
| Skill Level | Beginner to advanced |
| Portability | High – keychain hole |
| Durability | Low to moderate |
| Additional Features |
|
- Comes in a pack of 12, so you always have a spare on hand
- The leaf-shaped handle is easy to grip, even with stiff or unsteady fingers
- Works with a wide range of needle and thread sizes across different fabrics
- The metal hook can feel flimsy and may bend or break with heavy use
- The tiny hook can be hard to see and manipulate, especially for those with serious vision issues
- May not work well with very fine needles like a size 28, and can occasionally snag or cut thread
5. Brexfire Magnetic Sewing Seam Guide
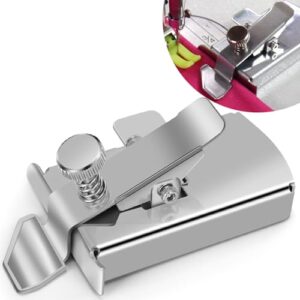
Consistent seam allowances can make or break a sewing project, and the Brexfire Magnetic Seam Guide keeps you on track without any permanent installation. Its strong neodymium magnet grips your machine’s metal throat plate instantly — no tools, no fuss.
The stainless-steel body measures 2.99 × 1.30 × 1.18 inches, with smooth rounded edges that won’t snag your fabric.
You can reposition it for different seam widths in seconds, making it a practical addition to any sewing space.
| Best For | Sewers and quilters who want quick, consistent seam allowances without any permanent setup on their machine. |
|---|---|
| Price | Not specified |
| Material | Stainless steel |
| Primary Use | Seam guidance |
| Skill Level | Hobbyist to professional |
| Portability | Medium – removable |
| Durability | High |
| Additional Features |
|
- Snaps on instantly with a strong neodymium magnet — no tools or drilling required.
- Stainless-steel body with rounded edges keeps fabric moving smoothly without snagging.
- Repositions in seconds for different seam widths, so switching between projects is painless.
- Won’t work on machines that don’t have a metal throat plate.
- Sliding it across the plate during use can leave scratches over time.
- Best on straight seams — curved or irregular paths make it harder to use effectively.
Avoid Common Measuring Mistakes
Even careful sewists can lose a good cover to a few small, avoidable slip-ups during measuring. Most of the trouble comes down to the same handful of mistakes that show up again and again. Here’s what to watch for before you cut a single piece of fabric.
Forgetting Extra Ease
Skipping extra ease is one of the most common — and frustrating — mistakes in cover-making. Without it, tight fit issues appear immediately: the cover strains against the machine surface, rubbing knobs and edges with every placement.
Always add at least ½ inch to both width and depth, and include top roll-over space so the fabric folds cleanly without binding at the upper edge.
Ignoring Knobs and Levers
Knobs and levers are easy to overlook when you’re focused on basic dimensions — but they can make or break your fit.
Add 2 to 3 centimeters of clearance around any protrusion. Thread takeup levers can swing up to 4 centimeters outward, so build that buffer in.
Do a quick test fit with a paper template first to catch any snags.
Measuring Fabric Too Tightly
Measuring fabric too tightly is one of the sneakiest mistakes you can make. When your fabric measurement hugs the machine with no breathing room, you’re setting yourself up for seam stress, puckering, and a cover that barely slides on.
Here’s what tight fabric actually causes:
- Needle deflection risk increases on thick seams, leading to skipped stitches or breakage.
- Fabric grain distortion creates wavy, uneven edges after stitching.
- Covers cut too tight wear faster at edges from constant rubbing against hardware.
Always build in ease allowance — at least ½ inch to width and depth. A simple quick math sizing check before cutting saves a re-cut later. Also remember: fabric shrinks after washing, so fabric shrinkage impact is real. That snug cover becomes impossible to use after the first wash.
Use a template or paper mockup to test fit first. If the mock-up strains at any corner, add to your adjustable seam allowance before touching your good fabric.
Skipping a Test Fit
A test fit isn’t optional — it’s your last chance to catch problems before they become permanent.
Without one, your sewing machine cover pattern may collide with knobs, levers, or the handwheel. Cover interference risks are real: fabric can snag on protrusions or block cord access entirely.
| What You Check | What Goes Wrong Without It | What You Gain |
|---|---|---|
| Clearance around handwheel | Fabric catches on rotation | Smooth removal every time |
| Ease at side panels | Cover fits too tight to slide on | Confirmed fabric movement check |
| Cord and foot pedal space | Snagging during daily use | Safe, unobstructed access |
| Top roll-over space | Thread handling gets blocked | Preserved machine access |
| Corner and hem alignment | Uneven hems needing rework | Clean, accurate pattern adjustment |
Wrap a paper mockup around your machine before cutting good fabric. If it strains anywhere, that’s your signal to adjust. Fit verification importance shows up most here — one quick test protects your sewing measurements and saves you from resewing entire panels.
Cutting Before Double-checking
Cutting too soon is like jumping the last step on a staircase — you think you’re fine until you’re not.
Before any scissors touch your fabric, run a pre-cut verification:
- Double-check all sewing measurements against your pattern
- Confirm blade sharpness with a quick scrap test cut
- Verify pattern accuracy by comparing pieces to your template
- Review seam allowances to avoid fabric waste risks
- Complete a cut confirmation check on every marked piece
Frequently Asked Questions (FAQs)
Which singer is best for heavy fabrics?
The Singer Heavy Duty line is your best bet. Its heavy duty motor, reinforced bobbin system, and walking foot compatibility let it power through denim, canvas, and leather without skipping a stitch.
What is a 3/4 size sewing machine?
A 3/4 size sewing machine is a compact portable model, smaller than a standard full-size machine, weighing just 10–15 pounds. Many are collectible vintage pieces still compatible with standard needles and presser feet today.
What fabrics work best for a sewing machine cover?
The best fabrics are mediumweight cotton, canvas, linen, or denim. Cotton breathes well and holds shape. Canvas resists sagging. Linen stays cool and structured. Avoid stretchy knits — they won’t hold their form.
How do I add handles to my cover?
Hand grips make your sewing machine cover far more practical. Use webbing straps sewn into side seams with a bartack stitch, positioned at the cover’s midline, spaced 6–8 inches apart for balanced lifting.
Can I make a reversible sewing machine cover?
Yes, you can. Use a reversible two-fabric cover with seams tucked inside so both sides look clean. Bias binding finishes the edges neatly on either face when you flip it.
What stabilizer should I use for structure?
Foam stabilizer is your best bet — it holds shape, cushions knobs, and won’t collapse. Fusible interfacing works too for a slimmer profile. Match weight to your machine size.
How do I finish the bottom edge neatly?
Use double-fold bias tape to bind the bottom edge for a clean, durable finish. A topstitched hem works well too. Both options keep raw edges secure and give your cover a polished look.
Conclusion
The devil is in the details when you learn how to measure your sewing machine for a cover, and now you have every detail mapped out. You’ve got the dimensions, the ease allowances, the pattern math, and the common pitfalls to dodge.
A cover built on accurate measurements won’t fight you—it’ll slide on clean, sit flush, and actually stay in rotation.
Do it right once, and your machine stays protected every time it’s not in use.
- https://makingitupasisewalong.weebly.com/blog/sewing-machine-cover-tutorial
- https://www.sewingtothemoon.com/blog/diy-easy-sewing-machine-cover
- https://www.applegreencottage.com/sewing-machine-cover-pattern
- https://www.professorpincushion.com/professorpincushion/sewing-machine-cover
- https://madamsew.com/blogs/sewing-blog/make-a-sewing-machine-cover