This site is supported by our readers. We may earn a commission, at no cost to you, if you purchase through links.
A sewing machine that skips stitches mid-seam or jams at the worst possible moment isn’t broken—it’s usually neglected. Most machines that end up in repair shops need nothing more than a good cleaning, fresh oil, and a new needle.
The fix costs almost nothing when you catch it early. Keeping your sewing machine in good condition comes down to a handful of habits you do consistently, not a complicated maintenance routine.
The sections ahead walk you through exactly what to do, how often, and what you watch for before small issues turn into expensive repairs.
Table Of Contents
Key Takeaways
- Clean your machine after every session — lint in the bobbin area and feed dogs cause most skipped stitches and jams before any real damage sets in.
- Change your needle every 8 hours of sewing and match it to your fabric type, because a dull or wrong needle quietly ruins seams long before you notice.
- Use only clear sewing machine oil, apply just 1–2 drops per port, and rotate the handwheel after oiling so the lubricant spreads evenly instead of pooling.
- Book a professional service every 12–18 months, even if your machine seems fine — a technician catches timing and tension issues that home maintenance can’t reach.
Clean Your Sewing Machine Regularly
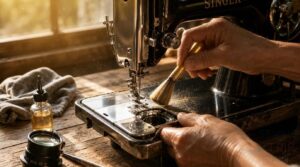
Lint and dust build up faster than you’d think, and even a quick sewing session leaves behind debris that can mess with your machine’s performance. The good news is that cleaning doesn’t take long if you make it a habit. Here’s what to do every time you sit down to sew.
For a deeper look at what to check and when, basic sewing machine maintenance tips walk you through the full routine so nothing gets overlooked.
Unplug Before Cleaning
Before you touch anything, unplug your machine from the wall. This isn’t optional — it’s the first rule of machine cleaning.
Even a quick lint brush near the bobbin area can trigger a needle drop if power is still connected. Disconnect the foot pedal too, then confirm the cord is away from any damp surfaces before you grab your cleaning tools.
Remove Bobbin Area Lint
With the machine unplugged, remove the needle plate to open up the bobbin area.
Use a soft brush to sweep out lint along the bobbin case, feed dog gaps, and latch areas. Grab tweezers for stubborn threads, then wipe surfaces with a dry microfiber cloth.
Lift the bobbin case and check behind it — lint hides there too. Performing regular bobbin case cleaning every few months keeps stitch quality high.
Brush Feed Dogs
Once the bobbin area is clean, shift your attention to the feed dogs — those small toothed ridges that grip and move your fabric forward.
Use a soft brush to sweep lint and dust from between the teeth and around the throat plate.
Short, firm strokes work best to pull debris out without pushing it deeper into the machine.
Avoid Canned Air
Canned air seems like a quick fix, but skip it. Propellants push debris deeper into the machine rather than removing it, and they can condense moisture onto electronics.
Instead, use a soft brush or low‑pressure blower rated for electronics.
Work in a well‑ventilated area to stay safe. Your machine will thank you.
Wipe Exterior Surfaces
A clean exterior protects more than just looks — it helps your machine last longer. Grab a lint-free cloth and use a mild soap solution on a damp cloth to lift grime gently. Then dry thoroughly to prevent water spots.
Here’s a quick routine to follow:
- Wipe surfaces weekly
- Spot clean smudges with isopropyl alcohol
- Use a dust cover between sessions
Oil Moving Parts Correctly
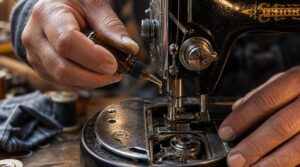
Oiling your sewing machine is one of those small habits that pays off big over time. Done right, it keeps the moving parts running smooth and quiet for years. Here’s what you need to know to oil your machine correctly.
Pairing a good oiling routine with proper tension care—like the tips in this complete sewing machine tension guide—means fewer headaches and more time actually sewing.
Oiling your sewing machine is a small habit that keeps moving parts running smooth and quiet for years
Check Your Manual
Before you add a single drop of oil, open your manual first. It tells you exactly which oil points your specific model has — and some machines have more than others. It also lists the recommended maintenance intervals and any safety warnings to know before you start. Skipping this step is how small mistakes happen.
Use Sewing Machine Oil
Not all oils are created equal — and your machine knows the difference. Use only sewing machine oil, never WD-40, motor oil, or cooking oils. Those alternatives gum up moving parts and attract lint fast.
Here’s what to keep in mind:
- Check the oil’s color — it should be pale and clear, not cloudy.
- Apply just 1–2 drops per oil port to avoid overapplication.
- Store your oil in a cool, dry spot away from sunlight so it stays thin and effective.
Follow Oil Port Locations
Every sewing machine has designated oil ports — specific spots the manufacturer chose for a reason. Don’t guess. Open your manual and find the exact locations before you apply a single drop.
Usually, you’ll oil the hook and bobbin area, plus any marked lubrication points along the moving parts. Hit those spots consistently, and your machine runs smoothly every time.
Avoid Over-Oiling
More is not better regarding oil. 1–2 drops per port is the limit — going beyond that causes real problems. Excess oil attracts lint, forms gummy clumps, and can seep onto your fabric during stitching.
Watch for warning signs: oily spots on fabric, slow handwheel movement, or a greasy film around the bobbin case. If you spot any of these, wipe the excess away immediately.
Rotate Handwheel After Oiling
After oiling your machine, rotate the handwheel slowly for 15–30 seconds. This spreads the lubricant through the hook race, needle bar bushings, and internal gears — instead of letting it pool in one spot.
Always do this with the power unplugged. Once done, run the machine briefly without thread to finish circulating the oil.
Log the date for consistent preventive maintenance.
Replace Needles and Check Bobbins
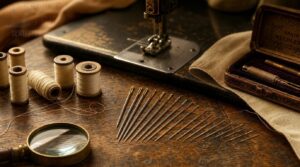
Needles and bobbins are small parts, but they cause most stitching problems when ignored. A dull needle or the wrong bobbin can ruin an entire project before you realize what went wrong. Here’s what to check and replace to keep everything running smoothly.
Change Needles Often
Needles wear out faster than most people think. Change the needle every 8 hours of sewing — or after every major project. A bent or dull needle causes skipped stitches, pulled threads, and fabric damage before you even notice.
Here’s a simple needle wear monitoring checklist:
- Log your sewing hours per session
- Note any skipped stitches or thread snags
- Check for visible nicks or needle breakage
- Replace immediately when any warning sign appears
Match Needle to Fabric
Once you’ve committed to changing the needle regularly, the next step is making sure you’re using the right needle for the job. Think of it like wearing the right shoes — sneakers on a hiking trail won’t cut it.
Use this fabric needle selection guide to match needle and thread selection to your material:
| Fabric Type | Needle Type | Needle Size |
|---|---|---|
| Cotton, linen (light woven) | Universal/Sharp | 70/10 |
| Denim, twill (medium-heavy) | Jeans needle | 90/14 – 100/16 |
| Knit, jersey | Ballpoint/Jersey | 75/11 – 80/12 |
| Silk, chiffon, organza | Microtex/Sharp | 60/8 – 70/10 |
| Leather, vinyl | Leather/Cutting point | 90/14 – 100/16 |
For knit and woven fabrics, the difference matters more than you’d think. A sharp needle cuts through woven fibers cleanly, but on stretchy knits, it can cause runs. Ballpoint needles glide between fibers instead of piercing them — that keeps your seams intact.
With heavy fabric needles like jeans needles, you also get better seam strength. Pair them with polyester thread to reduce fraying at seams on thick materials like canvas or denim.
Inspect Needle Condition
Even the right needle for the job can let you down if it’s damaged. Before loading it, roll the shaft between your fingers — a straight, smooth needle should feel even all the way down. Any wobble means it’s bent.
A quick Visual Defect Scan catches rust spots, coating flakes, or burrs that cause skipped stitches.
When in doubt, replace the needle.
Use Correct Bobbins
Just like needles, bobbin type selection matters more than most sewers realize. Your machine’s manual lists the exact class — Class 15, Class M, and others — and that’s the only one that belongs in your machine.
Metal bobbins suit vintage or heavy‑duty models; plastic ones fit most modern machines. Mix them up, and you’re asking for looping stitches or jams.
Watch for Bobbin Jams
Bobbin jams rarely come out of nowhere. Most start in the bobbin area when thread winds unevenly or the bobbin case isn’t fully seated. Watch for these warning signs:
- Sudden thread bunching under fabric
- Skipped stitches or looping on the underside
- The machine pulling or stopping mid-seam
- Unusual clicking sounds near the bobbin housing
When a jam hits, remove the bobbin, rotate the handwheel slowly, and check that the mechanism turns freely. Clean the bobbin area after every session to prevent lint buildup — that alone stops most jams before they start.
Manage Thread Tension and Stitch Quality
Thread tension is one of those things that looks simple but throws off your whole project when it’s off. Getting it right comes down to a few key habits you can build into your routine. Here’s what to focus on.
Use Quality Thread
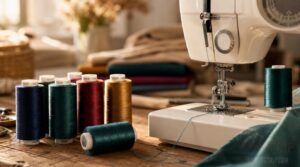
The thread you choose matters more than most people realize. Cheap thread leaves lint everywhere, breaks mid-seam, and quietly ruins your tension settings.
| Feature | Quality Thread | Low-Quality Thread |
|---|---|---|
| Fiber Type | Polyester or cotton blend | Mixed or unknown fibers |
| Surface Finish | Smooth, low-lint | Hairy, sheds easily |
| Colorfastness | Resists fading | Bleeds or fades quickly |
Match thread weight to fabric — fine thread for lightweight fabrics, medium for everyday projects. Always store spools in a cool, dry spot away from sunlight to preserve their strength.
Clean Tension Discs
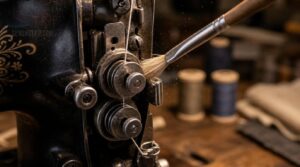
Skipping this step is one of the fastest ways to wreck your stitch quality. Tension discs grip and guide thread before it reaches the needle — and lint loves to hide between them.
Clean them every 6–8 hours of sewing using a soft brush. Raise the presser foot first to open the discs, then gently sweep debris away.
Adjust Tension Gradually
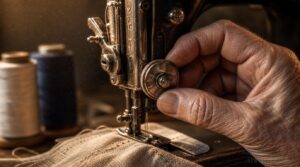
Tension is one of those settings where less is more. When something looks off — looping on the underside or puckering on top — resist the urge to crank the dial. Instead, make incremental dial turns, just a quarter-turn at a time. This keeps your thread tension management precise and prevents overcorrection.
Always reset to your tension baseline between adjustments.
Test on Fabric Scraps
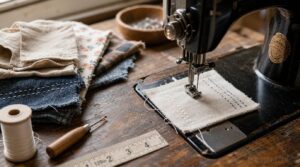
Before you start a real project, always test on a fabric scrap first. Cut a 2-by-2-inch piece that matches your actual project fabric — same weight, same weave.
Sew a straight stitch across it and check for seam puckering or thread breakage. What you see on the scrap is exactly what you’ll get on your project.
Recheck After Changes
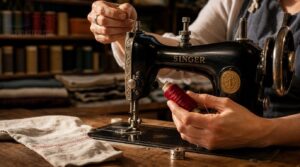
Any time you swap thread, change fabric, or replace a needle, don’t just dive back in. Do a quick routine inspection first.
Check your stitch length, verify your needle size matches the new fabric, and run a test seam on a scrap. Also, inspect the thread path and confirm bobbin tension — a smooth spin means you’re good to go.
Store and Service It Properly
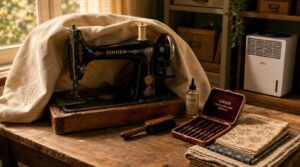
How you store and care for your machine between projects matters just as much as how you use it. A little attention to the basics — covering it, keeping it dry, and staying on top of wear — goes a long way toward avoiding costly repairs. Here’s what you should be doing to protect your investment.
Cover When Not Used
When your machine sits idle, cover it right away. A breathable fabric cover lets air circulate while blocking dust and lint from settling into the needle bar and bobbin area.
Make sure it fits snugly — a loose cover shifts and leaves parts exposed. Wash the cover regularly so it doesn’t transfer dust back onto the machine.
Store in Dry Areas
Where you store your machine matters just as much as how you cover it. Humidity above 60% can rust metal parts in just a few weeks. Aim for a dry, ventilated room kept between 15–25°C. Tuck a few silica gel packs nearby to absorb moisture. Avoid basements — they’re humidity traps.
Inspect Power Cords
Your power cord deserves the same attention as your machine.
Run your fingers along the full length and check the cord jacket for cuts, cracks, or scorched spots. Examine plug prongs for corrosion or bending, and look for wiring fray near entry points.
Always plug directly into a grounded surge protector — never an extension cord.
Check Belts for Wear
Your cord check naturally leads you to the next mechanical part worth inspecting — the drive belt.
Run a quick visual scan along the belt’s surface. Look for cracks, glazing, or fraying, which all signal that replacement is overdue. A glazed or shiny surface means the belt has been slipping. Uneven wear often points to a pulley alignment issue.
Watch for these warning signs:
- Visible cracks along the ribs or back side of the belt
- A wavy or shiny surface from slippage
- Missing or chipped ribs that reduce grip
- Uneven wear patterns across the belt length
- Squealing sounds during operation
Replace a worn belt immediately — a failing belt can cause skipped stitches, erratic speed, or full machine downtime.
Schedule Professional Servicing
Even well-maintained machines need a professional deep-clean every 12 to 18 months. A qualified sewing machine technician will calibrate tension, check timing, lubricate internal parts, and inspect your motor — things you simply can’t do at home. Expect to pay around $55–$65 for a standard service visit.
Before the appointment, unplug your machine, note any issues, and have your model and serial number ready. Set a calendar reminder so your next service doesn’t sneak up on you.
Frequently Asked Questions (FAQs)
Can I use my sewing machine daily without breaks?
Yes, you can — but take breaks every few hours. Continuous stitching builds heat in the motor and gears. Good ventilation and short rest periods prevent overheating and keep your machine running smoothly for years.
How do I reduce noise and vibration during sewing?
Place your machine on a vibration dampening mat and make sure it sits on a level surface. Oil moving parts regularly and run at moderate stitch speed to cut noise fast.
What should I do after a major thread jam?
Unplug immediately. Remove tangled threads using small tweezers, brush the bobbin area clean, then rethread top and bottom carefully. Replace the needle if bent. Test on scrap fabric before resuming your project.
How long does a sewing machine typically last?
A well-maintained home machine usually lasts 15 to 25 years. Industrial models can push beyond 40 years. Skip routine maintenance, though, and you can lose a third of that lifespan fast.
Can humidity or temperature affect machine performance?
Both can do a number on your machine. Humidity above 60% corrodes metal parts and washes out lubricants. Extreme temperatures stiffen oil and crack seals. Store your machine somewhere cool and dry.
Conclusion
The machines that get used the most tend to last the longest—but only when someone’s paying attention. Knowing how to keep your sewing machine in good condition isn’t about fixing problems. It’s about stopping them before they start.
Clean the lint, change the needle, oil the parts, and store it right. Do those things consistently, and your machine won’t let you down mid‑seam.
A little attention now saves a big repair bill later.
- https://weallsew.com/five-tips-solving-thread-tension-problems
- https://www.stringandstory.com/blog/tensionhowto
- https://www.diaryofaquilter.com/how-to-clean-your-sewing-machine
- https://sterlingsewing.com/blogs/maintain-your-sewing-machine
- https://www.threadsmagazine.com/2015/10/13/how-to-achieve-ideal-sewing-machine-thread-tension