This site is supported by our readers. We may earn a commission, at no cost to you, if you purchase through links.
That jagged, stair-step edge around a curved neckline? It’s rarely a fabric problem—it’s a technique problem. Most sewists grip their rotary cutter like a pizza cutter and drag it around a curve in one long, hopeful swoop. The blade skips, the fabric shifts, and suddenly your smooth armhole looks like a saw blade cut it.
Here’s the good news: learning how to cut curves with a rotary cutter comes down to a handful of small, controllable habits—blade size, wrist position, cutting rhythm. Master these and your curves will glide as cleanly as your straight seams.
Ready to trade choppy edges for confident, precise cuts? Let’s get your blade set up right.
Table Of Contents
Key Takeaways
- Match your blade size to the job: 28mm for tight curves and necklines, 45mm for gentle armhole arcs, and 60mm for cutting through multiple layers of thick fabric.
- Prep work matters as much as the cut itself—press fabric flat, align grainlines, and stabilize slippery materials with spray starch or tissue paper before you start cutting.
- Cut curves using short, controlled one-to-two-inch strokes while rotating the fabric rather than the blade, keeping light pressure and a relaxed, neutral wrist throughout.
- After cutting, clip concave curves and notch convex ones before pressing with a ham to lock in a smooth, professional-looking shape.
Choose The Right Rotary Cutter
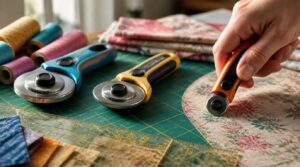
Cutting a smooth curve starts long before your blade touches fabric, it starts with picking the right tool for the job.
A sharp rotary cutter paired with a flexible ruler makes all the difference, and mastering rotary cutter techniques for curved edges will save you from jagged, uneven lines.
Not every rotary cutter controls curves the same way, and blade size makes a bigger difference than you’d think.
Let’s break down which cutters and blades will actually set you up for success.
28mm Blades for Tight Curves
One small blade, endless control. The 28mm blade is your go-to for tight curves, miniature appliqué, and necklines—its small diameter maneuvers precisely without drift.
- Tungsten steel holds a sharp edge longer
- Cuts in small increments for accuracy
- Quick-release mechanism simplifies blade swaps
- Compact cutter feels comfortable in-hand
- Delivers true curved edge accuracy
This set also features an auto-retracting blade on the included touch knife for added safety.
45mm Blades for Gentle Arcs
Once your tight curves are done, grab the 45mm blade—the workhorse for sweeping armholes and long seams.
| Feature | Benefit |
|---|---|
| Tungsten edge | Lasts longer, resists dulling |
| Wide arc radius | Smooth, precise curves |
Rotate fabric steadily as you cut; this keeps accuracy sharp and edges clean on gentle, flowing lines.
60mm Blades for Layered Fabric
Now stack up eight layers of quilt batting or foam interfacing—your 45mm blade taps out fast. The 60mm blade powers through multi-layer efficiency, cutting thick batting in one smooth pass without dragging.
- Slices up to 8 fabric layers cleanly
- Titanium blade durability holds edges longer
- Great for upholstery fabric trimming
- Reduces wrist strain on thick stacks
- Maintains cutting accuracy across bulky layers
Sharp Blades Prevent Fraying
A dull blade drags instead of slices, causing fiber lifting and friction heat that weakens weave. Sharp edges cut clean, reducing fray risk instantly.
| Blade Condition | Cutting Result |
|---|---|
| Sharp | Clean edges |
| Dull | Frayed threads |
| Micro-serrated | Better grip |
| Corroded | Snagging |
| Fresh | Precision cutting |
Replace blades often—your rotary cutter’s accuracy depends on it!
Dull blades cause more than sloppy edges—check out this guide on common fabric cutting mistakes to avoid for tips on keeping every cut precise.
Use Curve-friendly Templates
Grab a template and let it do the thinking for you. Precise curve cutting starts with choosing the right material—clear acrylic offers see-through alignment, while sturdy cardboard works for budget setups.
- Check grainline alignment marks
- Match scaling radius accuracy to your pattern piece
- Store flat to avoid warping
- Clean cutting guides after each session
- Track edges for smooth, precise curves
Skip flexible rulers here; templates keep your cutting technique locked in!
Prepare Fabric Before Cutting Curves
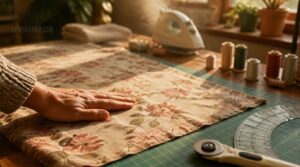
Great curves start long before your blade touches fabric. A little prep work now saves you from crooked lines and frustrating do-overs later. Here’s exactly how to get your fabric ready.
Press Fabric Completely Flat
Wrinkles are the enemy of accuracy here. Press your fabric using center-outward strokes, moderate steam, and a cotton pressing cloth to avoid shine.
| Skip This Step | Do This Instead |
|---|---|
| Cut wrinkled fabric | Press flat first |
| Drag the iron | Light, repeated presses |
| Skip cloth | Use pressing cloth |
| Rush cooling | Let fabric cool |
Cool sections before cutting for crisp, accurate curves!
Align Grainlines Carefully
Before your blade even touches fabric, check that grainline arrow against the selvage edge—this single step prevents garment twisting later. Lengthwise grain runs parallel to selvage; crosswise runs perpendicular. Bias grain (45 degrees) suits draped curves intentionally.
Use a clear ruler to confirm equal distance at both ends. Proper alignment maintains silhouette drape and keeps directional prints centered and true!
Stabilize Slippery Fabrics
Silk and satin have minds of their own under a blade, sliding sideways the moment you glance away. Light spray starch adds just enough grip to keep things honest.
For truly slippery textiles, slide tissue paper underneath or try a water-soluble stabilizer sheet—both prevent shifting without adding stiffness, keeping your curves smooth and your temper intact!
Use Pattern Weights
Why poke holes when you can just press down? Pattern weights hold your curve templates flat without a single pin in sight.
Light weights (40-50g) suit delicate curves; medium ones (60-75g) tame knits. Place them evenly along the edge and center—that’s your weight placement strategy for true tracing. DIY? Fabric-covered washers work great for slippery fabric solutions on a budget.
Avoid Pinning Near Curves
Pins near a curve are trouble waiting to happen—each one can snag your rotary cutter mid-arc.
- Fabric distortion from pins tugging the curve
- Blade snag risk on exposed pin heads
- Puckering along tight arcs
- Compression marks on delicate fabric
Try adhesive spray or basting stitches instead—both hold layers steady for precise sewing without piercing your fabric preparation.
Cut Curves With Controlled Motion
Your fabric’s flat, stabilized, and ready to go, so now comes the fun part: actually cutting that curve!
This is where control beats speed every single time, and your hands need to work together like a well-rehearsed team.
Here are five techniques that’ll keep your line smooth and your confidence high.
Start With Light Pressure
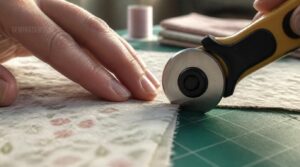
Ease into every curve with a feather-light touch—your rotary cutter should barely kiss the fabric. This pressure control builds tactile feedback, teaching your hand exactly when to deepen the cut. Light contact reduces blade drag, prevents fabric scorching, and keeps edges clean.
Let your rotary cutter barely kiss the fabric—a feather-light touch builds the feedback that guides every clean curve
Practice calibrating pressure increments on scraps first. Over time, you’ll develop muscle memory, and smooth, precise curves become second nature!
Cut Short Smooth Sections
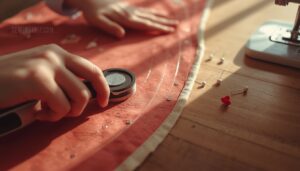
Long, sweeping cuts invite wobble. Break every curve into small increments instead, cutting just an inch or two at a time while keeping the blade perpendicular to your fabric’s edge.
This builds precision at inner corners and smooth curve transitions. Pause between segments, reassess your pressure management, and resume. Choppy? No—controlled cutting motions like this actually produce your cleanest, most consistent line.
Rotate Fabric Gradually
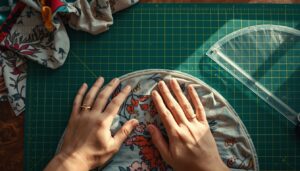
Here’s the trick: your cutter stays nearly still while the fabric does the moving. Rotate your fabric in small increments, keeping continuous blade contact instead of lifting and repositioning.
- Pivot gradually, never in sudden jogs
- Manage cutting drag with light pressure
- Build muscle memory through repetition
Practice this on scraps first. Small increments create smooth, precise curves every single time!
Keep Wrist Relaxed
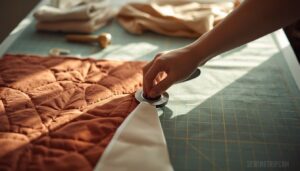
Your wrist should stay straight and neutral, in line with your forearm, never bent or twisted while guiding curves.
Hold the cutter with a relaxed, gentle grip, elbow tucked close to your body. Let your shoulder and elbow share the workload, keeping wrist motion smooth. Apply consistent pressure without gripping tight, and pause briefly between segments to release tension before continuing.
Follow Marked Cutting Lines
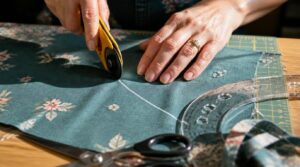
That marked line is your map, so trust it completely. Choose a fine-tipped marking tool for crisp visibility, and keep your eyes locked on the line, not the blade, as you rotate fabric through the curve.
- Recheck alignment after positioning templates
- Do a dry run cut on scrap first
- Smooth jagged marks before cutting
This verification step catches deviations before they become costly mistakes.
Improve Accuracy Around Sewing Curves
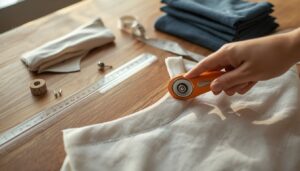
Controlled motion gets you smooth cuts, but true precision needs the right guides backing you up. Armholes and necklines especially demand extra care, since one wobble can throw off the whole fit. Here’s how to sharpen your accuracy on every curve you tackle.
Use Acrylic Rulers
See-through tools change everything. An acrylic ruler lets you watch your fabric while you trace, preventing parallax error and keeping curves true.
| Feature | Why It Matters |
|---|---|
| Clear body | Ruler visibility |
| Polished edges | Smooth tracking |
| Metric/imperial scales | Flexible measuring |
| Durable acrylic | Won’t warp |
| Grid lines | Repeatable curves |
That clarity means smooth precise curves, every single time.
Try French Curves
Grab a French curve set when your armholes and necklines need more than a single sweeping arc. Each template edge profile offers a different bend, so connecting pattern points feels natural, not forced.
Trace lightly first, then darken your line. This tool drafts smooth transitions between curves, giving you the natural silhouettes your rotary cutter will follow beautifully.
Cut Armholes Slowly
Slow down at the armhole—rushing here is where curves go crooked.
- Start conservative, opening the curve gradually
- Check symmetry verification on both sides
- Keep small, steady motions to reduce wobble
- Maintain blade perpendicularity against the fabric
A sharp blade minimizes pushing fabric, easing wrist fatigue while you align cuts precisely with your front and back pattern lines. Precision beats speed every time.
Shape Necklines Carefully
Necklines are the face-framers of every garment, so precision here matters most. Whether you’re cutting a scoop, V, or sweetheart shape, follow your French curve exactly, rotating fabric in small increments rather than forcing the blade.
Stable, interfaced fabric holds the curve true. Always test on muslin first—it reveals gaping or asymmetry before you touch your good fabric, saving both nerves and yardage.
Trim Uneven Edges
Even a great curve can end up looking wobbly if the trimmed edge wanders. Fix that by running your ruler and curved template back over the line, shaving off excess in thin, even passes for consistent width the whole way around.
This reduces jagged transitions, prevents seam distortion, and keeps your fabric stabilization efforts from going to waste. Clean edges mean stronger, smoother seams!
Finish and Maintain Clean Curves
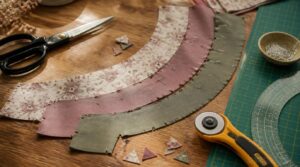
You’ve made the cut, but the job isn’t quite finished yet. A few final touches turn a good curve into a professional one that lies flat and sews up beautifully. Here’s exactly what you need to do before that fabric ever hits your machine.
Clip Concave Seam Curves
Concave curves pull inward, and that’s exactly why they need clipping before you turn the fabric right side out. Space your clips 1/8 to 1/4 inch apart, staying 2mm from your stitching line.
- Smoother seam allowance
- Reduced fraying risk
- A professional, puckerfree finish
Consistent spacing prevents bulk and keeps your curve lying flat every time!
Notch Convex Seam Curves
Now flip to convex curves, the ones that push outward like a collar edge or curved hem. These need V-shaped notches, not straight clips, cut every 1/2 inch with your rotary cutter staying 2mm from the stitching line.
Skimp on notching and you’ll get puckering; cut too deep and you weaken the seam. Stay precise, rotate the fabric as you go, and your curve turns smooth every time.
Press With a Ham
Once your notches are clipped, grab a pressing ham to set that curve for good. Steam and shape simultaneously—wool side for thick fabrics, cotton canvas for delicate ones.
The sawdust filling holds firm heat, perfect for:
- Shoulder darts
- Sleeve caps
- Curved hems
Work seam-toward-body, reposition often, and let it cool before storing to preserve the ham’s shape!
Check for Jagged Edges
Now’s the moment for a real quality check. Hold the curve up to bright, diffuse light and look for fiber separation or micro-tears along the edge—telltale jaggedness signs. A sharp blade leaves smooth, consistent lines; burrs or dull edges leave rough patches.
Compare your cut against the template. If anything looks torn rather than sliced, trim it clean with small scissors before sewing.
Lock Blade After Cutting
Once your curve looks clean, engage that locking mechanism right away—don’t set the cutter down first! A reliable lock prevents accidental closure and protects your fingers.
You should feel tactile lock feedback, a confident click confirming safety. Wipe away lint to maintain lock cleanliness, and avoid lock-induced blade flex by checking engagement regularly. Proper rotary cutter maintenance keeps every future cutting curves session precise and safe.
Frequently Asked Questions (FAQs)
Can rotary cutters cut curves?
Yes, they absolutely can! With the right blade size, steady pressure, and small increments of fabric rotation instead of arm movement, your rotary cutter glides smoothly through curved seams, necklines, and armholes with real precision.
What is the best way to cut a curve?
Is it really the blade that matters most, or your motion? Truth is, both count: pick the right blade size, then use short, controlled cuts while pivoting the fabric gradually for smooth, accurate curves every time.
Is there a trick to using a rotary cutter?
The real trick is pivoting the fabric, not twisting your wrist. Keep light, even blade pressure, grip the ergonomic handle firmly, and rotate gradually through each curve—this prevents fabric shifting and delivers clean, precise cuts every time.
What tool is used to cut curves?
Your trusty curve-taming companion? A rotary cutter, paired with a sharp 28mm or 45mm blade and curve-friendly templates. This combo delivers smooth, sewing-precision cuts on armholes, necklines, and tight arcs without shredding your fabric’s edges.
How often should rotary cutter mats be replaced?
Plan on swapping your self-healing cutting mat every 1–2 years with daily studio use, or up to 3–5 years for lighter hobby work. Watch for deep grooves, warping, or fading grid lines—those signal it’s time.
Can rotary cutters cut through leather or vinyl?
Yes—think of your blade as a scalpel switching targets. With carbide blades for durability, they slice leather up to 3mm or vinyl smoothly. Score tight curves first, use light pressure, and watch for heat buildup scorching edges.
What causes a rotary cutter to skip stitches?
Skipped stitches actually trace back to your sewing machine, not the rotary cutter: dull needles, wrong needle size, loose thread tension, sloppy bobbin winding, or off machine timing all disrupt stitch formation, especially on curved seams needing precise fabric manipulation.
Is it safe to cut curves alone?
Cutting solo? You’re the sole "curve-ator" of your project! It’s safe with the right setup: sharp blade, secured mat, weighted pattern, gloves for tricky curves, and slow, deliberate strokes to prevent slips or fatigue.
How do you store rotary cutters between projects?
Lock your blade and stash it in a padded case with elastic guards, sorted by size. Keep it dry, cool, and away from humidity—rust ruins sharpness fast. Wipe with light oil, and store spares separately for lasting blade protection.
Conclusion
A quilting teacher once traced a scalloped hem freehand for twenty minutes, fighting the blade the whole way—then switched to short strokes and finished in three. That’s the real secret behind learning how to cut curves with rotary cutter techniques: patience beats speed every time.
Small pivots, steady pressure, sharp blades. Your armholes and necklines will thank you with edges so smooth they look pressed, not pieced. Trust the rhythm, not the rush, and every curve becomes second nature.