This site is supported by our readers. We may earn a commission, at no cost to you, if you purchase through links.
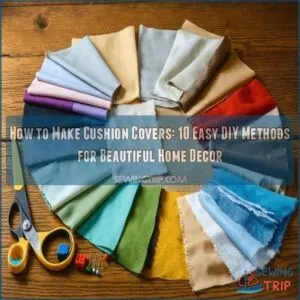
Start by measuring your cushion and cutting fabric pieces one inch larger on all sides.
For a basic envelope-style cover, you’ll need three pieces: one front panel and two overlapping back panels.
Fold and press the edges, then pin everything in place.
Sewing straight lines is all it takes – no zippers needed!
You can whip up a custom cover in under an hour, even if you’re new to sewing.
The secret to professional-looking results lies in choosing the right fabric and mastering a few key techniques.
Table Of Contents
- Key Takeaways
- Choosing The Right Fabric
- How to Make a Cushion Cover
- Cushion Cover Patterns and Designs
- Making a Cushion Cover Without a Zipper
- Upcycling Old Shirts and Scraps
- Sewing Cushions 101: Tips and Tricks
- Working With Different Fabrics and Techniques
- The Benefits of Making Your Own Cushion Covers
- Design Ideas and Inspiration
- Advanced Techniques and Variations
- Frequently Asked Questions (FAQs)
- Conclusion
Key Takeaways
- You’ll need just three fabric pieces to make a basic envelope-style cushion cover – one front panel and two overlapping back panels, with measurements one inch larger than your cushion on all sides.
- You can create custom covers without zippers by using the envelope-style design, which lets you easily slip cushion inserts in and out while maintaining a clean, professional finish.
- You’ll get the best results by choosing fabric that matches your cushion’s purpose – sturdy cotton for everyday use, water-resistant materials for outdoor furniture, or hypoallergenic options for those with sensitivities.
- You can transform old shirts and fabric scraps into unique cushion covers by cutting along seams, removing heavy prints, and stitching pieces together with reinforced joins for durability.
Choosing The Right Fabric
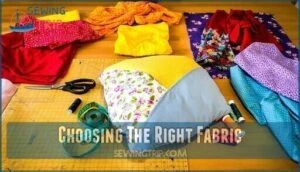
You’ll need to pick a fabric that matches your cushion’s purpose, whether you want something sturdy like cotton for everyday use or silk for decoration.
Fabric choice should also consider factors like allergies and washing requirements, so you can create cushion covers that’ll last and stay comfortable.
Hypoallergenic Options
Comfort meets care when choosing hypoallergenic fabrics for your cushion covers. If you’re sensitive to certain materials, selecting the right fabric isn’t just about aesthetics—it’s about creating a sneeze-free, itch-free space you’ll love.
- Opt for tightly woven fabrics that trap fewer allergens
- Look for certified hypoallergenic materials with non-toxic dyes
- Choose fabrics pre-washed to remove chemical residues
- Consider microfiber options specifically designed for allergy sufferers
Natural Fibers and Durability
For lasting cushion covers, natural fibers are your best friends.
Cotton offers breathability and easy care, while linen ages beautifully with each wash.
Unlike synthetic materials, these fibers won’t pill or fade quickly.
You’ll find medium-weight fabrics around 200-300 GSM hit the sweet spot for durability.
For extra peace of mind, look for natural dyes and stain-resistant treatments that won’t harm the environment.
Considerations for Functional Use
The way you’ll use your cushion covers should guide your fabric choices.
For indoor seating, soft cotton blends offer comfort while being easy to wash.
If you’re making covers for outdoor furniture, consider comparing polyester vs olefin fabric vs Sunbrella for the perfect water-resistant fabric.
If you’re making covers for outdoor furniture, pick water-resistant fabrics like treated canvas or Sunbrella.
High-traffic areas need stain-resistant materials, while kids’ spaces benefit from washable, durable options that can handle spills and rough play.
How to Make a Cushion Cover
You’ll find that making your own cushion covers is easier than you think, with just basic sewing supplies and your choice of fabric. To achieve a professional finish, consider investing in quality sewing equipment, such as sharp pinking shears, and learn how to cut & sew for a flawless result.
Whether you prefer a simple envelope-style or zippered design, you can create custom covers that match your home’s style in about an hour.
Measuring and Cutting Fabric
Start by measuring your cushion carefully – width and length, plus 2cm for seam allowances.
Cut your fabric following the grain line, adding enough for a double-sided cover plus overlap.
For standard cushions, you’ll want the front piece matching your measurements, and two back pieces each measuring half the width plus 5cm.
Mark your cuts with tailor’s chalk or washable marker.
Sewing a Zippered Cushion Cover
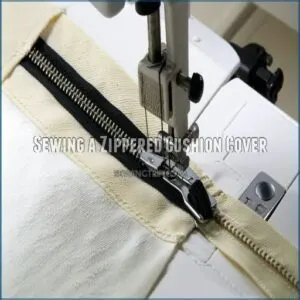
Installing a zipper in your cushion cover creates a sleek, professional finish that’ll make your DIY project shine, especially when using an invisible zipper for a seamless look.
Cut two fabric pieces equal to your cushion size plus one inch for seam allowance.
For a more detailed approach, check out sewing a zipper by hand for a perfect finish.
Here’s your foolproof game plan:
- Pin zipper face-down along the bottom edge
- Attach zipper foot to your machine
- Sew parallel lines 1/4 inch from zipper teeth
- Press seams open and topstitch for a polished look
Creating an Envelope-Style Cover
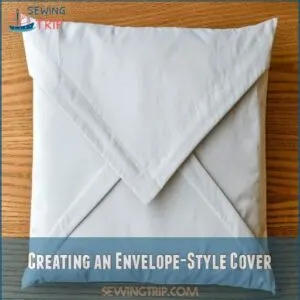
Moving from zippers to a simpler option, envelope-style covers offer a clean look without hardware.
You can find various envelope cushion cover designs online that can inspire your DIY project, such as those on envelope cushion cover websites.
You’ll fold your fabric to create overlapping back panels that naturally close around your cushion insert.
Make two parallel hems along the overlap edges, then align your front piece with the overlapped back pieces, right sides together.
Pin the edges, sew around the perimeter, and you’re done!
Cushion Cover Patterns and Designs
You’ll find a range of cushion cover patterns to match your style, from simple envelope closures to decorative buttoned designs and piped edges.
Whether you prefer traditional zippered covers or want to experiment with patchwork and color block prints,
you can create custom cushion covers that fit your home’s decor perfectly.
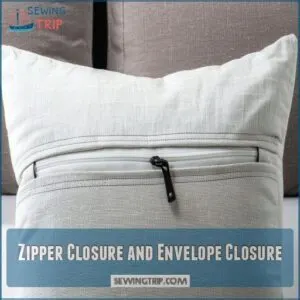
Zipper Closure and Envelope Closure
The choice between zipper and envelope closures shapes your cushion cover’s functionality and style.
Zippers offer a snug, fitted fit that keeps cushions firmly in place, while envelope closures create a clean look without hardware.
To make sure you get a professional finish, choose durable and washable fabrics like cotton, linen, and canvas.
Here’s what makes each option unique:
- Zipper closures allow for easy insert removal and washing, perfect for high-traffic areas
- Envelope styles need no special notions and work great for occasional-use pillows
- Both methods take about the same time to sew, so pick based on your needs
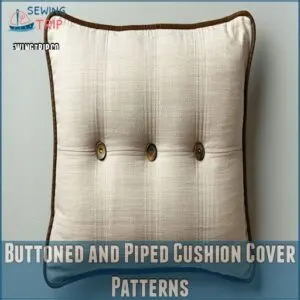
Buttoned and Piped Cushion Cover Patterns
Buttoned and piped cushion covers add sophisticated flair to any room.
For button placement, mark evenly spaced points across your fabric, creating decorative tufting when sewn.
You can find various styles of buttoned and piped cushion cover patterns online.
When adding piping, start by wrapping cord with bias-cut fabric strips, then stitch along seams for a polished edge.
Pair contrasting buttons and piping with your main fabric for eye-catching detail.
These techniques work beautifully with both modern and traditional designs.
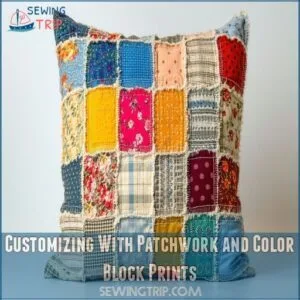
Customizing With Patchwork and Color Block Prints
Transform plain cushions into statement pieces with patchwork and color block designs.
Mix and match fabric scraps in complementary colors for a unique patchwork pattern, or create bold geometric shapes using solid-colored fabrics for modern color blocking.
You’ll need consistent seam allowances for clean lines.
Experiment with contrasting textures like velvet against linen to add depth, or try alternating light and dark fabrics for visual impact.
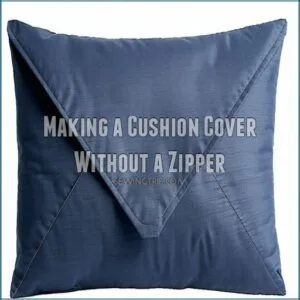
Making a Cushion Cover Without a Zipper
To unlock your creativity and bring unique personality to your home decor, consider seeking inspiration from diverse sources. You’ll learn how to make a cushion cover without the hassle of installing a zipper, using just three pieces of fabric and basic sewing skills.
The envelope-style design lets you easily slip your cushion insert in and out while creating a clean, professional finish that looks great in any room.
Preparing Your Fabric
Preparing fabric for your cushion cover starts with accurate measurements, considering the weight, texture, and durability of the fabric for your lifestyle, such as choosing the perfect fabric.
Pre-wash your chosen material to prevent future shrinkage, then iron it flat to remove any wrinkles.
Cut your fabric into three pieces: one front panel matching your cushion’s dimensions plus a 1-inch seam allowance, and two back panels that overlap.
Test your fabric’s durability with a quick stretch test before proceeding.
Sewing The Bottom Edge and Assembling Pieces
Now that your fabric is ready, let’s sew the bottom edge of your cushion cover. Start with your front piece facing up, then align the back pieces with overlapping edges.
Here’s what you’ll need to do:
- Pin all layers together securely
- Check fabric alignment is perfect
- Start with a backstitch at one corner
- Sew along the bottom edge with even pressure
- Double-check seam allowance stays consistent
Keep steady pressure on the fabric as you guide it through your machine, maintaining that perfect 1cm seam allowance throughout.
Finishing The Edges and Turning The Cover
After sewing your seams, trim any excess fabric to 1/4 inch and clip the corners at a 45-degree angle to reduce bulk.
Press your seams open with an iron.
Turn the cover right side out through the opening you left.
Use a chopstick or point turner to gently push out the corners until they’re crisp, being careful not to poke through the fabric.
Upcycling Old Shirts and Scraps
You’ll find endless possibilities in your closet by turning old shirts and fabric scraps into beautiful cushion covers that match your style.
With a few basic supplies and simple sewing techniques, you can transform these forgotten items into unique pieces using essential tools like quilting pins, sewing clips, and rotary cutters found in various tutorials sewing jobs from home, and beautiful home decor pieces while helping the environment.
Working With T-Shirt Fabric
T-shirt fabric offers a perfect starting point for your cushion cover journey.
Its forgiving stretch and soft texture make it ideal for beginners.
Here’s how to transform your old shirts into comfy cushion covers:
- Pick shirts with minimal wear and strong colors
- Cut along the side seams to create flat pieces
- Remove any graphics or heavy prints
- Choose shirts with similar fabric weights for consistency
Stitching Together Scrap Fabric Pieces
Once you’ve collected enough fabric scraps, lay them out in a pattern that fits your cushion dimensions.
Start by sewing smaller pieces together to form larger sections, matching fabric weights and thicknesses.
Press seams open as you go to keep everything flat.
For best results, align patterns and grains when possible, and reinforce joins with a second row of stitching for durability.
Creating a Unique and Eco-Friendly Cover
Transforming old clothing into stunning cushion covers lets you create sustainable home decor while giving new life to forgotten fabrics.
Here’s how to make your eco-friendly masterpiece shine:
- Mix different fabric textures and patterns to create visual interest – think denim with silk, or cotton with linen
- Use natural dyes from kitchen scraps like onion skins or beetroot for unique colors
- Layer contrasting pieces in a patchwork style for added dimension and personality
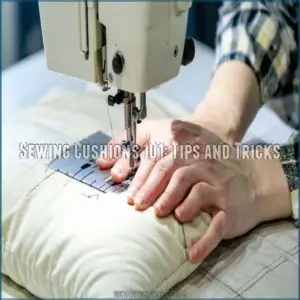
Sewing Cushions 101: Tips and Tricks
You’ll find essential techniques to help you create beautifully finished cushion covers, from selecting the right cushion insert size to proper fabric pressing methods.
Cushion insert size and fabric pressing are just two of the techniques covered.
Whether you’re working with pins, clips, or need to fix a mistake with your seam ripper, these practical tips will guide you through each step of the cushion-making process.
Choosing The Right Size of Cushion Insert
When choosing a cushion insert, size matters more than you might think.
For a plump, professional look, select an insert that’s 1-2 inches larger than your finished cover dimensions on all sides.
This makes sure your cushion stays full and shapely, without looking deflated.
| Insert Size | Cover Size | Final Look |
|---|---|---|
| 18" x 18" | 16" x 16" | Plump |
| 20" x 20" | 18" x 18" | Full |
| 24" x 24" | 22" x 22" | Shapely |
Pressing Fabric and Using Pins or Clips
Before your first cut, press your fabric with a hot iron to remove wrinkles and guarantee accurate measurements.
Pin or clip your fabric pieces together every 3-4 inches along the seam lines, keeping edges aligned perfectly. Using the correct pinning technique, as described in how to sew two pieces of fabric together, is crucial to prevent shifting during sewing.
If you’re working with delicate fabrics, opt for clips instead of pins to avoid leaving marks.
Always place pins perpendicular to the seam line for smooth machine sewing.
Undoing Mistakes With a Seam Ripper
Everyone makes sewing mistakes, and having a seam ripper in your toolkit is like having an undo button for your stitches.
Here’s how to use it effectively:
- Hold the seam ripper with the point facing away from you
- Slide the sharp inner curve under the stitches you want to remove
- Pull gently upward to cut through threads
- Brush away loose threads with your fingers
Keep your fabric taut while working to avoid accidental snags or tears.
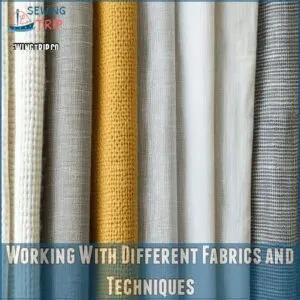
Working With Different Fabrics and Techniques
You’ll find it easy to work with knit fabrics, quilting materials, and crochet patterns to create unique cushion covers that match your style.
Whether you’re using stretchy materials that need special stitches or adding elastic edges for a snug fit, these techniques will help you make professional-looking covers that last.
Knit Fabric and Stretch Stitch
Knit fabrics bring a cozy, stretchy dimension to your cushion covers, but they need special handling.
Set your sewing machine to a stretch stitch or zigzag setting to prevent popped seams.
Work with jersey, fleece, or rib knit fabrics by using a ballpoint needle and polyester thread.
Keep a light touch on the presser foot—letting the fabric feed naturally prevents stretching and distortion.
Crochet and Quilted Cushion Covers
While knit fabrics offer stretch, crochet and quilted cushion covers bring unique textures to your home.
You’ll need specific yarn types for crochet or fabric squares for quilting to match your vision.
Here’s what makes these covers special:
- Creating granny squares lets you play with endless color combinations
- Quilting patterns often originate from traditional designs, which have been influenced by diverse cultures, reflecting cultural identity and heritage through techniques like patchwork and quilting techniques. Quilting patterns tell stories through fabric choices
- Both methods feel therapeutic and meditative
- Your finished pieces become family heirlooms
Adding Elastic or Drawstring
Adding elastic or drawstring closures transforms your cushion cover’s functionality and style.
When working with elastic, consider using 1-way, 2-way, or 4-way stretch materials for a flexible and secure fit.
Position elastic bands along the edges for a snug fit, or create a channel for threading a drawstring through.
Both methods offer excellent tension control while keeping your cushion secure.
For best results, use a wider elastic band (1/2 inch) or sturdy cotton cord that won’t twist inside the casing.
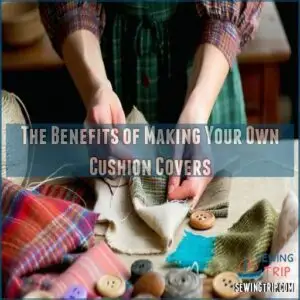
The Benefits of Making Your Own Cushion Covers
You’ll save money and express your creativity when you make your own cushion covers using materials you already have at home.
Creating custom cushion covers also helps you develop useful sewing skills while matching your home’s exact style and color scheme.
Customization and Expressing Creativity
Creating your own cushion covers lets you express your unique style in ways store-bought options never could.
You’re free to mix patterns, play with textures, and bring your design dreams to life.
Here’s what you can customize:
- Bold geometric prints paired with subtle solids for a modern vibe
- Vintage fabrics mixed with contemporary trims for eclectic charm
- Natural linens adorned with hand-embroidered details
- Seasonal patterns that capture holiday spirit or change with your mood
Improving Sewing Skills and Saving Money
Making your own cushion covers serves as a perfect training ground for developing essential sewing skills.
You’ll master straight stitches, learn to work with different fabrics, and save money compared to store-bought options.
Each project helps build confidence with zippers, piping, and buttonholes.
Plus, fabric remnants and upcycled materials can greatly reduce costs while providing valuable hands-on experience with various techniques.
Enjoying The Process and Sense of Accomplishment
Beyond saving money and building skills, each cushion cover you complete brings its own rewards.
You’ll feel a sense of pride seeing your handiwork displayed in your home, knowing you’ve created something unique.
The process itself becomes a form of relaxation – from selecting fabrics to adding final touches.
When guests admire your cushions, you’ll love sharing the story behind each one.
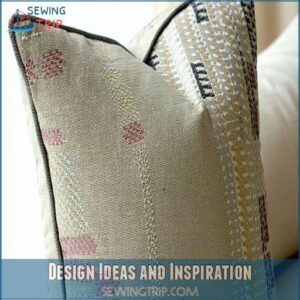
Design Ideas and Inspiration
You’ll discover endless design options for your cushion covers, from lively patchwork patterns to seasonal themes that match your home’s style.
Cushion covers can be transformed into eye-catching home decor pieces that reflect your creativity.
With simple embellishments like felt leaves and hook-and-latch designs, you can transform basic cushion covers into eye-catching home decor pieces that reflect your creativity.
Patchwork Patterns and Latch Hook Embellishments
Patchwork patterns let you transform fabric scraps into stunning cushion designs.
Start with simple squares arranged in a classic checkerboard, then experiment with triangles and hexagons as your confidence grows.
Add depth with latch hook embellishments – they’re surprisingly easy to master.
Choose chunky yarn for bold texture or fine wool for delicate details.
Mix different hook sizes to create varied patterns and visual interest.
Coordinating With Decor and Seasonal Themes
Your cushion covers can flow seamlessly with your home’s style through the seasons.
Start by selecting fabrics that echo your room’s color scheme – think rich burgundies and golds for fall, crisp whites and silvers for winter.
You’ll want patterns that complement existing furniture without overwhelming the space.
Mix solid colors with subtle prints, and remember to keep a few neutral covers handy for year-round versatility.
Using Felt Leaves and Other Appliques
Felt leaf appliques transform ordinary cushion covers into striking nature-inspired pieces.
Cut leaf shapes from wool felt in autumn colors, then arrange them in flowing patterns before securing with a blanket stitch.
Mix different sizes and shapes for depth, or layer leaves for a 3D effect.
Try other applique designs like flowers, geometric shapes, or abstract patterns to match your style and decor theme.
Advanced Techniques and Variations
You’ll find new ways to expand your cushion-making skills with advanced techniques like tufting, piping edges, and working with specialty fabrics.
Once you’ve mastered these methods, you can create custom-sized covers with professional finishes that match any room’s style.
Tufted Cushion Covers and Custom Sizes
Creating tufted cushion covers transforms ordinary pillows into luxurious statement pieces.
With custom sizing, you’ll craft covers that fit perfectly while adding elegant diamond patterns or deep button tufting.
If you’re looking for inspiration or need to upgrade your existing covers, consider browsing tufted cushion designs.
Master precise measurements for professional-looking results.
Create stunning diamond patterns that catch the eye.
Add personality with vintage buttons or modern toggles.
Transform basic cushions into boutique-worthy pieces.
For custom sizes, measure twice and add 1 inch seam allowance on all sides.
Piped Edge Covers and Envelope-Style Covers
Piped edges add that perfect finishing touch to cushion covers, while envelope-style closures offer a clean, professional look.
Piping can be made by wrapping cord with bias tape, or using pre-made options.
Once you’ve mastered basic tufting, try combining piping with envelope closures for sophisticated results.
Remember to adjust your sewing machine’s zipper foot for smooth piping installation alongside the cover’s edges.
Experimenting With New Fabrics and Designs
Once you’ve mastered basic cushion cover techniques, you’ll love exploring new design possibilities.
Mix unexpected fabrics like velvet with linen, or combine vintage textiles with modern prints.
Try adding texture with chenille or bouclé, or create depth by layering different materials.
You can even experiment with metallic threads, sequins, or hand-embroidered details for unique, personalized touches that reflect your style.
Frequently Asked Questions (FAQs)
What is DIY cushion covers?
Like artists crafting their masterpiece, you’ll transform ordinary fabric into custom cushion covers.
They’re handmade cases that protect and beautify your cushions.
Letting you refresh your space without buying new furniture.
How long does it take to make a cushion cover?
Making a basic cushion cover typically takes 10-15 minutes for envelope style and 20-30 minutes with a zipper.
You’ll need extra time if you’re new to sewing or adding decorative elements.
What is a good pattern for a cushion cover?
Sarah chose the envelope pattern for her first cushion cover – it’s perfect for beginners.
You’ll love how it doesn’t need a zipper, just three fabric pieces that overlap at the back for easy assembly.
How do I choose a cushion cover?
Consider your room’s color scheme and pick a durable fabric that matches.
You’ll want washable materials for daily use.
Don’t forget to measure your cushions carefully before selecting a cover size.
Can you make a cushion cover with fabric?
Even if you’re not a sewing expert, you can create beautiful cushion covers with fabric.
You can start a business selling sewn items like custom cushion covers at craft fairs or online, but first, you’ll need basic supplies like scissors, pins, and a sewing machine to craft custom covers that match your style.
Why should you make your own cushion covers?
Making your own cushion covers lets you save money, personalize your space, and develop sewing skills.
You’ll express creativity through fabric choices and patterns while enjoying the satisfaction of crafting something unique by hand.
How much fabric do you need to make a cushion cover?
You’ll need 5 meters (1/2 yard) of fabric for a standard cushion cover. Add the cushion’s width plus 2cm for seams, and double the length plus extra for overlap and hems.
What is the best material to make cushion covers?
Durable denim and dynamic cotton deliver delightful cushion covers.
For your living space, choose natural fibers like cotton, linen, or velvet that’ll withstand daily use while staying soft.
They’re machine-washable and resist wear beautifully.
How do you make a cushion cover without zip or buttons?
Create an envelope-style cover by cutting two back pieces overlapping each other. Measure your cushion, add 5 inches for overlap, then sew the three pieces together with right sides facing inward.
How do you cut fabric for cushion covers?
Measure your cushion insert first, then add 1-2 inches for seam allowance.
Cut your fabric pieces with sharp scissors following chalk markings, ensuring straight edges and precise corners for a professional finish.
How do I fix puckered seams on cushion covers?
To fix puckered seams, reduce your sewing machine’s tension, use a walking foot, and press the fabric flat before stitching.
You’ll also want to avoid pulling or stretching the fabric while sewing.
Can cushion covers be made without a sewing machine?
You can make cushion covers by hand using basic running and whipstitches.
It’ll take longer than machine sewing,
but with sharp needles and strong thread, you’ll create beautiful covers through hand stitching.
Whats the best way to store unused covers?
Store cushion covers in breathable cotton bags or fold them neatly in a cool, dry drawer.
Add cedar blocks to prevent moths, and don’t compress them too tightly.
Label each cover for easy identification.
How often should cushion covers be washed?
Regular washing every 3-4 months keeps cushion covers fresh.
High-traffic areas might need monthly cleaning.
If you’ve got pets or kids, consider bi-weekly washes.
Don’t forget to check care labels first.
Why do my cushion corners look pointy and misshapen?
Pointy corners often result from insufficient trimming before turning the cover right-side out.
Clip the corners at a 45-degree angle, leaving a small margin, then use a pointed tool to push them out gently.
Conclusion
Like a butterfly emerging from its cocoon, your DIY cushion covers will transform your living space into something beautiful.
Now that you’ve learned how to make cushion covers using these simple techniques, you’re ready to create stunning pieces that reflect your style.
Whether you choose zippered designs or envelope closures, each cover you make adds a personal touch to your home.
Remember, practice makes perfect – so grab your fabric, fire up that sewing machine, and let your creativity soar!

