This site is supported by our readers. We may earn a commission, at no cost to you, if you purchase through links.
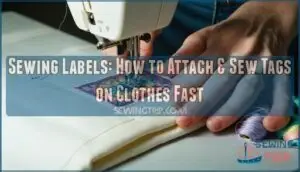
You’ll find them sewn into seams, necklines, or side panels of garments. They’re like a garment’s ID card, telling you everything from "wash in cold water" to "made by your favorite designer."
You can sew them by hand with basic stitches or use a machine for faster results. Some labels come with iron-on or adhesive backing, making attachment a breeze without threading a needle.
Whether you’re creating handmade items or adding personal touches to store-bought clothes, mastering label attachment opens up endless possibilities for customization and professional-looking finishes, allowing for personal touches and a garment’s ID card with care instructions.
Table Of Contents
Key Takeaways
- You’ll find several attachment methods for sewing labels – hand stitching gives you precise control, machine sewing offers speed and durability, while iron-on and stick-on options let you skip needles entirely
- Position your labels strategically inside seams, necklines, or side panels where they won’t irritate skin or show through lightweight fabrics – proper placement makes all the difference in professional results
- Different label materials serve different purposes – polyester offers durability, cotton provides eco-friendliness, satin adds luxury, and Tyvek resists water perfectly
- You’ll use labels for multiple functions including brand identification, care instructions, sizing information, and creating that polished, professional finish that distinguishes handmade items from amateur work
How to Sew Labels on Clothes
Sewing labels onto clothes gives your handmade pieces a professional finish while helping you identify your work later.
You can attach these fabric tags by hand for precision or use a sewing machine for speed and durability.
By Hand
When tackling hand sewing, you’ll discover that careful stitch placement makes all the difference in professional-looking results.
Choose a sturdy thread that matches your fabric’s weight—cotton for natural fibers, polyester for synthetics.
Match your thread to your fabric’s needs—cotton threads for natural materials, polyester for synthetics.
Position your sewing labels along inside seams where they won’t irritate skin or show through lightweight materials.
Master basic knotting techniques by securing your thread with a small backstitch before beginning.
Hand stitching offers superior control over label attachment methods, letting you adjust tension and placement as you work.
You can find a variety of supplies for sewing online.
The hand sewing benefits include precise positioning and custom label designs that reflect your personal style, making each garment uniquely yours through thoughtful sewing techniques.
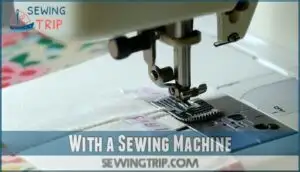
With a Sewing Machine
Machine sewing beats hand-stitching when you need speed and consistent results. Position your label at the neck or side seam allowance, about 1⁄2 inch from the edge.
Here’s your step-by-step approach:
- Set your machine to a tight zigzag stitch with shallow stitch length
- Tack down each corner with a few securing stitches first
- Sew around the entire perimeter for complete attachment
The zigzag stitch provides stretch and prevents puckering, while machine durability guarantees your labels won’t budge through countless washes. Understanding the machine’s basic functions guarantees a smooth sewing process.
How to Attach Fabric Without Sewing
Not all clothing labels require needle and thread—you can attach them quickly using heat or adhesive methods that save time and effort.
These no-sew options work perfectly when you need a fast solution or want to avoid potential stitching mishaps on delicate fabrics.
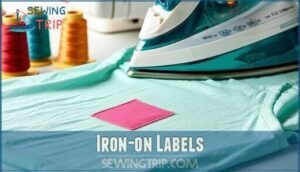
Iron-on Labels
Iron-on labels offer a quick solution when you’re short on time or sewing skills.
No needles, no problem – iron-on labels get the job done fast.
These fabric labels feature heat-activated adhesive that bonds permanently to most textiles through simple application steps.
Set your iron to medium-high heat settings (around 300°F) and position the label face-up on your garment’s interior.
Press firmly for 10-15 seconds, applying even pressure across the entire surface.
The ironon adhesive creates a durable bond that withstands regular washing cycles.
You can find a variety of customizable label options online.
| Aspect | Details |
|---|---|
| Heat Settings | Medium-high (300°F) for cotton, lower for synthetics |
| Application Steps | Position, press 10-15 seconds, cool completely |
| Fabric Types | Works best on cotton, polyester blends, avoid fleece |
| Durability Testing | Withstands 25-50 wash cycles at 40°C |
| Design Considerations | Choose contrasting colors for visibility, simple fonts for clarity |
Most sewing labels work well with this method, though design considerations matter—choose bold text that’ll remain readable after multiple washes.
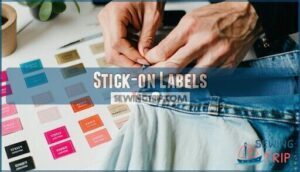
Stick-on Labels
Stick-on labels offer instant application without needles or thread. These adhesive labels work perfectly for temporary adhesion on delicate fabrics, allowing quick customization for short-term wear. Simply peel and press for immediate results.
- Save precious time – Apply stickon labels in seconds versus minutes of sewing
- Protect your favorite garments – No needle holes or permanent alterations to delicate materials
- Embrace creative freedom – Repositioning labels lets you experiment with different looks effortlessly
Adhesive options include fabric tape, or you can explore self-adhesive options for easy attachment.
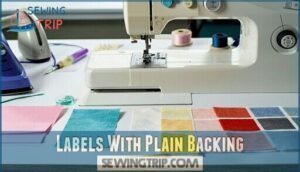
Labels With Plain Backing
For a polished finish without stitching, plain backing materials offer maximum flexibility in label application.
These clothing labels lack adhesive, so you’ll need fabric glue, sew-on snaps, or iron-on backing for secure attachment. Choose label designs that complement your fabric compatibility—subtle whites work beautifully on darker materials, while bold contrasts make statements.
Many options are available if you need more plain backing. Adhesive options range from temporary fabric glue to permanent heat-seal methods, making sewing labels accessible for any skill level with maximum flexibility.
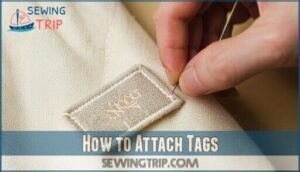
How to Attach Tags
Tags come in two main types: hang tags that dangle from your garment and price tags that need careful removal or reattachment.
You’ll master both techniques quickly with the right approach and a steady hand.
Price Tags or Hang Tags
Price tags and hang tags serve as your garment’s first impression with customers.
Choose hang tag materials like cardstock or recycled paper for durability—cardstock accounts for over 80% of retail use.
Strategic tag placement near the neckline showcases your brand while QR codes add interactive features.
Security features prevent theft on higher-value items.
Consider various tag options for different product lines.
Effective pricing strategies and professional tag design boost perceived value by 13%, making your clothing labels worth the investment with a clear brand showcase.
Reattaching Tags
Sometimes clothing labels come loose or fall off completely. When reattaching tags, use matching thread color to maintain a professional appearance. Remove any old adhesive residue first, then position the label in its original spot.
For sewing labels back on, try a whipstitch or ladder stitch for delicate garments. Knowing how to do easy hand sewing can help with this task.
Reinforcement stitching at start and end points prevents future unraveling. Lost tag solutions include double-sided fabric tape for temporary fixes or iron on labels for permanent attachment. Secure tag placement guarantees your garment labels stay put through multiple washes.
Frequently Asked Questions (FAQs)
What does "sewn-in label" mean?
About 90% of garments contain sewn-in labels, which you’ll find permanently attached inside clothing during manufacturing.
These labels are integrated into seams, providing durable branding and care information that won’t peel off like stick-on alternatives, which supports durable branding.
What is the purpose of fabric labels?
Fabric labels serve multiple purposes: they identify your brand, provide care instructions, display sizing information, and create a professional appearance.
You’ll build customer recognition while ensuring proper garment maintenance through these essential tags.
What is the difference between a tag and a label?
Tags hang from garments temporarily, while labels are permanently attached inside clothing.
You’ll find tags on new clothes with pricing and care info, but labels stay sewn into seams providing brand identification and washing instructions, which includes care info.
How to sew labels on clothes?
Position your label carefully, pin it securely, then sew around all edges using straight or zigzag stitches.
You can attach labels by hand or machine, depending on your preference and available tools.
What materials are sewing labels made from?
You’ll find sewing labels crafted from polyester, cotton, satin, nylon, Tyvek, leather, metal, TPU, and PVC.
Each material offers different benefits—polyester‘s durable, cotton’s eco-friendly, satin’s luxurious, while Tyvek resists water perfectly.
How do you design custom clothing labels?
Nike’s swoosh logo started as a simple sketch—your custom clothing label begins the same way.
You’ll choose fonts, colors, and text that reflect your brand.
Consider size constraints, fabric compatibility, and washing durability when creating your design for professional manufacturing.
Whats the difference between woven and printed labels?
Woven labels use a loom to create durable designs with threads, making them wash-resistant and long-lasting.
Printed labels apply designs onto fabric surfaces, offering cost-effective customization but less durability than woven options.
Where should brand labels be placed on garments?
You’ll typically place brand labels at the back neck inside the collar, along side seams, at the hem, on sleeves for visibility, or on waistbands for sizing information.
How do you choose the right label backing?
Think of backing as your label’s foundation—it determines how it’ll bond with fabric.
You’ll choose iron-on for heat activation, stick-on for instant adhesion, or plain backing when you’re sewing by hand or machine instead.
Conclusion
Mastering what’s sewing labels will absolutely transform your sewing game forever.
You’ve now learned multiple techniques to attach labels professionally, from hand-stitching to machine methods, plus no-sew alternatives like iron-on and adhesive options.
Whether you’re adding care instructions, branding handmade items, or reattaching store tags, you’ve got the skills to make your garments look polished and complete.
Practice these methods to find your preferred technique for different projects and make your garments look more professional.


