This site is supported by our readers. We may earn a commission, at no cost to you, if you purchase through links.
 Basic sewing lessons start with gathering essential tools like fabric scissors, measuring tape, pins, and seam ripper alongside your chosen needle and thread.
You’ll master fundamental techniques including straight stitching, backstitch, and hemming through hands-on practice with simple projects like pillowcases or tote bags.
These foundational skills build confidence whether you’re hand sewing or using a machine, teaching you fabric selection, pattern reading, and seam finishing.
Most beginners can complete their first project within a few hours of focused practice, understanding tension settings, proper cutting techniques, and common troubleshooting methods that prevent frustration down the road, by also learning about common troubleshooting.
Table Of Contents
Key Takeaways
- You’ll need essential tools like fabric scissors, measuring tape, pins, thread, needles, and a seam ripper before starting any project
- Start with beginner-friendly fabrics like cotton or linen that won’t stretch or slip, and practice basic stitches like straight stitch and backstitch on simple projects
- Master your sewing machine by learning proper threading, tension adjustment, and basic troubleshooting to prevent frustrating interruptions
- Regular practice with easy projects like pillowcases builds confidence and muscle memory faster than jumping into complex garments
Basic Sewing Tools
You’ll need the right tools before you start sewing, just like a chef needs sharp knives before cooking dinner.
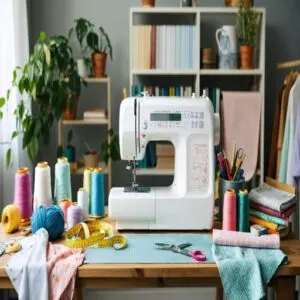
A basic sewing kit should include fabric scissors, measuring tape, pins, thread, needles, and a seam ripper for those inevitable mistakes we all make, which can be easily fixed with a seam ripper.
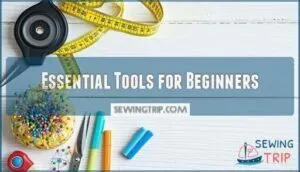
Essential Tools for Beginners
Where should you begin your sewing journey? Start with these essential sewing tools that’ll transform fabric scraps into finished projects.
These sewing basics make sewing for beginners manageable and enjoyable.
Your toolkit needs:
- Measuring Tools – tape measure and ruler for precise dimensions
- Cutting Implements – sharp fabric scissors and rotary cutter
- Marking Tools – fabric chalk or washable pens for guidelines
- Pin Cushion with assorted pins to secure pieces temporarily
- Seam Rippers for fixing mistakes without starting over
Ensuring accuracy requires specialized measuring devices.
Quality sewing supplies prevent headaches later.
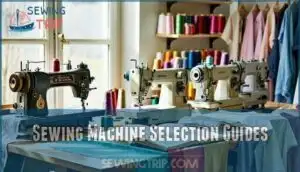
Sewing Machine Selection Guides
Choosing your first sewing machine requires smart Budget Considerations and Brand Comparison. Mechanical machines cost less but electronic models offer better precision.
Check User Reviews for real experiences with Machine Features like automatic threading and speed control. Compare Warranty Details across brands—Brother and Janome lead in reliability.
Focus on sewing machine basics: straight stitch, zigzag, and buttonhole functions. Skip fancy decorative stitches initially.
Test sewing machine operation in-store when possible. A key factor is to verify a good quality motor for handling thicker fabrics.
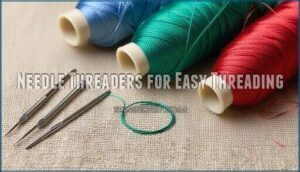
Needle Threaders for Easy Threading
Threading needles doesn’t have to feel like performing surgery with mittens on! Needle threaders transform this frustrating task into a breeze, making sewing lessons much more enjoyable for beginners.
Threading needles without threaders is like trying to thread a needle blindfolded during an earthquake!
Types Threaders come in wire and automatic versions. Threading Difficulties disappear when you master these handy tools. For sewing machine threading, they work just as well as hand sewing.
Here are five game-changing threading tips:
- Wire threaders cost pennies but save hours of squinting
- Automatic threaders built into machines eliminate guesswork
- Threader Alternatives include using white backgrounds or magnifying glasses
- Ergonomic Threading tools reduce hand strain during long projects
- Threader Maintenance means keeping them clean and storing carefully
These simple tools turn threading from a chore into child’s play, letting you focus on actual sewing tips instead of wrestling with tiny needle eyes.
Fabric Selection Basics
Choosing the right fabric can make or break your first sewing project, so you’ll want to start with beginner-friendly materials like cotton or linen that won’t stretch or slip around.
These stable fabrics forgive mistakes and handle easily, giving you confidence as you learn basic cutting and stitching techniques.
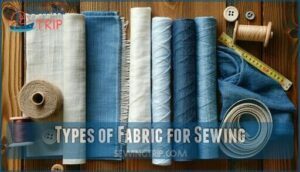
Types of Fabric for Sewing
Your fabric selection sets the foundation for every successful project. Natural fibers like cotton offer stability and breathability, making them perfect for sewing for beginners.
Choose cotton for forgiving fabric that breathes—your first sewing success starts here.
Synthetic fabrics such as polyester provide durability and easy care. Understanding fabric weight helps match materials to your vision—lightweight cottons for summer tops, heavier denims for structured pieces.
Fabric weave affects drape and handling, with plain weaves being most forgiving. Knit fabrics stretch and require different techniques than woven materials, so start with stable wovens for your first sewing lessons.
For beginners, cotton lawn is a great choice due to its tight weave and ease of handling.
Choosing Right Thread for Fabric
Right Thread Material selection makes the difference between amateur and professional results.
Cotton thread pairs perfectly with cotton fabric, while polyester handles synthetic materials better. Check Fabric Weight first—heavyweight materials need stronger thread, lightweight fabrics require finer options.
Color Matching works best in natural light, not under store fluorescents. Special Threads like metallic or elastic serve specific Project Type needs.
Your sewing machine and sewing techniques improve dramatically when thread complements your chosen material perfectly. For ideal results, consider matching thread fiber to the fabric type.
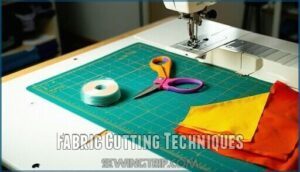
Fabric Cutting Techniques
Mastering precise fabric cutting transforms your sewing projects from amateur to professional.
Follow these essential sewing techniques for flawless results:
- Prepare your workspace – Use pattern weights and verify proper grain alignment before cutting
- Choose the right tools – Sharp fabric scissors or rotary cutters deliver clean edges and accurate sewing measurements
- Master cutting curves technique – Take your time with curved seams for perfect fits
These sewing skills create the foundation for all successful projects.
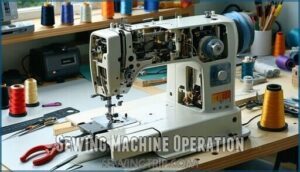
Sewing Machine Operation
Getting your sewing machine running smoothly isn’t rocket science, but it’ll make the difference between loving your new hobby and wanting to throw fabric across the room.
You’ll master threading, tension adjustments, and basic troubleshooting to keep your machine humming along without those frustrating hiccups that make beginners quit, which will help you enjoy your hobby with smoothly running equipment.
Threading a Sewing Machine
Every successful sewing project starts with bobbin threading and proper sewing machine setup.
You’ll need to match needle types to your fabric and select appropriate thread types for best results.
Follow your machine’s threading path carefully, ensuring the thread brands you choose work well with your sewing machine needles.
When troubleshooting threading issues, check that everything’s seated correctly before adjusting tension settings or machine tension.
Adjusting Machine Tension
Your sewing machine tension controls thread tightness for perfect stitches.
Start with manufacturer settings, then adjust the upper dial for Fabric Compatibility.
Test on fabric scraps first—loose stitches need tighter tension, puckered fabric needs looser settings.
Check Bobbin Tension and Thread Type compatibility for ideal Stitch Quality and smooth Tension Troubleshooting.
Troubleshooting Common Issues
When tension problems won’t budge, don’t panic—most sewing machine hiccups have simple solutions.
Here’s your troubleshooting toolkit:
- Skipped Stitches: Switch to fresh needles that match your fabric weight
- Fabric Feeding Issues: Clean lint from feed dogs and check presser foot pressure
- Bobbin Issues: Rewind bobbin evenly and make certain it’s inserted correctly
- Needle Breaks: Use proper needle types for your project and slow down stitching speed
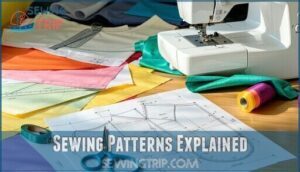
Sewing Patterns Explained
Sewing patterns are your roadmap to creating beautiful garments, but they can look like hieroglyphics at first glance.
You’ll master reading pattern symbols, making alterations for the perfect fit, and switching between paper and digital formats with confidence.
This will enable you to create garments with confidence.
Pattern Alteration Techniques
Now you can tackle fit issues head-on with pattern alteration techniques. Start with accurate body measurements—they’re your foundation for successful sewing patterns for beginners. Practice simple adjustments first: shortening sleeves or hemming pants builds confidence.
A key aspect is to ensure adequate ease for comfortable movement.
| Alteration Type | Best For | Difficulty |
|---|---|---|
| Lengthening/Shortening | Arms, legs, torso | Beginner |
| Bust Adjustments | Proper chest fit | Intermediate |
| Shoulder Adjustments | Comfort, mobility | Advanced |
| Combining Sizes | Mixed proportions | Intermediate |
Use tissue paper for pattern pieces when making adjustments. Sewing tutorial videos help visualize these changes. Remember, sewing instructions often include basic alteration guidance, so check your pattern envelope first.
Using Digital Patterns
Once you’ve mastered pattern alterations, digital sewing patterns become your next game-changer.
These pattern filetypes (usually PDFs) offer instant downloads and space-saving digital adjustments. You’ll print them at home, watching for printing issues like incorrect scaling—always check that test square first!
Layered patterns let you select specific sizes, while projecting patterns eliminates paper entirely.
Sewing tutorials often accompany these downloads, making sewing projects for beginners more accessible. Online sewing courses frequently use digital formats, perfect for modern sewing for beginners who want flexibility and convenience.
Hand Sewing Techniques
Hand sewing gives you complete control over every stitch, making it perfect for delicate work and quick repairs when your machine isn’t available.
You’ll master essential techniques like running stitches, backstitches, and button attachment that form the foundation of all sewing skills.
Basic Hand Stitches
When you learn to sew by hand, master these basic stitches first.
The Running stitch creates simple, even lines—perfect for basting and gathering fabric.
The Back stitch forms strong seams that won’t pull apart.
Use the Slip stitch for invisible hems and the Blanket stitch for decorative edges.
The Whip stitch quickly joins two pieces together.
These hand sewing techniques form your foundation!
Sewing Buttons and Fasteners
Buttons and zippers can make or break your handmade projects, so you’ll want to get this right.
Button types include flat buttons and shank buttons—flat ones work great for shirts while shank buttons suit heavier fabrics.
Here’s what you need to master:
- Zipper installation requires careful pinning and slow, steady stitching along the teeth
- Snap closures offer quick fastening—just hammer them through marked fabric points
- Hook-eye closures work perfectly for waistbands and provide invisible secure fastening
- Fastener alternatives like velcro give you flexibility for kids’ clothes and bags
- Basic stitches like backstitch guarantee your sewing button stays put through countless washes
Hand Sewing Tools
Now that you’ve learned buttoning techniques, the right hand sewing tools make all the difference.
Sharp needle types like sharps and betweens handle different fabrics perfectly. A good thimble with comfortable ergonomic handles protects fingers during long sessions.
Threaders explained simply – they guide thread through needle eyes effortlessly. Beeswax benefits include smoother thread flow and reduced tangling.
For a wide selection, you can often find specialty sewing supplies online.
These basic sewing skills transform your beginner sewing journey, making each sewing guide project enjoyable. You’ll learn to sew with confidence when quality tools support your creativity.
Learning Sewing Online
You’ll find countless online sewing classes that break down complex techniques into manageable steps, perfect for learning at your own pace.
Online communities connect you with experienced sewers who share tips, troubleshoot problems, and cheer you on through every project milestone, providing a sense of belonging and community.
Online Classes and Tutorials
After mastering hand sewing techniques, you’ll want to expand your skills through online learning.
Online sewing courses offer flexibility that fits your schedule perfectly. One can also explore pattern-free sewing for creative projects.
Here are three top beginner resources for online learning:
- YouTube channels like Made to Sew provide free tutorials with step-by-step guidance
- Skillshare and Udemy offer structured courses averaging $21 per session with expert techniques
- Craftsy’s interactive learning platform features 200+ lessons with 4.7/5 ratings
These platforms make cost comparison easy—Udemy courses drop to $5.64 during sales. Most offer certification programs upon completion, helping you track progress in your sewing guide journey.
Sewing Communities and Forums
Online classes give you knowledge, but sewing communities and forums provide something equally valuable: connection and ongoing support.
You’ll find seasoned sewers enthusiastic to share their expertise through skill exchange opportunities and collaborative projects that push your abilities forward.
These vibrant sewing community spaces offer incredible sewing resources:
- Online support from experienced members who’ve faced your exact challenges
- Project showcases where you can display your work and gain confidence
- Pattern sharing that expands your project library without extra costs
- Sewing tips for beginners shared through sewing social media groups and dedicated forums
Joining these communities transforms solitary sewing education into an interactive experience where you’ll make friends who truly understand your fabric obsession.
Sewing Machine Maintenance
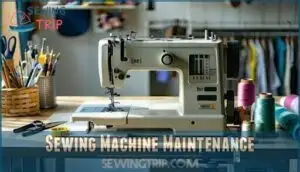
Your sewing machine needs regular care to perform at its best and last for years.
Simple maintenance tasks like cleaning lint buildup and replacing worn needles will keep your machine running smoothly and prevent costly repairs down the road, which is crucial for the longevity of your machine.
Cleaning and Oiling Machines
Your machine needs regular cleaning and oiling to prevent jams.
Clean the bobbin area weekly, removing lint with a small brush. Oil moving parts monthly following your manual’s guidance.
Oiling frequency depends on usage—heavy sewers need more frequent maintenance. Clean the motor area quarterly and listen for unusual troubleshooting noise during operation.
Proper machine sewing maintenance keeps your sewing tools and supplies working smoothly.
Replacing Needles and Parts
Now you’ll replace sewing needles every 6-10 hours or when you hear popping sounds.
Different needle types work with specific fabrics—universal for woven, ballpoint for knits.
Consider these replacement essentials:
- Turn off your machine and raise the needle to its highest position
- Match needle size to fabric weight (70/10 for delicate, 100/16 for heavy)
- Check part compatibility with your machine brand before purchasing
Refer to a detailed needle size guide for ideal results.
Fresh needles prevent thread breaks and improve stitch quality substantially.
Regular Maintenance Tips
Beyond needle replacement, consistent care keeps your machine humming smoothly. Follow this sewing maintenance routine to avoid costly repairs and frustrating breakdowns.
Weekly maintenance checklist:
- Oiling Frequency: Apply machine oil to moving parts monthly
- Bobbin Cleaning: Remove lint buildup from bobbin case weekly
- Tension Calibration: Test sewing machine tension adjustment on scraps
- Belt Inspection: Check drive belt for cracks or looseness
- Needle Replacement: Switch needles after every major project
Sewing for Beginners
Starting your sewing journey feels overwhelming, but you’ll master the basics faster than you think with the right projects and mindset.
You’ll build confidence quickly by avoiding common beginner traps and choosing simple patterns that teach essential skills without frustration.
Easy Sewing Projects
Several beginner-friendly sewing projects will jumpstart your creative journey. Start with Accessories DIY like scrunchies or simple headbands—they’re quick wins that build confidence.
Home Decor projects such as pillowcases and cloth napkins teach basic stitches while creating useful items. Tote bags make excellent Gift Ideas and introduce you to Beginner Garments construction.
Easy sewing repairs like hemming pants or patching holes develop practical skills. Upcycling Projects transform old clothing into trendy pieces, making DIY sewing projects both eco-friendly and budget-conscious.
These sewing projects for beginners provide hands-on practice with immediate, satisfying results.
Common Mistakes to Avoid
While traversing your sewing journey, watch out for these pitfalls that can derail your progress.
These common missteps often plague beginners, but you can sidestep them with awareness:
- Uneven seams happen when you rush—slow down and guide fabric steadily
- Fabric puckering occurs from tension problems—adjust your machine settings properly
- Crooked cutting ruins projects before you start—use sharp scissors and rulers
- Wrong needle choice causes skipped stitches—match needle size to fabric weight
- Ignoring grain lines creates wonky garments—follow pattern markings religiously
Master these sewing for beginners fundamentals during your sewing lessons.
Practice basic stitches regularly, and you’ll develop solid sewing skills practice habits that prevent frustration and guarantee success.
Frequently Asked Questions (FAQs)
How do I learn to sew?
Start by threading your needle and tying knots – like taking baby steps before running.
Practice straight stitches on scrap fabric first.
You’ll build confidence quickly through simple projects like pillowcases before tackling bigger dreams.
What do you learn in a sewing class?
You’ll learn threading your machine, basic stitches like straight and zigzag, cutting fabric accurately, and sewing seams properly.
Classes also cover essential tools, reading patterns, and hands-on practice with simple projects, which includes hands-on practice.
Should you practice sewing for beginners?
Eighty-five percent of sewing beginners quit within their first month without proper practice.
You’ll absolutely benefit from practicing basic sewing skills regularly.
Start with simple stitches and seams to build muscle memory and confidence before tackling complex projects.
Where can I learn sewing online for free?
YouTube offers free sewing tutorials from creators like WithWendy and Evelyn Wood.
AllFreeSewing provides hundreds of beginner patterns and guides.
Many fabric stores also host free online workshops and downloadable resources.
Where can I learn English sewing?
Like learning a foreign language, mastering English sewing terminology opens up a global community of patterns and tutorials.
You’ll find extensive English sewing lessons on YouTube channels, websites like AllFreeSewing, and through online sewing courses that teach both vocabulary and techniques, which helps in understanding the global community of sewing.
Who are the best online sewing classes for beginners?
For beginners, you’ll find excellent value in Craftsy, Skillshare, and YouTube channels like WithWendy.
These platforms offer structured lessons that’ll turn you from fumbling with thread into confidently creating beautiful projects.
What is the easiest thing to sew for a beginner?
You’ll find success starting with a simple pillowcase – it’s basically a rectangular fabric tube that requires minimal cutting and straight seams, making it perfect practice.
What is the first thing a beginner should sew?
Sarah grabbed fabric scraps from her grandmother’s sewing box and decided to start simple.
You should sew a straight line first—just practice stitching on fabric scraps.
It builds muscle memory and confidence before tackling actual projects.
How to teach basic sewing skills?
Start with basic hand-sewing skills like threading needles and tying knots.
Demonstrate straight stitches on scrap fabric.
Teach measuring, cutting, and pinning before introducing machine basics.
Practice makes perfect, so keep sessions short and encouraging.
Does Hobby Lobby offer sewing classes?
Wonder where your thread meets needle mastery?
Hobby Lobby offers craft classes including various crafts for all ages, but you’ll need to contact your local store directly to confirm if they currently offer specific sewing classes and schedules in your area.
Conclusion
Like Rome wasn’t built in a day, your sewing skills won’t develop overnight—but these basic sewing lessons provide the foundation you need.
You’ve learned essential tools, fabric selection, machine operation, and hand techniques that’ll serve you well.
Start with simple projects and don’t rush the process. Remember, every expert seamstress began exactly where you’re now.
Practice regularly, stay patient with mistakes, and soon you’ll be creating beautiful handmade pieces with confidence and skill.
- https://winslets.com/blogs/sewing-basics/100-sewing-tools-and-equipment-for-beginner-and-advanced-sewists
- https://www.youtube.com/watch?v=zE6BHgcAWy0
- https://so-sew-easy.com/hand-sewing-stitches-for-making-clothes-by-hand/
- https://www.redtedart.com/basic-hand-stitches-beginners/
- https://sewcanshe.com/15-life-skills-sewing-can-teach-you/

