This site is supported by our readers. We may earn a commission, at no cost to you, if you purchase through links.

Start by threading your machine correctly; even a little slip-up can throw things off. Use a scrap of fabric like your testing ground and sew a few stitches.
If they’re loose or loopy, tighten the tension dial little by little. Puckering? Loosen it up.
Don’t forget, thicker fabrics or threads might need lower tension, while lightweight materials usually require higher settings. Patience pays off here—test, adjust, and test again.
Your perfect stitch is just a dial away! Thicker fabrics or threads might need special consideration, but with the right approach, you can achieve professional-looking results.
Table Of Contents
Key Takeaways
- You’ll achieve smooth stitches by understanding thread tension is like tuning a guitar—small, intentional tweaks make all the difference in your sewing machine’s performance.
- Your test fabric is your best friend; always start by sewing a few sample stitches and incrementally adjust the tension dial, raising or lowering it by half-numbers until you achieve balanced seams.
- Different fabrics require different tension settings, so you’ll need to match your thread tension to your fabric type—lower tension for thick fabrics like denim, higher tension for lightweight materials to prevent loose or puckered stitches.
- Regular machine maintenance is crucial; you’ll want to clean your tension discs, check for lint buildup, and replace worn parts to ensure consistent thread flow and prevent tension-related sewing frustrations.
Thread Tension Basics
Thread tension might sound a bit technical, but it’s really just about getting your stitches to look and feel right.
When you understand how the thread path works and why balance matters, smooth and sturdy seams become much easier to achieve.
Definition and Importance
Thread tension is the secret sauce to clean and professional-looking stitches. Without mastering the basics, you risk stitches that unravel or pucker. Understanding tension isn’t scary—it’s just about balance! Think of it as tuning a guitar for harmony.
- Strong and even seams depend on proper tension basics.
- Fabric tension keeps stitches tight without damage.
- Tension mistakes lead to thread tension problems, impacting stitch quality.
Start with small thread tension adjustments, and watch your sewing machine hum perfectly! This approach will help you achieve proper tension and clean stitches.
Thread Path and Control
Getting smooth, even stitches starts with threading your machine correctly.
Smooth, even stitches begin with perfect machine threading—each guide and disc working in harmony for flawless sewing.
The thread’s route—through thread guides, tension discs, the thread regulator, and the bobbin spring—works like a well-choreographed dance, balancing tension at every stage.
Each part plays its role in the sewing mechanics, ensuring tension control methods work their magic.
If the thread skips a step, expect trouble.
Use the thread tension gauge or adjustment tool if things feel off.
Remember, the presser foot should be up so the tension discs release the thread freely.
Keep it smooth, not stressful, and ensure that the machine is properly set up to maintain even tension.
Identifying Tension Issues
Spotting tension issues can save you from endless frustration and messy stitches.
Whether it’s loose loops or puckered seams, learning to recognize these problems is the first step to solving them, and this is where recognize is key to improvement.
Loose Loopy Stitches
Struggling with loose stitches that leave your fabric looking messy? It’s likely a thread tension issue. Poor stitch balance happens when the top thread isn’t interlocking properly with the bobbin thread.
Fix it with these steps:
- Lower the presser foot and rethread your sewing machine.
- Check for thread visibility on the underside.
- Adjust the tension dial slightly higher.
- Test on scrap fabric to ensure the stitch balance is corrected and the top thread is properly interlocking with the bobbin thread.
Puckered Seams
Puckered seams can make your project look like it went through a wrinkle marathon. This often happens when sewing machine tension adjustments are too tight, shortening stitch length excessively.
Check your setup using the table below:
| Problem | Possible Cause | Solution | Tools Needed | Prevention |
|---|---|---|---|---|
| Puckered fabric | Tight thread tension | Loosen tension dial | Tension dial | Test on fabric scrap |
| Uneven stitching | Thread selection | Use matching thread weight | Quality thread spool | Pair thread with fabric type |
| Rippled seams | Fabric choice | Select stabilizing fabric | Suitable fabric | Adjust Stitch length |
| Visible loops | Thread path issues | Re-thread the machine | Threads and guides | Proper machine threading |
| Stitched puckering | Presser foot pressure | Adjust pressure evenly | Presser foot adjust | Practice balanced tension |
Stay calm—tension control is always fixable! Proper machine threading and quality thread spool can also help prevent issues. It’s essential to test on fabric scrap and pair thread with fabric type to ensure the best results. By following these tips, you can achieve a professional finish and avoid common sewing mistakes, such as puckered fabric and uneven stitching.
Frequent Thread Breakage
When thread keeps snapping mid-project, it can feel like a sewing nightmare!
Common breakage causes include mismatched thread weight and needle size, improper tension balance, or sewing speed that’s too fast for your fabric thickness.
For effective thread breakage prevention, slow down, double-check threading, and try small thread tension adjustments.
These thread tension tips can save both your thread and sanity!
Rippled Fabric Appearance
Sometimes fabric ripples sneak in like uninvited guests, signaling tension issues.
Overly tight thread tension can cause fabric distortion and puckering, ruining stitch quality.
Look for uneven thread visibility or stretched stitches as clues.
Fix it by loosening the sewing machine tension incrementally and testing on scrap fabric.
Proper tension adjustment prevents fabric ripples, enhances stitch quality, and guarantees smooth sewing every time!
Understanding fabric stretching causes is vital to addressing these issues effectively.
Troubleshooting Tension Problems
When your stitches are uneven or your fabric puckers, it’s frustrating, but fixing thread tension isn’t as tricky as it seems.
By tackling common culprits like incorrect threading, bobbin issues, or lint buildup, you’ll have your sewing running smoothly in no time.
Incorrect Threading
Incorrect threading often throws your sewing tension off balance.
Make sure the thread passes through all Thread Guides and Tension Discs correctly, with no snags or skips.
Bobbin Springs must also hold the thread just right.
Use your machine’s Thread Paths as a roadmap.
Proper threading keeps your tension dial adjustments effective and avoids frustrating sewing machine tension troubleshooting by ensuring that the thread is guided correctly through all necessary components, including Thread Guides.
Improper Bobbin Filling
If your sewing’s acting up, don’t overlook the bobbins. Improper bobbin filling—uneven threads, wrong bobbin sizes, or rushed filling speeds—throws everything off.
Use correct filling techniques: steady speeds, consistent tension, and no overfilling. Mismatched thread weights or poorly wound bobbins can mess with the sewing machine bobbin case, leading to thread breakage.
Master this, and tension adjustments become smoother!
Dirty Machine and Lint
Lint buildup can wreak havoc on sewing machine tension, causing thread flow to snag and stitches to misbehave.
Regular sewing maintenance keeps your machine running smoothly. Follow these steps:
- Clean tension discs: Remove lint with a soft brush.
- Inspect bobbin area: Clear debris affecting stitch quality.
- Remove fabric fibers: Wipe feed dogs.
- Oil strategic parts: Prevent thread breakage.
Proper maintenance also involves understanding thread tension issues to guarantee smooth sewing operations.
Damaged Parts and Mismatched Combinations
Bent needles, broken bobbins, worn discs, or faulty regulators can throw your sewing machine tension troubleshooting into a spiral.
Damaged threads may snap, making thread breakage a constant headache.
Glance at your sewing machine parts diagram to locate culprits, then apply tension adjustment techniques.
Regular checks and replacements keep things smooth—don’t let a misfit part steal your masterpiece.
Adjusting Thread Tension
Adjusting thread tension might seem tricky at first, but it’s easier than you think with a few simple steps.
By fine-tuning the tension dial and testing on scrap fabric, you’ll quickly achieve smooth, balanced stitches every time.
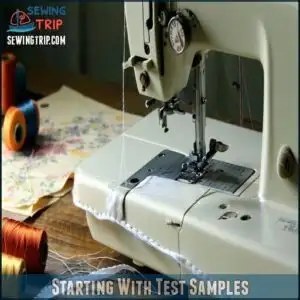
Starting With Test Samples
Starting with a test sample is your go-to move for perfect thread tension adjustment. Grab scrap fabric, and run sewing trials while tweaking tension settings.
Follow this quick routine:
- Stitch a few sample stitches; examine both sides.
- Adjust tension as needed—loosen or tighten slightly.
- Repeat these thread tests until the stitches look even and smooth.
Understanding proper thread tension settings is essential for achieving superior results with the right tension settings.
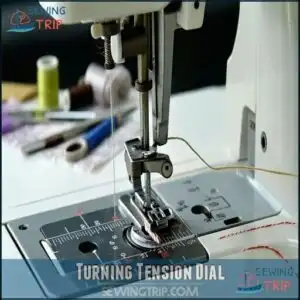
Turning Tension Dial
To adjust tension, locate your machine’s tension dial, often a numbered knob.
For looser stitches, lower the dial settings; for tighter tension, raise them.
Turn the dial slowly during sewing, checking for smooth thread balance and consistent stitch quality.
Think of it as fine-tuning a guitar—you’re aiming for harmony, not frustrating snarls or loose loops!
Achieving proper thread tension settings is essential for perfect stitches.
Ideal Tension Settings
Achieving perfect stitch quality starts with ideal thread tension.
Most sewing machine tension settings hit the sweet spot at 4.5, ensuring balanced seams on many fabrics.
Adjusting dial settings for tension balance between the top and bobbin threads is key.
Always match tension to fabric thickness and thread type for precision and consistent thread control.
Incremental Adjustments
When tension feels off, small adjustments are the way to go. Fine-tune using incremental tension adjustments for the best stitch quality.
Here’s how:
- Turn the tension dial slightly—just a half-number at a time.
- Test stitches on scrap fabric (your tension adjustment process buddy).
- Evaluate with tension checks.
- Repeat Thread Tests until balance looks perfect.
Understanding proper thread tension settings is vital for achieving superior results with the right tension adjustments.
Fine-Tuning Tension Settings
In the context of fine-tuning thread tension, small adjustments can make a big difference in your sewing results.
Whether you’re working with thick fabrics, lightweight materials, or specialty threads, knowing how to tweak the tension guarantees smooth, professional-looking stitches every time, which is crucial for achieving professional-looking results.
Lowering Tension for Thick Fabrics
Thick fabric sewing feels like taming a wild beast, doesn’t it?
Lower the tension slightly on your sewing machine to prevent thread stretching and puckered seams.
Heavy thread management also benefits from bobbins calibration.
Experiment with small tweaks—watch for clean, balanced stitches.
Understanding proper tension settings is essential for achieving professional results.
| Fabric Type | Suggested Tension | Tip |
|---|---|---|
| Denim | 3-4 | Use strong needles |
| Canvas | 2-3 | Opt for thicker threads |
| Fleece | 1-2 | Lower presser foot tension |
Increasing Tension for Lightweight Fabrics
When working with lightweight fabrics, dial up the upper thread tension slightly to maintain stitch security and ideal thread tension.
A gentle increase prevents loose stitches while keeping fabric stretch under control.
Always test tension balance on a scrap piece—watch for minimal thread visibility.
Lightweight materials might seem easy, but sewing machine tension requires precision to conquer fabric thickness challenges, and it is crucial to achieve the right balance for ideal thread tension.
Adjusting for Thread Weight and Type
If you’ve nailed tension for lighter fabrics, now it’s time to focus on sewing thread types and weights.
Thicker threads need looser tension, while finer ones demand tighter control for balanced stitching.
Test ideal thread tension on scrap fabric—small tweaks make a big difference.
Remember, thread material and sewing technique also affect tension adjustment, so trust your machine; it’ll listen, and note that thread material and sewing technique are crucial.
Advanced Tension Adjustments
When basic fixes just don’t cut it, advanced tension adjustments can save the day.
By fine-tuning the bobbins case or tackling tricky fabrics, you’ll keep your stitches looking flawless and frustration-free.
Adjusting Bobbin Case Tension
Adjusting your bobbins case tension might feel intimidating, but it’s simpler than it looks.
Use these steps for balanced stitching:
- Remove the bobbin case before any tension adjustment.
- Turn the small screw clockwise to tighten, counterclockwise to loosen.
- Test changes on scrap fabric and tweak in small increments.
- Reset settings or consult a pro if issues persist—no harm in asking for help!
Proper bobbin case adjuster techniques are essential for achieving ideal thread tension.
Changing Bobbin Tension Increments
Tinkering with bobbin tension? Tiny tweaks make big differences.
Use a small screwdriver to adjust the bobbin-case screw—clockwise tightens, counterclockwise loosens. Make 1/8 to 1/4 turns and test stitches after each change for thread balance.
It’s no magic act, just patience and good tension control. With practice, your sewing technique will shine, thanks to precise fabric tension adjustments.
Professional Servicing and Maintenance
When adjustments fail, professional servicing can save the day. Regular check-ups guarantee your sewing machine tension adjustment stays flawless.
A trained technician will handle machine checks, tension calibration, and part replacement.
- Benefits of professional servicing:
- Accurate tension calibration
- Fixing wear and tear
- Avoiding long-term repairs
- Budgeting for servicing costs
- Keeping maintenance schedules for smooth sewing to ensure your machine runs with flawless tension adjustment.
Regular Cleaning and Replacement of Parts
While professional servicing is helpful, regular cleaning and part replacement keep your machine humming along.
Stick to a cleaning schedule—lint loves hiding in tension discs and the bobbin case.
Sharpen tools, replace worn parts, and prioritize bobbin care. Sewing machine maintenance is easier with a thread tension adjustment tool, ensuring consistent stitches and frustration-free sewing every time, which is crucial for sewing machine maintenance.
Frequently Asked Questions (FAQs)
How does humidity affect thread tension?
Humidity can mess with thread tension by making threads swell or stick together.
This affects how smoothly they flow through your machine, leading to uneven stitches.
Keep your sewing space dry to avoid unwanted tension drama and ensure that threads flow smoothly, which is crucial for achieving even stitches.
Can thread quality impact tension settings?
Yes, thread quality directly affects tension settings.
Cheap threads can cause inconsistent tension, breakage, and uneven stitches.
Invest in high-quality threads that match your fabric weight for smoother sewing and more reliable tension control.
What tension is best for quilting fabrics?
Like a tightrope walker balancing delicately, you’ll want to set your tension between 3-4 for quilting fabrics.
Test on scrap pieces first, adjusting slightly for different fabric weights to achieve smooth, even stitches that’ll make your quilt sing, with a focus on achieving complete concepts of quilting.
How do I prevent skipped stitches with tension?
To prevent skipped stitches, first check your needle’s condition and make certain it’s the right size for your fabric.
Adjust tension gradually, use quality thread, and clean your machine’s tension discs for smoother stitching performance, which helps in preventing skipped stitches by ensuring complete concepts of maintenance are followed.
What causes inconsistent tension during sewing?
Did you know 75% of sewing tension issues stem from threading errors?
You’ll face inconsistent tension when your machine’s parts are misaligned, threads are improperly seated, or fabric thickness varies unexpectedly during your project.
Conclusion
Sewing Success Starts with Stellar Strategies! Mastering the best way to adjust thread tension isn’t rocket science—it’s about patience and practice.
You’ll transform from a frustrated novice to a confident sewist by understanding your machine’s quirks. Keep experimenting with test fabrics, dial in those settings, and don’t be afraid to make incremental adjustments.
Remember, perfect stitches are just a tension tweak away. Your sewing projects will thank you for the extra care and attention.
- https://youtu.be/FpNciWmnY3Q
- https://www.threadsmagazine.com/2008/11/02/understanding-thread-tension
- https://www.wikihow.com/Adjust-the-Tension-on-a-Sewing-Machine
- https://subscribe.threadsmagazine.com/pubs/TP/THR/default_step1.jsp?cds_page_id=211211&cds_mag_code=THR&id=1517323718009&lsid=80300848380032459&vid=1&cds_misc_1=W30488EM&ref=th-footer&cds_tracking_code=W30488EM&cds_response_key=W30001NP

