This site is supported by our readers. We may earn a commission, at no cost to you, if you purchase through links.
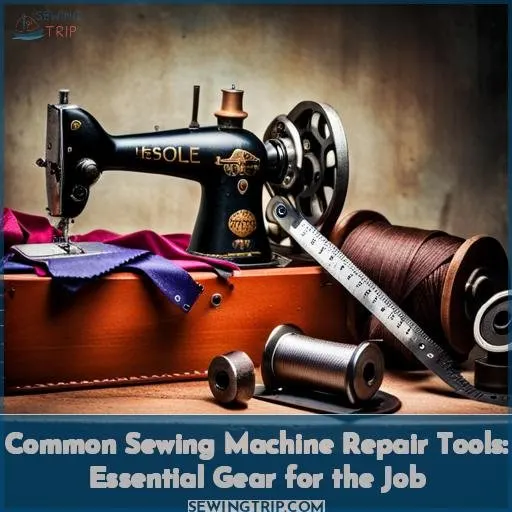 Are you trying to master the common sewing machine repair tools? You’re not alone. In fact, many people are eager to learn how to service their own machines and save money on repair costs. With the right set of essential gear, it’s easy! This article will explore all the necessary items for successful sewing machine repairs – from kits and gauges to screwdrivers and professional-grade tools.
We’ll also discuss some of the best solutions for thread bunching under fabric, bent or broken needles, as well as troubleshooting fabric that won’t feed properly.
Table Of Contents
- Key Takeaways
- Essential Sewing Machine Repair Tools
- Sewing Machine Repair Kits
- Sewing Machine Repair Gauges
- Sewing Machine Repair Screwdrivers
- Professional Sewing Machine Repair Tools
- Industrial Sewing Machine Repair Tools
- Best Tools for Sewing Machine Repair
- Troubleshooting Thread Bunching Under Fabric
- Solutions for Bent or Broken Needles
- Troubleshooting Fabric Not Feeding
- Frequently Asked Questions (FAQs)
- Conclusion
Key Takeaways
- Essential sewing machine repair tools include Allen wrenches, tweezers, metal bobbin cases, needle threaders, presser foot lifters, and extra bobbins.
- Sewing machine repair kits should include sewing kits, piece timing tools, double-headed lint brushes, ratchet handles, and thread tension gauges.
- Gauges are important for adjusting tension settings, measuring thread thickness, ensuring proper bobbin tension, and determining the correct needle size.
- Screwdrivers are necessary for precise adjustments and cleaning out lint buildup.
Essential Sewing Machine Repair Tools
To keep your stitching projects in top shape, you’ll need a few essential items to help diagnose and fix any issues that arise – from needles and thread to cleaning supplies and screwdrivers.
A basic set of sewing machine repair tools includes an allen wrench for adjusting tension settings, tweezers or hemostats for re-threading the machine, a metal bobbin case for ensuring consistent bobbin tension, needle threaders or thimbles when changing out threads quickly without having to use two hands.
You will also want a presser foot lifter so you can easily change out feet while getting just the right pressure on fabrics with different weights.
Heat-treated steel screwdrivers are great if you ever find yourself needing some force to get things back into place again under the hood of your beloved sewing machine. Having these basics at hand means being able to take on most repairs confidently – whether it’s regular maintenance like replacing light bulbs or more complex fixes such as restoring power after replacing fuses or motors.
No job is too big when armed with knowledge plus quality tools made specifically designed for repairing machines expertly crafted by skilled artisans long ago who knew their craft inside out.
Sewing Machine Repair Kits
Having the right set of tools at your disposal can make all the difference when tackling sewing machine repairs, from a simple bobbin switch to more complex fixes.
- Sewing Kits – These are essential for thread tension and bobbin issues, as they come with multiple needles in different types that are suited to each project’s fabric weight and thickness.
- Piece Timing Tools – Having an assortment of pliers on hand will help you adjust pieces quickly without having to use two hands whenever needed during repairs or maintenance projects!
- Double-headed Lint Brush – This handy tool is great for cleaning out lint buildup around delicate parts like feed dogs or other sensitive areas inside machines where dirt accumulates over time if not maintained regularly enough!
- Ratchet Handle – With this device, you’ll be able to easily tighten screws securely so that everything stays in place while using minimal effort thanks to its ergonomic design, which fits comfortably into one hand too!
- Thread Tension Gauge – To ensure consistent stitches every time by helping measure tension settings accurately so fabrics don’t bunch up unevenly or pull apart prematurely due to adjusting wrong tension levels incorrectly, either too loose or tight respectively when it matters most; especially with heavier materials such as denim jeans, etc…
When selecting a good repair kit, always look out for these five items included plus any additional accessories like extra bobbins (which often differ depending on the type/weight of threads used) before purchasing anything else because otherwise, it may end up costing more money than necessary down the line.
Sewing Machine Repair Gauges
Gauges are essential for keeping your sewing projects on track, allowing you to adjust tension settings with precision and accuracy for perfect stitches every time. Adjusting gauges helps ensure proper thread tension, bobbin tensions, needle size, and fabric type.
Threading gauges allow you to measure the thickness of threads so they don’t break or cause skipped stitches. Bobbin gauges enable accurate measurements of bobbin tension, while needle gauges inform which size is best suited depending on the material being sewn.
| Gauge Type | Use |
|---|---|
| Thread | To measure thread thickness |
| Bobbin | For proper measurement of bobbin tensions |
Fabric gauges can also be used for fine fabrics that require delicate threads and thinner needles to avoid any unnecessary breaks during the stitching process.
Finally, having a well-rounded setup with these five important tools will not only save headaches but also money in the long run. Repairs can become costly if done improperly initially due to incorrect measurements taken from using low-quality gadgets.
Instead, use properly calibrated instruments from the first go-round when it matters most.
Sewing Machine Repair Screwdrivers
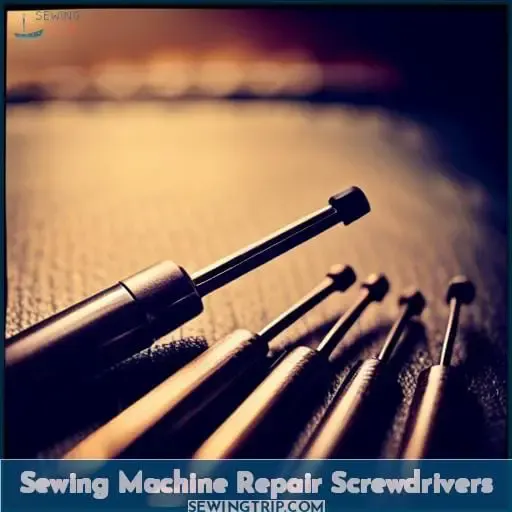
You need screwdrivers to make precise adjustments and keep your stitching projects running smoothly.
A necessary tool for sewing machine repair is a set of quality flathead screwdrivers in different sizes. Threading needles correctly requires using a longer screwdriver that allows access where needed.
It’s also useful when adjusting tension settings on machines with hard-to-reach screws.
When cleaning out lint buildup from around feed dogs, having a shorter screwdriver helps get into tight spaces safely without damaging delicate parts inside the machine.
All these tasks require precision and accuracy, which only comes when equipped with appropriate instruments like these drivers that guarantee reliable results every time by taking care not to overtighten any part during repairs or replacements.
Professional Sewing Machine Repair Tools
Now that you’ve equipped yourself with the basics, it’s time to step up your sewing machine repair game! Professional-grade tools are essential for precise adjustments and reliable results.
Re-threading machines is a breeze when using the right needle compatibility, while adjusting tension settings requires an extra-long screwdriver. Cleaning and maintenance should be done regularly to prevent lint buildup around feed dogs – best tackled with a shorter screwdriver from a Singer Sewing Machine Kit.
A presser foot lever is necessary for making sure fabric feeds through smoothly without bunching or tangling threads. This can be found in most professional-grade repair kits along with other helpful components like spool caps, bobbin holders, etc.
With all these tools at hand, you’ll soon become an expert seamstress! However, if any repairs become too complicated or require specialized parts, don’t hesitate to ask for assistance from professionals who have extensive experience in repairing all kinds of sewing machines.
Industrial Sewing Machine Repair Tools
Take your seamstressing to the next level with industrial-grade repair tools! Lubricating oils, needle types, thread tensions, and presser feet are among some of the essential items you’ll need when it comes to tackling even the toughest sewing machine repairs.
With these components on hand, you can easily change out bobbin cases or adjust tension settings for different fabric weights. You should also select the correct type of bobbin threads for each project, ensuring they’re wound at the right time for universal application.
For electronic devices like circuit boards in newer model machines, you’ll need a specialized toolset for troubleshooting and maintenance tasks. This includes replacing faulty parts or examining wiring connections between components.
By equipping yourself with these professional-grade tools and having a basic understanding of how all major sewing machine brands work, whether mechanical or electronic, you’ll soon become an expert technician capable of quickly and efficiently completing any job.
So don’t wait, arm yourself today. Whenever those pesky problems arise again, which they inevitably will, you’ll be ready to tackle them head-on without wasting precious stitching time.
Best Tools for Sewing Machine Repair
Equip yourself with the essential items needed to complete any sewing machine repair job, from lubricating oils and needle types to thread tensions and presser feet.
Whether you’re tackling a common problem like adjusting tension or choosing the right type of thread for your project, having all these tools on hand will make it easier.
With different tools available for both mechanical and electronic devices, it’s possible to own your own sewing machine repair kit so you can fix issues as they arise without delay!
Having a good understanding of how various brands work is also important when selecting specific needles or threads suitable for certain fabrics.
Thread size should match up with the weight of fabric being used while needle sizes vary according to application requirements – be sure not to utilize anything too big that may cause damage!
Similarly, pressure feet are designed in various shapes based on their purpose; some are made specifically for quilting while others feature grooves that allow them to hold thinner materials such as lace securely in place during stitching.
Knowing which one works best before starting repairs can save time later if problems occur unexpectedly down the line!
Finally, using an appropriate walking foot helps minimize slipping and bunching even when working with stretchy materials like lycra or spandex, giving professional-looking results every time.
All these points come together, making owning quality sewing machine repair equipment a worthwhile investment over just relying on standard components included within machines themselves – more often than not due to a lack of knowledge about how each part functions correctly, resulting in costly mistakes needlessly incurred by inexperienced users who don’t have a proper toolkit handy and ready to use at a moment’s notice whenever required maintenance task arises.
Troubleshooting Thread Bunching Under Fabric
If your project is suddenly interrupted by annoying thread bunching under the fabric, don’t panic! The problem can often be solved quickly and easily with a few simple steps.
First, try re-threading the machine and adjusting tension settings. If this doesn’t work, then it might be time to switch out needle types or presser feet for different projects, depending on what you’re working on.
It’s also important to use the same type of thread in both the top and bobbin. If not, knots of extra threads will appear as soon as stitching starts!
As an added precaution against future problems, consider investing in a micro vacuum attachment kit. This kit helps cut bits of thread before they get caught up underneath fabric when sewing at high speeds or using heavier materials like denim jeans, etc.
Along with making sure that the correct pressure is applied regardless of the type of thread being used (polyester vs cotton), these tips should help ensure smooth sailing from now onwards!
Solutions for Bent or Broken Needles
Replacing a bent or broken needle is the first step to fixing the issue. Make sure you choose one that’s appropriate for your project. There are many different types of needles available in stores and online, so it’s important to do your research before making a purchase.
When selecting thread type, take into account both the weight of fabric being used and tension settings needed for optimal results. Heavier fabrics will require stronger threads with higher tensions, while lighter fabrics may need lighter threads at lower tensions.
Additionally, certain sewing techniques can help decrease extra thread bunching up at ends of seams. Try using scrap pieces of fabric as testing grounds before starting on final projects! It’s also key to support delicate fabrics by hand when possible during the stitching process, as well as use walking feet attachments if available.
This helps keep seam lines even no matter what kind of material is being worked on.
Taking these measures will ensure proper needle installation, leading to smoother functioning machines overall!
Troubleshooting Fabric Not Feeding
Checking your drop-feed setting, using the correct pressure and positioning of the presser foot, and ensuring you have a compatible needle for your fabric can help troubleshoot any issues with fabric not feeding properly.
Here are 3 key steps to take:
- Adjust tension settings according to the type of material being used. Heavier fabrics require stronger threads at higher tensions, while lighter fabrics need lighter threads at lower tensions.
- Check the condition of the feed dogs or replace them if necessary. Lint buildup may cause friction reduction that affects how easily materials move through the machine’s throat plate area during the stitching process, so regular cleaning is important!
- Ensure both the top thread and bottom threads (bobbin) are correctly threaded into their respective areas on the sewing machine.
By taking these measures, you can ensure consistent seam lines no matter what kind or weight material is being worked on, as well as proper functioning machines overall! Furthermore, it’s always good practice to use scrap pieces before starting final projects in order to get a feel for the best technique/tension settings needed.
This way, the piece comes out looking its best every time. Just remember to also support delicate items by hand whenever possible to make sure everything stays in place without any bunching up along the way.
This ensures that the finished product looks neat, clean, and professional all around. The end result is the desired effect achieved, and the success story lives another day.
Frequently Asked Questions (FAQs)
What type of thread should I use when repairing a sewing machine?
When repairing a sewing machine, use thread that is compatible in size with the needle and fabric for best results. Do not make the mistake of overlooking this small detail – it will be your saving grace! Irony will serve you well: an inconsistent knot can unravel all your hard work, so do not take chances.
What is the best way to adjust the tension settings of a sewing machine?
Adjusting tension correctly can be intimidating, but with the right tools and guidance, it doesn’t need to be. Follow your manual closely for specifics on setting tensions appropriately – knowledge is power! Once you understand the basics, practice makes perfect.
Overcome any fears by starting slowly and gradually increasing speed as confidence grows.
How often should I clean and maintain my sewing machine?
Clean and maintain your sewing machine regularly to prevent issues; a single skipped stitch can ruin an entire project! Keep it running smoothly with weekly cleanings, lubrications, and inspections.
How do I know if I need a professional to repair my sewing machine?
If your sewing machine is making strange noises, has odd results when stitching, or won’t start up at all, you may need professional repair.
What can I do to prevent common sewing machine issues?
To prevent common sewing machine issues, follow the manual’s instructions for regular maintenance and cleaning.
Conclusion
Sewing machine repair is a complex task, and having the right tools is essential to success. A variety of essential tools, such as repair kits, gauges, and screwdrivers, can help you troubleshoot common problems.
For more serious issues, you may need professional or industrial-grade tools. With the right tools in your arsenal, you can master any sewing machine repair challenge. So, take some time to familiarize yourself with the products available, and you’ll be ready to tackle any repair job that comes your way.
After all, when it comes to sewing machine repair, having the right tools makes all the difference.

