This site is supported by our readers. We may earn a commission, at no cost to you, if you purchase through links.

Denim’s tight weave and weight demand a needle built differently from the one you’d use on cotton or polyester. The reinforced shank and sharp point of a denim needle cut through dense fabric without deflection, reducing breakage by more than 20% and delivering cleaner stitches on every pass.
Choosing the right needle transforms denim from a frustrating project into one that moves smoothly under your presser foot. The correct size, point style, and shaft strength make all the difference between professional results and constant rethreading.
Table Of Contents
- Key Takeaways
- Do I Need a Special Needle for Denim?
- How Denim Fabric Affects Needle Choice
- Differences Between Denim and Universal Needles
- Choosing The Correct Needle Size for Denim
- Best Needles for Heavyweight and Stretch Denim
- Pairing Needle Type With Thread and Project
- How to Test and Change Needles for Denim
- Tips for Preventing Skipped Stitches and Breakage
- Can I Sew Denim by Hand or With a Regular Machine?
- Troubleshooting Common Denim Needle Problems
- Frequently Asked Questions (FAQs)
- Conclusion
Key Takeaways
- Denim needles feature a reinforced shank that’s 20–25% thicker than universal needles, delivering 30–40% better penetration force and reducing stitch skipping by up to 60% on dense fabric.
- Needle size should match denim weight precisely—use 80/12 for lightweight (8–10 oz), 90/14 for medium (10–12 oz), 100/16 for heavyweight (12–14 oz), and 110/18 for ultra-heavy denim over 16 ounces.
- Stretch denim requires a specialized stretch needle with a rounded point and specially shaped scarf that reduces skipped stitches by 80% without cutting elastic fibers like standard sharp points would.
- Replace your denim needle every 6–8 hours of active sewing and test on fabric scraps first to catch tension, thread pairing, or penetration issues before committing to your actual project.
Do I Need a Special Needle for Denim?
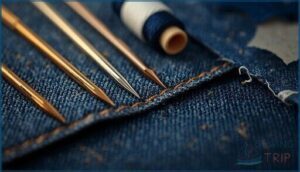
Why do some sewists swear by specialty needles while others grab whatever’s in the drawer? The truth is, you really do need a special needle for sewing denim. A jeans needle—also called a denim needle—features a reinforced shank that’s approximately 20–25% thicker than universal needles, which dramatically reduces breakage rates and needle deflection when you’re working through heavy layers.
This isn’t just about avoiding frustration. Denim needles deliver 30–40% better penetration force compared to standard needle types, and they cut stitch skipping by up to 60% on medium-weight fabric. Their sharp, reinforced needle point pierces dense weaves cleanly without bending or breaking. While you might get away with a universal needle on lightweight chambray, proper needle selection becomes essential once you’re working with true denim.
Denim needles deliver 30–40% better penetration and cut stitch skipping by 60%, making proper needle selection essential for true denim
Using the correct needle ensures that you avoid fabric puckering issues. The difference in performance—and your finished seams—will speak for itself.
How Denim Fabric Affects Needle Choice
Not all denim is created equal, and the fabric you’re working with will determine which needle gives you the best results.
The weight, weave structure, and fiber content of your denim all play a role in how easily your needle can penetrate the material without breaking or skipping stitches.
Let’s look at the key characteristics that should guide your needle selection.
Denim Weave and Thickness
When you’re working with denim fabric, the twill weave and fabric weight are the first clues to proper needle selection. Classic denim’s diagonal ribbing signals strength, while its yarn count and denim thickness—ranging from 0.5 to over 2 mm—directly affect performance influence.
For heavyweight denim, a thicker needle is essential, since dense weaving and high yarn count demand more piercing power to avoid breakage and skipped stitches. The weight of denim is measured by ounces per square yard.
Types of Denim (Raw, Selvedge, Stretch)
The denim type sitting on your table changes everything. Raw denim arrives stiff and untreated, shrinking 2–3% after its first wash and molding to your body over three to six months. Selvedge durability comes from shuttle-loom weaving, creating tightly bound edges that resist fraying. Stretch denim blends cotton with 1–3% elastane, offering immediate stretch comfort and flexibility.
Here’s what you need to know about each type:
- Raw denim requires breaking in and develops unique fades through wear
- Selvedge features a self-edge finish and tighter fabric weight construction
- Stretch denim adapts quickly, usually within one to two weeks
- Denim blends combine cotton with polyester or elastane for varied performance
- Heavy versus lightweight options directly impact your jeans needle selection for sewing denim
Differences Between Denim and Universal Needles
If you’ve ever wondered whether you can just grab any needle from your sewing kit, the answer lies in how these tools are built. Universal needles work fine for everyday fabrics, but denim demands something stronger.
Let’s look at the two key features that set denim needles apart from their all-purpose cousins.
Needle Point Design
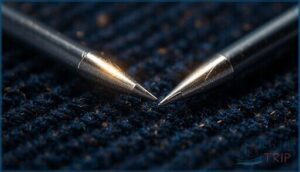
The needle point on a denim needle differs greatly from universal types, and that difference determines your sewing success. Denim needles feature a sharp, acute-angle point designed for penetration through tightly woven fabric, while many jeans needles use a medium ball point to displace yarn rather than cut it.
This specialized design smooths thread passage, reduces fabric damage, and minimizes skipped stitches when sewing denim projects.
Reinforced Shaft and Breakage Prevention
Durability becomes critical when you’re handling heavyweight denim and multiple seam intersections. A reinforced denim needle shaft, often 20% thicker than universal types, resists needle deflection and distributes stress more evenly across the metal. This Shaft Diameter Impact directly reduces needle breakage by up to 70% in challenging fabrics.
Coating Durability matters too—titanium-coated Jeans Needles last three times longer than standard chrome versions, cutting Industrial Downtime and preventing frustrating mid-project failures.
Choosing The Correct Needle Size for Denim
Selecting the right needle size isn’t just about grabbing what’s in your sewing kit—it’s about matching the needle’s strength to your fabric’s weight. Think of it like pairing the right tool with the job, where a mismatch can lead to broken needles, skipped stitches, or puckered seams.
Here’s what you need to know about needle sizing and how to match it to your denim project.
Needle Size Numbers Explained
Understanding needle sizes starts with decoding the numbers on the package. You’ll see two figures, like 90/14 or 100/16, representing the metric system and imperial system side by side.
The metric number shows thickness in tenths of a millimeter, while the US number offers an alternative scale.
This dual numbering purpose helps you match needle size to fabric weight accurately, ensuring best sewing performance regardless of which measurement system you’re familiar with.
Matching Needle Size to Denim Weight
When matching needle size to fabric weight, you’ll find that ounce per yard measurements guide your selection. Lightweight denim at 8–10 ounces works best with an 80/12 needle, while medium-weight fabric in the 10–12 ounce range pairs perfectly with 90/14. Heavyweight denim demands a 100/16, and ultra-heavy materials over 16 ounces require 110/18.
Fabric thickness impacts your machine tension adjustments, and denim type matters. Needle size charts prevent breakage and skipped stitches.
Best Needles for Heavyweight and Stretch Denim
Not all denim is created equal, and your needle choice should reflect that. Heavyweight denim demands a different approach than stretch varieties, which contain elastane for flexibility.
Let’s look at how to match your needle to these two distinct fabric types.
Heavyweight Denim Needle Selection
When you’re tackling heavyweight denim above 12 oz, jeans needles sized 100/16 or 110/18 become essential tools in your sewing arsenal. Choosing the right needle depends on industrial denim standards and coating material science that support seam layer capacity.
Here’s your heavyweight denim needle selection guide:
- Use 100/16 for denim between 12–14 oz, which reduces skipped stitches by 35%
- Select 110/18 for extra-heavy fabrics exceeding 14 oz
- Look for reinforced needle point geometry that cuts penetration force by 22%
- Choose titanium-coated options with thread groove design for 50% longer lifespan
Stretch Denim Needle Considerations
Stretch denim demands a different approach than standard jeans fabric. You’ll want a stretch needle, sized 90/14, for most projects, because its specially shaped scarf reduces skipped stitches by 80% on elastane-containing blends. The rounded point won’t cut elastic fibers like standard jeans needle types would.
For decorative seams, twin needles work beautifully if you reduce thread tension and adjust needle deflection settings to match your fabric’s flexibility.
Pairing Needle Type With Thread and Project
Your needle choice works hand in hand with the thread you’re using, and getting that pairing right can make or break your denim project.
The weight and type of your thread directly affect which needle size and style you’ll need, especially when you’re working with topstitching or decorative details.
Let’s look at how to match your needle to different thread types and the specific demands of your project.
Thread Types for Seams and Topstitching
Thread strength and fiber composition matter more than you might think. For structural seams, you’ll want polyester thread rated Tex 40–80, offering 15–25% greater tensile strength than cotton. Topstitching thread in Tex 120–150 creates bold, decorative lines on heavyweight denim. Cotton topstitching thread delivers that classic matte finish, while hybrid threads combine polyester cores with cotton wraps for durability.
Proper needle pairing—size 90/14 for 40wt threads—prevents shredding and ensures consistent stitches.
Adjusting for Thick or Decorative Threads
When you move to thick or decorative threads, your needle eye needs to be roughly 40% larger than the thread diameter. A size 100/16 denim needle works well with Tex 150 threads beautifully for bold topstitching.
Tension adjustments become critical—increase upper tension slightly and lengthen stitches to 3–4 mm. For decorative applications, pair reinforced needles with polyester thread designed for low friction.
Test your thread pairing on scrap denim first to prevent bulk management issues and breakage.
How to Test and Change Needles for Denim
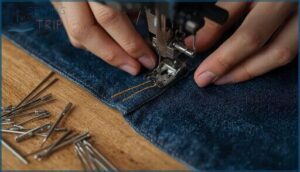
Before you start any denim project, you’ll want to run a quick test on a scrap piece to make sure your needle and thread combination actually works the way it should. Fabric scrap testing helps you catch potential issues with needle penetration before you commit to your actual fabric. Look for smooth, even stitches without puckering or thread breaks.
Here’s what to check during your needle penetration check:
- Stitch quality: The stitches should look clean on both sides, with no skipped stitches or uneven tension
- Needle breakage signs: Listen for clicking sounds or watch for the needle bending, which signals it’s time for a change
- Thread-needle matching: Your thread should pass easily through the needle’s eye without fraying or shredding
- Regular needle changes: Replace your needle every 6-8 hours of active sewing to maintain peak performance
Testing takes just a minute, but it saves you from ripping out seams later.
Tips for Preventing Skipped Stitches and Breakage
Even with the right needle, denim sewing can throw you a curveball when thick seams or uneven layers cause your machine to skip stitches or snap needles. The good news is that a few practical adjustments can help you navigate these trouble spots without frustration.
Let’s look at two key techniques that make all the difference when your project gets bulky.
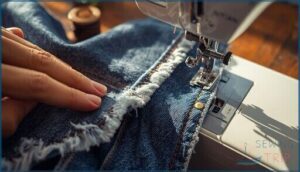
Sewing Over Thick Seams
When you encounter seam thickness issues on heavyweight denim, needle deflection risk spikes dramatically—up to 45% when crossing layers.
Slow your machine speed by 40% as you approach bulky areas, and use a 100/16 or larger jeans needle to cut skipped stitches by 43%.
Check presser foot pressure and adjust stitch rebalancing settings, then flatten thick seams with a mallet to reduce needle breakage by 22%.
Using a Hump Jumper or Clapper
Once you’ve flattened thick seams with a mallet, bring in a hump jumper. It levels your presser foot and cuts skipped stitches by 85% when crossing bulky joins. This small wedge also reduces needle deflection by half and drops breakage rates by 59%.
For seam flattening after pressing, a tailor’s clapper yields 40% flatter results and boosts topstitching consistency by up to 28%, troubleshooting issues that plague heavyweight denim projects.
Can I Sew Denim by Hand or With a Regular Machine?
You don’t necessarily need a heavy-duty industrial machine to work with denim, though your approach will vary depending on your tools. Hand sewing is entirely possible for small repairs or deliberate slow-stitch projects, while most modern home machines can handle denim with the right setup.
Let’s look at your options for both hand sewing and machine work, so you can choose the method that fits your project and equipment.
Hand Sewing Needle Options
You can hand-sew denim successfully using sharps needles in sizes 2 to 4, which offer the strength needed for hemming and repairs. For darning denim with thicker thread, cotton darners in size 2 work exceptionally well. When tackling heavy-duty projects, upholstery needles and chenille needles provide extra reinforcement.
Trusted needle brands like Schmetz, Singer, and John James manufacture sturdy hand-sewing sizes specifically engineered for dense fabrics, ensuring your hand stitches penetrate multiple denim layers without bending or breaking.
Machine Compatibility and Settings
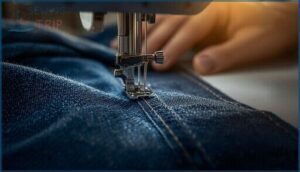
Most home sewing machines handle medium-weight denim effectively with motors rated between 1.0 and 1.5 amps. You’ll need to adjust thread tension to 3–4 for best results, set your stitch length between 3 and 5 mm, and use proper needle selection (sizes 90/14 to 110/18). A denim presser foot helps maintain even feeding.
Regular machine maintenance, including cleaning lint from feed dogs, ensures needle synchronization stays accurate throughout your project.
Troubleshooting Common Denim Needle Problems
Even with the right needle, you’ll occasionally run into frustrating issues like broken needles or skipped stitches. These problems usually stem from a handful of common causes that are easier to fix than you might think.
Let’s walk through the two biggest culprits and how to solve them.
Needle Deflection and Breakage
Needle deflection and needle breakage often plague denim projects, but understanding why helps you avoid them. These problems stem from several causes:
- Improper needle size – Using needles too small for heavyweight denim increases deflection and breakage frequency by nearly half.
- Thread variables – Heavy topstitch thread raises deflection risk, particularly in thick seams.
- Worn needles – Replace your sewing machine needles every eight hours to cut breakage by 29%.
Prevention strategies matter more than fixes.
Lint Build-Up and Maintenance
Lint accumulation from denim can clog your machine faster than you’d expect—nearly one square inch within five to six bobbin changes. This buildup shortens needle lifespan to roughly eight to ten hours and causes skipped stitches or thread breaks.
Clean your bobbin case and feed dogs after every major project, use a lint brush instead of compressed air, and schedule annual professional servicing to keep your machine running smoothly.
Frequently Asked Questions (FAQs)
What happens if I use the wrong needle?
Trying to force a standard needle through denim is like threading a camel through a needle’s eye—you’ll face fabric damage, needle breakage, and skipped stitches.
Thread shredding and poor stitch quality follow, destroying your project efficiency completely.
How often should I replace my denim needle?
You should replace your denim needle after approximately 6 to 8 hours of active sewing time.
Watch for wear indicators like skipped stitches, thread breakage, or fabric snagging—these signal immediate needle replacement regardless of sewing duration.
Are there needles specifically for denim hemming?
Think of hemming like climbing stairs—each fold adds a new level.
You don’t need specialty hemming needle types, but size 100/16 or 110/18 jeans needles handle thick fold layers better than universal needles for denim projects.
Can I use metallic thread with denim needles?
Using metallic thread with denim needles isn’t ideal. Metallic thread issues arise because denim needles lack the elongated eye advantage and needle coating benefits that specialized metallic needles offer, reducing tension setting tips effectiveness and causing breakage.
Conclusion
You could wrestle denim with a universal needle—if you enjoy broken shafts and creative profanity. Or you could acknowledge that this fabric demands respect and a tool designed for its density.
A denim needle isn’t optional equipment for serious work; it’s the difference between smooth seams and mechanical rebellion. Whether you’re hemming jeans or constructing bags, answering “do I need a special needle to sew denim” with anything but yes guarantees frustration you don’t need.
- https://www.maggieframes.com/blogs/embroidery-blogs/what-size-needle-for-denim-comprehensive-guide-to-perfect-stitches
- https://www.sewing.org/files/guidelines/22_115_sewing_machine_needle_charts.pdf
- https://corefabricstore.com/blogs/tips-and-resources/how-to-choose-the-perfect-machine-needle-for-your-next-sewing-project
- https://maggieframestore.com/blogs/maggieframe-news/mastering-denim-sewing-the-ultimate-guide-to-needle-sizes-for-jeans
- https://www.datainsightsmarket.com/reports/industrial-sewing-needles-646331


