This site is supported by our readers. We may earn a commission, at no cost to you, if you purchase through links.
By embracing this technique, you’ll not only protect your quilt’s edges but also add a striking visual element.
Guiding you through 10 straightforward steps to elevate your projects. Let’s embark on this journey together, transforming your quilting skills with each stitch.
Table Of Contents
- Key Takeaways
- Why Machine Bind a Quilt?
- Preparing Your Quilt for Wide Binding
- Cutting and Prepping Wide Binding Strips
- Attaching Wide Binding to Quilt Front
- Turning Corners With Wide Binding
- Securing Wide Binding on Quilt Back
- Mitering Corners on Quilt Back
- Finishing Touches for Wide Binding
- Creative Considerations for Wide Binding
- Troubleshooting Common Wide Binding Issues
- Frequently Asked Questions (FAQs)
- Conclusion
Key Takeaways
- Trim the quilt sandwich to include a batting overlap and extra fabric for seam allowances, ensuring a precise foundation for attaching the binding.
- Cut binding strips to a width of 3 1/2 inches for an extra-wide finish, join them end-to-end with matching seam allowances, and press in half lengthwise to prepare for attachment.
- When attaching the binding to the quilt front, align the binding edges with the quilt top edge carefully and stitch in place, paying special attention to corners where a 45-degree sewing angle and folding technique are used to create mitered corners.
- After attaching the binding to the front, press it towards the quilt edges, then turn and press it to the back to cover the stitches, and secure it with a stitch-in-the-ditch method from the front for a seamless finish.
Why Machine Bind a Quilt?
Why opt for machine binding your quilt?
Let’s dive into the heart of quilt finishing with a twist. Machine binding, compared to hand stitching, is like choosing a sports car over a bicycle for a cross-country race.
Whether you’re a fan of bias binding, double-fold binding, or decorative binding, machine quilt binding opens up a world of possibilities. This extra wide quilt binding tutorial will guide you through the process, offering a variety of quilt binding methods to suit your project.
So, rev up your sewing machine and let’s get that quilt show-ready with a technique that combines speed with beauty.
Preparing Your Quilt for Wide Binding
Before attaching your wide binding, it’s crucial to properly prepare your quilt. Start by trimming the quilt sandwich and marking the quilt top to ensure precision.
Trimming the Quilt Sandwich
Now that you’re ready to dive into machine binding, let’s tackle trimming the quilt sandwich.
You’ll want to trim the excess batting and backing, leaving a batting overlap and extra fabric for seam allowances.
This step ensures your quilt binding wraps snugly, reinforcing those corners for a polished finish.
Keep your quilt binding tutorial handy; precision here sets the stage for success.
Marking the Quilt Top
After trimming your quilt sandwich, it’s time to mark your quilt top. This step is crucial for ensuring your wide binding aligns perfectly.
- Accuracy Importance: Use measuring tools to ensure precision.
- Marking Techniques: Draw a line ¼” in from the quilt top edge.
- Extra Fabric Allowance: This guides you while attaching the quilt binding, avoiding guesswork and ensuring a flawless finish.
Cutting and Prepping Wide Binding Strips
You’ll start by cutting your strips to the perfect 3 ½” width, ensuring they’re just right for that chunky, wide look. Next, join these strips end-to-end and press them in half lengthwise to prep them for attachment.
Cutting Strips to Width
Cutting strips to the right width is like finding the perfect ingredient for your quilt’s secret sauce.
| Strip Width Options | Use Case |
|---|---|
| 2.5 inches | Standard quilts |
| 3.5 inches | Extra-wide binding |
| 2 inches | Delicate finishes |
| 3 inches | Bold visual impact |
| Custom | Your quilt, your rules |
Joining Strips End-to-End
Joining strips end-to-end is your gateway to customizing your quilt’s edge. Here’s how to nail it:
- Choose your fabric wisely: Different fabrics can transform the look.
- Mind your seam allowances: A consistent seam ensures a smooth join.
- Explore joining methods: Discover the technique that clicks with you.
- Play with strip widths: Mix and match for unique design options.
Mastering this step is crucial for a flawless machine quilt binding.
Pressing Strips in Half Lengthwise
After joining your strips end-to-end, you’re ready for the next step: pressing them in half lengthwise. This isn’t just about making a fold; it’s about setting the stage for your quilt’s grand finale.
| Step | Action |
|---|---|
| 1 | Set your iron to the fabric-appropriate heat. |
| 2 | Lay your strip wrong side up on the ironing board. |
| 3 | Fold the strip in half lengthwise, ensuring edges meet perfectly. |
| 4 | Press along the fold, creating a crisp edge for your binding width. |
Attaching Wide Binding to Quilt Front
Now you’re ready to attach the wide binding to your quilt front. Carefully align the binding edges with the quilt top edge, then stitch them in place to secure.
Aligning Binding With Quilt Top Edge
When you’re lining up your wide binding with the quilt top edge, think of it as setting up a first date between two eager partners: your fabric selection and your quilt’s edge.
This step is crucial for a harmonious relationship, ensuring design impact, pattern matching, color coordination, and texture combination all click.
It’s like matchmaking for your quilt, where first impressions count.
Stitching Binding in Place
- Choose the right needle size and thread type for durability.
- Keep an eye on binding placement; it should be your stitching guide.
- Opt for a shorter stitch length for a strong hold, or hand sew for a personal touch.
Turning Corners With Wide Binding
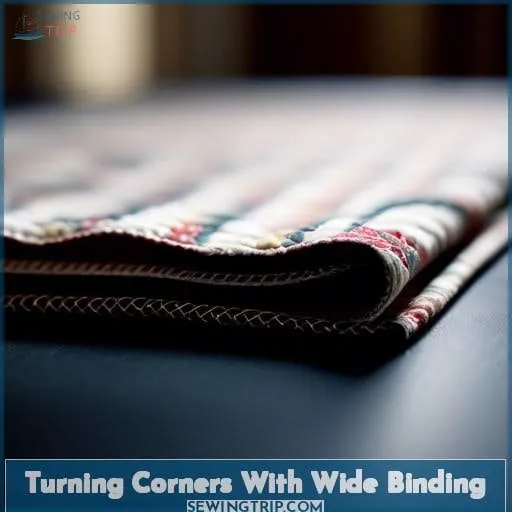
When you reach a corner while attaching wide binding, sewing off at a 45-degree angle is your first step.
Sewing Off Corner at 45-Degree Angle
As you approach the quilt’s corner, it’s showtime for your bias tape to shine.
Pivot with pizzazz, sewing off at a 45-degree angle—think of it as the bias tape’s grand jeté.
Now, fold that corner with the grace of a paper airplane, creating a mitered angle that’s sharp enough to rival a samurai’s sword.
Next up: folded corners that’ll make your quilt pop!
Folding Techniques for Mitered Corners
Turning corners with your quilt binding can feel like solving a puzzle, but with these mitered corner techniques, you’ll crack it in no time:
- Pressing before folding ensures crisp edges.
- Achieving precise angles makes for a professional finish.
- Matching binding at corners keeps the look seamless.
- Preventing fraying adds durability.
- Remember, practice makes perfect—don’t be afraid to try and try again!
Securing Wide Binding on Quilt Back
Now that you’ve turned your corners with precision, it’s time to secure your wide binding on the quilt back. You’ll press the binding toward the quilt edges, turn and press it to the back, and then stitch-in-the-ditch from the front for a flawless finish.
Pressing Binding Toward Quilt Edges
After conquering those corners, it’s time to press on—literally! Grab your iron and let’s get those bindings lying flatter than a pancake.
Think of it as giving your quilt a spa day; you’re shaping and flattening the binding to perfection.
Turning and Pressing Binding to Back
Now, let’s flip that binding to the back, shall we? It’s like wrapping the ultimate gift—your quilt deserves it.
- Gently press the binding away from the quilt’s edge.
- Fold the binding over to the quilt’s backside, covering the stitches.
- Use pins or clips to hold it in place.
- Consider fabric selection and color combinations for a stunning contrast.
- Add decorative stitching or bias binding for a custom flair.
Stitch-in-the-Ditch From the Front
Now that you’ve turned and pressed the binding to the back, it’s time to secure it in place. You can either stitch-in-the-ditch from the front or hand stitch the binding down. Stitching in the ditch is a quick and tidy way to attach the binding, creating a seamless look on the front.
Just follow the seam line between the binding and quilt top to lock everything in place.
Stitching in the ditch is a quick and tidy way to attach the binding, creating a seamless look on the front. Just follow the seam line between the binding and quilt top to lock everything in place.
You can either stitch-in-the-ditch from the front or hand stitch the binding down.
Mitering Corners on Quilt Back
Ah, mitering corners on the quilt back, the final frontier for your wide binding adventure! Think of it as the cherry on top of your quilting sundae.
Here’s the scoop: mastering mitering techniques is like unlocking a superpower. It’s all about folding precision and a bit of fabric origami.
Choose your fabric wisely; it’s the secret sauce that adds visual impact.
Now, don’t skimp on corner reinforcement—this step is your quilt’s knight in shining armor, ensuring those corners stay crisp through every cuddle session.
And remember, pressing tips are your best friends. A well-pressed corner is like a well-tied bow: it just makes everything look better.
So, press on, quilt warrior, and watch your quilt transform!
Finishing Touches for Wide Binding
You’re almost there! Checking for gaps ensures your quilt’s edges are perfectly sealed.
Inspecting for Gaps
After conquering those corners, it’s time for a binding inspection.
Give your quilt the once-over, checking for any sneaky gaps that might’ve dodged your needle.
Your fabric choices and binding width should sing in harmony, so any discord means a stitch adjustment may be in order.
Final Press for Crisp Edges
After you’ve checked for any sneaky gaps, it’s time for the grand finale: pressing your quilt’s edges. This isn’t just any old ironing session; it’s your chance to infuse crispness into those edges, making them sharp enough to rival a samurai’s blade.
Consider this pressing moment your quilt’s final touch, elevating its visual appeal with a perfectionist approach.
Creative Considerations for Wide Binding
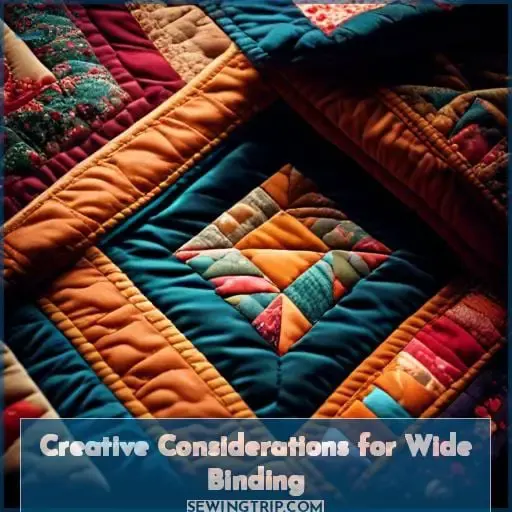
Choosing the right fabric and prints can truly elevate your quilt’s appearance. Adjusting the width of your binding also offers a unique way to impact its visual appeal.
Choosing Fabric and Prints
When choosing fabric for your quilt’s wide binding, think harmony and pizzazz.
Coordinating colors ensure a seamless look, while bold stripes or patterned prints can add a zesty twist.
Don’t shy away from accent fabrics that pop—your quilt could be the canvas for your very own custom designs.
Adjusting Width for Visual Impact
After picking your fabric, it’s time to jazz things up by adjusting the width for visual interest.
Think of your quilt as a canvas where scale adjustment and dimension variation are your brushes.
A wider binding adds a bold frame, while color contrast and pattern play can turn a simple quilt into a masterpiece.
It’s all about making your quilt pop!
Troubleshooting Common Wide Binding Issues
When working with extra wide quilt binding, you may encounter bulky corners that disrupt the quilt’s smooth finish. To ensure your binding width is consistent all around, pay close attention to how you handle and fold the fabric at the corners.
Handling Bulky Corners
After diving into the creative depths of wide binding, let’s tackle those pesky bulky corners head-on.
- Bias Binding for Bulky Corners: Adds flexibility, making those corners easier to manage.
- Corner Mitering Techniques: Ensure crisp, clean angles.
- Alternative Corner Treatments: Sometimes, a little top stitching for strength can work wonders.
Embrace these tips and watch your corners transform!
Ensuring Even Binding Width
After tackling those bulky corners, let’s smooth out another wrinkle: ensuring even binding width. Measuring accurately is your best friend here. Aligning binding precisely and avoiding puckering are your secret weapons.
Don’t forget, securing corners firmly and using pressing as a tool can turn a good finish into a great one.
Frequently Asked Questions (FAQs)
Can wide binding be used on curves?
Sure, you can use wide binding on curves, but it’s like hugging a cactus—tricky and requires a gentle touch.
How to calculate fabric yardage for binding?
Like a chef calculating ingredients for a feast, measure your quilt’s perimeter, add 20 inches for corners and seams, then divide by the width of fabric to find the number of strips needed.
Is hand stitching necessary for durability?
Hand stitching isn’t a must for durability; machine binding can be just as sturdy and is quicker. But for that heirloom touch or if you’re after a seamless look, hand stitching is your friend.
Can wide binding accommodate bulky seams?
Imagine tucking in a giant with a cozy blanket; that’s wide binding for your quilt. It wraps around bulky seams like a hug, ensuring every inch is snug without a stitch out of place.
What alternatives exist to mitered corners?
You’re in luck! Ditch the mitered hassle and try butted corners, or go for a smooth finish with the pillowcase or self-binding methods.
Conclusion
You’ve journeyed through the steps, and now the art of extra wide quilt binding is at your fingertips.
Imagine the durability and style your quilts will boast with this skill. Your creations will stand out, as you’ve learned to cut, press, and stitch with confidence.

