This site is supported by our readers. We may earn a commission, at no cost to you, if you purchase through links.
To find and fix embroidery machine problems, start by identifying the issue. Is it thread breakage, inconsistent stitch quality, or fabric distortion?
Check your machine tension and thread, and adjust as needed.
Make sure you’ve threaded the machine correctly and that the needle is aligned properly.
Consult your user manual for guidance.
By learning a few essential troubleshooting skills, you’ll be back to creating beautiful embroidery designs in no time.
And, trust me, it’s just the beginning of your embroidery journey…
Table Of Contents
- Key Takeaways
- Common Embroidery Machine Issues
- Troubleshooting Embroidery Machine Problems
- Embroidery Machine Thread Issues
- Embroidery Machine Needle Problems
- Embroidery Machine Fabric Issues
- Advanced Embroidery Machine Troubleshooting
- Embroidery Machine Maintenance and Repair
- Embroidery Machine Hoop and Frame Issues
- Embroidery Machine Design and File Issues
- Preventing Embroidery Machine Problems
- Frequently Asked Questions (FAQs)
- Conclusion
Key Takeaways
- You’ve got this! To find and fix embroidery machine problems, start by identifying the issue—is it thread breakage, inconsistent stitch quality, or fabric distortion? Take a step back, assess the machine’s behavior, fabric type, thread quality, needle condition, and tension settings, and get ready to troubleshoot like a pro!
- Don’t let thread breakage get you down! Check your machine tension and thread, and adjust as needed. Make sure you’ve threaded the machine correctly and that the needle is aligned properly. Remember, using low-quality thread or incorrect bobbin tension can be a major contributor to thread breakage.
- Time to tame that temperamental fabric! To prevent fabric puckering and distortion, choose the right stabilizer for your fabric, and ensure a snug, even fit in the hoop. Don’t be afraid to experiment with different stabilizers and hoop sizes to find what works best for your project.
- You’re not alone in the frustration of embroidery machine thread issues! To avoid thread bunching, breakage, and fraying, check your thread quality, needle type, and tension issues. Use the right thread type and weight for your fabric, and don’t forget to clean and oil your machine regularly to keep it running smoothly.
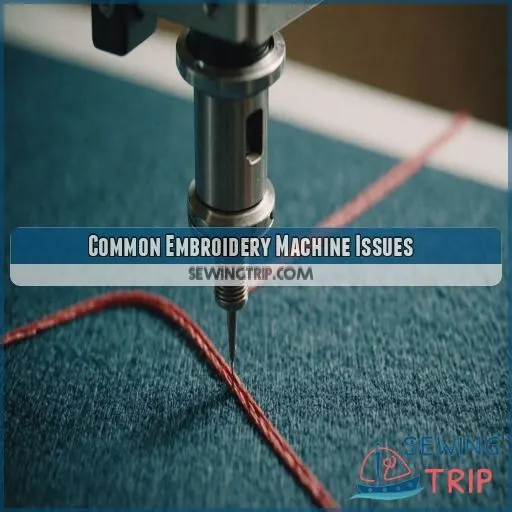
Common Embroidery Machine Issues
You’re in the middle of an embroidery project, and your machine suddenly starts acting up – don’t worry, we’ve all been there! Let’s tackle the most common embroidery machine issues, like thread breakage, bobbin thread showing on top, and fabric puckering, and get you back to stitching in no time.
Thread Breakage and Tangles
Thread breakage got you down? Don’t worry, friend! Let’s tackle this common embroidery machine issue together. Here are four potential culprits:
- Low-quality thread: Yep, it’s time to upgrade!
- Incorrect bobbin tension: Check your machine’s manual for guidance.
- Wrong needle type: Make sure it’s compatible with your fabric.
- Poor machine maintenance: When was the last time you cleaned and oiled your machine?
Bobbin Thread Showing on Top
You’re frustrated with bobbin thread showing on top! Adjust your bobbin tension, make sure you’re using high-quality thread, and check your needle type to resolve this common embroidery machine issue quickly.
Inconsistent Stitch Quality
Now that you’ve tackled the pesky bobbin thread issue, let’s move on to inconsistent stitch quality. Your embroidery machine’s stitch quality can be affected by three main factors:
- Incorrect needle type: Using the wrong needle for your fabric can lead to poor stitch quality.
- Off-kilter thread tension: Thread that’s too tight or too loose can affect stitch consistency.
- Hooping issues: If your fabric isn’t properly secured in the hoop, stitches can become distorted.
Machine Not Picking Up Bobbin Thread
Is your embroidery machine playing hard to get with the bobbin thread? Check the bobbin case for tangles, adjust the tension, and use high-quality thread for a smooth pickup.
Fabric Puckering and Distortion
Now that we’ve tackled the machine not picking up bobbin thread, let’s move on to fabric puckering and distortion. Here are 4 common causes:
- Insufficient stabilizer: Choose the right stabilizer for your fabric.
- Poor hooping techniques: Make sure there’s a snug, even fit to prevent fabric shifting.
- Incompatible fabric types: Select fabrics suitable for embroidery, considering stretch and density.
- Tension issues: Adjust thread tension to balance stitch density and prevent puckering.
Troubleshooting Embroidery Machine Problems
You’re in the middle of an embroidery project and suddenly, your machine starts acting up – don’t panic! With some basic troubleshooting skills, you can quickly identify and fix common embroidery machine problems, getting you back to stitching in no time.
Identifying the Problem Cause
To tackle embroidery machine problems, start by identifying the root cause. Take a step back, and assess the machine’s behavior, fabric type, thread quality, needle condition, and tension settings – it’s like solving a puzzle, and you’re the detective!
Checking Machine Tension and Thread
Now that you’ve identified the problem, let’s get down to business! Checking your machine tension and thread is the next step. Make sure your thread is properly seated, and the take-up lever is in the correct position.
Adjusting Bobbin and Top Thread Tension
Let’s talk about adjusting bobbin and top thread tension. You’re on a roll!
- Check your machine’s manual for specific tension settings.
- Adjust bobbin tension by turning the dial clockwise to tighten or counterclockwise to loosen.
- Test your stitches to make sure you have a smooth, balanced tension.
Ensuring Proper Threading and Needle Alignment
Now that you’ve got your bobbin and top thread tension in check, let’s get down to business – threading and needle alignment! Make sure to follow the needle thread path and wind that bobbin correctly to avoid those pesky skipped stitches.
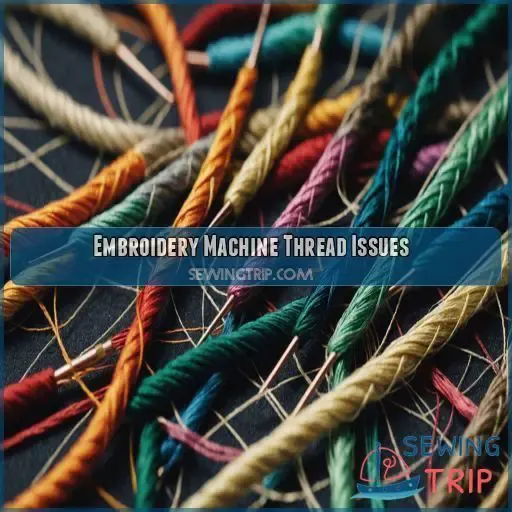
Embroidery Machine Thread Issues
You’re not alone in the frustration of embroidery machine thread issues – we’ve all been there, wrestling with tangled threads and uneven stitches. In this section, we’ll walk you through the common thread problems that plague embroidery machines and provide you with practical solutions to get your machine humming smoothly again.
Thread Bunching and Knotting
Now that you’ve tackled machine troubleshooting, let’s get tangled up in thread bunching and knotting! To avoid this messy issue, make sure you have proper thread tension, wind your bobbin correctly, and use the right needle type for your fabric.
Thread Breaking and Fraying
Ugh, thread breaking and fraying – the ultimate embroidery machine buzzkill! Check your thread quality, needle type, and tension issues to prevent this headache. Also, consider the fabric type and regular machine maintenance to keep your threads happy and healthy.
Thread Not Feeding Properly
Uh-oh, your thread’s not feeding properly! Check if the thread path is clear, the bobbin is wound correctly, and the needle type is suitable for your fabric. Adjust your sewing speed to prevent thread bunching and skipped stitches.
Thread Tension Issues and Solutions
Tackling thread tension troubles? Start by checking your top thread tension and bobbin tension. If they’re out of whack, you’ll end up with thread bunching or breakage. Adjust them carefully to avoid pesky embroidery machine problems.
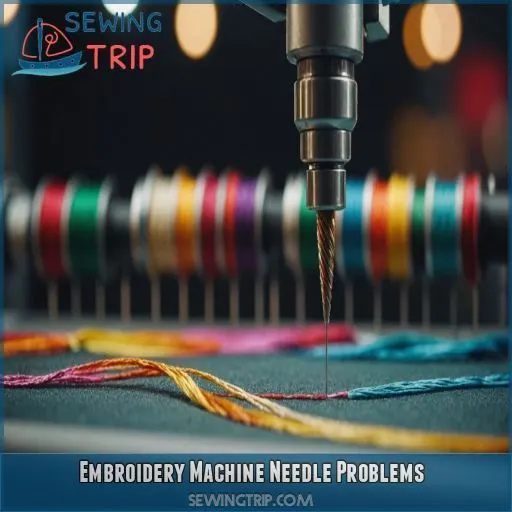
Embroidery Machine Needle Problems
You’re dealing with embroidery machine needle problems, and it’s a real pain – but don’t worry, we’re here to help! In this section, we’ll walk you through the most common needle-related issues, from bent or dull needles to incorrect needle sizes and types, and provide you with practical solutions to get your machine up and running smoothly again.
Bent or Dull Needles
Bent or dull needles can wreak havoc on your embroidery projects. Check your needle regularly and replace it if necessary. Here are some tips to keep in mind:
- Use a needle threader to prevent bending
- Store needles in a protective case
- Replace needles every 8-10 hours of use
Incorrect Needle Size and Type
Using the wrong needle size and type can wreak havoc on your embroidery machine projects. Make sure you choose a needle that matches your fabric weight and thread compatibility to avoid needle breakage and other embroidery machine problems.
Needle Not Fully Inserted or Secured
Now that you’ve double-checked your needle size, let’s make sure it’s fully inserted and secured. A loose needle can cause breakage, skipped stitches, and more. Here are three things to check:
- The needle is fully seated in the needle bar clamp.
- The flat side of the needle is facing the correct direction (usually the back).
- The needle bar tension is set correctly to prevent excessive movement.
Needle Threader Issues and Solutions
You’re struggling with needle threader issues! Don’t worry, it’s more common than you think. Check your needle threader alignment and threading technique. Make sure the needle threader hook isn’t bent and use the right thread type and tension.
| Common Issues | Solutions |
|---|---|
| Bent needle threader hook | Replace or adjust the hook |
| Incorrect threading technique | Refer to your machine’s manual |
| Thread type mismatch | Use the recommended thread type |
Adjust your needle threader, and you’ll be sewing like a pro in no time!
Embroidery Machine Fabric Issues
You’re having fabric issues with your embroidery machine – don’t worry, it’s more common than you think! Let’s troubleshoot the problems together, whether it’s fabric not feeding properly, slipping or dragging, or choosing the right fabric for your embroidery project.
Fabric Not Feeding Properly
Your embroidery machine’s having a feeding frenzy – and not the good kind! When fabric won’t feed properly, it’s time to troubleshoot. Check these potential causes:
- Fabric tension too tight or loose
- Foot pressure too strong or weak
- Incorrect needle type
- Stitch length too short
- Feed dog issues
Fabric Slipping or Dragging
Fabric Slipping or Dragging? Don’t let it ruin your embroidery! Check your hooping technique, fabric weight, and stabilizer use. Use a ballpoint needle and reduce sewing speed. Consult your sewing machine manual for guidance. Here’s a helpful table:
| Fabric Type | Stabilizer | Sewing Speed |
|---|---|---|
| Lightweight | Water-soluble | Low |
| Medium-weight | Cut-away | Medium |
| Heavyweight | Tear-away | High |
| Stretchy | Cut-away | Low |
Choosing the Right Fabric for Embroidery
For embroidery, choosing the right fabric can make all the difference. Look for fabrics with a medium weight and minimal stretch, like cotton or linen. Avoid super-light or super-stretchy fabrics, as they can be tricky to work with. Your embroidery machine (and your sanity) will thank you!
Advanced Embroidery Machine Troubleshooting
You’re about to tackle the tough stuff – advanced embroidery machine troubleshooting! Don’t worry, with these expert tips, you’ll be able to identify and fix those pesky problems that have been holding you back from creating flawless embroidery designs.
Timing Issues and Solutions
Your embroidery machine’s timing is off? Don’t panic! Check the timing belt, needle position, and synchronized movement. Calibrate the motor and make sure the machine is aligned to get your machine humming smoothly again. It’s a quick fix!
Machine Not Stitching or Moving
Your embroidery machine’s gone quiet? Don’t panic! Check the power cord, make sure the bobbin isn’t jammed, and inspect for thread breakage. If issues persist, it may be a motor failure or needle issue – time to get it serviced!
Error Messages and Codes
When your embroidery machine flashes an error message, don’t panic! Look up the error code meaning, and follow the troubleshooting guide. Understanding these codes will help you decode the machine language and resolve issues quickly.
Advanced Thread and Tension Issues
Now that error messages aren’t stressing you out, let’s tackle advanced thread and tension issues. Time to geek out and master your embroidery machine’s intricacies!
- Identify thread types and weights causing tension issues
- Adjust top and bobbin thread tension for harmony
- Solve thread bunching with correct threading and guides
- Consult sewing machine professionals for personalized advice
Embroidery Machine Maintenance and Repair
You’re probably here because your embroidery machine has decided to take a break, and you’re ready to get back to creating. Don’t worry, with some simple maintenance and repair tricks up your sleeve, you’ll be stitching like a pro in no time, and we’re here to guide you through the process.
Regular Cleaning and Oiling
To keep your embroidery machine purring like a kitten, establish a regular cleaning schedule. Every 1-3 months, use a soft brush and sewing machine oil to lubricate moving parts. Check the table below for specific guidance.
| Frequency | Task | Tools Needed |
|---|---|---|
| Daily | Wipe down exterior | Soft cloth, mild detergent |
| Monthly | Clean bobbin area | Small brush, tweezers |
| Quarterly | Oil machine | Sewing machine oil, applicator bottle |
Replacing Worn or Damaged Parts
Now that you’re a pro at regular cleaning and oiling, it’s time to tackle worn or damaged parts! Inspect your machine’s needle, bobbin case, tension discs, presser foot, and feed dog for signs of wear, and replace them as needed.
Updating Machine Software and Firmware
Update your embroidery machine’s software and firmware to keep it running smoothly. Don’t worry, it’s a breeze. Here’s what you need to know:
- Check for updates every 6-12 months.
- Verify compatibility before installing.
- Follow the manufacturer’s update process.
- Restart your machine after updating.
Troubleshooting Common Machine Errors
When troubleshooting common machine errors, start by checking the basics: needle problems, tension issues, and fabric choice. Next, inspect your machine’s stitch quality and address any jamming issues to get back to sewing smoothly.
Embroidery Machine Hoop and Frame Issues
You’re just about to start embroidering, and your hoop and frame are being stubborn – don’t worry, we’ll help you out! In this section, we’ll tackle common embroidery machine hoop and frame issues, such as hoop burn, fabric distortion, and frame alignment problems, so you can get back to creating beautiful designs.
Hoop Burn and Fabric Distortion
Got hoop burn? Don’t worry, it’s an easy fix! Try floating your fabric onto the hoop or treating the affected area with water or steam to remoisturize and lift the imprint, especially for delicate fabrics like t-shirt knits and velvets.
Frame Not Aligning Properly
Frame Not Aligning Properly? Relax, it’s an easy fix! Check the hoop’s tension and adjust as needed. Make sure the hoop is the right size for your fabric, and tighten the frame’s screws to prevent slippage and dreaded hoop burn.
Hoop Not Securing Fabric Correctly
Your embroidery hoop’s not cooperating? Don’t worry! To secure fabric correctly:
- Check fabric tension: not too tight, not too loose.
- Adjust hoop alignment for a snug fit.
- Choose the right fabric type for your hoop.
- Prevent hoop burn with a stabilizer or float.
Choosing the Right Hoop Size and Type
When choosing the right hoop size and type, consider your project size, fabric tension, and hoop burn. A well-fitting hoop helps you stitch smoothly and minimizes errors.
| Hoop Size | Hoop Type | Suitable Projects |
|---|---|---|
| Small | Fixed | Small designs, patches |
| Medium | Adjustable | Medium-sized designs, sleeves |
| Large | Roll-away | Large designs, quilts |
Embroidery Machine Design and File Issues
You’re staring at your embroidery machine, wondering why your design won’t load or stitch correctly – don’t worry, we’ve all been there! Let’s troubleshoot the most common embroidery machine design and file issues together, from file format problems to editing and customizing your designs.
Design Not Loading or Opening
- Corrupted design file: Check for errors or try re-downloading the file.
- Insufficient machine memory: Free up space or upgrade your machine’s memory.
- File size limits exceeded: Reduce the design size or split it into smaller parts.
- Software compatibility issues: Make sure your machine’s software is up-to-date and compatible with the design file.
File Format and Compatibility Issues
Now that your design is loaded, let’s tackle file format and compatibility issues. Make sure your embroidery software supports the file type, and check for design conversion options if needed. Don’t let file size limits or import errors slow you down!
Design Not Stitching Correctly
Having tackled those pesky file format issues, let’s get your design stitching like a pro! To fix a design not stitching correctly, try:
- Adjusting the stitch length for a smoother finish
- Tweaking hoop placement for perfect alignment
- Swapping stabilizers for a more stable stitch
Editing and Customizing Embroidery Designs
You’re close to perfecting your design, but it needs a tweak. Let’s edit and customize your embroidery masterpiece!
| Design Desire | Digitizing Drama | Delightful Solution |
|---|---|---|
| Scale up a logo | Loses clarity | Use design scaling software |
| Change thread color | Doesn’t match | Learn color changing basics |
| Combine designs | Looks messy | Master design combining techniques |
Preventing Embroidery Machine Problems
To prevent embroidery machine problems, you’ll want to stay on top of regular maintenance and upkeep, as a well-oiled machine is a happy machine. By choosing the right thread and fabric, ensuring proper threading and needle alignment, and troubleshooting before calling for help, you’ll be well on your way to a stress-free embroidery experience.
Regular Maintenance and Upkeep
Now that you’ve conquered design and file issues, let’s talk maintenance! Set a cleaning schedule, lubricate regularly, and store threads properly. Needle care is also essential. Clean your machine monthly to prevent clogs and keep it humming smoothly.
Choosing the Right Thread and Fabric
Now that you’re on top of regular maintenance, let’s talk threads and fabrics! To avoid embroidery machine problems, choose wisely. Here are some tips:
- Select a suitable thread weight for your fabric type.
- Consider fabric stretch and stability when choosing embroidery thread.
- Make sure color matching between threads and fabrics for a professional finish.
- Balance thread tension with fabric stability for smooth stitching.
Proper Threading and Needle Alignment
Now that you’ve picked the perfect thread and fabric, it’s time to get your machine in gear! Make sure you’re threading correctly by following your machine’s thread guides, and align that needle with the needle threader for a smooth, trouble-free ride.
Troubleshooting Before Calling for Help
Before calling for help, take a deep breath and review your machine’s basics: is your needle properly seated, tension adjusted, threading correct, bobbin in place, and fabric smoothly fed? A quick double-check can save you time and frustration!
Frequently Asked Questions (FAQs)
Why is my embroidery machine not picking up the bobbin thread?
Don’t stress! If your embroidery machine isn’t picking up the bobbin thread, check the threading and tension (Source). Make sure the needle is properly inserted and the bobbin is correctly aligned .
How do I know if my bobbin tension is correct in embroidery?
Check your bobbin tension by gently tugging on the thread – it should have a bit of give, but not be too loose. If it’s too tight, your stitches will pucker; too loose, and you’ll get uneven tension.
Why does my embroidery machine keep stopping?
A million thread breaks later, and you’re still stuck! Check if your embroidery machine is clogged with thread or debris, and make sure the bobbin is properly seated and threaded – it’s an easy fix!
Why does my embroidery machine keep bunching up?
Ugh, bunching thread is the worst! Check your upper thread’s threaded correctly, make sure the bobbin’s not tangled, and verify the presser foot is down. Also, avoid sewing too many layers or heavy materials – your machine will thank you!
What causes inconsistent stitch lengths in embroidery designs?
Inconsistent stitch lengths in embroidery designs can be caused by incorrect tension settings, improper thread or needle usage, or inadequate stabilization. Check your machine’s settings and adjust as needed to achieve uniform stitches (Source).
How do I prevent embroidery threads from getting tangled?
Are tangled threads driving you crazy? To prevent embroidery threads from getting tangled, simply cut them to a manageable length, use thread clips or organizers, and gently guide them through your machine – voila, tangle-free stitching!
Can I use different thread weights for embroidery projects?
With embroidery threads, you can experiment with different weights, but keep in mind that using threads with vastly different weights can cause tension issues and affect your design’s overall quality.
What is the ideal humidity level for embroidery machines?
For embroidery machines, maintaining an ideal humidity level between 40-60% is really important to prevent thread breakage, reduce static, and make sure stitching is smooth – so keep your workspace comfy for your machine too! (Source)
How often should I update my embroidery machine software?
Imagine your embroidery machine suddenly freezes mid-project! To avoid this, update your software every 6-12 months or whenever the manufacturer releases new features or bug fixes. Regular updates will keep your machine running smoothly and efficiently.
Conclusion
Troubleshooting triumph! You’ve gone from frustrated to fantastic, mastering the art of finding and fixing embroidery machine problems.
With these expert tips, you can tackle thread breakage, inconsistent stitch quality, and fabric distortion like a pro.

