This site is supported by our readers. We may earn a commission, at no cost to you, if you purchase through links.
Your sewing machine hums along beautifully for months, then suddenly the thread starts breaking every few stitches. The fabric bunches. The needle skips. What changed? In most cases, nothing dramatic—just weeks of invisible lint building up in the bobbin case and dried oil on the moving parts.
A machine that could last 15 years might struggle after just three if you skip basic cleaning and maintenance. The good news is that keeping your machine running smoothly takes less time than you’d think. A few simple steps every month can cut stitch problems by nearly 30% and prevent the kind of breakdowns that leave projects sitting unfinished for weeks.
Table Of Contents
Key Takeaways
- Clean your bobbin case and feed dogs every 2-3 bobbins or 8-10 hours of stitching to cut thread breakage and stitch problems by 20-30%, preventing most tension issues before they start.
- Change your needle every 6-8 hours of use and match it to your fabric weight—dull needles cause skipped stitches, fabric damage, and broken thread that no amount of tension adjustment will fix.
- Oil your machine’s moving parts every 300-500 hours for light use or every few months for heavy stitching, but check your manual first since some modern machines don’t need regular oiling.
- Schedule annual professional servicing for $75-$130 to catch timing and alignment issues early, turning a potential decade of use into 15-20 years or more with proper care.
Why Regular Sewing Machine Maintenance Matters
Your sewing machine works hard every time you stitch, and just like any tool, it needs regular care to keep running smoothly. Without proper maintenance, small problems can snowball into costly repairs or a machine that won’t sew at all.
Let’s look at why cleaning and maintaining your machine isn’t just a nice thing to do—it’s essential.
Benefits of Consistent Cleaning and Care
Regular maintenance isn’t just busy work—it’s your machine’s lifeline. When you keep your equipment clean and oiled, you realize real advantages:
- Stitch Quality: Routine cleaning reduces stitch irregularities by 20–30% and cuts thread breakage by half.
- Machine Uptime: Preventative maintenance minimizes unexpected breakdowns.
- Lifespan Extension: Proper care helps machines last 10–20 years.
- Cost Savings: Scheduled servicing prevents expensive emergency repairs.
To maintain peak performance, remember to remove lint regularly.
Common Issues Caused by Neglect
Skip cleaning even a few times, and you’ll face a lineup of frustrations. Poor stitch quality—looping, skipping, unevenness—jumps 18–27% when maintenance slips. Machine jamming and thread breaking issues multiply as lint chokes the bobbin area. Component wear accelerates, repair costs climb, and downtime drags out your projects. One common cause is incorrect thread tension, which can lead to thread breakage and tangling.
Here’s what neglect triggers:
| Problem | Cause | Impact |
|---|---|---|
| Stitch Quality | Lint buildup, tension faults | Skipped stitches, loops, rework |
| Machine Jamming | Compacted debris in hook | Frozen handwheel, production halt |
| Component Wear | Dried oil, contamination | Shortened lifespan, part replacement |
| Repair Costs | Deferred cleaning | Tune‑up becomes part swap |
How Maintenance Extends Machine Lifespan
Beyond frustration, neglect shortens your machine’s life. Well‑maintained mechanical models run 10–20 years or more; some work past 50.
Neglect shortens your machine’s life, but proper maintenance can keep it running smoothly for decades—even past 50 years
Cleaning stops dried‑oil sticking after 12 months, oiling at 100‑hour marks cuts breakdowns, and proper storage guards motors. Light users clean every six months; heavy sewers need monthly care.
Professional servicing yearly catches misalignment early, turning a decade into decades of reliable stitching.
Step-by-Step Sewing Machine Cleaning Guide
Cleaning your sewing machine doesn’t have to feel overwhelming if you break it down into simple steps. The key is working methodically through each part of the machine, from the inside out.
Here’s how to give your machine a thorough cleaning that keeps it running smoothly.
Preparing Your Machine for Cleaning
Before you start sewing machine cleaning, unplug the power cord—safety precautions come first. Remove the presser foot, needle, and bobbin case for better access to internal parts.
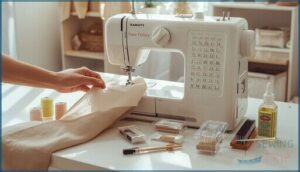
Gather your cleaning tools for sewing machines: a soft brush, tweezers, and microfiber cloth. Set up your workspace on a stable surface with good lighting.
Do a quick pre-clean inspection, checking for broken needle fragments or debris around the feed dogs.
Removing Lint and Dust From Key Areas
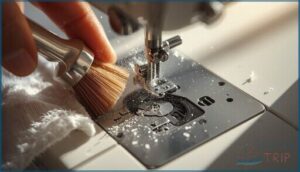
After each project, lint removal starts in the zones that matter most: the throat plate, tension discs, and hook race. Use a small brush to sweep away surface dust, then reach tight corners with a cleaning brush designed for machinery. Skip canned air—it drives debris deeper.
Industrial cleaning methods rely on frequent brushing because stitch quality impact shows up fast when lint accumulation zones go unchecked.
Cleaning The Bobbin Case and Feed Dogs
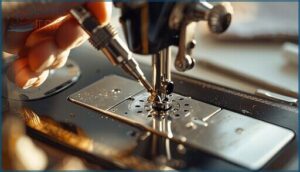
Because lint between feed dogs and inside the bobbin case causes skipped stitches and poor fabric feeding, you’ll need to clean these spots every three to five sewing hours. Unscrew the needle plate, lift it away, then use a small brush to sweep debris from the teeth and hook race.
Expert advice confirms most tension problems vanish after removing lint from machine parts here.
Cleaning The Exterior Safely
After interior cleaning, dusting your machine’s exterior protects finishes and decals. Unplug first for electrical safety.
Use a soft cloth lightly dampened with sewing machine oil or mild cleaner—never spray directly on the housing. Avoid canned air; it pushes lint inward and risks moisture damage.
Gentle wiping tools prevent scratches on painted surfaces, while finish protection starts with the right cleaning agents applied sparingly.
Oiling and Lubricating Your Sewing Machine
Not every sewing machine needs oil, but most home models require regular lubrication to keep their moving parts running smoothly. Your machine’s manual will show you exactly where to apply oil and how often to do it.
Let’s walk through how to identify oil points, choose the right product, apply it correctly, and stay on schedule.
Identifying Oil Points and Lubrication Needs
Your machine’s manual holds the roadmap to every oil point, but not all sewing machines need lubrication. Modern machines often label themselves “self-lubricating,” while vintage models like the Singer 237 list 39 precise spots.
Check your manual first—over-oiling causes more harm than skipping the oiling process entirely. The lubrication frequency depends on use, and synthetic oils aren’t always recommended.
Choosing The Right Sewing Machine Oil
You’ll find clear, light mineral oils labeled for sewing machines at viscosities around 10–22 centistokes work best—heavy alternatives risk gumming and timing issues. Biodegradable options reduce toxicity levels and environmental impact, but check your manual first.
Never substitute automotive or household oils; application risks include staining and electronic damage.
Store machine oil in labeled containers away from children, replacing bottles every three months to prevent contamination during sewing machine oiling.
Proper Application Techniques
Start by unplugging your machine and removing the needle plate—that’s where you’ll target key lubrication points. Apply just 1–2 drops per marked oiling sequence point; excess oil attracts lint and causes contamination.
After oiling sewing machines, reassemble components and run test stitches on scrap fabric to distribute oil. Avoiding contamination means skipping WD-40 or household substitutes—machine type dictates specific oil quantity for proper sewing machine maintenance.
How Often to Oil Your Machine
Oiling frequency depends on how much you sew. Light users need lubrication every six months, while moderate sewers—clocking three to seven hours weekly—should oil every three months. Daily stitchers require weekly maintenance to fight friction buildup.
Vintage machines demand oiling every eight to ten hours regardless of your schedule. Watch for squeaking or stiffness between intervals—those signs mean your machine needs immediate attention.
Essential Tools for Cleaning and Maintenance
You don’t need a lot of fancy equipment to keep your sewing machine in top shape. A handful of basic tools will handle most cleaning and maintenance tasks you’ll run into.
Here are the essentials worth adding to your sewing kit.
1. Sewing Machine Cleaning and Repair Kit
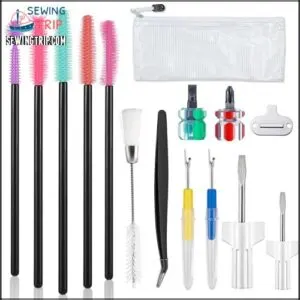
You’ll need a proper cleaning and repair kit to tackle regular sewing machine maintenance. A good kit bundles 8 to 21 cleaning tools—brushes, tweezers, seam rippers, and screwdrivers—so you don’t buy sewing machine parts separately.
These cleaning tools let you reach tight bobbin areas and feed dogs where lint causes most problems. Kits offer real cost savings compared to professional servicing and help you handle minor repair capabilities at home.
Aim to clean every 300 to 500 hours of use, and your kit keeps those sewing machine cleaning supplies organized and ready.
Best For: Home sewers who want to handle routine maintenance and small repairs themselves instead of paying for professional service visits.
- Bundles 8 to 21 essential tools in one package, saving you from hunting down individual brushes, tweezers, and screwdrivers separately.
- Reaches critical lint-prone spots like bobbin cases and feed dogs where most thread and feeding problems start.
- Supports the recommended cleaning schedule of every 300 to 500 hours, helping you avoid the “needs cleaning” issues that account for a huge chunk of repair shop visits.
- Some kits include flimsy tweezers and brushes that bend under pressure, limiting their usefulness for tougher cleaning jobs.
- Basic kits don’t cover electrical diagnostics or timing adjustments, so computerized machine issues may still need a technician.
- Tool quality varies widely across brands, and cheaper sets may require replacement sooner than expected.
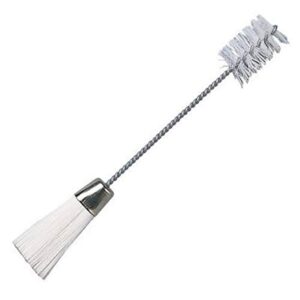
2. Double Ended Sewing Machine Cleaning Brush
A double-ended cleaning brush gives you two bristle types in one compact tool—about 5.8 inches long and light enough to control precisely. One end addresses tight bobbin cases and hook races, while the other sweeps feed dogs and gears.
The nylon bristles lift lint outward instead of pushing debris deeper like compressed air can.
You’ll use this brush after every project or every few hours of sewing, especially with fleece and other high-lint fabrics. It’s durable enough to rinse clean and works for keyboards too.
Best For: Home sewers who work with lint-heavy fabrics like fleece or brushed cotton and need a precise, reusable tool for cleaning bobbin cases and feed dogs after every project.
- Dual-ended design gives you two bristle options in one 5.8-inch tool—one end for tight bobbin areas, the other for larger surfaces like gears and feed dogs
- Lifts lint outward mechanically instead of pushing debris deeper into the machine like compressed air can
- Durable nylon bristles hold up to repeated use, can be rinsed clean with water, and work for other small items like keyboards
- Some users report bristles falling out or bending with regular use, suggesting inconsistent quality across batches
- May be too large to reach certain tight spots around bobbin cases, limiting effectiveness in the smallest crevices
- Can push lint around rather than removing it completely in some situations, depending on debris type and technique
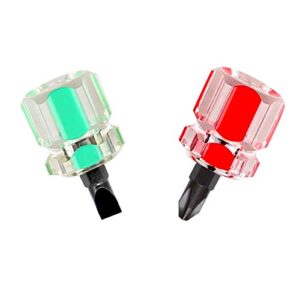
3. Buspoll Sewing Machine Screwdriver Short Set
Once your brush work is done, you’ll need the right screwdriver to open your machine’s throat plate and access deeper lint. The Buspoll stubby set gives you both flat head and Phillips drivers under three inches long—short enough for tight spaces around your needle bar and bobbin case.
The chrome vanadium steel tips resist stripping on small screws, and the two-color grips help you grab the right driver fast. This ergonomic design works well even if you have arthritic fingers, making your sewing machine maintenance routine easier.
Best For: Sewists who need to access recessed screws in tight spaces around the throat plate, bobbin case, and needle clamp during routine machine maintenance and cleaning.
- Ultra-short design under 3 inches lets you work in confined areas where standard 5–6 inch screwdrivers won’t fit, especially around needle bars and bobbin covers.
- Chrome vanadium steel tips resist deformation and stripping on small screws, even after repeated use on tight face-plate and needle-bar fasteners.
- Two-color ergonomic handles make it easy to identify the right driver quickly and provide comfortable grip for users with arthritic fingers.
- Limited to specific screw sizes (1/4 inch flat head and PH2 Phillips), so you may need additional drivers for other fasteners on your machine.
- Short handle length requires more hand strength to generate adequate torque on tight screws compared to standard-length drivers.
- Not suitable for heavy-duty or high-torque applications beyond small sewing machine hardware and similar precision tasks.
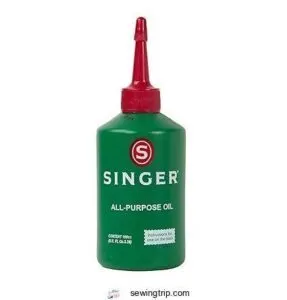
4. Singer All Purpose Sewing Machine Oil
After you’ve cleared out lint and tightened screws, proper lubrication keeps your machine running smooth. Singer All Purpose Sewing Machine Oil is a light mineral formula that won’t gum up metal parts or stain fabric. This petroleum-based oil reduces friction, cuts down noise, and protects against rust.
You’ll apply just one or two drops at each lubrication point your manual shows—usually the hook race and needle bar.
Check your sewing machine oiling instructions, since some newer models run sealed and don’t need regular oiling.
Best For: Anyone maintaining older Singer machines or other mechanical sewing equipment that needs regular oiling to keep friction low and parts moving quietly.
- Light mineral formula flows easily into tight spaces and won’t leave sticky residue or gum up over time
- Works on a wide range of brands and models, plus you can use it on other small household devices like vacuums or typewriters
- Prevents rust and corrosion on metal parts, which matters if you store your machine for long periods between projects
- Some users struggle with caps that are tough to twist off, which gets annoying when you oil frequently
- Has a shelf life of about five years from manufacture, so you might waste product if you sew infrequently
- Not compatible with all modern machines—many newer models have sealed parts that don’t need oil, and petroleum formulas can damage certain plastics
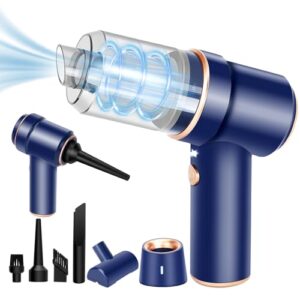
5. Honlibey Mini Cordless Vacuum Cleaner
A mini vacuum handles the lint that brushes push around. The Honlibey cordless unit delivers 8,000 Pa of suction power through a crevice nozzle that fits tight spaces around feed dogs and bobbin cases.
Its 4,000 mAh battery runs about 20 minutes per charge—enough for several quick cleanings. You’ll want to rinse the washable HEPA filter every few uses to keep suction strong.
Always power off your machine before vacuuming near moving parts, and use suction mode instead of blowing to avoid forcing debris deeper inside.
Best For: Anyone who sews regularly and wants a quick way to clear lint from tight spots around feed dogs, bobbin cases, and machine crevices without taking everything apart.
- 8,000 Pa suction and a slim crevice nozzle reach into narrow areas where brushes can’t grab lint
- Cordless design with a 20-minute runtime lets you clean multiple times between charges without dealing with plugged-in cords near your workspace
- Washable HEPA filter keeps costs down since you can rinse and reuse it instead of buying replacements
- Some users report the battery doesn’t hold a charge as well over time, which can shorten cleaning sessions
- Not strong enough for heavy debris or thick fabric scraps—it’s really only made for light dust and lint
- You’ll need to clean the filter often to maintain full suction, and skipping that step drops performance quickly
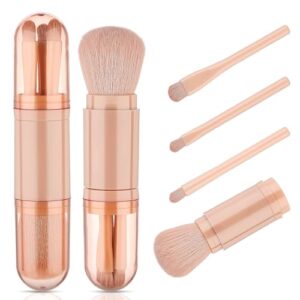
6. Gjinxi 4 In 1 Makeup Brushes
Cosmetic brushes work surprisingly well for precision lint removal. The Gjinxi 4 In 1 set includes powder and eyeshadow brushes with soft synthetic bristles that won’t scratch delicate parts around your tension discs or needle bar.
The bristle material—usually nylon—attracts fine fibers better than many stock cleaning tools. You can trim the bristles shorter for stiffer reach into tight spots.
Dedicate one set exclusively to your sewing machine maintenance routine and wash it weekly with mild soap. At under three dollars, portability benefits and alternative uses make this an affordable addition to your cleaning kit.
Best For: Sewists looking for an inexpensive, portable brush set to clean tight spaces in their machines without scratching delicate parts.
- Soft synthetic bristles attract lint and thread fragments better than many stock cleaning tools, especially around bobbin areas and feed dogs
- Retractable design keeps bristles clean and protected when stored with other sewing tools
- Extremely affordable (under $3) so you can dedicate one set purely to machine maintenance while keeping another for makeup
- Bristles may be too soft out of the box and require trimming for better stiffness in narrow crevices
- Only four brushes in the set, so you’re limited if you want different sizes for various machine parts
- Plastic construction may not hold up to heavy weekly cleaning routines over long-term use
7. Nook and Cranny Cleaning Brushes
Twenty-five micro-tip brushes in a dedicated pack target every hidden surface where lint hides. The bendable shafts reach under your needle plate and around the hook race without full disassembly. These nylon brush designs attract fibers instead of pushing debris deeper—a safety advantage over compressed air that often compacts lint into gears.
Clean your bobbin case and feed dogs after every project or every eight hours of stitching. Pair them with a mini vacuum to lift what you dislodge, keeping tension discs and internal channels clear for smooth performance.
Best For: Sewers who tackle lint-heavy fabrics like cotton or flannel and need precise tools to clean tight spaces in their machine without risking compressed-air damage.
- Bendable shafts and micro-tips reach under the needle plate and around the hook race without taking apart extra components.
- Nylon bristles attract and lift lint instead of shoving it deeper into gears or tension assemblies.
- Reusable design pairs well with mini vacuums so you can dislodge debris and remove it in one cleaning session.
- Not built for large or heavy-duty cleaning jobs outside small machine crevices.
- Requires gentle handling to keep brush tips from bending permanently out of shape.
- No storage case included, so you’ll need to organize 25 brushes on your own.
Pro Tips for Sewing Machine Care and Storage
You’ve got the cleaning basics down, but a few smart habits can make a real difference in how your machine performs over time. Small choices about needles, thread, and storage add up to fewer headaches and smoother stitching.
Here’s what you need to know to keep your machine in top shape between cleanings.
Needle and Thread Selection Best Practices
Choosing the right needle and thread isn’t guesswork—it’s the foundation of great stitch quality and smooth tension adjustment. Mismatched pairs cause skipped stitches, broken thread, and fabric damage. Here’s your fabric-needle pairing cheat sheet:
- Lightweight fabrics like silk need 60/8–70/10 needles with fine polyester thread
- Medium cottons and linens work best with 80/12–90/14 universal needles
- Heavy denim and upholstery require 100/16–110/18 needles with thick thread
- Stretch fabrics need ballpoint needles to prevent runs
Match your needle and thread selection to your project requirements—it prevents headaches later.
Changing Needles Regularly
A dull needle is like trying to slice bread with a butter knife—you’ll get somewhere, but it won’t be pretty. Change your sewing machine needles every 6–8 hours of stitching to protect stitch quality and prevent fabric damage.
Fresh needle sharpness reduces thread breakage and safety risks from broken fragments. Regular needle replacement is cheap insurance against costly repairs.
Storing Your Machine to Prevent Damage
Proper sewing machine storage tips start with location: keep your machine away from humidity control challenges like basements or garages. High moisture invites rust on metal parts.
Your storage essentials for sewing machine care:
- Cover with breathable fabric—skip plastic bags that trap dampness
- Unplug cords to prevent electrical hazards and cord damage
- Choose stable, dry spaces between 50–80°F
A good machine cover protects against dust without trapping moisture.
Scheduling Professional Servicing
Even with careful home care, your machine needs professional eyes. Most repair shops recommend annual service—around $75–$130 depending on your model.
Watch for service frequency indicators like grinding sounds, skipped stitches, or tension troubles that won’t quit. These signal it’s time for a sewing machine dealer visit.
Qualified technician selection matters: choose authorized service centers for warranty service needs and reliable machine repair.
Frequently Asked Questions (FAQs)
How to maintain a sewing machine?
To maintain a sewing machine, clean lint from the bobbin area every 2–3 bobbins, oil moving parts every 8–10 hours of use, replace needles regularly, and schedule professional servicing annually.
Do you need to clean your sewing machine?
Yes, absolutely. Lint accumulation leads to lousy stitch quality, fabric feeding failures, and odd machine noise. Regular cleaning prevents overheating risk and keeps your machine running smoothly for years.
How long does it take to maintain a sewing machine?
A basic home cleaning session takes 10–20 minutes once you know the steps. Adding oiling extends that to 20–30 minutes. Beginners may need 30–45 minutes as they learn the process.
Why is maintenance important for a sewing machine?
Think of regular maintenance as insurance—it delivers performance impact through consistent stitches, repair prevention against costly breakdowns, and uptime assurance for projects.
It also ensures investment protection by extending machine longevity and safety compliance by preventing electrical hazards.
What are the 7 steps in cleaning the sewing machine?
Cleaning a sewing machine step by step involves seven core actions: power down, remove thread and needle, dust surfaces, disassemble and clean the bobbin case, vacuum interior components, apply oil to designated points, and reassemble carefully.
How to keep a sewing machine in a good condition?
Sewing machine maintenance relies on consistent cleaning, regular oiling, and preventative measures like needle changes every 8–10 hours.
Schedule professional servicing annually, perform component checks often, and store your machine in a suitable environment away from dust.
How often should a sewing machine be oiled?
For light home use, oil your sewing machine every 300-500 hours of stitching. Heavy daily users need oiling more often—every few months.
Always check your manual first, since some modern machines require less frequent lubrication.
Can you service a sewing machine yourself?
Absolutely—you can tackle basic sewing machine maintenance yourself! Routine cleaning, proper oiling frequency, and needle changes fall within safe DIY limits.
Just avoid internal timing adjustments to prevent warranty impact and costly servicing risks.
What is the average repairing cost of a vintage machine?
Vintage sewing machine repair usually runs $50 to $100 for basic tune-ups. Full restoration with cosmetic work can reach $900 to $1,100.
Labor rates and condition drive the final bill, making repair vs replacement worth weighing carefully.
Why do new home sewing machines cost between $100 and $1000?
New home sewing machines range from $100 to $1,000, with entry-level pricing covering basic mechanical models.
Computerized features, brand segmentation, market demand, and ongoing maintenance costs push prices higher for sophisticated machines.
Conclusion
Thread your way to years of smooth sewing by making maintenance a habit, not an afterthought. Learning how to clean and maintain a sewing machine isn’t just about preventing problems—it’s about respecting the tool that brings your projects to life.
Spend fifteen minutes each month on cleaning and oiling, change your needle regularly, and your machine will reward you with consistent stitches and fewer headaches. A little care now means countless finished projects later.
- https://pubs.nmsu.edu/_c/C102/index.html
- https://sewguide.com/sewing-machine-maintainence/
- https://www.youtube.com/watch?v=jL_FcFdeY_E
- https://www.sewingmachinesinstitute.com/single-post/choosing-the-right-program-your-guide-to-sewing-machine-repair-education
- https://insights.made-in-china.com/Comprehensive-Guide-to-Sewing-Machine-Maintenance-Strategies-Practices-and-Performance-Evaluation_VtiaERfljmHb.html

