This site is supported by our readers. We may earn a commission, at no cost to you, if you purchase through links.

A button that cost the factory two cents can hold your favorite jeans hostage for years. Maybe the fit’s off and you want to move it over. Maybe the original hardware is corroded, loose, or just plain ugly. Whatever the reason, knowing how to remove jean buttons cleanly — without punching a ragged hole through your waistband — is one of those skills that pays off every time you reach for a pair of denim that almost works.
The good news: you don’t need a tailor, a sewing machine, or anything fancy. A few basic tools, a flat surface, and about ten minutes is all it takes to do this right.
Table Of Contents
- Key Takeaways
- Tools for Removing Jean Buttons
- Identify Your Jean Button Type
- Prepare Jeans Before Removal
- Remove Jean Buttons With Pliers
- Remove Buttons With a Screwdriver
- Remove Buttons With Wire Cutters
- Remove Sewn-on Jean Buttons
- Top 3 Items Not Needed
- Repair Holes After Button Removal
- Replace The Jean Button
- Frequently Asked Questions (FAQs)
- Conclusion
Key Takeaways
- Knowing your button type — rivet, sew-on, shank, or snap — before grabbing any tool is what separates a clean removal from a torn waistband.
- Needle-nose pliers paired with a flathead screwdriver cover most jean button removals, and wire cutters step in when stubborn rivets won’t budge any other way.
- Slow, steady pressure beats brute force every time — rushing the twist or pull is exactly how you end up with frayed fabric and a hole you didn’t want.
- Once the button’s out, reinforcing the hole with a fusible patch and tight stitching is what keeps your jeans wearable instead of just button-free.
Tools for Removing Jean Buttons
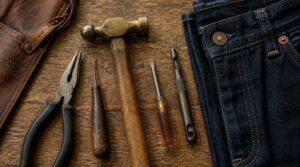
Before you start prying anything loose, having the right tools in hand makes a real difference. Most of what you need is probably already in your toolbox. Here’s what to grab before you get started.
A quick tool and supply checklist run-through beforehand saves you from mid-job trips back to the garage.
Needle-nose Pliers
Needle-nose pliers are your go-to for popping rivet buttons off jeans cleanly. Their jaw precision lets you grip tight spaces a bulkier tool would crush right through.
- Clamp the button cap firmly
- Grip the back tack with a second pair
- Twist slowly to loosen the rivet
- Pull both pieces apart
- Check the fabric for stress marks
Ergonomic grips and steel durability make the job surprisingly controlled.
Flathead Screwdriver
Pliers handle the grip work, but a flathead screwdriver does the prying. Slide the blade tip under the rivet button cap and ease it loose — slow pressure wins here.
Blade tip varieties matter. A keystone tip wedges cleanly under rivet buttons without slipping.
| Feature | Why It Matters | Best For |
|---|---|---|
| Blade tip varieties | Different tips fit different gaps | Rivet buttons on denim |
| Steel tempering benefits | Prevents brittle snapping under pressure | Heavy prying tasks |
| Driver handle ergonomics | Reduces hand fatigue mid-job | Extended removal sessions |
| Preventing cam-out | Keeps blade seated during force | Tight rivet bases |
| Tool maintenance tips | Clean blade grips better | Repeat use longevity |
The screwdriver and pliers method pairs well — pry with the screwdriver, pull with pliers.
Wire Cutters
When the screwdriver alone won’t cut it — literally — wire cutters step in. Snip the metal shank or rivet shaft, and the cap lifts right off.
Look for:
- Diagonal jaw design for flush, clean cuts near fabric
- High carbon steel blades that stay sharp through tough rivets
- Eye protection, because metal fragments fly
Wipe the blades after. Aligned jaws cut cleaner every time.
Seam Ripper
Not every jean button needs metal-on-metal force. For sewn-on buttons, a seam ripper does the job cleanly.
Slip the pointed beak under the thread, tilt slightly, and let the blade sever it. Move in small segments to avoid widening the hole in your denim fabric. The ball tip protects the surface — no accidental snags. Using ergonomic handle designs can help reduce hand fatigue during this process.
Safety Gloves
Sharp edges and flying metal fragments are real hazards when you remove buttons from jeans. That’s why gloves aren’t optional.
- Nitrile gloves resist oils and grip small parts well
- Leather gloves handle heavy-duty rivet removal comfortably
- Cut-resistant gloves (ANSI ISEA 105-rated) protect against sharp shanks
- Latex gloves offer flexibility for detailed work
Pick your pair before touching any tool.
Identify Your Jean Button Type

Before you grab any tools, it helps to know exactly what you’re working with. Jean buttons aren’t all built the same, and the removal method that works for one type can damage another. Here are the five most common types you’ll run into:
Two-part Tack Buttons
Most jean buttons you’ll deal with are two-part tack buttons — a decorative cap on the front and a metal post punched through from the back. The post spreads inside the fabric to lock everything together, which is why they hold up through hundreds of washes.
They’re usually brass or zinc alloy, finished in nickel or chrome to resist rust and match the rest of your hardware.
Sew-on Denim Buttons
Spotting a sew-on button is easy — look for visible thread on the outside of the waistband. These are stitched directly through the denim, usually with several passes to hold the button cap in place.
They’re usually 15 to 22 millimeters wide and rely entirely on thread tension to stay put, which means wear and repeated use can loosen them faster than tack-style hardware.
Shank-style Buttons
Shank buttons have a small loop on the back instead of holes through the face, so the thread ties to that loop and keeps the button floating above the fabric.
That gap matters — it prevents the denim from bunching when you button up. You’ll find these on heavier jackets and coats, made from metal, plastic, or shell depending on the garment.
Snap-in Replacement Buttons
Snap-in replacements are the DIY-friendly option — no sewing, no drilling, no removing buttons from jeans with tools you barely own. They press into place using a snap press or hammer, and they come off just as easily.
- Sizes run 12 to 16 millimeters
- Metal versions outlast plastic
- Brass or nickel finishes resist rust
- Posts are reusable hardware
- No new holes needed
Metal Rivet Buttons
Metal rivet buttons are the most common type you’ll wrestle with — a two-part system with a decorative front cap and a sharp tack post that punches through the denim and locks in place. Most are brass or nickel, built to resist rust and daily abuse.
That’s exactly what makes removing rivet buttons the trickiest job of the bunch.
Prepare Jeans Before Removal
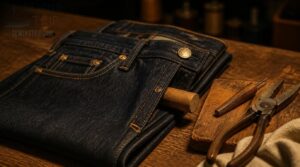
Before you grab any tools, take a few minutes to set your jeans up the right way — it makes the whole job cleaner and keeps your denim in one piece. Rushing this part is how people end up with torn fabric or a scratched surface they didn’t mean to ruin. Here’s how to prep before you touch a single button.
Lay Jeans Flat
Start with a clean, flat surface — a table or hard floor works best. Extend both legs side by side with no folds at the knee. Wrinkles shift the fabric during removal and can cause tool slippage.
Before you touch any hardware, get these right:
- Waistband aligned parallel to the surface edge
- Legs fully extended, no bunching
- Neutral background underneath for visibility
Protect Denim Surface
Once the jeans are flat, slide a piece of cardboard or a folded cloth underneath the waistband area. This creates a protective buffer between your tools and the denim, absorbing hammer impact before it can cause fabric damage.
Think of it like a cutting board — you wouldn’t skip it. Denim fabric protection starts here, before a single tool touches the button.
Work From Backside
Flip the jeans over before anything else. Working from the backside keeps your tools away from the visible front panel, so you’re not scratching or tearing the denim you actually care about.
Locating hidden tack threads is also way easier from here — you can see exactly where the rivet post sits without guessing.
Stabilize The Waistband
Once the jeans are flipped over, the waistband needs to stay put. If it shifts while you’re working, you risk fabric damage and torn denim fibers.
Press the waistband flat and hold it down with one hand. Fusible stay tape or a reinforcement strip along the interior seam line keeps things locked during removal — no rolling, no bunching.
Wear Eye Protection
Don’t skip this step. When you’re using pliers or wire cutters to remove rivets or metal hardware, tiny fragments can snap loose without warning.
Polycarbonate lenses meet ANSI Z87.1 impact resistance standards and take that hit so your eyes don’t. Get a pair with wraparound side shields — debris doesn’t only come from straight ahead. Anti-fog coatings help too, especially if you’re working fast.
Remove Jean Buttons With Pliers
Pliers give you the most control when pulling a jean button apart, which makes them a go-to for this job. The trick is knowing where to grip and how much pressure to use so you don’t stress the fabric. Here’s how to work through it step by step.
Grip Button Cap
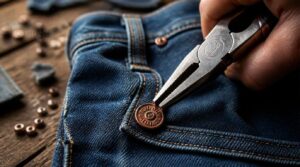
Take your needle-nose pliers and clamp down on the button cap’s outer edge — firm, like you mean it. Think of it like tactical baton retention: a textured polymer grip holds even on wet hands, and your grip here needs that same confidence.
Don’t squeeze the center. The edges give you control without crushing the cap.
Hold Back Tack
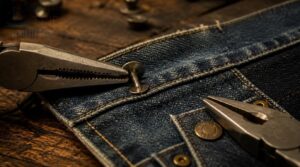
With your second pair of pliers, clamp onto the back tack — that small metal post sitting flush against the inside of the waistband. It’s the anchor half of the two-part system, and it needs to be held just as firmly as the cap up front.
Don’t let it spin or shift.
Twist Gently
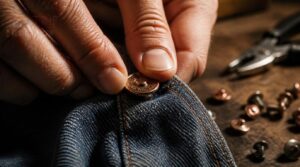
Now comes the part where control matters most. Apply rotational force control — a slow, steady twist rather than a sudden wrench. You’re testing resistance, not breaking it.
Watch for these cues:
- Symmetric movement around the button’s center axis
- No visible stress lines forming in the denim
- Resistance that eases gradually, not abruptly
- Surface texture staying consistent during rotation
Stop if anything feels wrong.
Pull Pieces Apart
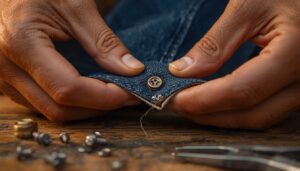
Once the twist gives way, pull in small increments — not one sharp yank. Think of it like peeling tape: slow and steady keeps the denim intact.
| Pull Stage | Action | Goal |
|---|---|---|
| Initial separation | Apply light outward pull | Break first resistance |
| Mid-pull | Maintain even tension | Prevent fabric stress |
| Near-release | Slow down force | Avoid sudden snaps |
| Final detachment | Ease components apart | Control metal hardware removal |
| Post-pull | Release grip gently | Protect rivet style buttons |
Incremental pulling force beats brute strength every time.
Check Fabric Damage
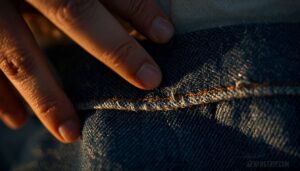
Once the button is out, run your fingers across the waistband hole. Feel for yarn thinning or rough fuzz — that’s fiber fatigue telling you the area took stress.
Check the surrounding stitches too. Any puckering or loose threads means stitch integrity is already compromised. Catch it now, before wearing pulls it wider.
Remove Buttons With a Screwdriver
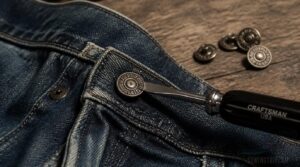
A flathead screwdriver gives you more control than you might expect for popping jean buttons loose. It works by wedging into tight spots and applying steady pressure where pliers sometimes can’t reach. Here’s how to do it without wrecking your denim in the process.
Insert Screwdriver Tip
Slide the flathead screwdriver tip into the gap between the metal button cap and the denim fabric. You want a tip that fits snugly — too small and it slips, too wide and it chews up the fabric.
Hardened steel tips hold their shape under pressure, so torque transfers cleanly to the rivet base without the tip rolling off course.
Pry Under Button
With the tip in place, angle the screwdriver slightly and apply slow, steady pressure — not a sudden jerk. That controlled pressure is what keeps the fabric from fraying or the hole from stretching.
Work the flathead screwdriver around the button’s edge in small increments to manage the metal tension evenly and remove buttons from jeans cleanly.
Lift Rivet Base
Once you’ve worked around the edges, the rivet base should start to shift. That’s the base geometry doing its job — loosening its grip on the denim layers it was crimped into.
- Angle the screwdriver under the base
- Feel for the rivet’s seating area
- Apply upward pressure steadily
- Watch the base lift from the fabric
- Keep metal hardware removal slow and controlled
The base is built for load transfer and alignment, so it won’t just pop free instantly.
Use Slow Pressure
Now that the rivet base is shifting, gradual force application is everything. Rush it and you risk pinching the denim or snapping the post sideways.
| Pressure Stage | What To Do |
|---|---|
| Initial contact | Seat tool fully before pushing |
| First movement | Push in small, steady increments |
| Resistance felt | Pause, reposition, then continue |
| Base lifting | Maintain consistent downward angle |
| Near release | Ease off to control separation |
Keep your grip relaxed. Controlling tool control means less slipping, fewer fabric tears.
Avoid Tearing Denim
Denim is more forgiving than you’d think — until it isn’t. The real risk with the screwdriver prying method isn’t the button itself, it’s fabric stress distribution going wrong when you angle the blade too sharply against the weave.
Denim forgives until it doesn’t — and a blade angled wrong against the weave is where that patience ends
Keep the tool nearly flat. That small adjustment protects the surface and keeps fiber strain minimal, so you remove jean buttons without leaving behind a tear.
Remove Buttons With Wire Cutters
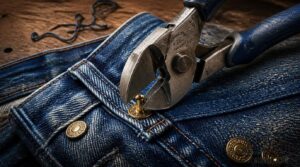
Wire cutters give you a more decisive approach when pliers and screwdrivers just aren’t getting the job done. This method works by cutting straight through the metal post, so there’s no wrestling with the button — just clean separation. Here’s how to do it step by step.
Access Inner Tack
Before wire cutters can do their job, you need to locate the backing post hidden beneath the button cap. Flip the jeans over and look for the small metal stem poking through the fabric — that’s your target.
Watch for corrosion on older rivet buttons, since rust can snag the denim fibers as you work. Use needle-nose pliers to gently lift the cap and expose the inner tack cleanly.
Cut Metal Post
Position your wire cutters or diagonal side cutters around the exposed metal post, as close to the fabric as you can get. Squeeze with steady, controlled pressure — don’t rush it. The post should snap cleanly.
Metal dust can kick up, so keep your face back. Galvanized or stainless steel posts resist corrosion but still leave sharp burrs after cutting.
Separate Button Cap
Once the post is cut, the cap lifts away pretty easily. Slide your flathead or fingernail under the cap’s recessed underside and pop it free from the fabric.
- Grip the cap edge with pliers for better control
- The smooth domed surface reduces snagging on denim fibers
- A locking lip may add slight resistance — that’s normal
- Matte or glossy finishes don’t affect how cleanly it releases
- Work parallel to the fabric weave to avoid fraying
Remove Sharp Fragments
After the cap’s gone, take a breath — tiny metal slivers can scatter across your work surface fast. Use pliers to grab any visible fragments before touching them bare-handed.
Wear your cut-resistant gloves throughout cleanup. Sweep the area with a stiff brush, then do a slow flashlight pass to catch hidden slivers. Drop everything into a rigid, closed container.
Smooth Rough Edges
The cut edge of that metal post isn’t done with you yet. Run a fine abrasive pad over any jagged points left on the fabric side — think P120 to P240 grit.
This quick deburring step pulls microscopic metal frays before they snag threads or skin. Even a few slow passes makes a real difference when you’re ready to fit replacement hardware.
Remove Sewn-on Jean Buttons
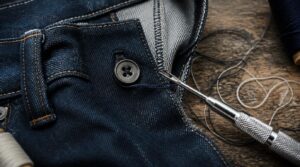
Sewn-on buttons are actually the easiest type to deal with — no metal rivets, no drilling, just thread holding everything together. You’ll need a seam ripper and a little patience, but that’s about it. Here’s how to get it done cleanly without wrecking the fabric around it.
Locate Thread Stitches
Flip your jeans inside out and look at the back of the waistband. Thread color contrast makes this easier — the stitching usually stands out against the denim.
Trace the stitch path with your finger to map where threads pass through the fabric. Denser clusters mean more passes to deal with, so take a second to study the full pattern before touching anything.
Use Seam Ripper
Once you’ve mapped the stitch pattern, grab your seam ripper and slide the pointed tip under a single thread loop — not the fabric itself.
Keep the blade at a low angle and use short, controlled movements. The ball end is your safety net; it stops the tool from gouging denim when you’re working close to the surface.
Cut Threads Carefully
Work one thread at a time. Angle your blade slightly away from the denim — perpendicular cuts dig into weft fibers and cause fraying you can’t undo.
After each snip, pause and check the stitch integrity around it. A sharp knife or box cutter works here, but keep movements shallow. Fabric damage happens fast when you rush.
Remove Loose Thread
Once the threads are snipped, gather what’s left. Trim fraying ends close to the fabric using small sharp scissors — cut at the base, not mid-air.
- Snip loose threads cleanly at the base
- Avoid pulling threads to prevent seam unraveling
- Press the area gently with a warm iron
- Apply tiny fabric glue to seal exposed ends
- Inspect and repeat trimming if fibers remain
Preserve Buttonhole Shape
Keeping that buttonhole intact after fastener removal matters more than most people think. Dense, even stitching around the edges stops fraying before it spreads. If the fabric looks loose, press lightweight fusible interfacing behind the hole — just that small area.
Strengthen the end bars with a few backstitches too. Puckering means the tension’s off, so adjust before the denim repair is done.
Top 3 Items Not Needed
Not every tool you own belongs in this project. Some things look helpful on the surface but won’t do a thing for jean button removal. Skip these three and save yourself the clutter.
1. Naturelo Calcium Magnesium Zinc Supplement

The Naturelo Bone Strength supplement — with its plant-based calcium, Vitamin D3 from lichen, and K2 mix — is genuinely useful for your bones. Just not these ones.
Your denim waistband doesn’t need 600mg of marine algae calcium to stay strong. Save this one for your actual skeleton. For pulling apart a rivet button, pliers beat supplements every time.
| Best For | Anyone looking to support long-term bone health through a clean, plant-based supplement — especially women navigating perimenopause or menopause, and those following vegan or vegetarian diets. |
|---|---|
| Form Factor | Capsules |
| Item Weight | 5.47 oz |
| Dimensions | 2.75 x 2.75 x 4.75 in |
| Unit Count | 120 capsules |
| Primary Benefit | Bone density support |
| Suitable For | Vegan & vegetarian |
| Additional Features |
|
- Plant-based calcium from marine algae paired with Vitamin D3, K2, and Magnesium for better absorption than calcium alone
- Fully vegan-friendly and free from common allergens like dairy, soy, gluten, and nuts
- Clean-label formula with no artificial colors, preservatives, or unnecessary fillers
- Certain minerals in the formula may interact with medications, so a doctor check is worth it before starting
- Results require consistent, long-term use — not a quick fix
- Positioned as a supplement for support, not a medical treatment for bone conditions
2. L’ange Le Volume Titanium Brush
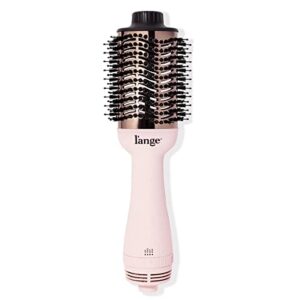
The L’ange Le Volume Titanium Brush is impressive — 360° airflow, ionic frizz control, a teardrop barrel that lifts roots like a dream. Genuinely great tool. For your hair.
Your jeans don’t have hair. The titanium barrel won’t grip a rivet, and the swivel cord won’t pry anything loose. Put it back on the bathroom counter where it belongs.
| Best For | Anyone who wants salon-quality blowouts at home, especially those with thick, wavy, or curly hair looking to cut down on styling time. |
|---|---|
| Form Factor | Handheld Brush Tool |
| Item Weight | 2.89 lbs |
| Dimensions | 16 x 8 x 4 in |
| Unit Count | 1 styling tool |
| Primary Benefit | Salon-quality blowouts |
| Suitable For | All hair types |
| Additional Features |
|
- Dries and styles at the same time, cutting your morning routine in half
- 360° airflow and ionic technology work together to add volume and tame frizz
- Lightweight enough to use without your arm giving out halfway through
- The high heat can scald skin if you’re not careful with your grip
- You’ll need a heat protectant every time — skipping it risks damage
- The end cap can loosen over time, which raises some durability concerns
3. Bearvana Women’s Multivitamin Herbal Gummies

Maca root, fenugreek, ginger, dong quai — Bearvana gummies are doing real work for women’s wellness. Berry-flavored, vegan, gluten-free. Sixty gummies per bottle, packed with botanicals and B vitamins.
Not a single ingredient in here pries metal from denim. You can’t hammer a rivet with herbal extracts. Take your two daily gummies, support your health, and grab actual tools for the jeans.
| Best For | Women looking for a convenient, plant-based way to support their daily wellness routine without swallowing pills. |
|---|---|
| Form Factor | Chewable Gummies |
| Item Weight | 14.11 oz |
| Dimensions | 5.25 x 2.75 x 5 in |
| Unit Count | 120 gummies |
| Primary Benefit | Women’s daily wellness |
| Suitable For | Vegan & on-the-go lifestyles |
| Additional Features |
|
- Tasty berry-flavored gummies make it easy to stick to a daily supplement routine
- Vegan, gluten-free, soy-free, and non-GMO — works for a wide range of dietary preferences
- Packed with traditional botanicals like maca root, ginseng, fenugreek, and ginger for well-rounded herbal support
- Requires two gummies per day, so the 120-count combo pack only covers a 60-day supply
- Botanical extracts may interact with other supplements, so it’s worth checking with a doctor first
- Formulated specifically for women, so it’s not a fit for everyone
Repair Holes After Button Removal
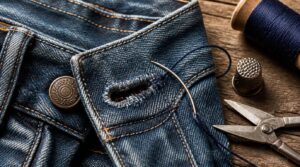
Once the button’s out, you’re left with a hole — and how you handle it determines whether your jeans last another few years or fall apart at the waist. The good news is a little repair work goes a long way. Here’s what to do, step by step.
Inspect Waistband Hole
Once the button’s out, take a close look at what’s left behind. Check for hole edge fraying, uneven diameter, or denim color fading around the rim — that pale ring means the fabric took stress.
Press gently along the edges. If threads pull or pucker, the fabric structural integrity is compromised and needs attention before you install anything new.
Reinforce Weak Denim
Weak denim needs backup before anything else goes through it. Cut a denim-weight patch an inch wider than the hole on all sides, then iron fusible interfacing underneath to lock fibers and prevent edge fraying.
- Match the patch color to your jeans for a clean fabric reinforcement
- Use a zigzag stitch pattern for stress point reinforcement and denim repair durability
- Press interfacing at low heat to avoid scorching during clothing repair
Stitch Around Damage
Once the patch is fused, stitch around the damage to lock everything in place. A tight backstitch border keeps the repair from unraveling and spreads tensile forces across a wider fabric area — so one weak spot doesn’t carry all the stress.
| Stitch Type | Best Use | Density |
|---|---|---|
| Backstitch | Edge reinforcement | Tight |
| Zigzag | Stretch points | Medium |
| Running stitch | Light repairs | Loose |
| Blanket stitch | Frayed borders | Medium |
| Whip stitch | Quick fixes | Varies |
Add Backing Patch
Once the stitching holds, lay a backing patch over the hole for extra support. Iron-on options bond at 275–350°F in seconds and survive dozens of washes. Denim-compatible or cotton fabric works best — avoid knits; they stretch wrong. Sew-on patches last longer under stress.
Pick a tonal or clear backing so your repair doesn’t show through.
Trim Loose Fibers
After the patch is set, give the area a quick once-over with small scissors or thread snips. Trim any loose fibers that poked out during your repair work — they fray fast under regular wear.
Post-laundry is the best time to catch them, since washing reveals what’s actually sticking up. Keep cuts shallow and away from seams.
Replace The Jean Button

Once the old button is out and the fabric is patched up, you’re ready to put a fresh one in its place. Getting it right comes down to a few key steps done in the right order. Here’s how to replace your jean button and make it hold:
Choose Matching Hardware
Getting the right replacement matters more than people think. Match your new jeans button to the original in finish color coordination — brass with brass, nickel with nickel.
- Pick metal corrosion resistance rated for 50+ washes
- Check button size proportions (10–14mm range)
- Confirm shank height compatibility with your fabric thickness
- Prioritize material strength selection — brass or zinc alloy holds best
Wrong hardware just fails faster.
Insert Tack Backside
Slide the tack post through the waistband hole from the inside, metal disc facing outward. The backside sits flush against the interior fabric, distributing load so the denim doesn’t tear under pressure.
Press it flat — any tilt here causes wobble later. A properly seated backing, usually stainless steel or zinc alloy, gives you a tight, flared-end crimp that actually holds.
Align Button Cap
Set the button cap face-up on the exterior, centered over the tack post. Check that the cap’s center axis lines up with the post before any pressure goes on it — even a slight tilt causes wobble and uneven wear on the denim fibers.
If the cap has a logo, orient it right-side up before it locks.
Hammer Into Place
Bring a 16-ounce hammer down with steady, controlled strikes — not a full swing.
Here’s the sequence:
- Hold the cap flush against the post
- Strike the center directly for even impact distribution
- Add two or three firm follow-up taps
- Stop once the jeans button sits flush
Uneven hits distort denim. Keep it centered, keep it clean.
Test Button Strength
Pull the button firmly away from the waist — no tools needed for this test. You’re checking whether the new hardware holds under real tension. A properly installed tack button should resist a strong tug without shifting or loosening.
Visible fabric puckering near the button means the post didn’t seat cleanly. Give it that honest pull before you wear them out the door.
Frequently Asked Questions (FAQs)
How to remove Jean buttons?
Grip the cap with pliers, brace the back tack, and twist apart. A flathead screwdriver pries stubborn rivets loose. Wire cutters snip sewn shanks cleanly. Always protect your denim underneath first.
How do you remove a button from a jeans stud?
Clamp the button cap with pliers, twist gently, and pull the back tack free. A flathead screwdriver works too — wedge it under the cap and pry with steady pressure.
How do you remove sewn on buttons?
Slide the seam ripper blade under a thread loop, not through the fabric. Cut threads one by one, then pull them free with tweezers. Your buttonhole stays clean, your denim stays intact.
How to remove jean button without breaking it reddit?
Reddit threads on this come down to one thing: go slow. Use two pairs of pliers, twist gently, and work from the backside. Yanking is how denim tears — patience wins every time.
Can you remove rivets from jeans?
Yes, you can remove rivets from jeans, but they’re not designed to budge easily. Solid metal rivets may fray fabric or leave holes. Work carefully — or risk permanent damage.
How are jeans buttons attached?
Jeans buttons are press-fit hardware — a front cap and a metal tack post driven through the waistband and crimped tight from the back. That’s it. No glue, no screws, just pure mechanical grip.
How to remove jeans button pins?
Grip the button cap with pliers, clamp the back tack with another pair, then pull apart steadily. For sew-on types, a seam ripper cuts thread cleanly without tearing your denim.
Can I remove a jeans button with a hammer?
Technically, yes — but should you? Hammer impact can bend the cap, fray surrounding fibers, and dent your waistband. Safer tools exist. Skip the hammer and reach for pliers or a flathead instead.
Can I use a jeans button for another piece of clothing?
Sure, but it depends on the fabric. A tack-style jeans button works on jackets or thick canvas, but may damage thin materials. Test the fit before committing.
Can removed buttons be reused on other jeans?
Yes, removed buttons can often be reused on other jeans. Check the shank integrity and look for corrosion or bending. If the hardware is clean and straight, it’s good to go.
Conclusion
Some people worry the fabric won’t survive. It will — if you work slow and steady. Learning how to remove jean buttons isn’t some complex tailoring skill reserved for professionals. It’s a ten-minute task with basic tools you probably already own.
The button doesn’t own the jeans. You do. Pull it off cleanly, patch what needs patching, swap in something better. One small fix, and a pair you almost gave up on becomes your favorite again.
- https://www.spring85buttons.com
- https://blog.megannielsen.com/2022/12/how-to-remove-and-replace-jeans-buttons
- https://www.thesprucecrafts.com/remove-two-part-stud-buttons-denim-4078426
- https://www.goldstartool.com/rivets-and-jean-buttons
- https://www.jfbutton.com/info/how-to-remove-jeans-button-and-rivet-103069493.html