This site is supported by our readers. We may earn a commission, at no cost to you, if you purchase through links.
Start by balancing your thread tension—too tight, and you might end up with scrunched seams.
Use the right needle size and type for your fabric; it’s like choosing the right tool for a job.
Lighten up on the presser foot pressure so your fabric doesn’t feel like it’s in a vice grip.
Keep your fabric feeding evenly and match your thread and fabric types to avoid mismatches.
With these tweaks, you’ll be sewing smoother seams in no time.
And remember, every perfected seam is a victory!
Table Of Contents
- Key Takeaways
- Common Causes of Fabric Puckering
- Fabric Preparation Techniques
- Machine Settings for Puckering Prevention
- Sewing Techniques to Prevent Puckering
- Solutions for Seam Puckering
- Troubleshooting Persistent Puckering Issues
- Advanced Puckering Prevention Techniques
- Maintaining a Pucker-Free Sewing Experience
- Fabric-Specific Puckering Issues
- Fixing Puckered Fabric
- Frequently Asked Questions (FAQs)
- Conclusion
Key Takeaways
- Balance your thread tension by fine-tuning both bobbin and top tension to prevent puckering.
- Choose the correct needle size and type for your fabric to avoid ruining seams.
- Adjusting the presser foot height to the ideal space of 5/16 inch between the presser foot and the throat plate, as measured with a presser foot gauge, is crucial for preventing issues like puckering and skipped stitches. Adjust presser foot pressure appropriately to maintain even fabric feeding.
- Use stabilizers and pre-wash fabrics to prepare them for smooth sewing.
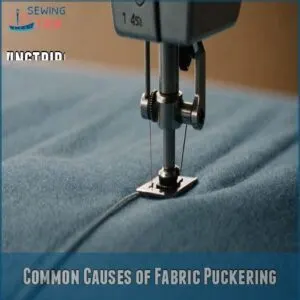
Common Causes of Fabric Puckering
You’ve probably felt the frustration of fabric puckering when your thread tension is off, or when you’ve accidentally used the wrong needle.
Imagine your sewing machine’s like a fussy cat—if its settings aren’t just right, it’s going to throw a wrinkle party on your project!
Unbalanced Thread Tension
Mastering thread tension techniques is key to achieving smooth stitches and preventing fabric puckering. Unbalanced thread tension can feel like playing tug-of-war with your sewing machine.
To avoid those pesky puckers, keep an eye on both bobbin and top tension.
Here’s how to tackle tension issues:
- Evaluate tension problems: Start simple—test stitch on scrap fabric.
- Adjust bobbin tension: Turn tiny screws delicately.
- Fine-tune top tension: Tweak the tension dial until just right.
Incorrect Needle Size or Type
Finding the right needle is key!
Using the wrong size or type can cause puckering faster than you can say, “Oops!”
Check this quick guide:
| Needle Type | Fabric Weight | Needle Size |
|---|---|---|
| Universal | Light to Medium | 70/10 |
| Ballpoint | Knits and Jersey | 75/11 |
| Denim | Heavy Fabrics | 90/14 |
Choosing wisely keeps your seams smooth.
Avoid needle damage by replacing them frequently!
Improper Presser Foot Pressure
Struggling with fabric puckering?
Improper presser foot pressure is a common issue that can cause up to 75% of sewing problems, so you need to get it right.
Adjusting presser foot pressure settings can help achieve smooth fabric feeding and consistent stitch quality.
Experiment with your machine’s settings to find the sweet spot.
Different fabric might need different foot types.
So, don’t be shy—tinker a bit and troubleshoot those pesky issues!
Uneven Fabric Feeding
Presser foot pressure’s all set? Great! Now, let’s tackle uneven fabric feeding. This happens when your feed dogs aren’t cooperating. Imagine them as tiny, tireless workers, but sometimes they need a tune-up. Here’s how to fix it:
- Check feed dog alignment.
- Adjust your sewing speed; slower is better for tricky fabrics.
- Maintain your machine regularly. A clean, well-oiled machine runs smoother, feeding fabric evenly.
Mismatched Thread and Fabric Types
Ever tried matching threads and fabrics like a chef pairing wine with dinner?
Using heavyweight thread on lightweight fabric (or vice versa) is a recipe for puckering!
Make sure your thread type and fabric type align.
Just like misplacing socks, mismatched threads disrupt harmony, impacting thread tension and fabric weight.
Perfect pairs stitch seams smoothly, avoiding pesky puckers.
Fabric Preparation Techniques
Before you even start sewing, preparing your fabric can make all the difference in avoiding those pesky puckers.
By pre-washing and pressing your fabric, you’ll set the stage for smooth seams.
Using stabilizers can also help.
You might even find yourself bonding with your fabric in the process!
Pre-Washing and Pressing
Pre-washing fabric is like giving it a warm-up before the main show; it helps prevent shrinkage and surprises down the line.
Following general fabric care tips can help make sure your fabric is well-prepared for sewing.
Regularly press your fabric with a decent iron and consider the steam benefits—it’s like magic for fibers!
This step smooths any wrinkles and sets you up for stitching success.
Remember—happy fabric, happy sewing!
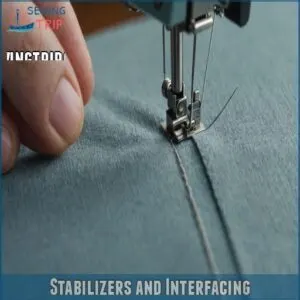
Stabilizers and Interfacing
For sewing, stabilizers and interfacing are your secret weapons against puckering.
They support fabric and keep those pesky at bay.
You can find various types of interfacing, including knit interfacing for stretchy fabrics, at specialized online stores like knit interfacing supplies.
To make the most of them, just remember:
- Choose the right stabilizer type for your project.
- Understand interfacing uses and how they differ.
- Master stabilizer application techniques with ease.
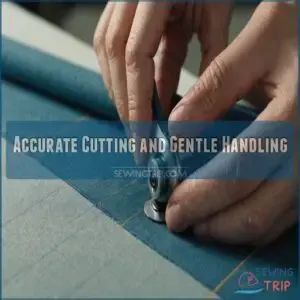
Accurate Cutting and Gentle Handling
Think of fabric like a good haircut—it needs precision.
Lay the fabric flat, following its natural grain to avoid a wonky finish.
Use sharp cutting tools and check that your pattern matching is spot-on.
Be gentle with bias-cut pieces, as they stretch easily.
Keep an eye on seam allowance, and handle the fabric tenderly to prevent puckering.
Machine Settings for Puckering Prevention
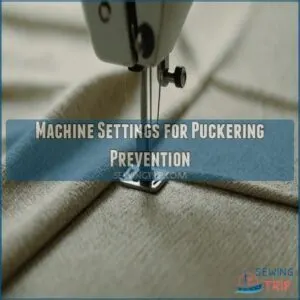
To keep your seams looking smooth and professional, mastering your machine’s settings is essential, and honestly, it’s not as mysterious as it sounds.
By adjusting the thread tension, needle type, presser foot pressure, and stitch length, you’ll banish puckering from your sewing projects faster than you can say "unraveled thread.
Thread Tension Adjustment
To achieve perfect seams, understanding the correct thread tension for your fabric weight is crucial, and learning how to know what tension to use. Your sewing machine’s thread tension is key to preventing puckering.
It’s like Goldilocks and the Three Bears—you need it just right!
Too loose, and your stitches will be weak; too tight, and your fabric will pucker.
Here’s how to get it perfect:
- Consult your machine’s manual for tension basics.
- Use tension tools to fine-tune the setting.
- Practice on scraps before tackling your project.
Needle Size and Type Adjustment
Choosing the right needle size and type is like finding the perfect dance partner for your fabric.
Lightweight fabric? Use a fine needle.
Heavy fabric? Go big.
Needles come in different gauges, so match them with fabric weight for smooth sewing.
Here’s a quick guide:
| Fabric Weight | Needle Type | Needle Gauge |
|---|---|---|
| Light | Sharp | 70/10 |
| Medium | Universal | 80/12 |
| Heavy | Denim | 90/14 |
Keep them sharp, or they’ll dull boring seams.
Presser Foot Pressure Adjustment
Adjusting presser foot pressure can make your seams smoother. Here’s how to get it right:
- Test Foot Pressure: Experiment with scraps to find the sweet spot for your fabric’s thickness.
- Know Foot Types: Different feet for different jobs—like shoes for your sewing machine!
- Adjust Pressure: Too tight? Ease it up to prevent puckering woes.
Stitch Length and Width Adjustment
Ever found a seam just won’t lay flat?
Stitch length and width might be your culprits.
For lightweight fabric, a fine balance between short stitches helps prevent puckering.
If you’re unsure about the ideal stitch length for your fabric, balanced tension can also impact your seams, and learning how to adjust sewing machine tension is crucial. check out the sewing machine stitch length guidelines [sewing machine stitch length](https://zon.everysimply.com/Sewing+machine+stitch+length/dp/.
Sewing Techniques to Prevent Puckering
When you’re sewing, mastering techniques like proper fabric handling or choosing the right seam type can prevent puckering and transform your projects.
Whether you’re stitching curves or working with delicate fabrics, a little finesse makes all the difference and keeps your seams smooth and professional.
Proper Fabric Handling While Sewing
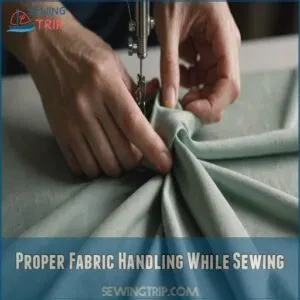
Ready to tackle fabric puckering? Handling fabric right is key. Align the fabric grain properly and watch that seam allowance!
Bias-cut pieces are delicate. Treat them like fragile treasures—careful handling makes all the difference.
When pressing, think of it like a spa treatment for fabric; gentle and deliberate. Layering fabrics evenly and smoothly helps keep everything in line.
Using The Right Seam Type for Your Fabric
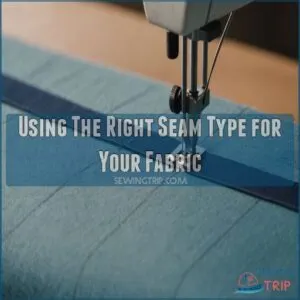
You’ve mastered handling fabric; now focus on seam types to tackle puckering.
Picking the right seam depends on fabric weight and stretch.
Consider using a seam finishes technique like turned and stitched seam finish, ideal for stable fabrics.
- Straight seams for woven heavyweight fabrics.
- French seams give delicate fabrics a clean finish.
- Zigzag seams enhance stretch for knit fabrics.
- Flat-felled seams strengthen and hide raw edges.
Choose wisely for flawless seams!
Sewing Curved Seams Without Puckering
Mastering curves? It’s all about easing!
When sewing curves, don’t pull your fabric. Let it flow naturally.
Maintain a consistent seam allowance, and adjust your stitch length for smoother results.
A sharp needle helps, too.
Remember, gentle hands and a steady pace win the race against puckers.
Practice makes perfect!
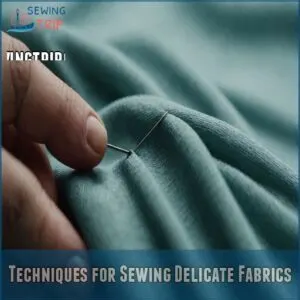
Techniques for Sewing Delicate Fabrics
Handling curved seams is challenging, but sewing delicate fabrics takes finesse.
Picture sewing sheer silk without puckering: it’s like trying to butter toast without crumbs!
Here’s how:
- Fabric choice matters—go light with linings.
- Needle selection counts—think fine, like 70/10.
- Adjust stitch length; test for perfect tension.
Enjoy the silky smooth results!
Solutions for Seam Puckering
When puckering threatens your perfect seam, it’s time to arm yourself with practical solutions, from adjusting thread tension to using a steam iron for a smooth finish.
With the right techniques, you can outsmart those pesky wrinkles and stitch with confidence.
Fabric Feeding Techniques
Imagine sewing as a dance, where fabric feeding becomes the rhythm that keeps everything smooth.
With fabric alignment and a well-adjusted feed dog, you’ll avoid puckers.
Remember, seam allowance and pressing techniques are your best friends.
Keep an eye on fabric tension control to let your seams shine.
| Technique | Purpose |
|---|---|
| Fabric Alignment | Smooth feeding |
| Feed Dog Adjustment | Even fabric movement |
| Seam Allowance Awareness | Consistent seams |
| Pressing Techniques | Sharp finishes |
| Fabric Tension Control | Pucker prevention |
Thread Tension Adjustment and Matching Fabric Densities
Getting your thread tension just right is like finding harmony in a song.
Pay attention to fabric weight and use a tension gauge to keep things smooth.
For instance, using the same thread type in both top and bobbin, as discussed in proper thread tension techniques, can help you achieve a balanced stitch.
If your stitches look off, think about:
- Thread tension basics
- Fabric weight impact
- Tension for different stitches
- Tension troubleshooting
- Adjustments for seam puckering
Fine-tune it all, and you’re golden!
Pressing and Seam Rippers
Pressing techniques can be your best friend in smoothing out pesky puckers.
Before you start ripping seams, try giving them a good pressing.
Use various seam ripping tools to carefully undo stitches without harming the fabric.
Here’s a handy table:
| Tool | Use | Suitable for |
|---|---|---|
| Press cloth | Protects fabric while pressing | Delicate fabrics |
| Seam ripper | Removes unwanted stitches | All fabric types |
| Tailor’s ham | Shapes curved seams | Curved garments |
| Iron with steam | Relaxes fabric, removes wrinkles | Most fabric types |
| Point presser | Presses small corners and seams | Detailed garments |
Steam Iron and Seam Finishes
A steam iron’s your trusty sidekick for banishing seam puckers.
Use the right pressing tools and techniques; apply steam for smooth, professional finishes.
Experiment with different seam finish types to find what suits your fabric best.
The steam iron benefits are huge, offering control and mastery over fabric mischief.
Remember: patience here can turn puckers into seamless perfection.
Troubleshooting Persistent Puckering Issues
So, your seams are still puckering? Let’s troubleshoot those persistent problems and get you back to sewing beautiful, wrinkle-free projects!
Identifying The Cause of Puckering
To nail those perfect seams, you’ve gotta figure out what’s causing the puckering. Check for:
- Fabric tension: Too tight, and you’re headed for Puckerville.
- Thread type: Make sure it’s a match for your fabric.
- Seam allowance: Keep it consistent.
- Needle size: Use the right one for your fabric weight.
Spot the trouble and you’re halfway to smooth sewing.
Step-by-step Problem-solving Approach
Troubleshooting puckering can feel like untangling Christmas lights, but a methodical approach helps.
First, check your machine’s thread tension; it might be tighter than a drum.
Next, match your needle type with fabric thickness—no one likes a mismatch!
Finally, sew a test strip to confirm adjustments.
This simple guide lets you tackle puckering with a confident flair!
When to Seek Professional Help or Machine Servicing
If your puckering woes persist despite all your best efforts, it might be time for backup. Call in the pros when you notice:
- Machine malfunctions that seem like they need a wizard’s touch.
- Persistent puckering worse than a well-loved wrinkle.
- Fabric damage just behind your seams.
Sometimes, professional alterations or sewing machine repair is the only way to save your sanity!
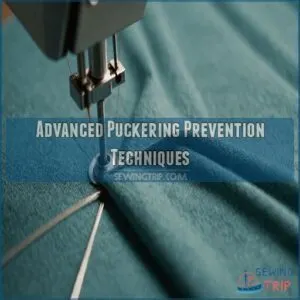
Advanced Puckering Prevention Techniques
If you’re ready to tackle fabric puckering like a pro, these advanced techniques will have you sewing with the confidence of a master tailor.
By using tools like walking foot attachments and some clever tricks with spray starch or tissue paper, your seams will stay smooth and wrinkle-free.
Using Walking Foot Attachments
The walking foot’s your trusty sidekick, preventing puckering by ensuring even fabric feeding.
It can handle tricky layers like a champ.
Consider these:
| Walking Foot Benefits | Types | Choosing the Right Foot |
|---|---|---|
| Smooth fabric feeding | Open toe | Match fabric type |
| No puckering | Standard | Check compatibility |
| Consistent stitches | Quilting | Test before sewing |
| Great control | Edge join | Buy quality brands |
| Essential for layers | Ditch | Compare features |
Applying Spray Starch and Water-Soluble Stabilizers
Imagine you’re taming a mischievous fabric that just won’t sit still.
Spray starch comes to the rescue, temporarily stiffening fabrics like a polite nudge.
Use it with water-soluble stabilizers, a team of invisible helpers, to keep puckering at bay.
This duo harmonizes stitch tension, perfecting seams.
But remember, each fabric has a sweet spot, so test first!
Implementing Tissue Paper Support
Ready to conquer those stubborn puckers? Try slipping tissue paper under your fabric.
It’s like adding a secret layer of support!
Use lightweight tissue paper; heavier types might show.
Place it strategically, under tricky curves or seams.
Sew right over it—it’ll tear away easily afterward.
Don’t have tissue? Try using a similar lightweight, tear-away stabilizer.
You’ll be amazed at the difference!
Maintaining a Pucker-Free Sewing Experience
Keeping your sewing machine in top shape and replacing needles regularly keeps those pesky puckers at bay.
Patience and a keen eye are your best sewing buddies, especially when you want those seams to stay smooth and flawless.
Regular Machine Maintenance and Needle Replacement
Properly adjusting your sewing machine’s feed dog height and alignment is crucial to prevent issues. Keeping your sewing machine in tip-top shape is for smooth seams without puckering hiccups.
Start with these three steps:
- Regular machine cleaning: Regular machine cleaning is necessary.
- Oil your machine: A little sewing machine oil can do wonders.
- Oil your machine: A little sewing machine oil can do wonders.
- Check needle types and gauge: Avoid the dull and wrong-sized needle drama. Using the right needle set, such as the ones available in a needle set collection is key for preventing puckering.
- Check needle types and gauge: Avoid the dull and wrong-sized needle drama.
Practicing Patience and Attention to Detail
In sewing, patience isn’t just a virtue; it’s your secret weapon.
Embrace a slow-sewing mindset, and your stitches will thank you.
Mindful stitching means accuracy matters—don’t rush those seams.
Handle your fabric gently, like it’s your prized possession.
Remember, patience and perfection go hand in hand, leading to flawless, pucker-free creations.
Keep your cool; masterful sewing awaits!
Fabric-Specific Puckering Issues
You’re probably familiar with the frustration of puckering, especially with stubborn fabrics like lightweight cottons or slippery silks.
Understanding how different fabrics behave can save you headaches and help you achieve those smooth, professional-looking seams you dream of.
Lightweight Fabrics
Lightweight fabrics can be as tricky as a cat on a leash when it comes to sewing.
Make sure your fabric choice matches your patience, and use narrow seam allowances for a smooth finish.
Bias cuts and gathering techniques add finesse.
For extra control, consider lining options to prevent puckering.
Remember, handling these fabrics requires a light touch and lots of love!
Stretch Fabrics
For those tricky, stretchy fabrics that just won’t behave, you’ll want to pay special attention to a few things:
- Check the grain direction: Always.
- Use ballpoint needles: They prevent damage.
- Choose stretchy thread: Adds flexibility.
- Adjust stitch length: Avoid tight seams.
- Consider seam finishes: Secure and neat.
It’s a balancing act, but you’ve got this!
Heavy Fabrics
Sewing heavy fabrics like denim or canvas? Mastering these thicker materials is all about the right tools and techniques.
Choose a heavy-duty needle; you wouldn’t use a toothpick to hammer a nail, right?
Use a larger seam allowance for extra strength, and don’t skimp on interfacing—it’s your secret weapon against puckering.
Pressing is key; a good steam iron helps those heavy fibers relax.
With the right approach, even the toughest fabrics will behave.
Delicate or Slippery Fabrics
Handling heavy fabrics? Now let’s talk delicate or slippery ones! They’re like trying to sew jelly, aren’t they?
For these types of fabrics, using a zig-zag stitch and adjusting the stitch length, as explained in sewing stretchy tips, can greatly help in preventing puckering.
Keep ’em in these steps:
- Pin Like a Pro: Place pins every inch.
- Stabilize Savior: Opt for a water-soluble stabilizer.
- Press Perfectly: Use a low-heat iron, always pressing—never sliding!
Keep calm, sew on!
Fixing Puckered Fabric
If your fabric looks like it’s puckered its lips for a selfie, don’t worry—there are simple fixes.
With a bit of heat and steam, some strategic resewing, and perhaps a dash of fabric relaxer, you can smooth out those pesky wrinkles and get your project back on track.
Heat and Steam Treatment
Using a steam iron for wrinkle removal might just be your new secret weapon.
The heat setting relaxes the fabric, smoothing those pesky puckers away.
Think of it as ironing out life’s little wrinkles—one seam at a time.
Just watch the steam press do its magic, turning stress into serenity.
Remember, patience is key for perfect seams!
Resewing Techniques
Imagine seam ripping as a reluctant dance partner, not your enemy.
When puckering strikes, gently rip the stitches, adjusting your stitch length and tension control.
Be mindful of seam allowance and fabric matching—too tight, and puckering wins.
Think of it as a reset; a chance to fix mistakes and become a sewing master, one seam at a time.
Apply Tension to Puckered Fabric
Got a pucker in your knit fabric? Give it a light, gentle stretch.
It’s like ironing out life’s little wrinkles.
Here’s your plan:
- Gently pull the fabric flat.
- Pin the edges to hold it in place.
- Use tension tools if needed for stubborn spots.
- Resew if necessary to set the fix. Keep calm, stretchy fabrics can behave!
Fabric Relaxer Products
Tired of those stubborn puckers that refuse to relax?
Fabric relaxer products can be your secret weapon. They soften the fibers, smoothing out unwanted wrinkles.
With various fabric relaxer types available, such as sprays or conditioners, you can easily reduce puckering.
For a DIY fabric relaxer alternative, try mixing vinegar and water. Give it a shot! Your seams will thank you.
Frequently Asked Questions (FAQs)
How do you prevent fabric Puckering in a sewing machine?
Prevent puckering by fine-tuning tension, tailoring needle type to fabric, and tweaking stitch length.
Too much foot pressure is a no-no.
Always prewash fabrics and use stabilizers—think of them as trusty sidekicks against puckers!
How do I avoid puckering seams?
To avoid puckering seams, select the right needle and thread, adjust your machine’s tension, and don’t rush the fabric.
Consider stabilizers for tricky fabrics.
Remember, slow and steady wins the race in sewing, too!
Why does my fabric pucker when I sew?
Your fabric puckers due to sneaky culprits like unbalanced thread tension, using the wrong needle size, or mismatched thread and fabric types.
These mistakes disrupt the harmony of sewing, causing those pesky little fabric ripples.
How do you stop a sewing needle from Puckering?
Keep your sewing needle from puckering by using the right size and type for your fabric.
Adjust thread tension, match thread and fabric, and set presser foot pressure just right for that smooth, wrinkle-free finish!
How do you fix fabric Puckering?
Steam’s your friend! Try gently stretching the puckered area. Resewing with adjusted tension often works wonders. A fabric relaxer might be your secret weapon for stubborn puckers.
Can woven fabric cause Puckering?
Woven fabric can definitely cause puckering, especially when there’s unbalanced thread tension or improper needle size.
Picture it like tug-of-war going wrong—your seams end up wavy instead of winning a smooth, polished look.
How to stop fabric from puckering when sewing?
Avoid fabric puckering by balancing thread tension, using the right needle, and adjusting presser foot pressure.
Pre-wash your fabric and choose matching threads.
Experiment with stabilizers if needed, and handle your fabric gently for best results.
How to sew without puckering?
To avoid puckering, match your needle and thread to the fabric type.
Adjust your machine’s tension and presser foot pressure.
Use a light touch when guiding fabric.
Prewash fabrics and consider stabilizers for tricky materials.
How do you keep fabric straight when sewing?
Keeping fabric straight while sewing is like guiding a dance partner; gently feed it through the machine, ensuring your hands keep a steady rhythm to prevent missteps.
seam guides for that perfect line.
How do you keep fabric stretchy when sewing?
You keep fabric stretchy when sewing by using stretch needles and polyester thread.
Adjust stitch settings to a zigzag or stretch stitch, and consider using a walking foot to help the fabric move smoothly without losing elasticity.
How does fabric type influence puckering?
Fabric type affects puckering because lightweight fabrics can gather easily, while knit fabrics might have wavy edges.
Heavier fabrics handle puckering differently as they’re less likely to bunch.
Knowing your fabric’s tendencies helps prevent puckering.
Are there puckering issues with embroidery?
Embroidery’s a whole other ball game!
Yes, it can pucker; tight stitches and dense designs are common culprits.
Use a stabilizer; it’s your secret weapon against puckering.
Proper hooping helps too!
Can thread quality affect seam puckering?
High-quality thread can definitely make a difference in preventing seam puckering.
Cheap, uneven threads can tangle and cause tension issues.
Opt for smooth, strong threads—they glide through fabric like butter, giving you a cleaner, professional finish.
What role do feed dogs play in puckering?
Feed dogs move fabric through your sewing machine, ensuring smooth progress, especially when dealing with thick fabrics that require careful tension adjustments, and ensuring smooth progress.
When they malfunction or misalign, uneven fabric feeding occurs, causing puckering.
Imagine fabric struggling through traffic without proper direction—a recipe for bumpy, puckered seams.
Does sewing speed impact fabric puckering?
Sewing speed can definitely impact fabric puckering.
Going too fast might lead to uneven feeding, especially with delicate fabrics, causing those pesky puckers.
Slow and steady wins the race, ensuring smooth seams and happy sewing.
Conclusion
Smooth seams should be your main goal, not a puckering nightmare.
With some practice, you’ll master preventing fabric puckering while sewing.
Balance your tools—like a chef selecting the right spices—and adjust tension, needles, and foot pressure to avoid scrunched seams.
Tackle fabric types with the same care as choosing a playlist for the right vibe.
Each perfect seam is a win, and with these tips, you’ll sew like a pro in no time.
Let’s turn frustrations into celebrations!

