This site is supported by our readers. We may earn a commission, at no cost to you, if you purchase through links.
Grab some soft, chunky yarn and the right-sized needles. You’ll be knitting away in no time, turning those stitches into a warm hug you can wear.
Don’t sweat the small stuff—mistakes are just part of the learning curve. Take it step by step, from casting on to binding off.
Before you know it, you’ll be wrapped up in your very own handmade creation, feeling proud and toasty. And who knows? This might be the start of your new favorite hobby.
Table Of Contents
- Key Takeaways
- Choosing the Right Pattern for a Beginner Sweater
- Essential Materials for Sewing a Cozy Sweater
- Selecting the Perfect Yarn for Your Project
- Beginner-Friendly Tools for Sweater Sewing
- Mastering Basic Stitches for Sweater Construction
- Understanding Gauge and Swatching for Beginners
- Step-by-Step Guide to Sewing Your First Sweater
- Troubleshooting Common Beginner Sweater Issues
- Blocking and Caring for Your Handmade Sweater
- Next Steps: Advancing Your Sweater Sewing Skills
- Frequently Asked Questions (FAQs)
- Conclusion
Key Takeaways
- You’ve got this! Don’t let the thought of knitting a sweater make you sweat. Start with a simple pattern, chunky yarn, and basic stitches. Before you know it, you’ll be wrapping yourself in a cozy hug that you made with your own two hands.
- Embrace the gauge swatch – it’s your crystal ball for the perfect fit. Take the time to knit this little square of wisdom, and you’ll avoid the dreaded "why does this look nothing like the picture" moment. Trust us, future you will thank you!
- Mistakes happen, even to the most experienced. Dropped a stitch? No biggie. Think of it as a chance to play detective with your knitting. Unraveling might feel like taking two steps back, but it’s actually a giant leap forward in your crafting journey.
- Your handmade sweater deserves some TLC. Give it a spa day with proper blocking techniques, and treat wash day like you’re bathing a delicate flower. Store it lovingly, and your wooly creation will be ready to warm you up for years to come.
Choosing the Right Pattern for a Beginner Sweater
Picking your first sweater pattern can feel like choosing a new hairstyle—exciting but a bit nerve-wracking.
Look for designs with clear instructions, basic stitches, and minimal shaping to start your cozy crafting journey** on the right needle.
Recommended Stitch Patterns for Beginners
Five stitch patterns are your best friends when starting your sweater journey.
Garter stitch, the beginner’s security blanket, creates a cozy, textured fabric. Stockinette stitch, the smooth operator, showcases your yarn’s beauty.
Rib stitch adds stretch and definition to cuffs and hems. Moss and seed stitches bring subtle texture, perfect for adding interest without complexity.
These knitting techniques are your building blocks, like Lego for yarn enthusiasts. Mix and match to create your unique comfort masterpiece!
Importance of Clear Instructions and Visual Aids
Now that you’ve got your stitches down, let’s talk about choosing a pattern that won’t leave you in knots.
Clear instructions and visual aids are your best friends here.
Look for patterns with step-by-step guides, picture tutorials, or even video demos.
It’s like having a knitting guru right by your side, guiding you through every loop and purl.
You’ll be stitching up a storm in no time!
Avoiding Complex Techniques and Shaping
Start making sweaters without getting tangled up in complexity!
Stick to beginner-friendly designs with simple stitch patterns and basic shaping. You’ll want to avoid short rows and intricate techniques that might leave you feeling like you’re wrestling an octopus.
Instead, opt for sweaters knit in pieces or with drop sleeves . These styles are like training wheels for your knitting journey, giving you a sense of control and safety as you craft your cozy creation.
Beginner-friendly designs are perfect for this stage, allowing you to build confidence in your knitting skills.
As you work on your sweater, remember that it’s all about simple stitch patterns and enjoying the process.
Essential Materials for Sewing a Cozy Sweater
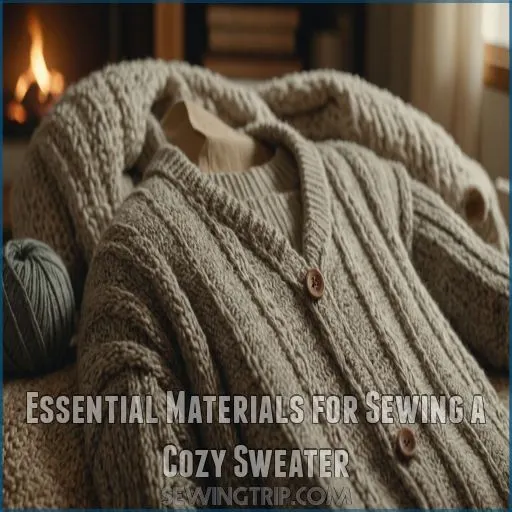
You’ve picked your pattern, and now it’s time to gather your cozy-making arsenal! Let’s talk about the must-have materials that’ll turn you into a sweater-sewing superhero.
First up, you’ll need a trusty measuring tape – it’s like your secret weapon for getting the perfect fit . Next, snag some sewing tools: sharp scissors, pins, and a seam ripper (because oops happens to the best of us).
Don’t forget about needles! Choose the right size for your project – think Goldilocks, not too big, not too small. A project bag is your new best friend, keeping everything organized and tangle-free.
And here’s a pro tip: grab some stitch markers. They’re like tiny cheerleaders, marking your progress and keeping you on track. With these tools in your corner, you’ll be whipping up cozy creations faster than you can say "sweater weather"!
Selecting the Perfect Yarn for Your Project
You’re about to start a yarn adventure.
That’ll make or break your sweater.
Let’s find the perfect match for your project, considering weight, fiber, care, and quantity.
To create a cozy masterpiece you’ll love wearing.
Yarn Weight and Its Impact on Sweater Texture
The magic of yarn weight lies in its power to transform your sweater’s texture.
Imagine your cozy creation as a canvas: bulky yarn paints bold strokes, while fine yarn weaves delicate details (Source).
Want a drapey, fluid fabric? Go for lighter weights. Craving structure and warmth? Opt for chunkier options.
Remember, your chosen weight affects your knitting time too – thicker yarn works faster, perfect for impatient crafters!
Fiber Types: Pros and Cons for Beginners
Now that you’ve got the weight down, let’s talk fibers. Choosing the right yarn can feel like a woolly adventure, but don’t worry – I’ve got your back. Each fiber type has its own personality, just like the sweater you’re about to create.
In terms of sweater-making, consider the importance of hemming sweater sleeves for a professional finish. This will help you achieve the perfect fit and look for your cozy sweater.
- Wool: Nature’s insulator, perfect for cozy sweaters
- Acrylic: Budget-friendly and easy to care for
- Cotton: Cool and breathable for summer sweaters
- Bluefaced Leicester: A medium weight that’s a dream to work with
Considering Yarn Care Requirements
Every yarn has its own personality in terms of care. Don’t let those labels intimidate you! Let’s unravel the mystery of yarn care together.
| Fiber Type | Care Tips |
|---|---|
| Wool | Hand wash, dry flat |
| Cotton | Machine wash delicate, tumble dry low |
| Acrylic | Machine wash, durable |
| Blends | Check label, test swatch |
| Linen/Hemp | Improves with washing |
Remember, caring for your yarn is like nurturing a friendship – a little attention goes a long way!
Calculating Yarn Quantity Needed
You’ve chosen your yarn with care, but how much do you need?
Let’s crunch some numbers! Yarn weight, project size, and stitch gauge all play a role in this knitting puzzle.
For a basic adult pullover, you’ll need about 1100-1400 yards of medium-weight worsted weight yarn, suitable for garments and accessories
.
Don’t forget to factor in your knitting style and pattern complexity. It’s better to have a little extra than to play yarn chicken!
Beginner-Friendly Tools for Sweater Sewing
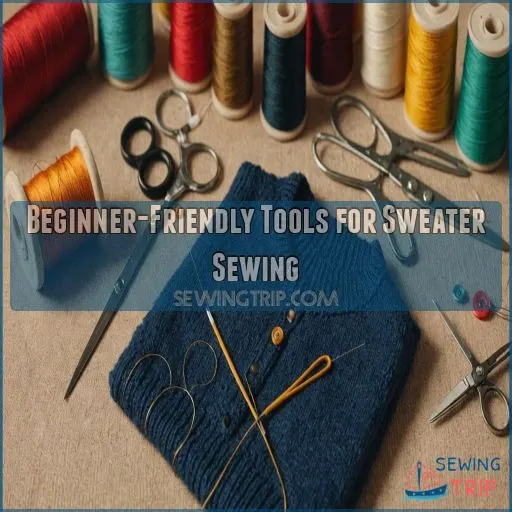
You’ll need more than just needles and yarn to craft your cozy sweater. Let’s explore the beginner-friendly tools that’ll make your sweater-sewing journey as smooth as butter on warm toast.
Choosing the Right Needles
With your perfect yarn in hand, let’s pick the right needles for your cozy creation.
Think of needles as your knitting sidekicks – they can make or break your sweater-making adventure.
Straight needles are great for beginners, while circular ones offer more flexibility for larger projects.
Choose a size that matches your yarn weight and desired fabric texture.
Remember, the right tools will help you stitch up success!
Essential Notions for Sweater Construction
Ready to gear up for your sweater-sewing adventure? Let’s wrangle those essential notions!
Grab your sewing needles and yarn needles – they’re your trusty sidekicks for stitching and weaving in ends. Stitch markers are like tiny traffic lights, guiding you through pattern changes.
Don’t forget your measuring tape; it’ll keep your sizing on point. With these tools in your arsenal, you’ll be tackling knitting patterns for all seasons, styles, and tastes like a pro in no time, handling projects with different sizing.
Optional Tools to Enhance Your Sewing Experience
Let’s jazz up your sweater-making toolkit.
While your trusty sewing machine does the heavy lifting, a few nifty gadgets can take your craft to the next level. Stitch markers are like tiny cheerleaders, keeping you on track. Tapestry needles and row counters become your best friends for seamless finishes.
And don’t forget blocking – they’re the secret weapon for that professional touch.
These tools open doors to knitting patterns for all budgets, desires, and dreams.
Mastering Basic Stitches for Sweater Construction
You’ll build your sweater from the ground up with simple stitches that are easier than you think.
Starting with knit and purl, you’ll combine these building blocks to create texture and shape.
Adding in decreases and increases as you go to craft your cozy masterpiece.
Knit Stitch Techniques
The humble knit stitch is your trusty sidekick in sweater-making adventures. You’ll master tension control faster than you can say "cozy comfort!" Explore knit stitch variations to add texture and flair.
When sewing knit pieces together, use a yarn the same size or slightly smaller than the yarn and make sure you have even tension by consistently inserting the needle through each stitch using the running back stitch technique.
Practice k2tog for sleek decreases, while m1l and m1r will have you increasing like a pro.
Remember, smooth sailing comes with practice – your stitches will soon flow as naturally as a warm hug from your finished sweater.
Purl Stitch Variations
Now that you’ve mastered the knit stitch, it’s time to explore the world of purl stitch variations.
These techniques will add depth and texture to your cozy sweater project. Purl stitch patterns are like the secret sauce of knitting, giving your creation that "wow" factor.
- Seed Stitch: Creates a bumpy, seed-like texture
- Moss Stitch: Offers a thicker, squishier feel
- Rib Stitch: Adds stretchy, vertical lines
- Waffle Stitch: Resembles your favorite breakfast food
Combining Knit and Purl for Texture
Ready to add some pizzazz to your sweater?
You’ve mastered knits and purls, now it’s time to mix things up! By combining these stitches, you’ll create eye-catching textures that’ll make your sweater pop.
Try the Seed Stitch for a bumpy, seed-like texture, or the Basketweave for a woven look.
Remember, you’re the artist here – experiment with different combinations to find your perfect pattern!
Simple Decreases and Increases
Mastering simple decreases and increases is like learning to steer your knitting ship. You’ll shape armholes and necklines with ease, using K2tog and SSK to decrease stitches. It’s a bit like magic – you’re the captain of your sweater’s destiny!
Let’s set sail on this adventure together, no matter your level of knitting knowledge or ability.
- Learn K2tog (knit two together) for right-leaning decreases
- Master SSK (slip, slip, knit) for left-leaning decreases
- Practice M1L and M1R increases for balanced shaping
- Experiment with YO (yarn over) for decorative increases
Understanding Gauge and Swatching for Beginners
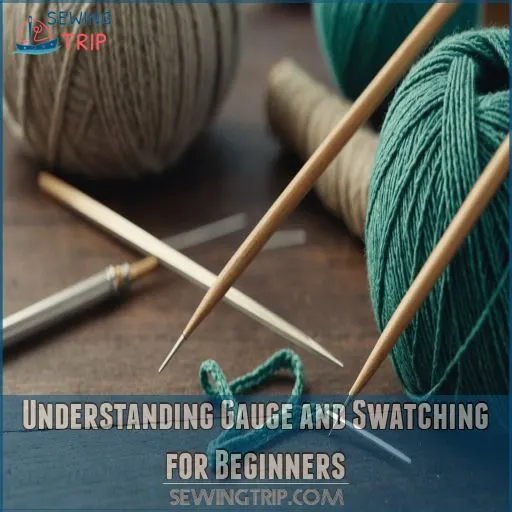
You’ve picked your pattern and yarn, but hold up—there’s one important step before you start knitting that cozy sweater.
Swatching might seem like a chore, but it’s your secret weapon for nailing the perfect fit and avoiding the dreaded "why-does-this-look-nothing-like-the-picture" moment.
Importance of Gauge in Sweater Fit
The humble gauge swatch holds the key to your sweater’s perfect fit. It’s like a crystal ball for your knitting, revealing the future of your project. You’ll want to nail your gauge to avoid a sweater that’s more tent than cozy hug.
Let’s explore why gauge matters and how it can make or break your knitting dreams:
| Gauge Impact | Emotional Response | Knitter’s Action |
|---|---|---|
| Too Tight | Panic | Size Up Needles |
| Just Right | Celebration | Start Knitting |
| Too Loose | 樂 Confusion | Size Down Needles |
| Inconsistent | Frustration | Practice Tension |
| Ignored | Regret | Learn from Mistakes |
How to Create and Measure a Gauge Swatch
Now that you’ve grasped gauge’s importance, let’s create your magic measuring tool: the gauge swatch. It’s like baking a tiny sweater sample – fun and informative!
- Cast on enough stitches for a 6" square
- Knit in the pattern (usually stockinette)
- Measure the middle 4" for accuracy
Remember, your swatch is your predicting your sweater’s future fit. Happy swatching!
Adjusting Needle Size for Perfect Gauge
Armed with your gauge swatch, you’re ready to play needle detective! If your stitches are too snug, size up your needles. Too loose? Size down. It’s like Goldilocks finding the perfect porridge temperature.
| Swatch Result | Needle Adjustment |
|---|---|
| Too many stitches | Go up a size |
| Too few stitches | Go down a size |
| Just right | You’ve nailed it! |
Remember, even a quarter millimeter can make a world of difference in your knitting journey.
Step-by-Step Guide to Sewing Your First Sweater
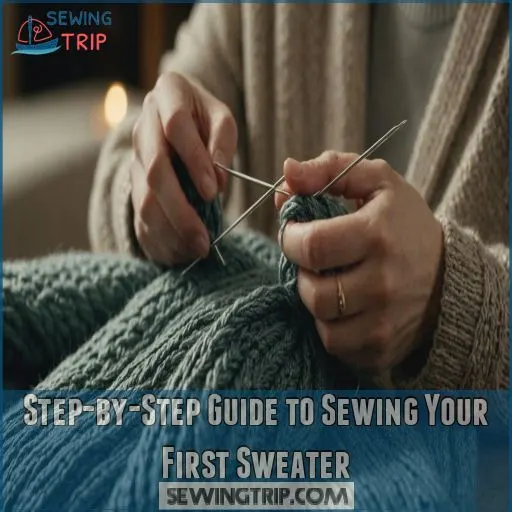
Ready to turn yarn into a cozy masterpiece?
Let’s walk through sewing your first sweater.
from casting on to adding those final touches that’ll make you want to strut your stuff in your handmade creation.
Casting on and Creating the Main Body
Excitement builds as you begin casting on, the foundation of your cozy creation. Choose the right needles and yarn, then master the knitted cast-on method.
When working with yarn, consider the fiber content, stretch, and drape to make sure the right feel and functionality for your sweater, similar to selecting the perfect fabric. It’s also essential to prewash your yarn to allow for any shrinkage and prevent distortion.
Work in rows, keeping an eye on your stitch count to avoid common mistakes. As you progress, you’ll feel the rhythm of knitting history in your hands.
Remember, every stitch brings you closer to joining the vibrant knitting community and crafting your unique masterpiece.
Shaping Armholes and Neckline
You’ve got the main body down pat—it’s time to give your sweater some shape!
Shaping armholes and necklines is like sculpting your cozy masterpiece. Start by decreasing stitches to create curves that’ll hug your body just right. Remember, precision is key—count those stitches like you’re counting sheep!
For a polished look, binding off in steps is essential. This creates a smooth "staircase" effect that’ll make seaming a breeze.
Attaching Sleeves to the Body
Confidence is key when attaching sleeves to your sweater body.
Start by aligning the sleeve’s edge with the armhole, using stitch markers for precise placement. Pick up stitches around the armhole, joining the sleeve seamlessly.
Don’t fret if it’s not perfect; knitted fabric is forgiving . As you work, take deep breaths – this step’s a great chance for stress relief and critical thinking practice.
You’re mastering an important skill!
Adding Ribbing and Finishing Touches
Now that your sleeves are snugly attached, let’s put the cherry on top with some ribbing.
You’re in the home stretch! Cut your ribbing, making sure the stretch goes around your wrist.
Sew it into a tube, then fold it in half.
Pin it to your sleeve, matching seams and stretching gently.
Stitch it on, and voila! You’ve just mastered the art of cuff creation.
Troubleshooting Common Beginner Sweater Issues
You’ve got this far, but your sweater’s acting up?
Don’t sweat it – even seasoned knitters face hiccups, from wonky stitches to mysterious holes.
We’ll tackle common snags like uneven tension, pesky mistakes, and fit issues, turning your crafting woes into wins.
Dealing With Uneven Tension
Don’t let uneven tension unravel your sweater dreams!
Achieving consistent stitches takes practice, but there are tricks to smooth out those bumps.
Try knitting around the legs of your needles instead of the tips for better control . Experiment with different needle materials to find what feels right.
Remember, even seasoned knitters face tension troubles – it’s part of the craft’s charm. Keep at it, and soon you’ll be stitching up a storm with confidence!
Fixing Mistakes in Your Knitting
Even with perfect tension, mistakes happen. But don’t fret! You’ve got this. Dropped a stitch? It’s not the end of the world. Unraveling rows or "frogging" can feel like taking two steps back, but it’s actually a giant leap forward in your knitting journey. Remember, every pro was once a beginner who dropped stitches too.
- Fixing mistakes builds confidence and problem-solving skills
- Learning to "read" your knitting helps catch errors early
- Embracing imperfections can lead to unique, charming details
Addressing Fit Problems During Construction
Occasionally, your sweater might throw you a curveball during construction. Don’t sweat it! For sleeves that feel like wings, adjust the bust circumference or shorten the armholes. If your neckline’s doing the limbo, deepen it at the front or back.
To achieve a perfect fit, keep in mind that mastering straight stitching techniques is important for a smooth sewing experience. By understanding how to work with fabric, you can prevent distortion and guarantee a comfortable sweater.
Remember, gauge is your best friend for a perfect fit. Shoulder seams playing peek-a-boo? Shorten them to match your body’s cross-back width. You’ve got this!
Blocking and Caring for Your Handmade Sweater
You’ve poured your heart into crafting that cozy sweater, and now it’s time to give it some TLC.
Proper blocking and care will keep your handmade treasure looking fabulous for years to come.
So let’s make sure your sweater gets the star treatment it deserves.
Proper Blocking Techniques for Different Fibers
Now that you’ve overcome sweater-related issues, let’s refine your creation with some blocking magic. Think of blocking as a spa day for your sweater fibers.
For different fibers, use the following techniques: For wool, give it a luxurious soak. Cotton and cotton blends? Treat ’em to a gentle mist. Silk loves a steamy embrace.
And for those rebellious acrylics? A hair dryer works wonders. You’ll be amazed at how blocking transforms your handiwork into a polished masterpiece.
Washing and Drying Your Finished Sweater
Your cozy creation deserves tender loving care! Treat your handmade sweater like a cherished friend.
Remember, wool’s a bit of a diva – it doesn’t need frequent baths.
When it’s time for a spa day:
- Fill the sink with lukewarm water and a gentle wool wash
- Gently submerge your sweater, avoiding agitation
- Squeeze out excess water and lay flat to dry
Don’t wring it out – you’re not trying to get a confession!
Storage Tips to Maintain Sweater Shape
Let’s give your handmade sweater the royal treatment it deserves.
Fold it gently to avoid stretching, and tuck it away in a drawer with cedar blocks for natural moth protection.
For longer-term storage, consider hanging it on a padded hanger to maintain its shape.
Remember, a well-organized drawer is your sweater’s best friend.
Think of it as creating a cozy nest for your woolly creation to hibernate in style!
Next Steps: Advancing Your Sweater Sewing Skills
You’ve conquered the basics, now it’s time to level up your sweater game.
Try adding simple colorwork, exploring new styles like cardigans or vests, or tackling more intricate stitch patterns.
to keep your knitting skills growing and your wardrobe expanding with more intricate stitch patterns.
Incorporating Simple Color Work
Ready to add some pizzazz to your sweater? Jump into colorwork basics and watch your creation come alive!
Start with simple stripe patterns – they’re a breeze and instantly eye-catching.
As you gain confidence, explore Fair Isle for charming geometric designs.
Remember, when tackling intarsia or color changes, take a deep breath – it’s not as scary as it looks. You’ll be a colorwork pro in no time, turning heads with your vibrant, cozy masterpieces!
Exploring Different Sweater Styles
Now that you’ve mastered the basics mastered, it’s time to dip your toes into a sea of sweater styles.
From cozy cardigans to chic pullovers, sweater silhouettes are your oyster.
Try your hand at a trendy cropped design or a classic boyfriend cardigan for that perfect relaxed fit.
Color blocking can add a pop of personality, while fair isle patterns bring a touch of timeless charm.
Remember, each stitch is a step in creating your unique style masterpiece!
Tackling More Complex Stitch Patterns
With your basic sweater skills under your belt, you’re ready to jump into the exciting world of complex stitch patterns. Cable stitches will add depth to your creations, while lace patterns can give your sweaters a delicate touch.
To tackle these intricate designs, make sure you’re equipped with the right sewing essentials for beginners like sharp scissors and precision measuring tools. Use a seam measuring gauge for precise seam allowances and a Hera tool for marking fabric precisely without damaging it.
Feeling adventurous? Try your hand at Fair Isle or Intarsia for eye-catching colorwork. Remember, practice makes perfect, so don’t be afraid to unravel and start again. You’ve got this, stitch by stitch!
Frequently Asked Questions (FAQs)
How do I choose a sweater If I’m a beginner?
Picking your first sweater pattern? Go for simplicity.
Choose a flat-knit design with basic stitches and chunky yarn for quick results.
Aim for an 18-20 stitch gauge (Source).
Remember, it’s about learning the ropes, not creating a masterpiece!
How to choose a cozy sweater?
Look for soft, warm fabrics like merino wool or cashmere.
Choose a relaxed fit for ultimate coziness.
Consider a neutral color for versatility.
Don’t forget details like a comfy neckline and ribbed cuffs to keep the warmth in.
How to find easy sweater knitting patterns?
Check out online knitting communities or craft stores for beginner-friendly patterns.
Opt for chunky yarns and simple shapes like rectangles. Raglan sleeves are your best bet for an easy start.
You’ll be cozied up in no time with Raglan sleeves.
Can a beginner knit a sweater?
Did you know 80% of beginner knitters can tackle a sweater?
You’ve got this! Start with a simple pattern, master basic stitches by learning how to easy sew, and take it step-by-step
.
With patience and practice, you’ll be wrapping yourself in cozy, handmade warmth in no time.
How do I adjust sweater patterns for different body types?
You’ve got this!
Measure your body and compare it to the pattern’s schematic. Add width or length where needed, using stitch multiples wisely.
Try on as you go, and don’t be afraid to tweak. It’s your unique, perfectly-fitted sweater!
Can I combine different yarn weights in one sweater?
Mixing yarn weights can create stunning effects in your sweater.
Combine thicker and thinner yarns for texture and depth. Try pairing mohair with sock yarn for a soft, romantic look.
Just remember to swatch and adjust your gauge accordingly.
Whats the best way to join sweater pieces together?
Sewing up your masterpiece? The mattress stitch is your best friend.
It creates a strong, invisible seam that’ll make your sweater look seamless.
Work one stitch from the edge, ensuring your pieces align perfectly for that professional finish.
How do I prevent holes when changing colors in sweaters?
Changing colors can be tricky, but don’t sweat it.
To avoid gaps, twist the old and new yarns together, then weave the tail into the next stitch.
This ‘twist-and-weave’ technique keeps your stitches tight and hole-free.
Are there special techniques for sewing stretchy sweater fabrics?
Use a ballpoint needle to glide between threads (Source).
Opt for stretch stitches like zigzag or lightning.
Don’t pull the fabric; let it feed smoothly.
Remember, patience is key when taming these stretchy beasts!
Conclusion
You’ve just taken a giant leap into the world of cozy crafting!
Learning to sew a cozy sweater as a beginner might seem intimidating, but with these steps, you’re well on your way to creating your own wearable hug. Remember, every stitch is a step in the direction of mastery.
Embrace the process, learn from your mistakes, and don’t be afraid to unravel and start again. Before you know it, you’ll be wrapping yourself in the warmth of your very own handmade sweater.
Happy stitching!


