This site is supported by our readers. We may earn a commission, at no cost to you, if you purchase through links.
Check if your machine’s threaded correctly—it matters more than you’d think. Make sure the bobbin’s nestled securely and threaded just right.
If the tension’s off, tweak until you find that sweet spot where stitches stop skipping or tangling.
Keep an eye out for bent needles; they’re sneaky culprits of stitching woes.
Oh, and don’t forget to feed the fabric smoothly with the help of your trusty feed dogs. Now you’re geared up—but there’s more magic ahead!
Table Of Contents
- Key Takeaways
- Common Sewing Machine Issues
- Threading and Tension Troubleshooting
- Needle and Throat Plate Issues
- Fabric Feed and Stitch Quality
- Machine Performance and Maintenance
- Thread Quality and Bobbin Compatibility
- Basic Troubleshooting Steps
- Common Causes of Machine Malfunction
- Advanced Troubleshooting Techniques
- Preventative Maintenance
- Frequently Asked Questions (FAQs)
- Conclusion
Key Takeaways
- Don’t let tangled threads drive you batty—always check your machine’s threading path and tension settings. Thread your machine like a pro, and your projects will thank you.
- Got stitch hiccups? Make sure your needle’s fit for the fabric. A dull or bent needle can turn your stitch quality into a bowl of spaghetti.
- If your fabric’s playing hard to get and won’t feed smoothly, make sure your feed dogs are doing their thing. Adjust the presser foot pressure and consider a walking foot for those tricky materials.
- Keep your machine in tip-top shape with regular maintenance. A little oil here, a dusting there, and you’ll avoid machine meltdowns. Treat it like a cherished pet, not like a forgotten dust bunny!
Common Sewing Machine Issues
If your sewing machine’s acting up with tension, threading, or fabric feed issues, you’re not alone.
Let’s unravel these common problems quickly, so your machine doesn’t needle you into frustration.
Fabric Feed Problems
If your fabric isn’t feeding smoothly, check that your drop-feed setting isn’t activated and the feed dogs are accessible.
Make sure the presser foot is down and adjusted to the right pressure for your fabric.
Consider using a walking foot for tricky materials like stretch fabrics to help feed the fabric evenly and prevent puckering.
Thread Tension Issues
So, you’ve tackled fabric feed, and next up is the puzzling world of thread tension issues. Imagine this: You’re sewing, and the stitch quality resembles grandma’s unraveled sweater. Here’s how to fix it:
- Re-thread with the presser foot up.
- Check thread tension settings.
- Test different threads.
- Adjust upper thread tension to match fabric type.
All without breaking a sweat!
Bobbin Compatibility
Thread tension can be pesky, but don’t underestimate bobbin compatibility.
Using the wrong bobbin size or type can throw everything out of whack.
Keep your sewing machine smooth by ensuring your bobbin’s fit is just right.
| Issue | Solution |
|---|---|
| Bobbin size | Use manufacturer-recommended size |
| Bobbin winding | Wind evenly to prevent knots |
| Bobbin case issues | Clean regularly, check for damages |
| Bobbin tension | Adjust as needed for balanced stitches |
Threading Errors
Just tackled bobbin woes? Let’s chat threading errors! A little bird’s nest of tangled thread can send your machine into chaos. Follow these nuggets:
- Check threading guides are followed like a GPS
- Make sure the needle position is correct
- Adjust the sewing machine thread tension dial
- Avoid sewing a party of loops!
Quick fixes, big smiles!
Skipping Stitches
Uh oh, your machine’s skipping stitches? No need to panic – we’ve got this!
First, check your needle. Make sure it’s the right type for your fabric and not bent or dull.
Next, adjust the thread tension – it might be too tight or too loose.
And don’t forget to check that bobbin winding – a wonky bobbin can really mess with your stitches.
Unraveling Stitches
Your sewing stitches keep unraveling faster than a mystery novel plot twist? Start by checking your stitch tension and machine settings—loose tension can make stitches weak.
Take a glance at your fabric choice and make sure thread quality complements it.
Are you using the right needle type? These tweaks often fix sewing machine problems, creating solid stitches every time, understanding thread tension.
Puckering Fabric
When stitches unravel, it’s like a disappearing act; fabric puckering is another magic trick.
To avoid it:
- Adjust sewing machine thread tension for all fabrics to find the sweet spot.
- Use the right needle size for your fabric weight.
- Ensure the presser foot’s pressure matches your material.
Your fabric should lay flat, not look like a crumpled map.
Machine Not Feeding Properly
Ever felt like you’re sewing a marathon on a treadmill set to slow motion? It’s likely the feed dogs need attention. Check for lint buildup, adjust presser foot pressure, or try a walking foot for tricky fabrics.
If the machine’s still acting stubborn, it’s time for some sewing machine maintenance or repair.
Don’t let fabric thickness slow you down!
Machine Working Heavily
If your sewing machine is working heavily, it could be due to motor overload, lubrication issues, or even an aging machine.
Try lightening the load, oiling the moving parts, and checking the belt tension.
If the problem persists, it may be time for a tune-up to prevent overheating and potential damage.
Tension Imbalance
Balancing thread tension can feel like wrangling cats. But don’t fret! Here’s a quick fix list:
- Tension Adjustments: Tweak your machine’s dial for smoother stitches.
- Thread Compatibility: Match your threads. Think of it as setting up a blind date.
- Bobbin Tension: Make sure it’s not too loose or tight.
- Fabric Types: Adjust tension for different fabrics, like buttering toast.
Happy sewing!
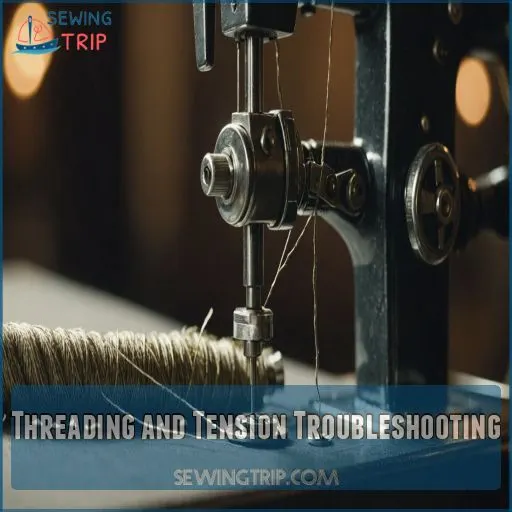
Threading and Tension Troubleshooting
When your sewing machine gets a little too creative with its loops and knots, it’s often a threading or tension issue.
Let’s sort out those tangled tensions and get your stitches back on track—you’ll be sewing smoothly in no time!
Removing and Re-threading the Top Thread
Threading your machine is like a dance; miss a step, and it’s chaos!
To tackle top thread tension issues, raise the presser foot before re-threading, ensuring the thread path is smooth, like a hot knife through butter.
Follow the machine manual, picking the right thread type for your fabric—whether cotton, silk, chiffon, or leather—for stitching success!
Removing and Re-threading the Bobbin
Removing and re-threading the bobbin is a breeze!
First, pop open that bobbin case and take a look.
Make sure the bobbin is winding in the right direction – you don’t want any tangles!
Then, firmly insert the bobbin into the case, ensuring it’s seated properly.
Now you’re ready to sew with confidence!
Adjusting Tension Settings
Adjusting tension settings can save your sanity—and your project!
Imagine tension as the handshake between your threads.
For light or thin fabrics, go easy, while thick fabrics need a firm grip.
Test on scraps and, like Goldilocks, find what’s "just right."
Remember, bobbin tension matters too.
Your sewing machine thread tension should suit all materials for perfect stitch quality, which you can learn more about in the threading guide.
Checking Thread Compatibility
After adjusting tension settings, consider the compatibility of your thread. Using mismatched thread weight, type, or brand may lead to tension headaches. It’s like dressing for a disco with cowboy boots—awkward.
Match thread weight and type for similar fabrics.
Balance thread color with your style.
Correct sewing machine thread tension makes for beautiful stitches without breaking a sweat.
Ensuring Proper Threading Technique
Getting the threading sequence right is half the battle.
Follow your sewing machine manual like a treasure map to make sure thread quality and bobbin winding align like peanut butter and jelly.
Picture a tension balance dance keeping threads tight yet graceful.
These sewing machine tips and tricks will have you feeling like a threading magician in no time.
Identifying Incorrect Threading
Uh oh, looks like your threading might be off! Don’t worry, we’ve all been there. Check for any loose threads or tangles in the tension disks or thread guides. Make sure the top thread is properly seated in each groove – that’s key to avoiding those pesky skipped stitches. Take a deep breath, and let’s get this machine humming again!
- Inspect the top thread path
- Make sure the thread is firmly seated in the tension disks
- Check for any obstructions in the thread guides
- Verify the bobbin is correctly threaded
- Confirm the needle is properly installed
Balancing Upper and Lower Thread Tension
Balancing thread tension isn’t rocket science—it’s like finding that sweet spot in your morning coffee. Run a quick tension test:
| Problem | Cause | Solution |
|---|---|---|
| Looping | Loose top thread | Tighten upper tension |
| Puckering | Tight top thread | Loosen upper tension |
| Uneven | Mismatched threads | Match upper and bobbin thread |
| Snapping | Wrong needle size | Use appropriate needle/fabric |
With these tips, transform your stitch quality across different types of projects and garments!
Using the Correct Threading Method
Threading your needle is like walking a tightrope; precision matters! For a smooth ride, consult your manual for model-specific guidance and make sure:
- Proper threading technique to avoid tension headaches.
- Thread compatibility to bust through projects like a pro.
- Correct tension settings for different garments and fabric thicknesses.
Trust me, follow these, and sew your worries away!
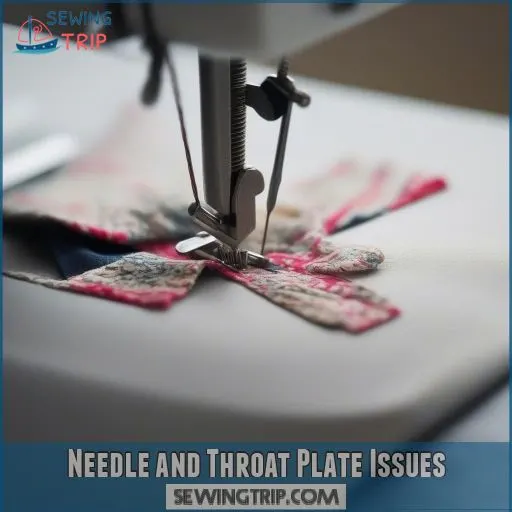
Needle and Throat Plate Issues
When your sewing machine’s needle gets bent or breaks, it can feel like it’s plotting against you, but don’t worry—you’re in control and learn why needles bend!
Just change the needle, check its height, and make sure it’s compatible with your fabric and thread,
while making sure the throat plate is smooth and damage-free for seamless sewing.
Changing the Needle
Always keep a fresh needle on hand – it’s the heart of your sewing machine!
Changing the needle regularly prevents skipped stitches and thread breakage.
Simply raise the needle to its highest position, loosen the needle screw, and gently pull out the old one.
Then, firmly insert the new needle, making sure it’s fully seated before tightening the screw.
Choosing the Right Needle Type
Success in sewing is all about marrying needle size with fabric type and needle point with your project’s needs.
- Make sure needle size matches your thread weight for smooth operation.
- Use sharp points for woven fabrics, ballpoints for knits.
- Choose wisely, and you’ll sew like a dream!
Inspecting the Needle for Damage
Needle hiccups? Check for those pesky nicks or bends causing havoc! A bent needle can lead to needle breakage or thread damage. Grab a magnifying glass—that needle might’ve hit a sharp edge! Swap out any damaged ones faster than you can say "stitch-mageddon."
Follow this table for clues:
| Problem | Quick Check |
|---|---|
| Bent Needle | Won’t sew straight |
| Dull Tip | Pulls fabric |
| Rust Spots | Sticks to threads |
| Burrs | Snags fabric |
| Misaligned | Skips stitches |
Checking Needle and Thread Size Compatibility
Choosing the right needle and thread size is really important for smooth sewing.
Match the needle to your fabric – a lightweight needle for delicates, a heavier one for thick materials.
And make sure the thread weight complements the needle size.
Too thin a thread can cause breakage, while a thick thread may struggle to pass through the eye.
Get this combo right, and your stitches will sing.
Ensuring Proper Needle Height
Got size compatibility down pat? Great! Next up, needle height. If it’s not sky-high enough, you might see wobbly stitches or breakage.
Adjust it so it’s just right for your fabric’s thickness and needle type. Imagine Goldilocks threading your machine—everything needs to be ‘just right’ for perfect stitch quality.
Don’t skip this! You’re aiming for stitch perfection!
Identifying Throat Plate Damage
Ah, the throat plate—your sewing machine’s silent partner. But when it gets scratched or nicked, it’s like sewing through molasses.
Look for:
- Visible scratches or burrs: These can catch threads faster than a cat catches mice.
- Unusual wear signs: Time to swap it out.
- Thread snags: A clear sign your throat plate’s begging for a vacation!
Filing Down Rough Spots on the Throat Plate
Noticed a few rough spots on your throat plate? It’s like hitting a pothole while stitching—your needle and fabric don’t appreciate it!
Grab a fine file or emery paper and gently smooth those bumps.
It helps maintain stitch quality and prevents fabric snagging.
With a bit of care, your sewing machine will purr like a kitten.
Replacing the Throat Plate
If your throat plate is looking a bit worse for wear, don’t fret – replacing it’s a breeze!
Carefully remove the old one, making note of how it’s aligned.
Then, select a new plate that’s compatible with your machine.
Snap it into place, ensuring it’s properly seated.
Voila – your sewing just got a whole lot smoother!
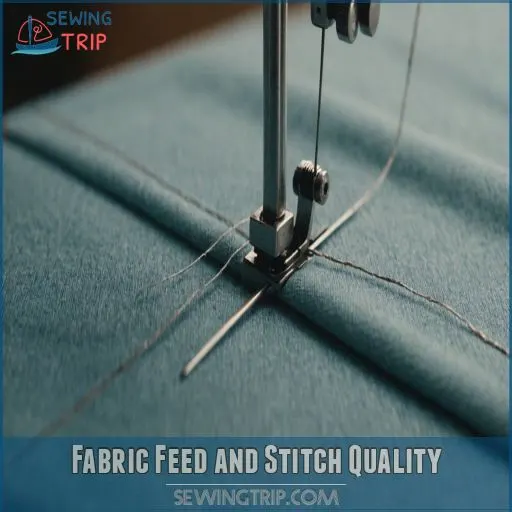
Fabric Feed and Stitch Quality
If your sewing project’s running off course, fear not—smooth sailing in the fabric feed department is just a few adjustments away.
From wrangling the right presser foot to taming stitch length and tension, we’ll have your stitches marching in formation faster than you can say "seam ripper!
Ensuring Proper Fabric Feed
Got fabric feed issues that make you want to pull your hair out? Make sure the feed dogs are up and working like champs!
Check the presser foot pressure – a smidge too tight or loose and all bets are off.
For tricky fabric types, consider using a walking foot. Your fabric will glide smooth like butter, sewing will be a breeze!
Using the Correct Presser Foot
Choosing the correct presser foot makes your sewing machine run like a well-oiled machine. It’s like picking the right shoes for a hike!
- Consider presser foot types for fabric compatibility.
- Keep an eye on foot maintenance to avoid snafus.
- Make sure the foot is compatible with your fabric to skip headaches.
Using the right foot can prevent your fabric from dancing unpredictably under the needle!
Adjusting Presser Foot Pressure
Adjusting the presser foot pressure is key for achieving an even fabric feed and stitch quality.
Too much pressure can cause puckering, while too little can lead to uneven stitches.
Start by testing on a fabric scrap, tweaking the pressure until the feed feels smooth and the stitches look balanced.
A well-adjusted presser foot is the secret to sewing success!
Checking Stitch Length and Width
While adjusting presser foot pressure feels like giving your sewing machine a pep talk, checking stitch length and stitch width is more like fine-tuning your guitar strings.
Stitch length impacts your seam allowance, while stitch width control cranks up those decorative stitches.
Experiment with your machine settings until you find that sweet spot where fabric feeds smoothly, creating consistent, happy stitches!
Using a Walking Foot for Stretch Fabrics
Explore stitch lengths and build on that by using a walking foot for stretch fabrics—it’s like a trusty sidekick!
Here’s how:
- Keep the fabric feeding smoothly and evenly.
- Maintain superb stitch quality, even with tricky materials.
- Say goodbye to skipped stitches.
- Prevent fabric from shifting around like a snake in a garden party.
Preventing Puckering and Bunching
Got a walking foot? Great! Let’s tackle that pesky puckering.
Before starting, prepare your fabric by gently smoothing it out and, hey, don’t forget to use the right presser foot and adjust stitch length.
With tension balance set, here’s a quick table to help:
| Fabric Type | Presser Foot | Stitch Length |
|---|---|---|
| Lightweight | Regular | Short |
| Medium | All-purpose | Medium |
| Heavyweight | Walking Foot | Long |
Remember, you’ve got this!
Ensuring Even Stitch Formation
To make sure your stitches are even, make sure your fabric feeds smoothly through the machine.
Check that the presser foot is down and the pressure is set correctly for your fabric type.
Adjust the stitch length and width settings as needed to prevent puckering or distortion.
With a little fine-tuning, you’ll be sewing like a pro!
Adjusting Tension for Fabric Type
Adjusting tension for your fabric type is like finding the right balance in a seesaw.
If your stitches look wobbly, try tweaking the tension settings.
Lightweight fabrics need less tension, while heavier ones crave more.
Experiment with thread types and needle choices to achieve perfect stitch quality.
Trust the process—your fabric’s happy ending is in sight!
Machine Performance and Maintenance
Keeping your sewing machine in tip-top shape is like giving your car an oil change—a little care can make a big difference.
Regular cleaning, oiling, and even listening for odd noises will help your machine run smoothly for years to come.
Regular Cleaning and Maintenance
Keeping your sewing machine purring like a cat requires regular cleaning and maintenance.
Think of it like brushing your machine’s teeth.
Don’t skimp on oil application—you wouldn’t drive a car without oil, right?
Store your machine well, like a golfer with prized clubs.
Replace worn parts to avoid surprise “golf balls” landing in your stitching.
They’ll thank you later!
Checking for Lint Buildup
Dust and lint can quickly clog up your sewing machine, causing all sorts of headaches.
Take a few minutes to inspect the nooks and crannies – check the:
- Lint trap for buildup
- Bobbin case for trapped threads
- Feed dogs for lint accumulation
- Throat plate for debris
- Entire machine for lint and fluff
A thorough cleaning will keep your machine running smoothly.
Oiling the Machine
Got a squeaky sewing machine? Time for an oil change! Use high-quality sewing machine oil to keep things smooth.
Don’t be stingy—oiling all those hidden hinges and gears is like giving your machine a spa day.
Aim for regular oiling frequency; every few months should do.
Grab a small tool (even a toothbrush works!), and spread that slick goodness!
Avoiding Canned Air
After oiling the machine, steer clear of using canned air.
While it might seem like a quick fix, it’s notorious for pushing dust further inside instead of removing it.
Think of it as sweeping dirt under the rug instead of out the door.
Instead, use:
- A small brush
- Lint-free cloth
- Q-tip
- Handheld vacuum attachments
Inspecting the Machine for Damage
Next time you’re tackling lint buildup, it won’t hurt to check for machine damage. Look for needle damage or broken parts like worn belts or loose screws. If your machine’s noisier than a rock concert, it’s telling you something!
Use this handy table to guide your examination:
| Part | Check For | Action Needed |
|---|---|---|
| Needle | Damage | Replace if needed |
| Belts | Wear | Tighten or replace |
| Screws | Loose | Tighten |
| Throat Plate | Cracks/Nicks | Smooth or replace |
| Bobbin Case | Alignment | Reinsert properly |
Scheduling Regular Maintenance
Scheduling regular maintenance is key to keeping your sewing machine in tip-top shape.
Mark your calendar for a monthly cleaning and oiling session – it’s a small investment that pays off big time.
Avoid costly repairs down the line by staying on top of maintenance.
Your machine will thank you with years of reliable, smooth performance.
Addressing Strange Noises
Strange noises from your sewing machine can be unsettling, like a cat yowling at midnight.
First, check for lint buildup and clean it out.
Lubrication is key, so oil the necessary parts (it’s like giving your machine a spa day).
Don’t forget about the belt; make sure it’s snug and secure, preventing any unwanted clatter or clunk.
Seeking Professional Repair
When odd noises persist or threads tangle more than a toddler’s hair, it’s time to bring in a pro!
Consider repair costs or warranty claims for your machine model.
Local technicians offer valuable insights.
Regular service intervals keep your machine purring like a kitten.
Trust those with the expertise—after all, even sewing machines need a little TLC sometimes!
Thread Quality and Bobbin Compatibility
You’d be amazed at the difference high-quality thread and the right bobbin can make for your sewing machine’s performance for smoother stitching.
If your stitches look like a tangled mess from a yarn ball fight, it might be time to check your thread and bobbin compatibility!
Choosing High-Quality Thread
Choosing high-quality thread is key for smooth, consistent sewing.
Look for reputable brands sold at sewing or quilt shops – they’ll be fresher and stronger than bargain bin options.
Match the thread weight to your fabric and needle size for best results.
Store thread properly to prevent tangles or discoloration.
Quality thread makes all the difference!
Avoiding Old or Low-Quality Thread
You know, a great thread can make or break your sewing projects.
Old or cheap threads might cause breakage faster than a rubber band in a cartoon.
And trust me, they can be sneaky about it.
For concrete seam strength and stitch quality, pick durable, high-quality threads.
Keep your work flawless; let each stitch stand firm like a superhero cape!
Ensuring Bobbin Compatibility
High-quality thread is important, but who knew bobbin compatibility‘s the bee’s knees too?
Each sewing machine’s a peculiar beast; they need the right bobbin size to shimmy with precision.
Match the bobbin type and tension with your machine’s manual.
Ignore it, and you might as well be sewing a wild dance party—threads going everywhere but where they should!
Checking Bobbin Alignment
Ever wondered why things go haywire with your sewing machine? Check your bobbin alignment! Misaligned bobbins can be a real thorn in your side. Here’s a quick checklist:
- Make sure Bobbin Case Compatibility.
- Double-check Bobbin Tension and Winding.
- Verify proper Bobbin Threading.
Doing this will keep your stitches smooth and your frustration levels down!
Clearing Jammed Threads
Uh oh, looks like you’ve got a tangled mess on your hands! Don’t panic – clearing jammed threads is a breeze.
First, check the bobbin case for any stuck threads.
Gently remove any debris, being careful not to damage the delicate components.
With a clean bobbin area, you’re one step closer to smooth sailing.
Performing Regular Machine Maintenance
Now that your threads are clear of jams, let’s keep that machine purring with regular maintenance.
Follow this easy cleaning schedule:
- Unplug the machine and remove lint with a brush; avoid using canned air.
- Add a drop of the recommended oil type monthly.
- Replace worn parts for smooth operation.
Remember, a happy machine means smoother sewing!
Using the Correct Bobbin Size
Choosing the right bobbin size is like trying to fit Cinderella’s glass slipper—it has to be just right!
Check your machine’s model and consult a bobbin sizing chart.
An ill-fitting bobbin can lead to tension issues or jams.
Make sure the bobbin slips into the bobbin case with ease, ensuring smooth operation and preventing winding problems.
Threading the Bobbin Correctly
While using the correct bobbin size is key, threading it properly can be your ace in the hole for avoiding tension issues.
Here’s how you can make sure things run smoothly:
- Check the bobbin winding direction.
- Make sure it sits snugly in the bobbin case.
- Make sure thread compatibility.
- Watch out for thread tangles.
Remember, every stitch counts!
Basic Troubleshooting Steps
When your sewing machine acts up, don’t panic!
Start with the basics – check the manual, do some simple maintenance, and make sure everything is properly threaded.
If the issue persists, it’s time to call in the experts for some advanced troubleshooting.
Identifying the Problem
First off, diagnosing a sewing machine problem is like playing detective, especially when you’re dealing with the feed dog problems. Is your stitch quality dodgy or do strange noises startle you? Perhaps your fabric’s behaving oddly? Take a look at this table for clues:
| Symptom | Possible Cause |
|---|---|
| Poor stitch quality | Incorrect threading or tension |
| Fabric bunching | Feed dogs or presser foot issue |
| Strange noises | Loose screws or lint buildup |
| Thread breaking | Needle or thread compatibility |
| Uneven stitches | Tension imbalance or needle size |
You’re on your way to a sewing epiphany!
Checking the Manual
Now you’ve identified the problem, it’s time to check that trusty sewing machine manual. It’s not just for decoration! Follow these troubleshooting tips:
- Uncover threading diagrams to make sure the thread’s path is right.
- Scrutinize the maintenance schedule like a detective.
- Note common problems that match your symptoms.
- Find aha moments that simplify fixing issues, like using that forgotten buttonhole foot!
Performing Basic Maintenance
In your quest for sewing glory, remember that a little TLC keeps your machine humming smoothly. Regular sewing machine cleaning can prevent hiccups.
Include a lubrication routine every few months, ensuring all moving parts glide effortlessly.
Always change needles before they resemble knitting needles, and store your thread and machine properly. Keep them cozy, and they’ll reward you with perfect stitches!
Checking for Loose Screws
After checking the basics, take a closer look at your machine. Give those screws a gentle wiggle – loose screws can cause all sorts of issues, from annoying vibrations to major malfunctions. Tighten any loose screws with the right screwdriver, and your machine will purr like a well-oiled kitten. No need to go overboard, though – you don’t want to strip those delicate parts.
- Check for loose screws on the:
- Needle plate
- Presser foot
- Bobbin case
Ensuring Proper Threading
Ensuring proper threading is like finding the right dance partner; harmony matters. Keep these in mind:
| Tip | Why It Helps |
|---|---|
| Check threading | Prevent skipped stitches |
| Adjust tension | Achieve balanced stitches |
| Check bobbin | Avoid jamming |
| Use quality thread | Boosts thread compatibility |
| Proper needle | Matches thread and fabric |
Master these, and your machine will sing!
Seeking Professional Help
Even the savviest sewing whiz sometimes needs a professional to tackle machine repair.
If the machine’s warranty covers common hiccups, breathe easy!
For those nagging issues, local repair shops offer expert help.
Remember, while DIY fixes are tempting, a professional touch guarantees quality and longevity without breaking the bank.
So, don’t fret over machine repair costs!
Common Causes of Machine Malfunction
Oops, your sewing machine’s acting up again?
Don’t panic—let’s unravel those common pitfalls like incorrect threading and insufficient tension that make it misbehave,
so you’re back to stitching in no time!
Incorrect Threading
Incorrect threading is a common culprit behind sewing machine woes. First, make sure you’re following the machine’s threading path to a tee.
Then, double-check that the bobbin is wound and inserted properly.
Insufficient Tension
Tension problems making your sewing a real pig’s ear? Don’t fret! Check the thread quality and make sure it dances smoothly through the machine.
Double-check the bobbin—sometimes those little rascals need a nudge.
Consider fabric weight, as heavier fabrics may require adjustments. Finding the right balance makes sure your stitches are as tight as a drum, preventing pesky loops and breaks!
Incorrect Needle Size
When battling tension like it’s your nemesis, needle size plays a superhero role.
An incorrect needle can cause:
- Needle breakage: Your needle bends under pressure.
- Fabric damage: Stabs your precious fabric.
- Stitch quality: Drops faster than a bad joke.
- Thread breakage: Flies apart mid-sew.
Ensure the needle matches your fabric and thread for smooth sewing.
Poor Fabric Feed
Tired of your fabric slippage? Check the feed dogs; they may not be doing their job!
If your fabric feed acts like a slippery eel, it might be time to adjust presser foot pressure or consider a walking foot for tricky fabric thickness.
Feed dog issues often stem from their improper exposure.
Remember, even machines appreciate a gentle nudge in the right direction!
Clogged Machine
Uh oh, looks like your machine’s clogged up! Don’t worry, we’ve got this. First, check the throat plate and bobbin area for any lint or thread buildup. Use a soft brush to gently clear out the debris.
Next, follow the manufacturer’s instructions to oil the machine – a few drops in the right spots can work wonders.
Finally, establish a regular cleaning routine to keep that baby running smoothly.
- Clear out lint and thread buildup from the throat plate and bobbin area.
- Oil the machine according to the manufacturer’s instructions.
- Develop a regular cleaning routine to prevent future clogs.
Worn or Damaged Parts
Over time, you’ll notice signs of worn parts as clear as day. That funky noise? It might just be a tired gear crying for retirement! Identify these troublemakers early. Repairing worn parts can save your machine from a complete meltdown.
Keep your eyes peeled for potential hiccups to prevent part damage—because nobody loves a sewing showstopper!
Incorrect Bobbin Size
When your stitching’s gone haywire, the sneaky culprit might be an incorrect bobbin size. Check the sewing machine manual for bobbin compatibility and avoid headaches with these tips:
- Make sure the bobbin size fits perfectly for smooth functioning.
- Monitor thread tension to maintain stitch quality.
- Prevent machine jamming with the right bobbin.
Stitching happiness restored!
Overloading the Machine
How many layers does your project really need? Overloading your machine with heavy fabric weight or intricate projects can stress the poor thing more than a cat in water.
Reduce sewing speed; adjust stitch density to match fabric weight.
Use a larger needle size to handle the weight.
Listen to your machine—it’ll whine before it collapses!
Advanced Troubleshooting Techniques
Feeling like your sewing machine’s got a mind of its own? You’re not alone!
Let’s tackle those advanced troubleshooting techniques, giving your trusty machine the TLC it needs.
From checking the timing to making sure your belts aren’t on vacation.
Using a Throat Plate Inspection Tool
Let’s zoom into throat plate damage next! Using a throat plate inspection tool can be your secret weapon to victory in sewing. It helps with:
- Identifying burrs and nicks hiding in plain sight
- Learning tool benefits through hands-on play
- Sharing cleaning tips with friends forever
- Deciding when replacement’s needed
- Boosting your sewing superpower-spirit!
Checking for Timing Issues
Checking your machine’s timing issues is like choreography for stitches. Needle timing is key; if it’s off, you’ll see missed stitches.
Timing adjustments might scare you, but it’s manageable. Think of the timing belt as a dance partner for perfect coordination.
If unsure, consult your machine’s manual or a professional. A well-timed machine sings smoothly!
Performing a Tension Test
Performing a tension test is a breeze – simply sew a scrap and inspect the stitches.
If they’re uneven, adjust the tension until you achieve a balanced look.
Tweak the top and bobbin tension knobs bit by bit until you nail that perfect stitch.
Troubleshooting tension woes has never been easier!
Using a Stitch Regulator
Taming your sewing beast just got easier! Using a stitch regulator can feel like magic for your projects. It helps you get even stitches, ideal for fussy fabrics.
- Understand the various stitch regulator types.
- Discover stitch regulator benefits.
- Make precise regulator adjustments.
- Troubleshoot regulator hitches.
- Make sure your regulator is compatible with your machine.
Unlock smoother sewing and let creativity flow seamlessly!
Checking for Loose Belts
After mastering stitch regulators, don’t forget about loose belts. A slipping belt can be like a slippery noodle—no good! Make sure belt tension and alignment are spot-on.
Belt maintenance is important for consistent sewing.
| Task | Check | Action Required |
|---|---|---|
| Belt wear | See visible cracks? | Plan a belt replacement. |
| Belt tension | Too loose or tight? | Adjust accordingly. |
| Belt alignment | Off-center? | Realign the belt. |
| Belt cleaning | Covered in dust, maybe? | Give it a gentle clean. |
Inspecting the Machine’s Electronics
Inspecting your machine’s electronics might sound like tackling a sci-fi thriller, but it’s simpler than it seems! Check the power supply, circuit board, wiring, motor, and sensors to make sure everything’s in tip-top shape.
A loose wire is like a squeaky wheel—it loves drama!
Keep your sewing adventures smooth by giving it a periodic high-tech check-up. You’ve got this wired!
Performing a Deep Clean
When your sewing machine needs a little extra TLC, it’s time for a deep clean. This thorough maintenance routine can work wonders, restoring your machine’s performance and extending its lifespan. Here’s how to do it:
- Disassemble the machine, removing all accessible parts
- Use a soft brush to gently remove lint and debris
- Apply a drop of machine oil to key components
- Wipe down the exterior with a damp cloth
- Reassemble the machine, ensuring everything is properly aligned
Preventative Maintenance
You’ve got to treat your sewing machine like a diva, with regular cleaning and a splash of oil to keep it running smoothly.
Don’t forget to swap out any worn parts and give it a comfy place to rest, avoiding overuse, so it doesn’t throw a dramatic tantrum during your next project!
Regular Cleaning and Oiling
Regular cleaning and oiling? It keeps your sewing machine purring like a kitten! Use the right tools for lint removal and stick to a maintenance schedule.
| Cleaning Tools | Oiling Frequency | Oil Type |
|---|---|---|
| Brush/Q-Tip | Monthly | Sewing Machine Oil |
| Small Vacuum | Bi-Monthly | Non-detergent |
| Lint Brush | Monthly | Clear synthetic |
Don’t skip oiling; your machine will thank you!
Checking for Wear and Tear
You’ve done the cleaning; now let’s spot the sneaky wear and tear. Check the needle condition; it should be straight as an arrow.
Bobbins shouldn’t look like they’ve wrestled with a cat.
Make sure the feed dog’s aligned and the presser foot’s not shaky.
And the machine case? It shouldn’t resemble a relic from Grandma’s attic.
Happy stitching!
Replacing Worn Parts
When your sewing machine starts acting up, it may be time to replace some worn parts.
Look for signs like skipping stitches, loud noises, or poor thread tension.
Swap out the needle, bobbin case, or feed dogs – these common culprits are inexpensive and easy to DIY.
Consult your manual or a pro for more complex repairs to keep your machine humming.
Storing the Machine Properly
Occasionally, you might feel like your sewing machine’s biggest fan, but it’s dust covers that’ll protect it best. Store your machine in a tidy storage space, away from damp spots. A nice machine cover adds an extra layer, keeping the climate controlled. Establish a cleaning routine to maintain it in mint condition.
| Tip | Benefit |
|---|---|
| Dust Covers | Shields from particles |
| Machine Covers | Offers extra protection |
| Climate Control | Prevents rusting |
| Storage Space | Keeps machine safe |
| Cleaning Routine | Long-term performance |
Avoiding Overuse
After storing your machine properly, avoid running it ragged; even sewing machines need a spa day! Keep these in mind:
- Project Planning: Space out complex tasks. Your machine deserves a breather!
- Rest Breaks: Let it cool between long sessions.
- Alternative Methods: Hand-stitch some steps.
- Machine Care: Listen for weird noises; that’s your machine whispering, "Hey, buddy, slow down!
Performing Regular Maintenance
A stitch in time saves nine, and regular maintenance is your sewing machine’s best friend.
Schedule cleanings and oilings to keep it purring.
Replace worn parts before they shout for attention.
You’ve got a lifelong partner under that needle—treat it well, and your machine will reward you with years of seamless service and delightful stitches.
Keeping the Machine Covered
Keeping your sewing machine covered when not in use is a smart move to prevent dust buildup, which you can easily clean with a lint brush after removing the needle plate cover.
Dust covers shield the machine from dirt, lint, and grime, which can gum up the works over time.
Protect your investment and extend your machine’s lifespan by popping on a cover after each use.
Your sewing buddy will thank you!
Scheduling Regular Check-Ups
While keeping your sewing machine covered protects it, scheduling regular check-ups is like taking it for a spa day.
Just like your car, machines deserve a little TLC.
Compare service center costs and decide if DIY or professional care fits best.
Follow best practices and establish a maintenance schedule to keep your trusty sewing buddy running smoothly and happily.
Frequently Asked Questions (FAQs)
What are the 10 common sewing machine troubles?
Struggling with thread tension? Needle issues? Fabric feed problems?
Don’t worry – we’ve got your back!
Tackle these 10 common sewing machine troubles and get back to seamless stitching in no time.
What is the most common problem when a machine doesn’t sew correctly?
When your sewing machine misbehaves, threading issues are usually the culprit.
Imagine a tightrope walker with shoes untied—it just doesn’t work smoothly!
Re-thread both top and bobbin carefully, ensuring tension is balanced like a seesaw.
Why is the thread not going through fabric?
It’s like the thread’s on strike!
Make sure the needle’s sharp and the machine is threaded correctly.
Check tension settings and make sure the fabric’s moving freely.
Sometimes a tangle throws a wrench (or thread) in the works.
How to tell if thread tension is correct?
To check if thread tension’s just right, flip your fabric over.
You shouldn’t find loops peeking around.
Stitches should look neat and identical front and back, like they’re not fighting a thread battle!
How to select the right fabric for sewing?
Choosing the right fabric is like finding your perfect dance partner – it’s all about the flow, the give, and the way it moves with you.
Pick a fabric that complements your sewing skills and the project at hand.
What adjustments are needed for thicker materials?
When tackling thicker materials, increase the needle size, adjust the presser foot pressure, and use a walking foot for even feeding.
Test tension settings on scraps first.
Don’t let your machine struggle—give it some muscle!
How to identify compatible sewing machine feet?
Did you know 80% of sewing newbies own incompatible feet?
Check your machine manual for details or look for universal low-shank feet.
It’ll feel like finding a needle in a haystack, but your seams will thank you!
What is the best lighting setup for sewing?
Great sewing lighting‘s like having a sunbeam on tap.
Use an adjustable lamp with daylight bulbs overhead and at your side.
Prevent eye strain with focused light, and sew like a pro through sunrise, sunset, or spotlight!
How to troubleshoot sewing machine accessories not working?
Troubleshooting sewing machine accessories can be a real headache, but don’t worry – you’ve got this!
Start by checking the connections, ensuring everything’s snug as a bug.
Then, test each accessory individually to pinpoint the culprit. Piece of cake!
Conclusion
Think of your sewing machine as a dance partner; when in sync, every stitch sings.
With these sewing machine basic troubleshooting tips, you’re equipped to smooth out those missteps.
Always check threading, tension, and needle alignment first.
Practice regular maintenance to keep everything running like a well-oiled machine.
Remember, even the best dancers need a tune-up now and then.
By following these steps, you’ll soon have your sewing machine ready for its next creative performance!

