This site is supported by our readers. We may earn a commission, at no cost to you, if you purchase through links.

It might simply be a case of a worn-out needle or incorrect thread tension.
Each stitch is a dance, so make sure your needle and thread are ready to tango.
Keep your machine clean – lint buildup is the dance floor hazard here.
And, of course, use high-quality thread to avoid the dreaded shredding.
Stick around for some expert tips to have your sewing machine humming smoother than ever, and learn about the best features to look for when buying one!
Table Of Contents
Key Takeaways
- Needle and Tension Troubles: Check your needle – think of it as your machine’s best friend. A worn or incorrect one can cause skipped stitches. Also, get your thread tension just right, like Goldilocks – neither too tight nor too loose.
- Keep It Clean: A dirty machine is like a dance floor with gum stuck to it. Regularly clean out lint and dust using a brush or vacuum attachment, and don’t neglect those moving parts – just a drop of oil will keep them happy.
- The Right Thread for the Job: Using high-quality thread can save you a lot of hassle. Ensure the thread suits your fabric and run a quick check for bobbin issues – incorrect bobbin winding can lead to chaos akin to a tangled slinky.
- Stay on Top of Maintenance: Just like your car needs a tune-up, your sewing machine needs regular checks and the right presser feet. Clean it often, replace worn parts, and if it’s still giving you grief, consider calling in a professional or even eyeing an upgrade.
Common Causes of Skipped Stitches
When your sewing machine starts skipping stitches, it might feel like it’s got a mind of its own, but don’t panic—it’s usually a simple fix. Check for common culprits like a worn-out needle, incorrect tensions, or a machine that’s as dirty as your sock drawer.
Worn-Out or Incorrect Needle Type
Think of a needle like a well-loved pencil—when it’s dull, it just doesn’t work right. A worn-out needle or the wrong needle size can cause skipped stitches. Try leveraging needle sharpness for perfect stitches. Explore different needle brands and sewing machine needle types, ensuring the right needle gauge. Remember, a fresh needle is your machine’s best friend!
Incorrect Thread Tension
If adjusting the needle didn’t fix your skipped stitches, thread tension might be the culprit. Picture thread tension as the Goldilocks principle: not too tight, not too loose, but just right. Consider these steps:
- Use a thread tension gauge.
- Check top tension.
- Verify bobbin tension.
- Make sure the needle is in the correct position.
Get these right, and you’ll sew like a pro!
Improper Fabric Tension
Ah, the dreaded improper fabric tension – the culprit behind those pesky skipped stitches! Think of your fabric like a tightrope walker – too loose and they’ll stumble, too tight and they’ll snap. Adjust the foot pressure, needle size, and sewing techniques to find that sweet spot where your fabric glides effortlessly through the machine. It’s all about finding the perfect balance!
| Fabric Type | Needle Size | Foot Pressure |
|---|---|---|
| Light | Smaller | Lighter |
| Medium | Standard | Moderate |
| Heavy | Larger | Heavier |
Clogged or Dirty Machine
Imagine this: your sewing machine’s skipping like a record! A clogged or dirty machine could be the culprit. Regular maintenance can nip this in the bud. Get started on a cleaning routine to banish lint buildup and keep those gears humming with these tips:
- Use a lint brush or vacuum attachment.
- Apply sewing machine oil sparingly.
- Check manuals for DIY cleaning tips.
Incorrect Stitch Length or Width
After conquering a dusty machine, tackle your stitch length and width next. Imagine sewing through concrete with a needle meant for silk—that’s stitch length impact! Machine settings gone haywire can mess with width impact too. Consider fabric thickness and needle size for a smoother ride. Adjust those dials, and watch your skipped stitches vanish like magic!
Thread Shredding Issues and Solutions
Thread shredding can turn your sewing project into a frustrating mess, but don’t throw in the spool just yet. Fixing issues like using the wrong thread type or having improper tension might just be the needle in the haystack you’re searching for.
Incorrect Thread Type or Quality
Using the wrong thread type or poor quality thread can definitely cause shredding issues. Make sure you’re using a thread that’s compatible with your fabric and machine. Opt for high-quality, name-brand threads – they may cost a bit more, but they’ll save you a headache in the long run. And always store thread properly to prevent tangles and breakage.
Thread Not Prewound or Prewound Incorrectly
Ah, the art of bobbin winding! Incorrectly prewound bobbins can wreak havoc on your machine. Avoid thread tension issues with a proper bobbin winding technique: winding a bobbin correctly
- Use compatible prewound bobbin types.
- Make sure the bobbin winds evenly.
- Watch for bobbin winder problems.
Master these steps, and your sewing machine will purr like a kitten, not hiss like a cat!
Thread Not Guided Properly Through Machine
Sometimes, the problem’s right under your nose, or rather, under the needle. A common mistake isn’t guiding the thread through the machine properly. Imagine this: the thread path‘s tangled like a cat with yarn. Make sure it flows smoothly from bobbin winding to needle threading. Avoiding tension issues starts with getting the thread path right!
Thread Tension Too Tight or Too Loose
If misguiding your thread isn’t the issue, thread tension might be. It’s like tuning a guitar—too tight or loose, and your stitches scream. Try these:
- Inspect for Tension Issues Symptoms—uneven stitches or thread snapping.
- Use a Tension Gauge—precise adjustments rock!
- Tension Adjustment Methods—fine-tune until your fabric harmonizes perfectly!
Machine’s Thread Take-Up Spring Not Functioning Correctly
If your machine’s thread take-up spring isn’t functioning properly, it can lead to frustrating thread shredding issues. The good news? This common problem has a simple fix. First, check the spring for any damage or wear. If it’s compromised, replace it with a new one. Proper spring maintenance is key to keeping your sewing machine running smoothly.
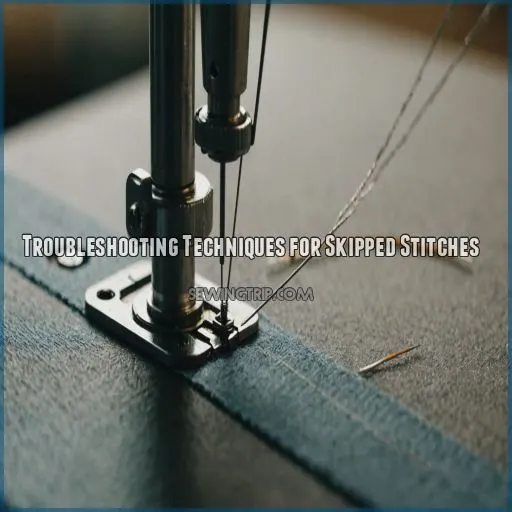
Troubleshooting Techniques for Skipped Stitches
If your sewing machine is skipping stitches like a hopscotch champion, don’t worry—we’ve got practical fixes to get you back on track. Let’s tackle those pesky problems by checking everything from the needle to the bobbin tension.
Checking and Replacing the Needle
Imagine your sewing machine as a car that needs the right tires. Sometimes, a simple needle swap can work wonders. Choose the correct needle size and type. Look for signs of needle damage and double-check needle insertion. A trusted needle brand cuts down on frustration. Remember, needles are like shoes—get the wrong fit, and everything’s off-kilter!
Adjusting Thread Tension and Fabric Tension
If needles could talk, they’d tell you tension’s as important as a perfect stitch. Thread tension tips can save your project—think Goldilocks: not too tight, not too loose! Or try fabric tension tricks for smoother seams. Sometimes, using a tension gauge helps, especially with tricky fabrics. Tension troubleshooting can make your sewing life stress-free!
Cleaning the Machine and Removing Lint
If your sewing machine is skipping stitches, a clogged lint trap could be the culprit. Use a small brush or canned air to clean out the lint trap regularly – at least once a month. This will keep your machine running smoothly and prevent lint buildup that can interfere with proper thread tension and stitch formation.
Checking and Adjusting the Bobbin Tension
Cleaning your machine didn’t work? Let’s tackle the bobbin tension basics! Start by ensuring bobbin tension isn’t too loose or tight, which can cause skipped stitches. Here’s what to do:
- Use bobbin tension tools.
- Avoid common bobbin tension mistakes.
- Test bobbin tension for different fabrics.
- Conduct bobbin tension troubleshooting.
- Adjust tension screw carefully.
You’ve got this!
Using a Different Type of Thread or Fabric
After tweaking bobbin tension, consider your project’s thread compatibility and fabric weight. Sometimes, mismatched materials are like trying to fit a square peg in a round hole. Use lighter threads for delicate fabrics and stronger threads for thicker ones. Think of it as pairing peanut butter with jelly, ensuring harmony between stitch selection, sewing techniques, and project suitability.
Preventative Maintenance for Sewing Machines
When your sewing machine starts acting up, showing skipped stitches or shredded thread, it’s probably time for some tender loving care. Regular maintenance like cleaning, oiling, and properly storing your machine can keep it running smoothly and save you from future frustration.
Regular Cleaning and Dusting
Regularly cleaning and dusting your sewing machine is key to keeping it in tip-top shape. Grab a soft brush, canned air, and a microfiber cloth – these cleaning tools will help you banish lint and dust bunnies lurking in nooks and crannies. Make this a monthly habit for a well-oiled, happy machine.
Oiling and Lubricating Moving Parts
Done with cleaning? Let’s talk oiling! Your sewing machine needs regular love—oiling frequency matters. Best lubricants? A few drops of sewing machine oil work wonders. Focus on parts to oil: moving mechanisms that need smooth sailing. But beware; over-oiling risks are real. Too much transforms your machine into a leaky mess, not a well-oiled wonder.
Checking and Replacing Worn-Out Parts
When your sewing machine feels under the weather, Identifying Worn Parts before a breakdown is wise. Common worn parts include:
- Needles: Bent or dull ones wreak havoc.
- Bobbin cases: Misalignment loves causing chaos.
- Belts: A squeaky spin means trouble.
- Foot pedals: If it’s sluggish, it might need replacing.
DIY vs. Pro Repair can affect Part Replacement Cost, so assess each Machine Maintenance Schedule accordingly!
Storing the Machine Properly
Storing your sewing machine properly is the icing on the cake after checking for worn-out parts and understanding bobbin threading. Avoid dusty chaos by using covers, and consider the humidity; it’ll keep rust at bay. Store vertically if space is tight, but horizontally, there’s no harm. Here’s a quick guide:
| Dusting | Covers |
|---|---|
| Humidity | Storage Space |
| Rust | Vertical vs Horizontal |
Keep it snug and cozy!
Using a Vacuum Attachment for Cleaning
For a thorough sewing machine cleaning, consider using a vacuum attachment. This specialized tool can suck up all that pesky lint and dust, reaching into even the tightest nooks and crannies. Just be gentle – you don’t want to damage any delicate components. A quick weekly vacuum session will keep your machine purring like a well-oiled kitten.
Advanced Solutions for Persistent Issues
If your sewing machine seems to be on strike and just won’t cooperate, it’s time to explore advanced fixes that go beyond the basics. From using a tension gauge to possibly considering an upgrade, we’ll show you straightforward solutions that could save you some hair-pulling frustrations!
Using a Tension Gauge to Adjust Thread Tension
Ever tangled with tension? A tension gauge might just be your knight in shining armor! It helps you get the perfect stitch every time. Consider these advantages:
- Tension gauge types: Various models suit different machines.
- Tension gauge use: Accurate adjustments made easy.
- Tension gauge accuracy: Precise tension every stitch.
- Tension gauge benefits: Avoid pesky skipped stitches.
- Tension gauge alternatives: Quick fixes if unavailable.
Replacing the Machine’s Timing or Hook
Ever felt like your sewing machine’s timing is as off as a juggler with one too many balls check for timing issues?? Inspect the timing belt and hook wear. Sometimes, the replacement process is straightforward, though cost comparison between DIY vs. a mechanic helps decide. But hey, taking control over these fixes might just stitch up that skipped-stitch blues!
Seeking Professional Help From a Sewing Machine Technician
If your sewing machine troubles persist despite your best DIY efforts, it may be time to seek professional help. A qualified technician can diagnose the issue, provide repair cost estimates, and advise on any applicable warranty coverage. They’ve the expertise to get your machine back in tip-top shape, so don’t hesitate to book a service appointment.
Considering Upgrading to a New Machine
When a sewing machine’s still causing headaches despite professional help, upgrading might be wise. Compare new machine features, budget plans, and credible reviews. A reliable machine should have:
- A solid warranty (it’s like insurance!).
- Reputable brands with proven track records.
- Power and precision for tough fabrics.
- Handy features that you’ll actually use.
A new machine can sew “seamlessly.”
Frequently Asked Questions (FAQs)
Can a worn-out bobbin case cause skipped stitches?
Absolutely, a worn-out bobbin case can make your sewing machine misbehave like a mischievous cat at 3 a.m., leading to skipped stitches. Make sure it’s intact and clean for smooth stitching and glitch-free sewing adventures!
How do I adjust the bobbin tension to fix shredding?
Think of your bobbin tension as the Goldilocks of sewing—too tight or too loose can create drama. To adjust, turn the bobbin case screw slightly. Test it; you’re aiming for just right!
What is the best way to clean the feed dogs?
To clean feed dogs, unplug your machine first; safety first, right? Then, gently brush out lint with a small brush or toothbrush. You’d be surprised how much gunk gets in there! This keeps stitches smooth.
Can a loose motor belt lead to skipped stitches?
Absolutely, a loose motor belt can wreak havoc on your sewing machine‘s performance, causing skipped stitches and shredded thread like a diva throwing a tantrum. Tightening that belt is the quick fix to get your machine back in the groove. (Source)
How often should I replace the sewing machine needle?
Replace your sewing machine needle every 6 to 8 hours of use or at the start of each new project. A dull or damaged needle can lead to stitching hiccups—don’t let a pesky needle ruin your masterpiece!
Conclusion
Understanding the causes of your sewing machine skipping stitches and shredding thread can keep you flawlessly sewing.
Like a well-rehearsed dance routine, these genius fixes help your sewing machine perform like a star check for needle issues.
From checking thread tension to cleaning out lint, you can troubleshoot common issues.
Don’t forget to maintain your machine regularly, upgrade when needed, and seek expert help for complex issues.
With these strategies, you’ll get back to creating masterpieces with ease, one smooth, swift stitch at a time.


