This site is supported by our readers. We may earn a commission, at no cost to you, if you purchase through links.
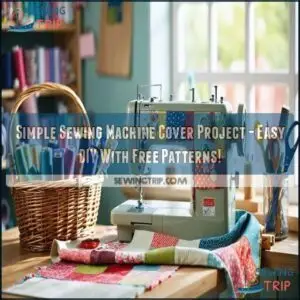
Start by measuring your machine’s height, width, and depth to guarantee a snug fit. Grab some sturdy fabric for the exterior, a lining fabric, and optional stabilizer for added structure.
Free patterns make it easy, and you can personalize with side pockets, handles, or decorative prints. Use basic quilting techniques, bind edges neatly, and be mindful of curved seams.
The best part? It’s functional and stylish! With a little creativity, you’ll have a custom cover—and maybe some leftover fabric for matching accessories.
Table Of Contents
Key Takeaways
- Measure your sewing machine’s height, width, and depth to ensure a snug fit for the cover.
- Use sturdy exterior fabric, optional stabilizer, and lining for added durability and structure.
- Add features like pockets, handles, and decorative prints to make the cover functional and stylish.
- Follow free sewing patterns for step-by-step guidance, and customize to match your style and machine’s dimensions.
Choosing Cover Size
Getting the right size for your sewing machine cover starts with accurate measurements.
Measure your sewing machine carefully—it’s the first step to a perfectly snug and functional cover.
Grab a tape measure and check your machine’s height, width, and depth to guarantee a perfect fit.
This will ensure that your cover is properly sized and functional.
Measuring Sewing Machine Dimensions
Start with your sewing machine cover measurements.
Use a tape measure to check the height/width combo, including spindle allowance. Don’t skip the back or thread holder!
A measurement guide helps nail accurate dimensions. Adaptable sizing means close counts, but precise numbers prevent frustration.
Think of it as tailoring a custom jacket for your machine—snug and perfect!
Selecting Correct Cover Size
Picking the right sewing machine cover size is easy with accurate measurements.
Check your model’s dimensions and verify spindle allowance—don’t skip that!
Regular size covers suit standard machines, while large size covers fit bigger models like semi-industrial types.
Adjust the sewing machine cover pattern for brand variations if needed, as small tweaks make all the difference for size adjustments!
Considering Machine Height and Width
When choosing a sewing machine cover, always factor in your machine’s height, width, and depth.
Use a measurement guide to guarantee accurate dimensions, especially accounting for spindles or thread holders.
Adaptable sizing makes DIY sewing covers fun and easy! It’s like tailoring a jacket—the better the fit, the more polished your sewing project will look.
Durable materials are essential for protection against dust, which provides long-lasting benefits and requires proper care.
Essential Materials Needed
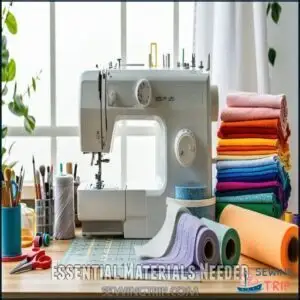
You’ll need a few key materials to make your sewing machine cover sturdy and stylish. Gather exterior and lining fabrics, foam stabilizer, a zipper, and binding to get started.
Exterior and Lining Fabrics
Pick cotton fabric for durability and ease of sewing. Choose prints that suit your space, but watch the orientation—upside-down designs feel awkward later.
Match colors for a polished look, and opt for fabric weights that stay sturdy yet manageable.
Washability matters too; pre-wash fabrics to avoid shrinking issues.
For enhanced durability, consider how lining prevents fraying.
Thoughtful fabric choices make your DIY sewing machine cover shine!
Flexible Foam Stabilizer Requirements
A flexible foam stabilizer adds structure to your sewing machine cover without extra weight, making quilting easier and enhancing durability.
Consider foam density for stability—popular brands like ByAnnie’s Soft and Stable or Bosal work well. Opt for sew-in versions for better control.
It’s forgiving and reusable, so mistakes aren’t a big fuss. This sewing tutorial staple guarantees your sewing machine cover materials shine!
Many suppliers offer flexible foam options suitable for various projects, providing a flexible foam solution that is highly reusable.
Zipper and Binding Options
A good zipper can make or break your sewing machine cover. Use a durable zipper type—18” for small, 22” for large—with smooth zipper placement.
For binding, choose 2.5” wide bias binding. Decorative binding options add flair to edges. Bias binding guarantees neat curves.
Durable zippers are vital for long-lasting sewing projects. Add a zippered pocket for storage, and your sewing machine cover stays practical and stylish!
Sewing Machine Cover Patterns
You can find free sewing machine cover patterns that fit small, medium, and large machines.
These patterns include helpful features like reversible designs, optional handles, and extra pockets for added convenience.
Free Pattern Availability
If you’re ready to start, there’s no shortage of free sewing patterns for creating a stylish sewing machine cover.
Pattern accessibility is easy with plenty of download options and printing instructions online.
Many sewing machine cover tutorials also include customization tips, letting you create a cover that fits perfectly, and these digital formats make crafting your own unique cover straightforward!
Reversible Cover Design
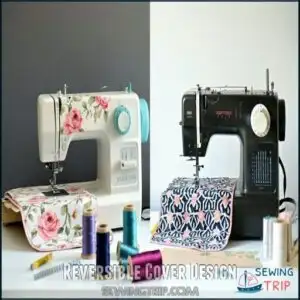
A reversible sewing machine cover isn’t just stylish – it’s practical.
Use contrasting fabric combinations for two fresh looks.
With reversible quilting, you’ll master pattern symmetry and showcase your creativity.
Follow the sewing machine cover pattern to guarantee:
- Dual functionality with reversible fabric sides.
- Clean, finished seams using binding choices.
- A custom sewing machine cover matching your style.
Optional Side Pocket and Handles
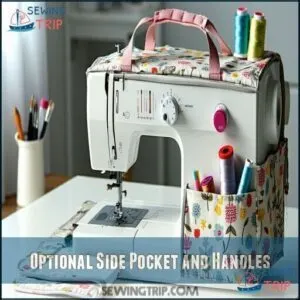
If you’re crafting a sewing machine cover, adding pockets and handles boosts its functionality.
Sewing machine cover pockets hold supplies like scissors or needles, keeping them handy. Place handles 2.5 inches below the top for transporting ease.
Experiment with fabric choices and sewing machine cover patterns for design variations. Many sewers find sewing machine pockets particularly useful for organization.
Use sturdy attachment methods to guarantee durability, especially for frequent use.
Quilting and Construction Techniques
You’ll bring your sewing machine cover to life with simple quilting and construction techniques.
From quilting the fabric pieces to binding curves, each step guarantees the cover fits perfectly and looks polished.
Basting and Quilting Process
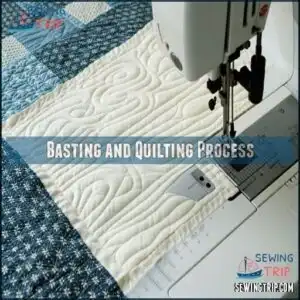
Starting with a quilt sandwich, baste your layers—fabric, stabilizer, and lining—together for stability.
Use basting spray or pins for easy adjustments. A walking foot helps keep layers even while stitching. Choose simple quilting patterns like grids or diagonal lines.
To perfect your sewing machine cover construction:
- Flatten seams with a hammer.
- Avoid overstretching stabilizer.
- Test stitching speed first.
Cutting and Binding Curved Edges
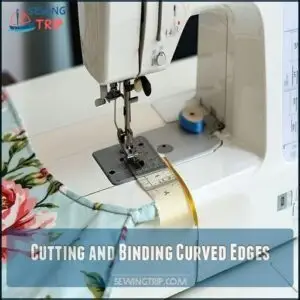
Binding curves on a sewing machine cover is easier with bias binding—it stretches to hug corners smoothly.
Trace rounded edges using a plate, then cut for curve ease.
Attach one side of the binding first and stitch carefully.
Topstitching tips? Keep tension steady for a neat edge.
Good fabric choice helps the binding lay flat against your cover, which is crucial for a neat edge.
Attaching Pockets and Handles
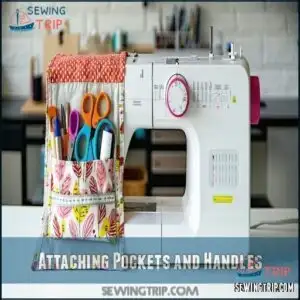
You’re ready to add pockets and handles to your sewing machine cover! For smooth steps:
- Place pockets where they’ll be functional and accessible.
- Baste edges securely before final sew-in.
- Reinforce handles for comfort and durability.
- Align handle openings symmetrically for balance.
- Stitch carefully to blend seamlessly with your sewing machine cover pattern.
Consider pocket placement for ideal use. It’s practical and stylish!
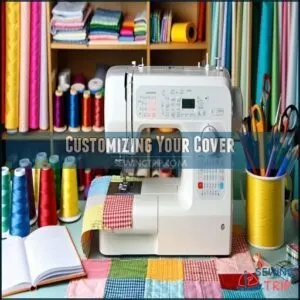
Customizing Your Cover
You can make your sewing machine cover truly unique by using fun fabrics, bold prints, or personalized touches.
Transform your sewing machine cover with bold prints, playful patterns, or personal touches that make it uniquely yours.
Add pockets, trim, or custom sizes to match your style and sewing space perfectly.
Using Directional Prints
When quilting, pay attention to print alignment for a polished look.
Use the fabric grain to match patterns and maintain visual flow. Avoid upside-down prints by double-checking your sewing pattern layout.
Consider large, bold prints or stripes for a custom sewing cover.
Here’s how prints might behave:
| Fabric Type | Best Use | Challenges | Results |
|---|---|---|---|
| Stripes | Clean lines | Matching corners | Modern and tidy |
| Florals | Playful covers | Upside-down blooms | Unique, cheerful vibe |
| Geometric | Stunning symmetry | Misaligned lines | Sleek, structured look |
| Solids | Minimalist style | None | Classic elegance |
The key to a successful quilt is understanding how different fabric types behave, including stripes, florals, and geometric patterns, to achieve the desired visual flow.
Adding Decorative Elements
Give your sewing machine cover a personality boost! Use decorative stitches to highlight seams or appliqué techniques to add flair.
Include patchwork designs for a colorful twist, or try piping for clean edges.
Mix fabric choices for a playful look or experiment with binding styles. These embellishment options can transform your custom sewing cover into charming sewing room decor!
Creating Custom-Fit Covers
If you’re tailoring a custom sewing machine cover, focus on accurate measurements and versatility.
Adaptable patterns make it simple to create perfect fits, even with spindle allowance or unique embellishments.
Here’s your checklist:
- Measure height, width, and spindles precisely.
- Use a sewing machine cover pattern with clear guides.
- Adjust handle placement for convenience.
- Verify sewing machine protection matches its unique dimensions, ensuring complete protection and a perfect fit.
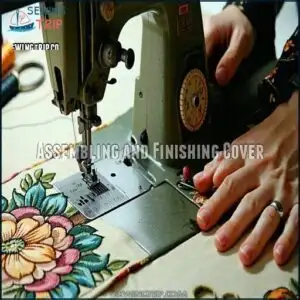
Assembling and Finishing Cover
You’re nearly at the finish line, so it’s time to bring all the pieces together.
Follow these steps to sew the sides and front, bind the edges, and add those final details for a polished look.
Sewing Side and Front Pieces Together
When piecing together the sides and front, pin carefully, always matching centers for precise seams.
Sew with a ⅜" seam allowance, leaving handle openings as needed.
Tackle those curved edges using slow, steady stitching—think of it as sewing’s version of tightrope walking.
To keep your machine pristine, consider that covers offer protection from dust and spills.
Here’s a quick comparison chart for seam steps:
| Task | Stitch Type | Key Focus |
|---|---|---|
| Pinning pieces | Straight pin | Matching centers |
| Sewing seams | Straight stitch | Seam allowance |
| Curved edges | Short stitch | Even tension |
| Handle openings | Straight stitch | Edge alignment |
Take your time—it’s an easy sewing project with a focus on seam allowance and even tension to ensure matching centers and proper edge alignment.
Binding Bottom Edge and Seams
Now it’s time to secure the bottom edge.
Attach your binding using bias binding techniques for neatly finished seams. Fold carefully, and don’t rush those mitered corners—precision keeps it tidy.
Topstitch close to the edge for a polished look. These seam finishes both strengthen your sewing machine cover and add a decorative touch that lasts.
Adding Final Touches and Details
Seam flattening is the secret to a polished sewing machine cover.
Gently hammer bulky seams or use a pressing tool before applying bias binding. Add decorative elements like topstitching tips or contrast fabric for flair.
Verify smooth handle access by trimming openings carefully. Your cover quilting, pockets, and handles should now shine with precision, blending function and style perfectly.
Frequently Asked Questions (FAQs)
Can You Make your own sewing machine cover?
Absolutely, you can make your own sewing machine cover.
It’s a fun, practical project that lets you customize fabric, size, and features like pockets.
Just measure your machine carefully and follow a suitable pattern.
What is a free sewing machine cover pattern?
Think of a sewing machine cover as a snug sweater for your machine.
You’ll find free patterns like Weallsew’s reversible cover or Sewdelicious’ quilted design, offering clear steps to create stylish, functional protection!
What is a sewing machine cover?
A sewing machine cover protects your machine from dust, scratches, and spills while adding a touch of style.
It keeps everything clean and ready to sew, like giving your machine its own cozy jacket.
What are some free sewing machine covers?
Picture your sewing room tidy with free patterns like Wagdoll’s simple cover or WeAllSew’s reversible design.
Explore options for dust protection, added pockets, and easy customization—all downloadable and perfect for your creative needs!
They are all free and great for your sewing room.
How do you sew a sewing machine cover?
Cut fabric to fit your machine’s dimensions, quilt it with lining for sturdiness, and add pockets or handles if desired.
Sew panels together, bind edges with bias tape, and topstitch for a neat finish.
Is there a Juki sewing machine cover pattern?
Covering a Juki sewing machine is like wrapping a gift perfectly suited to its shape.
Several patterns, like those from Lillyella and Threadsmagazine, fit models like the TL-2010Q, offering options for style and functionality, which can be considered a complete concept in the context of sewing machine covers.
Can a regular sewing machine do a coverstitch?
A regular sewing machine can’t do a true coverstitch.
You’ll need a specialized coverstitch machine or a serger with a coverstitch function to achieve that professional, double-stitched finish on stretchy fabrics.
What is the easiest sewing project to start with?
Did you know 35% of beginners start with a pillowcase?
It’s super simple, teaches straight stitching, and lets you play with fabrics.
Plus, who doesn’t love sprucing up their bed with something handmade?
How much fabric to make a sewing machine cover?
You’ll need about 1 to 5 yards of fabric for a sewing machine cover, depending on the size.
Add extra if you’re including pockets, handles, or binding—better safe than sorry!
What can you make with a basic sewing machine?
Think of your sewing machine as a creative powerhouse.
You can make clothes, quilts, curtains, tote bags, or even cute plush toys.
It’s perfect for crafting, mending, and personalizing almost anything fabric-related.
Conclusion
There’s nothing more satisfying than creating a simple sewing machine cover project that’s both functional and stylish.
With the right measurements, sturdy fabrics, and a free pattern, you’ll craft a snug cover that protects your machine and also adds personality to your sewing space.
Don’t forget to customize with pockets or fun prints to make it uniquely yours.
So, grab your materials, follow the steps, and enjoy sewing something practical and creatively rewarding!

